Table of Contents
Advertisement
Quick Links
Advertisement
Table of Contents

Related Manuals for NEFF B46C42 0 Series

Summary of Contents for NEFF B46C42 0 Series
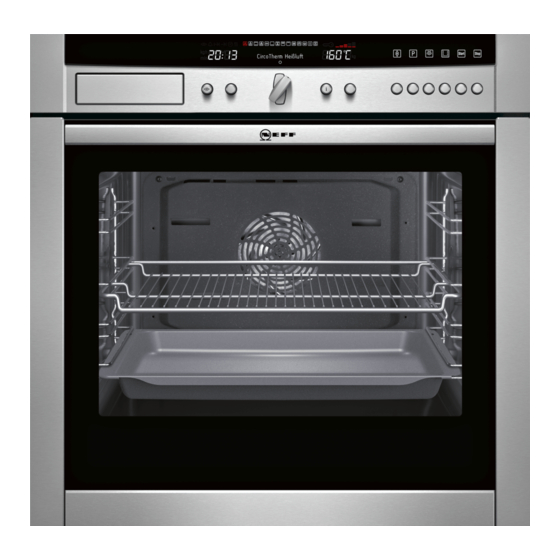
- Page 1 [en] Instruction manual Built-in oven B46C42.0...
-
Page 3: Table Of Contents
Baking table for basic doughs/cake mixtures ......15 Produktinfo Baking table for fresh meals and frozen convenience products..............16 Additional information on products, accessories, replacement Tips and tricks .................. 17 parts and services can be found at www.neff- international.com and in the online shop www.neff- eshop.com... -
Page 4: Safety Precautions
ã=Safety precautions Read these instructions for use carefully. Please keep the instructions for use and installation instructions in a safe place. If the appliance changes owners, the instructions should always be included. Risk of scalding! Before installation Hot steam is generated in the cooking compartment. Steam is generated in particular in the area around the steam inlet (top Damage during transport right in the cooking compartment). -
Page 5: Energy And Environment Tips
Only leave the cooking compartment to cool with the door Ovenware must be heat and steam resistant. Silicone baking ■ ■ closed. Even if the appliance door is only slightly open, the tins are not suitable for combined operation with steam. fronts of adjacent units may be damaged over time. -
Page 6: Operating Modes
Control element Operating mode selector Switches the appliance on and off Selects the required operating mode Water tank For steam-assisted applications (see section: Filling and emptying the water tank) Electronic clock (rapid heat up) Clock function button Selects the required clock function or Rapid heat up (see section: Electronic clock) Rotary selector: Makes settings within a clock function or activates Rapid heat up (see section: Electronic... -
Page 7: Shelf Positions
Operating mode Low-temperature cooking For tender pieces of meat, that are to be cooked medium/medium-rare or à point é Steam cooking For gentle preparation of vegetables, meat and fish ê Dough proving For preparing yeast dough and yoghurt > Oven cleaning Makes cleaning the cooking compartment easier ä... -
Page 8: Setting The Language
Setting the language Use the temperature selector to set the altitude range. "Select language English" is preset. If necessary, set another Altitude range Setting symbol (temperature language for the text display. display) Turn the temperature selector until the language you require below 0 m ™‡‹... -
Page 9: Operating The Appliance
Use the temperature selector to set the temperature to Emptying the water tank (see section: Filling and emptying 240 °C. the water tank) Press the VarioSteam button repeatedly until "High steam Afterwards, wipe the cooled cooking compartment with hot, Ÿ intensity"... -
Page 10: Filling And Emptying The Water Tank
Heating indicator Refilling the water tank If the water tank is empty, a signal sounds. "Fill water tank and The heating indicator displays the rising temperature in the slide in fully" appears in the display. Steam-assisted operation cooking compartment. is interrupted. Temperature reached (figure A) ■... -
Page 11: After Each Steam-Assisted Use
After each steam-assisted use Note: Remove limescale marks with a cloth soaked in vinegar, then wipe with clean water and rub dry with a soft Switch off the appliance. cloth. The remaining water is pumped out of the evaporator system and back into the water tank. -
Page 12: Electronic Clock
Electronic clock Clock display In this section, you can read about how to set the timer ■ how to switch off your appliance automatically ■ how to switch your appliance on and off automatically ■ (preset operation) how to set the time ■... -
Page 13: Cooking Time
Cooking time Preset operation The appliance switches on automatically, then switches off Automatic switch-off after a cooking time setting has elapsed. automatically at the time preselected for the end of operation. Set the operating mode and temperature. To set this function, combine the cooking time and end of Press the clock function button repeatedly until the operation clock functions. -
Page 14: Rapid Heat Up
Rapid heat up Depending on the appliance features, you can reduce the preheat time for the Hot air and ë Bread-baking operating modes if the set temperature is higher than 100 °C. Note: During Rapid heat up, do not place any food in the cooking compartment until the symbol goes out. -
Page 15: Baking
Baking In this section, you will find information on Baking trays Baking tins and trays We recommend that you only use original baking trays, as ■ these have been optimally designed for the cooking Baking on two or more levels ■... -
Page 16: Baking Table For Fresh Meals And Frozen Convenience Products
CircoTherm® Top/bottom heat Basic dough Shelf Tempera- Baking time in Shelf Tempera- height ture in °C minutes height ture in °C Yeast dough Tray bake with dry topping, e.g. crumble 160 - 170 40 - 60 170 - 180 1 + 3 160 - 170 45 - 65 Savarin/plaited loaf (500 g) -
Page 17: Tips And Tricks
ë Bread-baking Circotherm intensive Dishes Shelf Tempera- Baking time in Shelf Tempera- height ture in °C minutes height ture in °C Potato gratin made from raw potatoes 180 - 200 50 - 60 170 - 190 Strudel, frozen 190 - 210 35 - 45 180 - 200 Pizza, frozen... -
Page 18: Roasting
The specified baking time is not correct For small items, check the quantity on the baking tray. The items must not be touching each other. Frozen products are not browned evenly Check whether the frozen product is unevenly browned before baking. This uneven after baking browning will remain after the baking time. -
Page 19: Tips And Tricks
CircoTherm® Top/bottom heat Item Shelf Tempera- Roasting time in Shelf Tempera- height ture in °C minutes height ture in °C Meat loaf made from 500 g meat 170 - 180 60 - 70 200 - 210 Pork Smoked pork 160 - 170 70 - 80 190 - 210 Fillet, medium (400 g) -
Page 20: Low-Temperature Cooking
Low-temperature cooking Table for Low-temperature cooking In this section, you will find information on Low-temperature cooking The information in the table contains only guide values. The ■ searing time is for searing in a hot pan with fat. Tips and tricks ■... -
Page 21: Grilling
Grilling Circo-roasting In this section, you will find information on Grilling in general Circo-roasting operating mode is particularly suitable for ■ poultry or meat (e.g. roast pork with crackling) that is to be Circo-roasting ■ crispy. Radiant grilling (Full-surface and Centre-area grill ■... -
Page 22: Dough Proving
be grilled. They are for food placed in a cold oven and for meat Full-surface grill table taken directly from the refrigerator. The information in the table contains only guide values. The values may vary depending on the type and amount of food to Grilled food Shelf Tempera-... -
Page 23: Yeast Dough
Wait until the cooking compartment has cooled down and Proving yeast dough switch Dough proving on again. Switch on the appliance. Do not use Dough proving together with the Preselection mode Fill the water tank. clock function. Slide in the water tank all the way. Yeast dough Place the dish in the centre of the wire rack and slide in at shelf position 1. -
Page 24: Yoghurt
Yoghurt Distribute the containers over the entire cooking compartment floor, evenly spaced out. Remove accessories and hook-in racks, telescopic shelves Select Dough proving with the operating mode selector. ê or separate fitting systems. Set dough proving setting with the temperature selector. ‚... - Page 25 Food Steps Shelf Operat- Temperature Steam Cooking Notes height ing mode in °C/Dough intensity time in min- proving utes Cakes and pastries Genoese sponge cake (6 150 160 30 - 40 eggs) Genoese sponge cake (3 150 160 25 ...
-
Page 26: Automatic Programmes
Food Steps Shelf Operat- Temperature Steam Cooking Notes height ing mode in °C/Dough intensity time in min- proving utes Pork knuckle Step 1 high 40 50 Place with the rind-side Step 2 high 40 50 Step 3 20 30 Smoked pork 180 ... - Page 27 Turn the operating mode selector until the desired Note: In the Basic settings menu, you can adjust the programme (e.g. Chicken portions, fresh) appears. browning level for all automatic programmes (see section: Changing basic settings). A suggested weight appears in the temperature display (e.g. 0.1 kg).
-
Page 28: Reheat - Warming Using Steam
Programme group Programme Selection Weight range in Accessories Shelf position Poultry Whole chicken, fresh 0.70 - 1.50 Universal pan with wire rack Chicken portions, fresh 0.05 - 0.80 Universal pan with wire rack Goose/duck, unstuffed, fresh 1.30 - 4.50 Universal pan with wire rack Fish Fish fillet... -
Page 29: Defrosting
Food Shelf height Temperature in°C Cooking time in minutes Quiche 140 - 150 10 - 20 Pizza 140 - 150 10 - 20 Heating convenience products Lasagne, chilled (400 g) 140 - 150 20 - 30 Lasagne, chilled (1000 g) 140 - 150 25 ... -
Page 30: Cleaning And Care
Closing the preserving jars Ending the preserving process Wipe the rims of the preserving jars with a clean, damp cloth. For fruit, gherkins and tomato purée: Put a wet rubber ring and lid in place and close the jars with Turn off the appliance, once all preserving jars are bubbling. -
Page 31: Cleaning The Cooking Compartment
Appliance part/surface Cleaning agent/aid Water tank Use standard washing-up liquid, dry with a soft cloth and allow to dry off with the lid open. Thoroughly rub the seal on the lid until dry after every use. Caution! Damage to the water tank: Do not clean the water tank in the dishwasher. Clean the water tank with standard washing-up liquid. -
Page 32: Self-Cleaning Surface
EasyClean® Fill the water tank with 400 ml of descaling solution and slide it in fully. Dispose of the rest of the descaling solution and Your appliance comes with an > EasyClean® function to rinse with water. make cleaning the cooking compartment easier. An Press the Start button. -
Page 33: Removing And Fitting The Appliance Door
Lift the door handle slightly using both thumbs and lift out the Rapid drying appliance door (Fig. G). After cleaning, leave the appliance door ajar in the stop position (approx. 30°). CircoTherm® at 50 °C. After 5 minutes, switch off the appliance and close the appliance door. -
Page 34: Cleaning The Door Panels
Cleaning the door panels Fitting the door panel To facilitate cleaning, you can remove the door panels from the Insert the door panel into the two supports (Fig. A). appliance door. Press on the door panel on the left and right next to the ã= holders until it engages in the holders (Fig. -
Page 35: Faults And Repairs
Clean the hook-in rack with washing-up liquid and a sponge & or brush. Align the hook-in rack with the indentation (a) facing downwards, so that the shelf heights match. Insert the hook-in rack at the rear as far as it will go and push to the rear (figure C). -
Page 36: Replacing The Oven Light Bulb
Problem Possible cause Remedial action Smoke is generated during roasting or Fat is burning on the grill element Continue grilling or roasting until the fat on grilling the grill element is burnt away Wire rack or universal pan inserted incor- Place the wire rack in the universal pan rectly and insert them together at a lower shelf... -
Page 37: After-Sales Service
After-sales service Our after-sales service is there for you if your appliance needs to be repaired. We will always find the right solution in order to avoid unnecessary visits from a service technician. E number and FD number When calling us, please give the product number (E no.) and the production number (FD no.) so that we can provide you with the correct advice. -
Page 38: Test Dishes
Test dishes Test dishes tested to standard EN 50304/EN 60350 (2009) and IEC 60350. Please note the information in the tables about preheating. The table values do not include Rapid heat up. Baking Shelf height Operating Temperature Baking time in mode in °C minutes... - Page 40 Constructa Neff Vertriebs-GmbH Carl-Wery-Straße 34 D-81739 München *9000456400* 9000456400 911213...