
Related Manuals for Nortel 4145Ex


Summary of Contents for Nortel 4145Ex
-
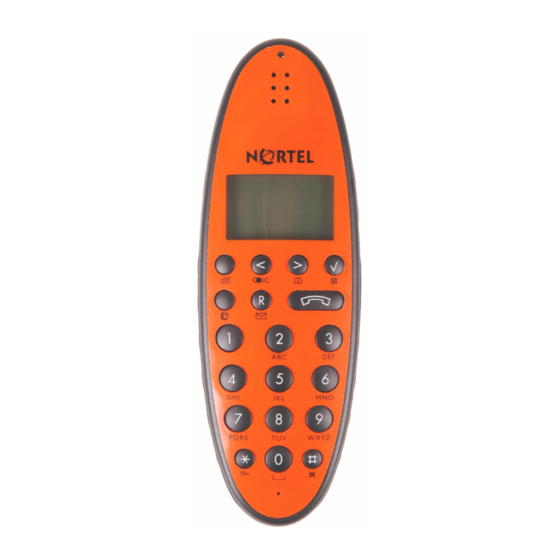
Page 1: Dect Handset 4145Ex
DECT Handset 4145Ex User Guide www.nortel.com © 2007 Nortel Networks N0018957 02 Printed in Denmark... - Page 2 Congratulations on your new handset Your new handset will provide you with the greatest possible degree of flexibility and mobility due to high battery capacity, practi- cal weight, size and design. STOP! Charge your handset 14 - 16 hours prior to first use for best performance...
-
Page 3: Table Of Contents
Battery disposal ....12 About your 4145Ex handset ..13 Handset display ....15 Display backlight . - Page 4 Quality Assurance ... . . 49 Safe use of the ATEX approved DECT Handset 4145Ex ..50 Name and adress of manufacturer . 59...
-
Page 5: Getting Started
Getting Started Read all the information in this section before you use your handset. Handset information The DECT Handset 4145Ex is devel- oped for use in potentially explosive working environments, as defined by local fire protection authorities. The handset complies with the ATEX directive 94/9/EC as well as IEC stan- dards. - Page 6 • Do not charge DECT Handset 4145Ex in a potentially explosive atmosphere. • The AC power adaptor used in connection with the charger must not be connected to a higher voltage than 250V AC. • Use only battery pack N0018955 for battery replacement.
-
Page 7: Label Information
• The battery will explode if disposed of in a fire. • Do not charge the batteries unless you use the Nortel Networks approved charger and the proper batteries. -
Page 8: Installing Battery
Only use battery type N0018955 in the DECT Handset 4145Ex handset. Do not use these batteries with other products. These batteries were designed specifically for use with the DECTHandset 4145Ex handset and the DECT Handset 4145Ex charger ONLY. Improper use of the batteries may result in fire hazard. -
Page 9: Charging Battery
5 Replace the back cover. Charging battery Warning: Do not charge DECT Handset 4145Ex in a potentially explosive atmosphere. Use only the dedicated charger N0018956 (orange) for charging of DECT Handset 4145Ex. When charging the battery for the first... - Page 10 • Place the handset in the charger. For correct charging, be sure the room temperature is between 0°C and 25°C. Do not place the handset in direct sunlight. The battery has a built-in heat sensor which will stop charging if the battery temperature is too high.
-
Page 11: Checking Battery Capacity
Checking battery capacity In the BATTERY MENU it is possible to see the remaining battery capacity. For reading the correct capacity, the handset has to be removed from the charger for at least one hour. 1 Press MENU ( or > keys to switch to the BATTERY MENU. -
Page 12: Battery Disposal
Battery disposal Defective batteries must be returned to a collection point for chemical waste disposal. Warning: Nickel metal hydride batteries must be disposed of properly. Do not dispose of the batteries in office or household waste. Nickel metal hydride batteries are recyclable. -
Page 13: About Your 4145Ex Handset
About your 4145Ex handset Flashes fast when phone is ring- ing. Flashes at low frequency if mes- sages waiting. Lights constantly when showing CLIP numbers in Redial list. Volume control Adjusts the handset and ringer volume. -
Page 14: Headset Connector
< ( On hook Enters the Redial List (idle) menu. > ( ) key On hook Enters the Telephone (idle) Book menu. ( ) key On hook Turns the handset off with (idle) a long (three second) key press. -
Page 15: Handset Display
On hook Read or write messages. (idle) Off hook Recall. (active) On/Off hook key On hook Turns the handset on. (idle) Off hook Ends an active call. (active) Handset display There are four lines on your handset display. Display information example JEAN The types of information shown on the display are:... -
Page 16: Display Backlight
(E2-MAIL). Left and right arrow icons appear on the display when you access Handset option menus. The telephone icon indicates a call is active. Display backlight The display backlight automatically turns on when there is an incoming call, or if a key is pressed. -
Page 17: Basic Handset Options
Basic handset options Turning the handset ON/OFF Press When the handset is turned on the radio signal display icon is shown in the lower left corner of the display, if the handset is subscribed to a system (For more information, see ing to system”... -
Page 18: Subscribing To System
3 Use the <> keys to choose between the predefined languages, then press the required language. 4 Press MENU ( structure. Figure 1 on page Subscribing to system Before you can use the registered handset it is necessary to subscribe the handset to a base station first. - Page 19 2 Use the <> keys to switch to SUBSCRIPTION CREATE MENU, and then click subscribe to a new system. 3 Use the <> keys to scroll between the search ID’s of the different systems available. During subscription the handset will search for free positions and perform subscription on the first free position.
-
Page 20: Auto Login
Subscribing to different systems The handset can be subscribed (con- nected) to a maximum of 10 different systems. Note: To be able to log on to a system, subscription to the system must be established (For more information, see on page 18). - Page 21 2 Use the <> keys to switch to SELECT LOGIN, and then press The actual chosen system is marked with a * or an A (if Auto Login is selected). 3 Press - use the <> keys to scroll between the IDs of the different systems to find the system t which you want to connect.
-
Page 22: Customizing Handset
Remove subscription Subscriptions can be removed from the system in use and from the 9 other systems (if connected). Removing a subscription requires a password. Password is factory set at 0000. If the system in use is removed, it is necessary either to select one of the remaining systems or to subscribe to a new one. - Page 23 Profile set-up In the following you will find a descrip- tion of how to set up the profile. 1 Press MENU ( PROFILE SET UP MENU. 2 Press You are now able to switch between the different settings using < or >. 3 Press you wish to change (or see).
- Page 24 UTO-ANSWER Can be turned on/off using < and >. Confirm with . When turned on, the handset auto- matically goes off hook when ringing. TART VOL Start volume can be adjusted using < and >. Confirm with . UT OF RANGE The out of range indication can be turned on/off using <...
- Page 25 OS NUMBER Enter a number to be called when pressing the SOS key. Confirm with Note: If no SOS number is entered, the SOS key is inactive. ANGUAGE Choose between predefined lan- guages using < and >. Confirm with ACKLIGHT Can be turned on/off using <...
-
Page 26: Making And Answering Calls
For external calls, dial the external code (or line pool code) to access an external line, then dial the external telephone number. (Contact your sys- tem administrator to confirm what external code or line pool code to use). Dial directly 1 Press 2 Dial the number. -
Page 27: Dial From Your Phone Book
Dial from your phone book 1 Press > ( telephone book. 2 Search for the number either by using the < > -keys, or by pressing the first letter in the name by using the digits 2 – 9. 3 Press... -
Page 28: Answering Calls
Answering calls When the phone rings, the LED flashes fast and the display shows the CLIP (if presented). If it is an external call (or if no CLIP) the display shows “INCOMING CALL”. To answer a call: • Press your handset rings. To stop the handset ringing without answering the call: •... -
Page 29: Transfer Call With Announce
To hold a call and make a second call 1 Press R ( hold. 2 Dial the telephone number of the second call. ), and dial the new to end your call. ) to switch ) to answer the second ) to put the first call on ) again. -
Page 30: Mute A Call
To return to the first call • Press R ( first call. The second call is automatically put on hold. Mute a call 1 While on a call, press 2 To cancel mute, press Listening to voice messages Note: Only available in systems configured with the possibility of receiving voice messages. -
Page 31: More Handset Options
More handset options Moving around in the Menu Press MENU ( menu structure. It has to be used if a “NO” or “CLEAR” is wanted in the menu structure. Press to jump to a lower level in the menu. When the lowest menu level is reached, it will store the setting and jump to a higher level. - Page 32 < or > to scroll to the name/ number, and then press The name/number is now deleted. If the number is stored, it is moved to the telephone book. It is possible to add prefixes to the redial numbers. • Find the number you wish to edit and press the digits you want to add to the number, e.g.
- Page 33 MENU MESSAGE (Text message) For more information,see “More handset options” on page MENU LOGIN For more information on this menu option, contact your system adminis- trator. Note: The PHONE BOOK MENU, REDIAL MENU and MESSAGE MENU can be accessed directly. The PHONE BOOK MENU by pressing >...
-
Page 34: Using Phone Book
Using phone book You can store telephone numbers and names in your telephone book. The telephone book can store up to 80 numbers with name. A maximum of 23 digits, including spaces, is allowed for each number. A maximum of 24 digits, including spaces, is allowed for each name. - Page 35 Storing a number 1 While on hook, press the number to be stored (max. 23 digits), press >, and then press 2 Enter a name (max. 24 digits), and then press number. After storing, the handset will go back to standby mode. to store the...
- Page 36 Figure 5 on page Storing from Redial/CLIP list 1 While on hook, use the < -key to find the number in the redial/CLIP list to be stored in the telephone book. 2 Press , then >, and then press again.
- Page 37 4 Press MENU ( telephone book. Note: Viewing and editing the telephone book can also be done while in conversation (off hook) by pressing > ( Figure 6 on page Changing numbers 1 While on hook, press > ( enter the telephone book.
-
Page 38: Using Text Messages (E2)
Deleting numbers 1 While on hook, press > ( enter the telephone book. 2 Use the < > -keys to find the number to be deleted, press twice. Figure 6 on page Deleting from Redial list • While on hook, press < ( use the <... - Page 39 • The text message is shown in the display, and when the message is read the envelope display icon will disappear. • If the message contains a callback number, this will be displayed on the bottom line of the display. •...
- Page 40 3 Press If the message includes more than 36 letters or digits, the message will run over more than one display screen. Use the < > -keys to scroll between the lines. 4 To see the sender of the mail, press the >...
- Page 41 3 Use the < > -keys to find the delete all message feature, then press All mails are deleted. Deleting a text message 1 While on hook, press R ( press 2 Use the > -key to scroll between the mails, and then press select a mail.
-
Page 42: Shortcuts
. (Display shows KEY LOCKED) “PHONE BOOK”: Press > ( ) (in on hook). Name search in telephone book: Press the first letter in name. Store a number: Press > ( ) after the number (in on hook). “REDIAL” and “CLIP”: Press < ( in on hook. -
Page 43: General Information
Charge the battery. If still a problem change the battery as it might be defective. Warning: Do not charge DECT Handset 4145Ex in a potentially explosive atmosphere. Use only the dedicated charger N0018956 (orange) for charging of DECT Handset 4145Ex. -
Page 44: Information
Information Error information Improper function of the handset might be related to the installation of the DMC system or failures related to the main system. Before declaring a handset for repair be sure that the main system is oper- ating properly. Warranty The handset is covered by a normal warranty solution, except the battery. - Page 45 Size and weight Size: 148 x 50 x 28 mm Weight: 130 g incl. battery ± 10 g Capacity Active talking time 15 hours Stand-by time 150 hours Temperature and air pressure °C Operating temperature: 0-40 Air pressure: Normal atmosphere condition Charger (orange) The AC power adapter used in con-...
-
Page 46: Ec Declaration Of Conformity
EC Declaration of Conformity Manufacturer: KIRK telecom A/S Langmarksvej 34 8700 Horsens Denmark Product DECT Handset 4145Ex ATEX handset Type 0238 02XX Type number XX can vary (numbers and letters) depending on software and design. Telecom requirements The transceivers described above comply with the essential require- ments of the R&TTE directive 99/5/... -
Page 47: Applied Standards
Attachment requirements TBR 6 General Terminal Attachment requirements Application, Intended purpose The DECT Handset 4145Ex is a DECT based handset, designed to be used in connection with Nortel Net- works wireless communication solu- tions in potentially explosive environments. The DECT transmitter... -
Page 48: Meaning Of Conformity
ATEX and IEC Type Examination Certifi- cate. Electrical apparatus for potentially explosive atmospheres The DECT Handset 4145Ex is in con- formance with the requirements of the ATEX Directive 94/9/EC as well as the below standards: Standards EN 50014... -
Page 49: Notified Body
Notified Body Identification number: 0539 Examination Certificate EN: DEMKO 04 ATEX 136204 X IEC: IECEx ULD 04.0001 X Validity This declaration is only valid if accom- panied with an EC Type Examination Certificate obtained from a Notified Body or from a competent authority in an EU member state. -
Page 50: Safe Use Of The Atex Approved Dect Handset 4145Ex
DECT Handset 4145Ex For safe use of the ATEX approved DECT Handset 4145EX, remember the following: The DECT Handset 4145Ex is devel- oped for use in potentially explosive working environments, as defined by local fire protection authorities. The handset complies with the ATEX directive 94/9/EC as well as IEC stan- dards. - Page 51 For safe use of Nortel DECT Handset 4145Ex: • In potentially explosive atmosphere areas (as defined by your system management) only ATEX-approved handsets may be used. • The handset may only be used after information from the system manager about safe use.
- Page 52 Pour utiliser en toute sécurité la ver- sion ATEX du combiné Nortel DECT Handset 4145Ex, veuillez suivre les instructions suivantes: • Dans les zones à atmosphère potentiellement explosive (telles que définies par le responsable du système), utilisez uniquement des combinés ATEX agréés.
- Page 53 être effectuées exclusivement par le fabricant. Beachten Sie die folgenden Hinweise zur sicheren Verwendung des Nortel DECT Handset 4145Ex: Hiermit erklärt Nortel, dass sich das DECT Handset 4145Ex in Überein- stimmung mit den grundlegenden Anforderungen und den sonstigen einschlägigen Bestimmungen der Richtlinie 1999/5/EG R&TTE befindet,...
- Page 54 Benutzerhandbuch, das bei Ihrer Systemverwaltung erhältlich ist. • Bei Unklarheiten oder Fragen wenden Sie sich bitte an den Systemverwalter, der für die Ausgabe des DECT Handset verantwortlich ist. • Reparaturen und Service des DECT Handsets 4145Ex dürfen nur von Hersteller vorgenommen werden.
- Page 55 Para un uso seguro de la versión ATEX del teléfono Nortel DECT Hand- set 4145Ex, recuerde lo siguiente: • En zonas potencialmente explosivas (según lo definido por el administrador de su sistema) solamente deberán utilizarse teléfonos aprobados por ATEX. • El teléfono solamente debe ser...
- Page 56 Let voor een veilig gebruik van de ATEX-versie van een Nortel DECT Handset 4145Ex - handset op de vol- gende punten: • Gebruik in explosiegevaarlijke omgevingen (zoals aanngewezen door uw systeembeheerder) alleen handsets met het ATEX-keurmerk. • U mag de handset alleen gebruiken na een veiligheidsinstructie van de systeembeheerder.
- Page 57 Per un uso sicuro della versione ATEX di un apparecchio Nortel DECT Hand- set 4145Ex tenere presante i seguenti puni: • In ambienti ad atmosfera potenzialmente esplosiva (come difinito dalla gestione del sistema) si possono usare solo apparecchi approvati ATEX.
- Page 58 • In caso di dubbi o in presenza di domande, rivolgersi al gestore di sistema responsabile per le problematiche relative all’apparecchio. • La riparazione e la manutenzione dei terminali DECT 414Ex possono essere effettuate solo dal produttore.
-
Page 59: Name And Adress Of Manufacturer
DECT Handset 4145Ex IP64 IECEx Product name IP 64 classification DECT Handset 4145Ex is approved according to International standards Intrinsic safe, ib category Equipment group II, ib group C (gas group C) Temperature group T3 (relevant for gas) International country code... - Page 60 Demko CE 0539 Equipment group II, zone 1 (gas) Equipment group II, zone 2 (dust) Max. surface temperature of DECT Handset 4145Ex in use Specific marking of explosion protection DECT Handset 4145Ex is approved according to European standards Intrinsic safe, ib category...
- Page 67 14128800-HD ED2...