
Related Manuals for Kodak EasyShare Printer Dock Plus Series 3


Summary of Contents for Kodak EasyShare Printer Dock Plus Series 3
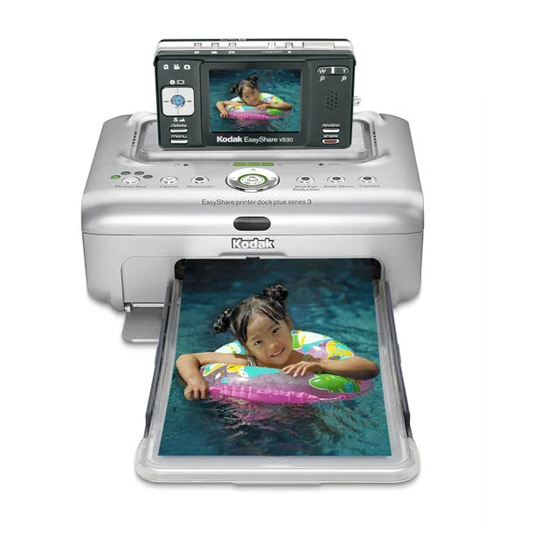
- Page 1 Kodak EasyShare printer dock plus series 3 User’s Guide www.kodak.com For interactive tutorials, www.kodak.com/go/howto...
- Page 2 ® Wi-Fi is a registered trademark of the Wi-Fi Alliance. Eastman Kodak Company is an authorized licensee of the SD trademark. Kodak, EasyShare, Perfect Touch, ImageLink, and XtraLife are trademarks of Eastman Kodak Company. P/N 4J3802_en...
-
Page 3: Product Features
Transfer button/light Slide Show button/light Red Eye Reduction button/light Print button/light 4-way control IR sensor 10 Paper tray www.kodak.com/go/support 11 Paper tray door 12 Bluetooth wireless technology button/light 13 Cancel button 14 Picture Size button 15 Picture Size lights 16 Accessory door... - Page 4 Product features Back/top/side view Camera connector Power connector (DC-in) USB connector (to computer) Cooling vent Slot for paper path Color cartridge (installed as shown) Cartridge door www.kodak.com/go/support...
-
Page 5: Table Of Contents
3 Printing without a computer ...12 Printing from your digital camera... 12 Printing from the internal card reader ... 13 Printing from a Kodak card reader ... 14 Printing tagged pictures ... 15 Printing from a PictBridge compatible camera or device ... 15 Changing the printed picture size ... - Page 6 Connecting to a computer ... 24 Transferring pictures from your digital camera... 26 Transferring pictures from the internal card reader ... 28 Transferring pictures from a Kodak card reader ... 29 Printing from a computer... 30 Canceling printing... 33 Uninstalling the software ... 34 5 Using the wireless features of your printer dock ...35...
- Page 7 Printer dock specifications ... 68 Wireless channels... 69 Important safety instructions ... 70 Extending battery life ... 71 Upgrading your software and firmware... 72 Additional care and maintenance ... 72 Warranty... 73 Regulatory compliance ... 75 www.kodak.com/go/support Table of contents...
-
Page 8: Getting Started
Getting started Finding a location for your printer dock Place the printer dock on a flat, clean, dust-free surface, in a dry location, and out ■ of direct sunlight. 5 in. (12.7 cm) ■ Avoid areas where ventilation ducts, open doors, or frequent passersby might expose the printer dock and paper to high levels of dust and debris. -
Page 9: Installing The Custom Camera Insert
* Contact customer support for a dock adapter if it is not included with your product. Visit www.kodak.com/go/dfiswwcontacts. For Kodak EasyShare camera and dock compatibility, visit www.kodak.com/go/adapterkitchart. www.kodak.com/go/support ■... -
Page 10: Connecting The Power
Getting started Connecting the power RISK OF ELECTRIC SHOCK: Use only the AC power adapter included with your printer dock. Other adapters or cords can damage your camera, printer dock, or computer. Handling and storing the color cartridge ■ For best quality prints, store the color cartridge in a location where the temperature does not exceed 85 ■... -
Page 11: Installing And Removing The Color Cartridge
Installing and removing the color cartridge 1 Open the cartridge door on the side of the printer dock. www.kodak.com/go/support 2 Check to make sure there is no slack in the color cartridge ribbon. To remove slack, push in on the cartridge spool, then rotate the spool clockwise. -
Page 12: Handling And Storing The Paper
Do not touch the glossy side of the paper. ■ When storing, remove the paper tray, then close the paper tray cover and paper tray door to keep out dust and debris. Store paper flat. www.kodak.com/go/support page... -
Page 13: Loading Paper
Use the upper limit line inside the paper tray as a guide to prevent overloading. Do not load paper that is missing perforated tabs. 4 Load the paper into the paper tray, with the Kodak logo side facing down. Getting started page... -
Page 14: Installing And Removing The Paper Tray
"click". This is the semi-open, or installation position. 2 Open the paper tray door on the printer dock. 3 Slide the paper tray in the printer tray slot until the tray locks into place. IMPORTANT: To ensure the paper tray fits squarely on the... -
Page 15: Setting Up Your Digital Camera
Kodak Ni-MH rechargeable digital camera battery or Kodak Li-Ion rechargeable digital camera battery. See your camera user’s guide for details. Plus, the Kodak EasyShare printer dock plus series 3 is ImageLink print system compatible. This allows you to dock not only Kodak EasyShare digital cameras, but other brands of ImageLink system compatible digital cameras as well. - Page 16 Setting up your digital camera Refreshing the Kodak Ni-MH rechargeable digital camera battery IMPORTANT: The battery refresh feature is intended for use with the Kodak Ni-MH rechargeable digital camera battery only. Li-Ion batteries do not require refreshing. NOTE: A full refresh cycle takes up to 8 hours, depending on how much charge is left in the battery. For best results, refresh the battery overnight;...
-
Page 17: Setting The Picture Quality
To purchase a Kodak Ni-MH rechargeable digital camera battery for your digital camera visit www.kodak.com/go/accessories. See your camera user’s guide for battery compatibility. Setting the picture quality www.kodak.com/go/support Setting up your digital camera 3 Press and hold the Battery charging lights/Refresh... -
Page 18: Tagging Pictures For Printing
Setting up your digital camera Tagging pictures for printing NOTE: The following procedure pertains to Kodak EasyShare digital cameras. For information on tagging pictures on other brands of ImageLink system compatible cameras, see the camera user’s guide. 1 Press the Share button on your camera, 2 Press to locate a picture. -
Page 19: Printing Without A Computer
The Print light blinks, and printing starts.The paper cycles four times before it is ejected. The first three passes apply layers of yellow, magenta, and cyan colors to the print, and the fourth pass applies the Kodak XtraLife coating that protects and preserves the image. -
Page 20: Printing From The Internal Card Reader
To remove the card, push it in, then release it. When the card is partially ejected, ■ pull it out. Purchase an SD or MMC card and other accessories at a retailer of Kodak products, or visit www.kodak.com/go/accessories. 26) or if the card slot light is blinking. -
Page 21: Printing From A Kodak Card Reader
To exit without printing, press the Cancel button, ■ Purchase a Kodak card reader and other accessories at a retailer of Kodak products, or visit www.kodak.com/go/accessories. www.kodak.com/go/support Printing without a computer 1 Open the accessory door on the printer dock. -
Page 22: Printing Tagged Pictures
■ Printing from a PictBridge compatible camera or device The Kodak EasyShare printer dock plus offers PictBridge compatibility, which lets you communicate with any PictBridge compatible camera or device. 1 Open the accessory door on the printer dock. 2 Plug the USB connector from the PictBridge compatible camera or device into the USB device connector located on the side of the printer dock. -
Page 23: Changing The Printed Picture Size
Select a picture size (see above), then press and hold the Picture Size button for 4 seconds. The selected Picture Size light blinks, then glows steady. www.kodak.com/go/support Printing without a computer Number and size of prints per sheet Up to two 2.1 x 3.3 in. (5.4 x 8.5 cm) pictures... - Page 24 If the picture size option selected on your device does not match any of the picture size options on the printer dock, the closest available picture size option on the printer dock is automatically selected.
- Page 25 1 Tag the pictures you want to print on your digital camera (see page 11). 2 Place the camera on the printer dock, or insert the memory card into the internal card reader or a connected Kodak 8-in-1 card reader (sold separately).
- Page 26 11). For each picture, choose the number of copies you would like to print. 2 Place the camera on the printer dock, or insert the memory card into the internal card reader or a connected Kodak 8-in-1 card reader (sold separately).
-
Page 27: Reducing Red Eye In Your Prints
Reducing red eye in your prints The Kodak EasyShare printer dock plus series 3 incorporates technology that automatically detects red eye in your subjects, and lets you correct your prints with push of a button. To reduce red eye in your printed pictures: ■... -
Page 28: Removing The Perforated Tabs From The Paper
Printing without a computer Removing the perforated tabs from the paper IMPORTANT: Remove perforated tabs only after printing. Paper missing perforated tabs will not feed properly. 1 Fold the tabs up, then down. 2 Remove each tab and discard. www.kodak.com/go/support... -
Page 29: Using Your Printer Dock With A Computer
Using your printer dock with a computer Install Kodak EasyShare software from the included CD to do more with your printer dock, including transferring pictures and printing from your computer. Installing the software 3 Load the software: Windows OS-based computer—if the install window does not appear, choose Run from the Start menu and type d:\setup.exe where d is the drive letter that... - Page 30 5 If prompted, restart the computer. If you turned off anti-virus software, turn it back on. See the anti-virus software manual for details. For information on the software applications included on the Kodak EasyShare software CD, click the Help button in the EasyShare software.
-
Page 31: Connecting To A Computer
Connecting to a computer IMPORTANT: Make sure your camera is NOT docked when you connect the printer dock to the computer. www.kodak.com/go/support Using your printer dock with a computer 1 Make sure Kodak EasyShare software is installed on the computer (see... - Page 32 Click Add. d From the list of printers, select the printer dock, then click More Printers. e From the pull-down menu at the top of the screen, select Kodak printer. f Select the printer dock, then click Add. The printer dock is added to your computer.
-
Page 33: Transferring Pictures From Your Digital Camera
NOTE: You can change Sync and Transfer Manager settings in EasyShare software after EasyShare software is installed. Click the Help button in the Kodak EasyShare software for details. IMPORTANT: Do not remove the camera when the printer dock is transferring pictures. - Page 34 EasyShare camera NOTE: The synchronization options described above are available only to Kodak EasyShare digital cameras that support them. See your camera user’s guide, or click the Help button in the Kodak EasyShare software for details. Each time your EasyShare camera connects to EasyShare software, the updates you selected in your synchronization settings are made.
-
Page 35: Transferring Pictures From The Internal Card Reader
Transferring pictures from the internal card reader 1 Make sure Kodak EasyShare software is installed (see dock is connected to your computer (see 2 Open the accessory door on the printer dock. 3 If a digital camera is docked, remove it. -
Page 36: Transferring Pictures From A Kodak Card Reader
Using your printer dock with a computer Transferring pictures from a Kodak card reader Your printer dock plus is compatible with the Kodak 8-in-1 card reader (sold separately). Other Kodak USB card readers may work with the printer dock plus;... -
Page 37: Printing From A Computer
5 Change any other settings, such as paper size and print layout, then click Print. NOTE: The Picture Size and Red Eye Reduction buttons on the printer dock are disabled when printing from a computer. Set printing options using EasyShare software. -
Page 38: Printing Using Other Applications
Print from the File menu.) NOTE: The Picture Size and Red Eye Reduction buttons on the printer dock are disabled when printing from a computer. Set printing options using EasyShare software. -
Page 39: Choosing A Color Mode
Using your printer dock with a computer Choosing a color mode Kodak’s color mode feature uses automatic color correction to help you make great-looking prints in no time. Your printer dock features three color mode options: Enhanced—to get richer, more vivid colors. -
Page 40: Canceling Printing
Canceling printing from the printer dock ■ Press the Cancel button, The print job is canceled and ejected from the printer dock. If you cancel a print during the fourth pass (clear coat), the paper is ejected upon completion. , on the printer dock. -
Page 41: Uninstalling The Software
Mac OS X: 1 Double-click the operating drive for your system. 2 Select Library, then select Printers. 3 Open the Kodak folder, then open the printer dock folder. 4 Double-click the printer dock uninstaller program. 5 Follow the on-screen instructions. -
Page 42: Using The Wireless Features Of Your Printer Dock
(PDAs) and wireless mobile telephones. Use your wireless device to review pictures, choose printing options, and print. NOTE: The Kodak EasyShare printer dock plus series 3 supports OPP (Object Push) and FTP (File Transfer) profiles only. By default, the on-board Bluetooth radio is on and ready to receive signals from a compatible Bluetooth technology enabled device. -
Page 43: Mac Os X
See your device user’s guide for details. To configure Bluetooth wireless technology settings for your printer dock: 1 Make sure the printer driver from the included Kodak EasyShare software CD is installed on your computer (see computer with the USB cable (see 2 Open the Kodak wireless printer configuration utility: Windows OS-based computer—... -
Page 44: Printing And Transferring Over A Wi-Fi Wireless Network
(sold separately) into the card slot. Then, print and transfer pictures using your printer dock on an existing Wi-Fi wireless (Infrastructure) network, or print pictures directly to your printer dock over a Wi-Fi wireless device-to-device (Ad-Hoc) network. Example of a wireless Infrastructure network:... - Page 45 IMPORTANT: Insert card only as shown. Do not force the card into the card slot. Notched corner 3 Make sure the printer driver from the included Kodak EasyShare software CD is installed on your computer (see computer with the USB cable (see www.kodak.com/go/support...
- Page 46 Configure the printer dock Wi-Fi settings: a From the Start menu, select Programs (or All Programs). b Open the Kodak folder, then open the Kodak EasyShare printer dock folder. c Select Kodak wireless printer configuration utility. The configuration utility opens on your computer.
- Page 47 5 Close all programs on your computer, then disconnect the USB cable between the computer and the printer dock. 6 (Optional) To print a copy of the current Wi-Fi settings for your printer dock: At the same time, press and hold the Print button, ■...
- Page 48 2 Dock your EasyShare digital camera (see , to transfer pictures to EasyShare software on your computer (see NOTE: If the printer dock is connected to the computer with the USB cable, pictures are transferred using the cable connection instead of the wireless connection.
-
Page 49: Printing From An Infrared Device
Also, be sure to visit periodically for new wireless printing accessories. Using the Kodak remote control The Kodak remote control (sold separately) lets you view and print pictures and control your printer dock remotely. The remote control is especially helpful when using your television as a display (see for details. -
Page 50: Reviewing Pictures
Reviewing pictures Reviewing pictures on the camera screen 1 Dock your digital camera (see 2 Press on the printer dock to scroll through the pictures, or press the Slide Show button, (see Displaying pictures on a television With a docked camera, you can view pictures on a television, monitor, or any device equipped with a video input. -
Page 51: Running A Slide Show
When the slide show ends, all pictures you selected for printing are printed. Changing the slide show settings See your Kodak EasyShare digital camera user’s guide for information on changing the slide show interval and setting the slide show loop. -
Page 52: Care And Maintenance
IMPORTANT: Disconnect the power before cleaning. Do not use harsh or abrasive cleaners or organic solvents on the printer dock or any of its parts. ■ To clean, wipe the outside of the printer dock with a clean, dry cloth. Avoid placing objects on the printer dock. ■... -
Page 53: Cleaning The Paper Feed Roller
IMPORTANT: Disconnect the power before cleaning. 1 Remove the paper tray from the printer dock, and leave the paper tray door open. 2 Lightly moisten a lint-free cloth with water. IMPORTANT: Do not use cotton or cotton swabs to clean the paper feed roller. -
Page 54: Traveling With Your Printer Dock
1 Disconnect the power and remove all cables. 2 Remove the paper tray from the printer dock; close the paper tray cover and the paper tray door on the printer dock. 3 Repack the printer dock in the original packing box, or use the optional printer dock travel bag. -
Page 55: Troubleshooting
Reload the paper tray. Do not exceed the fill line. Re-install the paper tray, then press www.kodak.com/go/support Use only Kodak color cartridge & paper kits for your printer dock. Do not use inkjet paper. Remove the paper tray (page Inspect the paper supply: make sure paper is not damaged in any way, or removable tabs have not been detached. - Page 56 IMPORTANT: Remove the color cartridge, remove any slack from the ribbon, then re-install the cartridge Use only Kodak color cartridge & paper kits for your printer dock. Do not use inkjet paper. Remove the paper tray (page Disconnect the power from the printer dock for 5 seconds, then reconnect the power.
- Page 57 NOTE: When storing paper, remove and close the paper tray and paper tray door to keep www.kodak.com/go/support Use only Kodak color cartridge & paper kits for your printer dock. Do not use inkjet paper. Remove the paper tray (page Check the paper slot on the back of the printer dock.
- Page 58 Cause and/or solution IMPORTANT: Print is too light ■ Make sure the paper is loaded with the Kodak logo facing down. Reload if necessary ■ Try re-taking the picture with the flash off. See your camera user’s guide for details.
- Page 59 ■ Make sure there is at least one picture in the camera’s internal memory or memory card. NOTE: The Kodak EasyShare printer dock is compatible with the Kodak 8-in-1 card reader Nothing happens when you try to print (from a Kodak card reader) ■...
- Page 60 Make sure you are using the a model U-5A USB cable included with your printer dock. Other USB cables are not supported. ■ Make sure Kodak EasyShare software is installed necessary. If you choose Custom installation, make sure to install the printer driver.
- Page 61 NOTE: When printing a large number of prints, printing may slow down to prevent the Printing is slow ■ Make sure the printer dock is not placed in direct sunlight or is not operating in a high-temperature environment (higher than 95 °F, or 35 °C).
- Page 62 —Advancement of the color cartridge ribbon upon reconnecting power to unlock the color cartridge Supply mismatch is likely to occur as you continue to use your printer dock. To keep your cartridge and paper supply synchronized, discard unused cartridge or paper when one or the other is fully depleted.
-
Page 63: Transfer/Communication Problems
If you are trying to transfer pictures from a compatible Kodak card reader connections between the printer dock and the card reader. NOTE: The Kodak EasyShare printer dock is compatible with the Kodak 8-in-1 card reader ■ Close unnecessary software applications, and minimize remaining application windows. -
Page 64: Wireless Network Connection
Make sure the wireless router and network are running before the printer dock begins scanning for a network. Out of range of the Wi-Fi signal. Make sure the printer dock is located within the operating range of the Wi-Fi wireless network. -
Page 65: Status Lights
Light blinks red There is a color cartridge jam. Light glows The color cartridge is depleted. steady red The color cartridge is not installed or is not fully seated. www.kodak.com/go/support Troubleshooting Action/solution None required. None required. Clear the jam (page... - Page 66 Remove the paper tray, check that paper is properly loaded, and re-install resume printing. Check the paper supply. Reload with new paper if necessary, then 48). press Clean the paper feed roller (page www.kodak.com/go/support (page 49), then (page 6), then press (page 7). Press 46).
- Page 67 Troubleshooting Action/solution Reseat the camera on the printer dock (page Turn off the camera. Install a Kodak Ni-MH rechargeable digital camera battery or Kodak Li-Ion rechargeable digital camera battery. See your camera user’s guide for battery compatibility and other charging options.
- Page 68 None required. Check the USB connections from the device to the printer dock (page Disconnect the device. Connect a Kodak 8-in-1 card reader, or a PictBridge compatible camera or device. Action/solution None required. Remove the card and make sure the card is not write protected or damaged.
- Page 69 There are no pictures in the camera or on the memory card. The camera is not docked, a compatible Kodak card reader is not connected, or a memory card is not inserted. The printer dock is not connected to the computer.
- Page 70 Red eye reduction has not been selected. NOTE: Red eye reduction is only available when printing docked. from a docked camera, the internal card reader, or a connected Kodak 8-in-1 card reader. Action/solution None required. Press the Slide Show button, , to start.
- Page 71 Light is off There are no pictures in the camera or on the memory card. The camera is not docked or a compatible Kodak card reader is not connected. The camera is not properly seated on the connector. The camera or card reader is...
- Page 72 PictBridge compatible camera or device. The camera is not docked, a compatible Kodak card reader or PictBridge compatible camera or device is not connected, or a memory card is not inserted. The camera is not properly seated on the connector.
-
Page 73: Helpful Links
Get help with the Windows operating system and working with digital pictures Other Get support for Kodak docks, cameras, software, accessories, more Get information on the Kodak Wi-Fi card and wireless Optimize your printer for truer, more vibrant colors Register your printer dock www.kodak.com/go/support www.kodak.com/go/printerdocks... -
Page 74: Telephone Customer Support
Troubleshooting Telephone customer support If you have questions concerning the operation of the software or printer dock, you may speak with a customer support representative. Before you call, have the printer dock connected to your computer. Be at your computer, and have the following... -
Page 75: Appendix
Appendix Printer dock specifications For more specifications, visit www.kodak.com/go/printerdocks. Printer dock specifications Printing process Operating environment (for optimum picture quality) Power (via AC power adapter) Output: 24 V DC Print speed Size Weight Print size Paper size with perforated tabs 4 x 7.25 in. (10.2 x 18.4 cm) Picture resolution www.kodak.com/go/support... -
Page 76: Wireless Channels
Format: IEEE802.11b (Wi-Fi), RCR STD-33, ARIB STD-T66 Speed: 1/2/5.5/11Mbps (auto-detect) Frequency range: 2412-2462 MHz (1 - 11 channel ISM band) Access modes: Infrastructure, Ad Hoc Security: 128 (104), 64 (40) bit WEP Via Kodak audio/video cable (catalog number 1983881) www.kodak.com/go/support ® card... -
Page 77: Important Safety Instructions
Use only a USB compliant computer equipped with a current-limiting motherboard. Contact your computer manufacturer if you have questions. ■ The use of an accessory attachment that is not recommended by Kodak, such as an AC adapter, may cause fire, electric shock, or injury. CAUTION: Do not disassemble this product;... -
Page 78: Extending Battery Life
Failure to observe this precaution may cause leakage. Remove batteries when the product is stored for an extended period of time. In the ■ unlikely event that battery fluid leaks inside the product, contact your local Kodak Customer Service representative. ■... -
Page 79: Upgrading Your Software And Firmware
■ If you are getting fewer than 20 pictures per charge with your Kodak Ni-MH rechargeable digital camera battery, (and if none of the tips above seem to help), consider refreshing the battery (see For more information on batteries, see your camera user’s guide, or visit... -
Page 80: Warranty
US, visit the Electronics Industry Alliance Web site at www.eiae.org. Warranty Limited warranty Kodak warrants the Kodak EasyShare printer dock plus series 3 to be free from malfunctions and defects in both materials and workmanship for one year from the date of purchase. - Page 81 Kodak (such as adapters and cables), or claims made after the duration of this warranty. Kodak makes no other express or implied warranty for this product. In the event that the exclusion of any implied warranty is ineffective under the law, the duration of the implied warranty will be one year from the purchase date.
-
Page 82: Regulatory Compliance
Unless specific Kodak warranty is communicated to the purchaser in writing by a Kodak company, no warranty or liability exists beyond any minimum requirements imposed by law, even though defect, damage, or loss may be by negligence or other act. - Page 83 FCC regulation. CAUTION: When using the Wi-Fi card with a printer dock: This equipment should be installed and operated with a minimum distance of 7.9 in. (20 cm) for 2.4 GHz operations between the radiator and your body. This transmitter must not be collocated or operate in conjunction with any other antenna or transmitter.
-
Page 84: Fcc And Industry Canada
RF that does not produce heating effects causes no known adverse health effects. Many studies of low-level RF exposures have not found any biological effects. Some studies have suggested that some biological effects might occur, but such findings have not been confirmed by additional research. Kodak ® Wi-Fi... -
Page 85: Waste Electrical And Electronic Equipment Labeling
Hereby, Eastman Kodak Company declares that this Kodak Wi-Fi compliance with the essential requirements and other relevant provisions of Directive 1999/5/EC. Waste Electrical and Electronic Equipment labeling In the European Union, do not discard the product as unsorted municipal waste. - Page 86 28, 29, 33, 44 canceling printing, 13, 14, 15, 20, 33 slide show, 44 transfer, 26, 28, 29 card reader external (Kodak), 14, 29 internal, 13, 28 card slot/light, i, 13, 28, 61 care & maintenance color cartridge, 3 general, 45, 72...
- Page 87 24 installing software, 22 printing from, 30, 31 transferring pictures to, 26, 28, 29 uninstalling software, 34 connecting Kodak card reader, 14, 29 PictBridge compatible camera/device, 15 power, 3 to computer, 24 to television, 43 connector A/V out, i, 43...
- Page 88 Kodak EasyShare software help, 66 installing, 22 printing with, 30 uninstalling, 34 Kodak Web sites, 66 Kodak Wi-Fi card. See wireless layout. See picture size light battery charging, i, 9, 60 Bluetooth, i, 35, 65 card slot, i, 13, 28, 61...
- Page 89 42 over Wi-Fi network, 37 print order, 15 problems, 48 reducing red eye, 20 tagged pictures from computer, 30 tagging pictures for, 11 with Kodak EasyShare software, 30 with remote control, 42 prints. See pictures Index...
- Page 90 13, 28 cooling vent, ii paper path, ii software help, 66 installing, 22 printing from, 30, 31 uninstalling, 34 upgrading, 66, 72 specifications, 68 supplies & accessories, ordering, 66 support, technical, 67 synchronization & transfer, 26, 27 www.kodak.com/go/support...
- Page 91 14, 15, 24, 29 connector (to computer), ii, 24 device connector, i, 14, 15, 29 device connector light, i, 14, 15, 29, 61 external (Kodak) card reader, 14, 29 wireless adapter, 35 www.kodak.com/go/support vent, cooling, ii, 45 viewing pictures. See reviewing pictures...