
Related Manuals for Mitsubishi Electric MELSERVO MR-J4-B-LL Series


Summary of Contents for Mitsubishi Electric MELSERVO MR-J4-B-LL Series
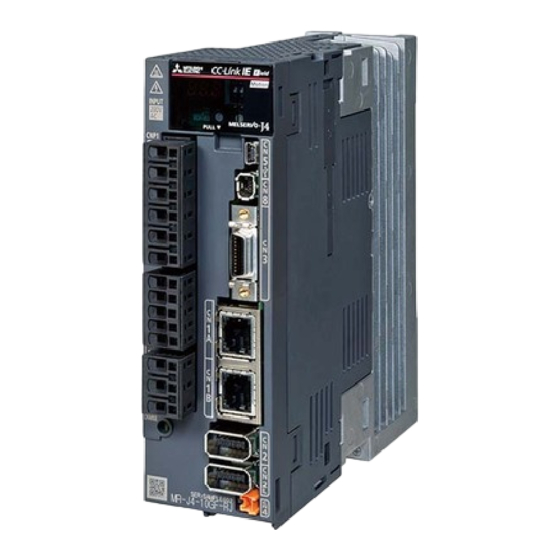
- Page 1 General-Purpose AC Servo SSCNET /H Interface AC Servo for Pressure Control MODEL (SERVO AMPLIFIER) MR-J4-_B_-LL MODEL (DRIVE UNIT) MR-J4-DU_B_-LL SERVO AMPLIFIER INSTRUCTION MANUAL...
- Page 2 Safety Instructions Please read the instructions carefully before using the equipment. To use the equipment correctly, do not attempt to install, operate, maintain, or inspect the equipment until you have read through this Instruction Manual, Installation guide, and appended documents carefully. Do not use the equipment until you have a full knowledge of the equipment, safety information and instructions.
- Page 3 1. To prevent electric shock, note the following WARNING Before wiring, turn off the power and wait for 15 minutes or more (20 minutes or more for converter unit) until the charge lamp turns off. Then, confirm that the voltage between P+ and N- (between L+ and L- for converter unit) is safe with a voltage tester and others.
- Page 4 3. To prevent injury, note the following CAUTION Only the voltage specified in the Instruction Manual should be applied to each terminal. Otherwise, a burst, damage, etc. may occur. Connect cables to the correct terminals. Otherwise, a burst, damage, etc. may occur. Ensure that polarity (+/-) is correct.
- Page 5 (2) Wiring CAUTION Wire the equipment correctly and securely. Otherwise, the servo motor may operate unexpectedly. Do not install a power capacitor, surge killer, or radio noise filter (optional FR-BIF(-H)) on the servo amplifier output side. To avoid a malfunction, connect the wires to the correct phase terminals (U, V, and W) of the servo amplifier and servo motor.
- Page 6 (4) Usage CAUTION Provide an external emergency stop circuit to stop the operation and shut the power off immediately. Do not disassemble, repair, or modify the equipment. Before resetting an alarm, make sure that the run signal of the servo amplifier is off in order to prevent a sudden restart.
- Page 7 (7) General instruction To illustrate details, the equipment in the diagrams of this Instruction Manual may have been drawn without covers and safety guards. When the equipment is operated, the covers and safety guards must be installed as specified. Operation must be performed in accordance with this Instruction Manual. DISPOSAL OF WASTE Please dispose a servo amplifier, battery (primary battery) and other options according to your local laws and regulations.
- Page 8 «About the manual» You must have this Instruction Manual and the following manuals to use this servo. Be sure to prepare all the instruction manuals necessary to use the servo safely. Servo amplifiers and drive units are written as servo amplifiers in this manual under certain circumstances, unless otherwise stated.
- Page 9 MEMO A - 8...
-
Page 10: Table Of Contents
CONTENTS 1. FUNCTIONS AND CONFIGURATION 1- 1 to 1-20 1.1 Summary ............................1- 1 1.2 Function block diagram ........................1- 2 1.3 Standard specifications ........................1- 3 1.4 Combinations of servo amplifiers and servo motors ............... 1-13 1.5 Combinations of converter units, drive units and servo motors............1-14 1.6 Function list ............................ - Page 11 4. PRESSURE LOOP GAIN ADJUSTMENT 4- 1 to 4- 8 4.1 Summary ............................4- 1 4.2 Pressure control adjustment flowchart ..................... 4- 1 4.3 Setting of pressure control system ....................4- 2 4.4 Setting of pressure feedback ......................4- 3 4.5 Adjustment of pressure loop gain .....................
-
Page 12: Functions And Configuration
1. FUNCTIONS AND CONFIGURATION 1. FUNCTIONS AND CONFIGURATION The following items are the same as those for MR-J4-_B_. Refer to the section of the detailed explanation field for details. "MR-J4-_B_" means "MR-J4-_B_(-RJ) Servo Amplifier Instruction Manual". "MR-J4-_DU_" means "MR-J4-DU_(-RJ)/MR-CR55K_ Instruction Manual". Item Detailed explanation MR-J4-_B_ section 1.7... -
Page 13: Function Block Diagram
1. FUNCTIONS AND CONFIGURATION (2) Compatible controller Use the MR-J4-_B_-LL with the pressure control compatible servo system controller and operation system listed in the following table. Never connect with other controllers. Motion controller model Operation system R64MTCPU/R32MTCPU/R16MTCPU SW10DNC-RMTFW version 03 or later (Note) Note. -
Page 14: Standard Specifications
1. FUNCTIONS AND CONFIGURATION 1.3 Standard specifications (1) Servo amplifier (a) 200 V class Model MR-J4-_-LL 100B 200B 350B 500B 700B 11KB 15KB 22KB Rated voltage 3-phase 170 V AC Output Rated current 11.0 17.0 28.0 37.0 68.0 87.0 126.0 3-phase or 1- phase 200 V 3-phase... - Page 15 1. FUNCTIONS AND CONFIGURATION Model MR-J4-_-LL 100B 200B 350B 500B 700B 11KB 15KB 22KB LVD: EN 61800-5-1 CE marking EMC: EN 61800-3 Compliance to global standards MD: EN ISO 13849-1, EN 61800-5-2, EN 62061 UL standard UL 508C Structure (IP rating) Natural cooling, open (IP20) Force cooling, open (IP20) Force cooling, open (IP20) (Note 4)
- Page 16 1. FUNCTIONS AND CONFIGURATION (b) 400 V class Model MR-J4-_-LL 60B4 100B4 200B4 350B4 500B4 700B4 11KB4 15KB4 22KB4 Rated voltage 3-phase 323 V AC Output Rated current 14.0 17.0 32.0 41.0 63.0 Voltage/Frequency 3-phase 380 V AC to 480 V AC, 50 Hz/60 Hz Rated current 10.8 14.4...
- Page 17 1. FUNCTIONS AND CONFIGURATION Note 1. 0.3 A is the value applicable when all I/O signals are used. The current capacity can be decreased by reducing the number of I/O points. 2. Test pulse is a signal which instantaneously turns off a signal to the servo amplifier at a constant period for external circuit to self-diagnose.
- Page 18 1. FUNCTIONS AND CONFIGURATION (c) 100 V class Model MR-J4-_-LL 10B1 20B1 40B1 Rated voltage 3-phase 170 V AC Output Rated current Voltage/Frequency 1-phase 100 V AC to 120 V AC, 50 Hz/60 Hz Rated current Permissible voltage 1-phase 85 V AC to 132 V AC fluctuation Main circuit power supply...
- Page 19 1. FUNCTIONS AND CONFIGURATION Model MR-J4-_-LL 10B1 20B1 40B1 Operation 0 °C to 55 °C (non-freezing) Ambient temperature Storage -20 °C to 65 °C (non-freezing) Operation Ambient 90 %RH or less (non-condensing) humidity Storage Environment Indoors (no direct sunlight), Ambience free from corrosive gas, flammable gas, oil mist, dust, and dirt Altitude 2000 m or less above sea level (Note 5)
- Page 20 1. FUNCTIONS AND CONFIGURATION (2) Drive unit (a) 200 V class Model MR-J4-DU_-LL 30KB 37KB Rated voltage 3-phase 170 V AC Output Rated current Main circuit power supply input The main circuit power of the drive unit is supplied by the converter unit. Voltage/Frequency 1-phase 200 V AC to 240 V AC, 50 Hz/60 Hz Rated current...
- Page 21 1. FUNCTIONS AND CONFIGURATION Note 1. 0.3 A is the value applicable when all I/O signals are used. The current capacity can be decreased by reducing the number of I/O points. 2. Test pulse is a signal which instantaneously turns off a signal to the drive unit at a constant period for external circuit to self- diagnose.
- Page 22 1. FUNCTIONS AND CONFIGURATION (b) 400 V class Model MR-J4-DU_-LL 30KB4 37KB4 45KB4 55KB4 Rated voltage 3-phase 323 V AC Output Rated current Main circuit power supply input The main circuit power of the drive unit is supplied by the converter unit. Voltage/Frequency 1-phase 380 V AC to 480 V AC, 50 Hz/60 Hz Rated current...
- Page 23 1. FUNCTIONS AND CONFIGURATION Note 1. 0.3 A is the value applicable when all I/O signals are used. The current capacity can be decreased by reducing the number of I/O points. 2. Test pulse is a signal which instantaneously turns off a signal to the drive unit at a constant period for external circuit to self- diagnose.
-
Page 24: Combinations Of Servo Amplifiers And Servo Motors
1. FUNCTIONS AND CONFIGURATION 1.4 Combinations of servo amplifiers and servo motors POINT When a 1-phase 200 V AC input is used, the maximum torque of 400% cannot be achieved with HG-JR series servo motor. When you use the MR-J4-100B-LL or MR-J4-200B-LL with the 1-phase 200 V AC input, contact your local sales office for the torque characteristics of the HG- UR series and HG-RR series servo motors. -
Page 25: Combinations Of Converter Units, Drive Units And Servo Motors
1. FUNCTIONS AND CONFIGURATION (2) 400 V class Servo motor HG-JR Servo amplifier HG-SR HG-JR (When the maximum torque is 400%) MR-J4-60B4-LL MR-J4-100B4-LL 1024 1034 MR-J4-200B4-LL 1524 1534 2024 2034 1034 MR-J4-350B4-LL 1534 3524 3534 2034 MR-J4-500B4-LL 5024 5034 3534 MR-J4-700B4-LL 6014 7024... -
Page 26: Function List
1. FUNCTIONS AND CONFIGURATION 1.6 Function list The following table lists the functions of this servo. For details of the functions, refer to each section indicated in the detailed explanation field. "MR-J4-_B_" means "MR-J4-_B_(-RJ) Servo Amplifier Instruction Manual". "MR-J4-_DU_" means "MR-J4-DU_(-RJ)/MR-CR55K_ Instruction Manual". Detailed Function Description... - Page 27 1. FUNCTIONS AND CONFIGURATION Detailed Function Description explanation MR-J4-_B_ Use a regenerative option when the built-in regenerative resistor of the servo amplifier Section 11.2 Regenerative option does not have sufficient regenerative capacity for a large regenerative power MR-J4-_DU_ generated. Section 9.2 Alarm history clear Clears alarm histories.
- Page 28 1. FUNCTIONS AND CONFIGURATION Detailed Function Description explanation Master-slave operation This is not available with the MR-J4-(DU)_B_-LL servo amplifier. function Scale measurement function This is not available with the MR-J4-(DU)_B_-LL servo amplifier. This is not available with the MR-J4-(DU)_B_-LL servo amplifier. Do not change the mode by using the application software "MR-J4(W)-B mode J3 compatibility mode selection".
-
Page 29: Model Designation
1. FUNCTIONS AND CONFIGURATION 1.7 Model designation (1) Rating plate The following shows an example of rating plate for explanation of each item. AC SERVO SER.A45001001 Serial number MR-J4-10B-LL MODEL Model Capacity POWER :100W Applicable power supply INPUT : 3AC/AC200-240V 0.9A/1.5A 50/60Hz Rated output current OUTPUT: 3PH170V 0-360Hz 1.1A Standard, Manual number... - Page 30 1. FUNCTIONS AND CONFIGURATION (b) Converter unit Power supply Series Symbol Power supply None 3-phase 200 V AC to 240 V AC 3-phase 380 V AC to 480 V AC Rated output: 55 kW (c) Drive unit Special specifications Series Symbol Special specifications Pressure control type Indicates drive unit...
- Page 31 1. FUNCTIONS AND CONFIGURATION MEMO 1 - 20...
-
Page 32: Signals And Wiring
2. SIGNALS AND WIRING 2. SIGNALS AND WIRING Any person who is involved in wiring should be fully competent to do the work. Before wiring, turn off the power and wait for 15 minutes or more (20 minutes or more for converter unit) until the charge lamp turns off. Then, confirm that the voltage between P+ and N- (between L+ and L- for converter unit) is safe with a voltage tester and others. -
Page 33: Input Power Supply Circuit
2. SIGNALS AND WIRING Connect the servo amplifier power outputs (U, V, and W) to the servo motor power inputs (U, V, and W) directly. Do not connect a magnetic contactor and others between them. Servo amplifier Servo motor Servo amplifier Servo motor CAUTION The following items are the same as those for MR-J4-_B_. -
Page 34: I/O Signal Connection Example
2. SIGNALS AND WIRING 2.2 I/O signal connection example ALM (Malfunction) is not assigned by default. Create a circuit that shuts off the CAUTION main circuit by being interlocked with an alarm detected by the controller. POINT When assigning ALM (Malfunction) to the CN3-9 pin, set [Pr. PD08] to "0003". In the pressure control mode, EM2 functions the same as EM1. - Page 35 2. SIGNALS AND WIRING Note 1. To prevent an electric shock, always connect the protective earth (PE) terminal (marked ) of the servo amplifier to the protective earth (PE) of the cabinet. 2. Connect the diode in the correct direction. If it is connected reversely, the servo amplifier will malfunction and will not output signals, disabling EM2 (Forced stop 2) and other protective circuits.
-
Page 36: For Source I/O Interface
2. SIGNALS AND WIRING 2.2.2 For source I/O interface POINT For notes, refer to section 2.2.1. Servo amplifier (Note 15) Short-circuit connector (Packed with the servo amplifier) 10 m or less 10 m or less (Note 14) (Note 12) (Note 12) 24 V DC (Note 10) Main circuit power supply (Note 3, 4) -
Page 37: Connectors And Pin Assignment
2. SIGNALS AND WIRING 2.3 Connectors and pin assignment POINT The pin assignment of the connectors is as viewed from the cable connector wiring section. For the STO I/O signal connector (CN8), refer to chapter 13 of "MR-J4-_B_(-RJ) Servo Amplifier Instruction Manual". For the CN3 connector, securely connect the shielded external conductor of the cable to the ground plate and fix it to the connector shell. -
Page 38: Signal (Device) Explanations
2. SIGNALS AND WIRING 2.4 Signal (device) explanations For the I/O interfaces (symbols in I/O division column in the table), refer to section 2.5.2. The pin Nos. in the connector pin No. column are assigned by default. 2.4.1 Input device POINT In the pressure control mode, EM2 functions the same as EM1. -
Page 39: Output Device
2. SIGNALS AND WIRING 2.4.2 Output device (1) Output device pin The following shows the output device pins and parameters for assigning devices. Connector pin No. Parameter Initial device I/O division CN3-13 [Pr. PD07] DO-1 CN3-9 [Pr. PD08] (2) Output device explanations Device Symbol Function and application... - Page 40 2. SIGNALS AND WIRING Device Symbol Function and application Zero speed detection ZSP turns on when the servo motor speed is zero speed or less. Zero speed can be changed with [Pr. PC07]. OFF level Forward 70 r/min rotation 20 r/min ON level direction (Hysteresis width)
-
Page 41: Input Signal
2. SIGNALS AND WIRING 2.4.3 Input signal Connector Signal name Symbol Function and application pin No. division Pressure feedback CN3-15 Input pressure feedback of the load cell for pressure control. Analog input Apply 0 V DC to +10 V DC between AD0 and LG. The pressure feedback value set in [Pr. -
Page 42: Interfaces
2. SIGNALS AND WIRING 2.5 Interfaces 2.5.1 Internal connection diagram POINT For the CN8 connector, refer to section 13.3.1 of "MR-J4-_B_(-RJ) Servo Amplifier Instruction Manual". Servo amplifier (Note 3) Approx. Forced stop 2 24 V DC 6.2 kΩ DOCOM (Note 2) (Note 2) DICOM (Note 3) -
Page 43: Detailed Explanation Of Interfaces
2. SIGNALS AND WIRING 2.5.2 Detailed explanation of interfaces This section provides the details of the I/O signal interfaces (refer to the I/O division in the table) given in section 2.4. Refer to this section and make connection with the external device. (1) Digital input interface DI-1 This is an input circuit whose photocoupler cathode side is input terminal. - Page 44 2. SIGNALS AND WIRING (3) Analog input Servo amplifier AD0, etc. Approx. Input voltage: ± 10 V 11 kΩ (4) Analog output Servo amplifier (MO2) Output voltage: ±10 V (Note) Maximum output current: 1 mA Resolution: 10 bits or equivalent Note.
-
Page 45: Source I/O Interfaces
2. SIGNALS AND WIRING 2.5.3 Source I/O interfaces In this servo amplifier, source type I/O interfaces can be used. (1) Digital input interface DI-1 This is an input circuit in which the anode of the photocoupler is the input terminal. Transmit signals from source (open-collector) type transistor output, relay switch, etc. -
Page 46: Parameters
3. PARAMETERS 3. PARAMETERS Never make a drastic adjustment or change to the parameter values as doing so will make the operation unstable. CAUTION If fixed values are written in the digits of a parameter, do not change these values. Do not change parameters for manufacturer setting. - Page 47 3. PARAMETERS 3.1.1 Basic setting parameters ([Pr. PA_ _ ]) Control mode Initial Symbol Name Unit value PA01 For manufacturer setting 1000h PA02 **REG Regenerative option 0000h PA03 *ABS Absolute position detection system 0000h PA04 *AOP1 Function selection A-1 2000h PA05 For manufacturer setting 10000...
- Page 48 3. PARAMETERS 3.1.2 Gain/filter setting parameters ([Pr. PB_ _ ]) Control mode Initial Symbol Name Unit value PB01 FILT Adaptive tuning mode (adaptive filter II) 0000h PB02 VRFT Vibration suppression control tuning mode (advanced vibration 0000h suppression control II) PB03 For manufacturer setting 18000 PB04...
- Page 49 3. PARAMETERS Control mode Initial Symbol Name Unit value PB46 Machine resonance suppression filter 3 4500 [Hz] PB47 NHQ3 Notch shape selection 3 0000h PB48 Machine resonance suppression filter 4 4500 [Hz] PB49 NHQ4 Notch shape selection 4 0000h PB50 Machine resonance suppression filter 5 4500 [Hz]...
- Page 50 3. PARAMETERS Control mode Initial Symbol Name Unit value PC25 For manufacturer setting PC26 0000h PC27 0000h PC28 0000h PC29 0000h PC30 For manufacturer setting PC31 RSUP1 Vertical axis freefall prevention compensation amount [0.0001rev] PC32 For manufacturer setting 0000h PC33 PC34 PC35 0000h...
- Page 51 3. PARAMETERS 3.1.4 I/O setting parameters ([Pr. PD_ _ ]) Control mode Initial Symbol Name Unit value PD01 For manufacturer setting 0000h PD02 *DIA2 Input signal automatic on selection 2 0000h PD03 For manufacturer setting 0020h PD04 0021h PD05 0022h PD06 0000h PD07...
- Page 52 3. PARAMETERS 3.1.5 Extension setting 2 parameters ([Pr. PE_ _ ]) Control mode Initial Symbol Name Unit value PE01 For manufacturer setting 0000h PE02 0000h PE03 0003h PE04 PE05 PE06 PE07 PE08 PE09 0000h PE10 0000h PE11 0000h PE12 0000h PE13 0000h PE14...
- Page 53 3. PARAMETERS Control mode Initial Symbol Name Unit value PE51 For manufacturer setting 0000h PE52 0000h PE53 0000h PE54 0000h PE55 0000h PE56 0000h PE57 0000h PE58 0000h PE59 0000h PE60 0000h PE61 0.00 PE62 0.00 PE63 0.00 PE64 0.00 3.1.6 Extension setting 3 parameters ([Pr.
- Page 54 3. PARAMETERS Control mode Initial Symbol Name Unit value PF32 For manufacturer setting PF33 0000h PF34 0000h PF35 0000h PF36 0000h PF37 0000h PF38 0000h PF39 0000h PF40 0000h PF41 0000h PF42 0000h PF43 0000h PF44 PF45 0000h PF46 0000h PF47 0000h PF48...
- Page 55 3. PARAMETERS 3.1.8 Pressure control parameters ([Pr. PT_ _ ]) Control mode Initial Symbol Name Unit value PT01 Pressure loop gain PT02 Pressure integral compensation [ms] PT03 Pressure incomplete integral coefficient 10000 PT04 For manufacturer setting PT05 PT06 PT07 PT08 10000 PT09 PT10...
-
Page 56: Basic Setting Parameters ([Pr. Pa
3. PARAMETERS 3.2 Detailed list of parameters POINT Items not mentioned in this section are the same as those for MR-J4-_B_ servo amplifier. Refer to section 5.2 of "MR-J4-_B_(-RJ) Servo Amplifier Instruction Manual" and section 5.2.2 of "MR-J4-DU_(-RJ)/MR-CR55K_ Instruction Manual". However, functions available with the MR-J4-_B_ servo amplifiers with software version C0 or later are not supported by the MR-J4-(DU)_B_-LL servo amplifiers. -
Page 57: Gain/Filter Setting Parameters ([Pr. Pb
3. PARAMETERS Initial Setting Symbol Name and function value range [unit] PA20 *TDS Tough drive setting Refer to the Name and function Alarms may not be avoided with the tough drive function depending on the situations of the column. power supply and load fluctuation. You can assign MTTR (During tough drive) to pins CN3-9 and CN3-13 with [Pr. -
Page 58: Extension Setting Parameters ([Pr. Pc
3. PARAMETERS 3.2.3 Extension setting parameters ([Pr. PC_ _ ]) Initial Setting Symbol Name and function value range [unit] PC09 MOD1 Analog monitor 1 output Refer to the Name and function Select a signal to output to MO1 (Analog monitor 1). column. -
Page 59: I/O Setting Parameters ([Pr. Pd
3. PARAMETERS 3.2.4 I/O setting parameters ([Pr. PD_ _ ]) Details of I/O setting parameters ([Pr. PD_ _ ]) are the same as those for MR-J4-_B_ servo amplifier. Refer to section 5.2.4 of "MR-J4-_B_(-RJ) Servo Amplifier Instruction Manual". 3.2.5 Extension setting 2 parameters ([Pr. PE_ _ ]) Details of Extension setting 2 parameters ([Pr. -
Page 60: Pressure Control Parameters ([Pr. Pt
3. PARAMETERS 3.2.8 Pressure control parameters ([Pr. PT_ _ ]) Initial Setting Symbol Name and function value range [unit] PT01 Pressure loop gain Set the proportional gain of the pressure loop. When "0" is set, the pressure command will be 6000 PT02 Pressure integral compensation... - Page 61 3. PARAMETERS Initial Setting Symbol Name and function value range [unit] PT13 *TOP2 Function selection T-2 Refer to the Name and function Setting Initial column. Explanation digit value Pressure control command compensation _ _ _ x Enable/disable the pressure control command compensation. 0: Disabled (A command from the controller will be immediately reflected.) 1: Enabled (A command from the controller will be compensated...
- Page 62 3. PARAMETERS Initial Setting Symbol Name and function value range [unit] PT27 Analog monitor input filter setting Refer to the Name and function Set the low-pass filter for AD0 (Pressure feedback), AD1 (Analog monitor input 1), and AD2 column. (Analog monitor input 2). Setting Initial Explanation...
- Page 63 3. PARAMETERS MEMO 3 - 18...
-
Page 64: Pressure Loop Gain Adjustment
4. PRESSURE LOOP GAIN ADJUSTMENT 4. PRESSURE LOOP GAIN ADJUSTMENT POINT Before making gain adjustment, check that neither speed nor torque is limited. 4.1 Summary Adjust pressure control in order to increase the response performance to the pressure command from the controller. -
Page 65: Setting Of Pressure Control System
4. PRESSURE LOOP GAIN ADJUSTMENT 4.3 Setting of pressure control system Set the parameters as follows according to the machine configuration and the controller to be used. (1) Setting of the rotation direction and the pressure increasing direction for the positioning address Set [Pr. -
Page 66: Setting Of Pressure Feedback
4. PRESSURE LOOP GAIN ADJUSTMENT 4.4 Setting of pressure feedback Execute setting related to the pressure feedback. Set the parameters of the load cell amplifier and the servo amplifier. (1) Setting of the pressure feedback unit constant (a) Setting of the load cell amplifier Adjust the voltage range of the load cell amplifier between 0 and +10 V according to the voltage input range of the pressure feedback. -
Page 67: Adjustment Of Pressure Loop Gain
4. PRESSURE LOOP GAIN ADJUSTMENT 4.5 Adjustment of pressure loop gain POINT Changing [Pr. PT22 Pressure feedback unit constant] also changes the response performance of the pressure control. In this case, readjust the pressure loop gain. To adjust the pressure control, adjust the following in order of the proportional control gain (pressure loop gain) and the integral control gain (pressure integral compensation and pressure incomplete integral coefficient). - Page 68 4. PRESSURE LOOP GAIN ADJUSTMENT (2) Adjustment of the proportional control gain (pressure loop gain) First, set [Pr. PT01], [Pr. PT02], and [Pr. PT03] as follows in order to enable only the proportional control gain. Parameter Symbol Setting PT01 Set "10". PT02 Set "1000".
- Page 69 4. PRESSURE LOOP GAIN ADJUSTMENT (a) For a machine providing a constant pressure when the servo motor stops First, set [Pr. PT01], [Pr. PT02], and [Pr. PT03] as follows. Parameter Symbol Setting Set the result of (2) adjustment of the proportional control gain PT01 (pressure loop gain) PT02...
-
Page 70: Checking Of Adjustment Result
4. PRESSURE LOOP GAIN ADJUSTMENT (b) For a machine providing a constant pressure when the servo motor rotates First, set [Pr. PT01], [Pr. PT02], and [Pr. PT03] as follows. Parameter Symbol Setting PT01 Set the result of (2) adjustment of the proportional control gain (pressure loop gain) PT02 Set "500". - Page 71 4. PRESSURE LOOP GAIN ADJUSTMENT MEMO 4 - 8...
-
Page 72: Troubleshooting
5. TROUBLESHOOTING 5. TROUBLESHOOTING POINT This chapter explains the details of alarms and warnings exclusively for the MR- J4-(DU)_B_-LL. Refer to "MELSERVO-J4 Servo Amplifier Instruction Manual (Troubleshooting)" for other alarms and warnings. As soon as an alarm occurs, make the Servo-off status and interrupt the main circuit power. -
Page 73: Alarm List
5. TROUBLESHOOTING 5.2 Alarm list Alarm deactivation Stop method Detail Cycling Name Detail name Alarm (Note 3, reset reset power 10.1 Voltage drop in the control circuit power Undervoltage 10.2 Voltage drop in the main circuit power 12.1 RAM error 1 12.2 RAM error 2 Memory error 1 (RAM) - Page 74 5. TROUBLESHOOTING Alarm deactivation Stop method Detail Cycling Name Detail name Alarm (Note 3, reset reset power Encoder normal communication - Receive data 20.1 error 1 Encoder normal communication - Receive data 20.2 error 2 Encoder normal communication - Receive data 20.3 error 3 Encoder normal communication - Transmission...
- Page 75 5. TROUBLESHOOTING Alarm deactivation Stop method Detail Cycling Name Detail name Alarm (Note 3, reset reset power 46.1 Abnormal temperature of servo motor 1 (Note 1) (Note 1) (Note 1) 46.2 Abnormal temperature of servo motor 2 (Note 1) (Note 1) (Note 1) 46.3 Thermistor disconnected error (Note 1) (Note 1) (Note 1)
-
Page 76: Warning List
5. TROUBLESHOOTING 5.3 Warning list Stop Detail method Name Detail name (Note 2, Servo amplifier overheat 91.1 Main circuit device overheat warning warning (Note 1) 92.1 Encoder battery cable disconnection warning Battery cable disconnection warning 92.3 Battery degradation 95.1 STO1 off detection STO warning 95.2 STO2 off detection... -
Page 77: Remedies For Alarms
5. TROUBLESHOOTING 5.4 Remedies for alarms When an alarm occurs, eliminate its cause, ensure safety, and deactivate the alarm to restart operation. Otherwise, it may cause injury. If [AL. 25 Absolute position erased] occurs, always make home position setting CAUTION again. -
Page 78: Remedies For Warnings
5. TROUBLESHOOTING 5.5 Remedies for warnings If [AL. E3 Absolute position counter warning] occurs, always make home position CAUTION setting again. Otherwise, it may cause an unexpected operation. POINT This section explains the details of warnings exclusively for the MR-J4-(DU)_B_- LL. - Page 79 5. TROUBLESHOOTING MEMO 5 - 8...
-
Page 80: Options And Peripheral Equipment
6. OPTIONS AND PERIPHERAL EQUIPMENT 6. OPTIONS AND PERIPHERAL EQUIPMENT Before connecting any option or peripheral equipment, turn off the power and wait for 15 minutes or more (20 minutes or more for converter unit) until the charge lamp turns off. Then, confirm that the voltage between P+ and N- (between L+ WARNING and L- for converter unit) is safe with a voltage tester and others. -
Page 81: Mr Configurator2
6. OPTIONS AND PERIPHERAL EQUIPMENT 6.1 MR Configurator2 POINT MR Configurator2 with software version 1.37P or later is supported by the MR- J4-(DU)_B_-LL servo amplifiers. Items not mentioned in this section are the same as those for MR-J4-_B_ servo amplifier. Refer to section 11.7 of "MR-J4-_B_(-RJ) Servo Amplifier Instruction Manual". -
Page 82: Appendix
APPENDIX APPENDIX App. 1 Optional data monitor function The optional data monitor function is used to monitor data in the servo amplifier with the servo system controller. In the optional data monitor function, data types of registered monitor and transient command can be set. - Page 83 This manual confers no industrial property rights or any rights of any other kind, nor does it confer any patent licenses. Mitsubishi Electric Corporation cannot be held responsible for any problems involving industrial property rights which may occur as a result of using the contents noted in this manual.
- Page 84 348 Victoria Road, P.O. Box 11, Rydalmere, N.S.W 2116, Australia : +61-2-9684-7245 MELSERVO is a trademark or registered trademark of Mitsubishi Electric Corporation in Japan and/or other countries. All other product names and company names are trademarks or registered trademarks of their respective companies.
- Page 85 Warranty 1. Warranty period and coverage We will repair any failure or defect hereinafter referred to as "failure" in our FA equipment hereinafter referred to as the "Product" arisen during warranty period at no charge due to causes for which we are responsible through the distributor from which you purchased the Product or our service provider.
- Page 86 MODEL MODEL CODE HEAD OFFICE : TOKYO BLDG MARUNOUCHI TOKYO 100-8310 This Instruction Manual uses recycled paper. SH(NA)030241-A(1606)MEE Printed in Japan Specifications are subject to change without notice.