Table of Contents
Advertisement
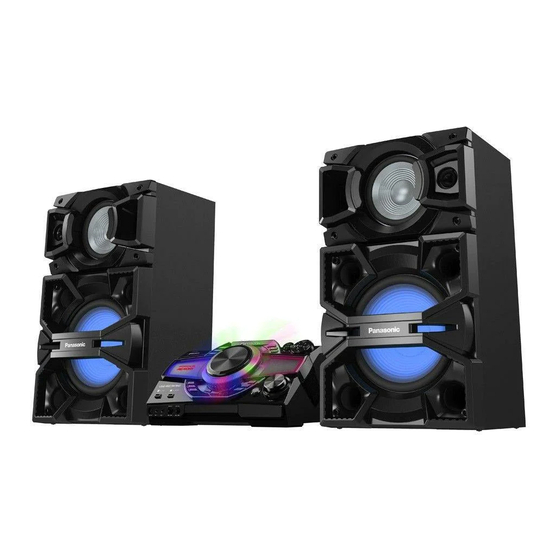
This illustration shows SC-MAX5000.
Thank you for purchasing this product.
For optimum performance and safety, please read these instructions carefully.
Please keep this manual for future reference.
GN
PU
PN
PS
Operating Instructions
CD Stereo System
SC-MAX9000
Model No.
SC-MAX7000
SC-MAX5000
RQT0A63-1B
Advertisement
Table of Contents

Related Manuals for Panasonic SC-MAX7000


Summary of Contents for Panasonic SC-MAX7000
- Page 1 Operating Instructions CD Stereo System SC-MAX9000 Model No. SC-MAX7000 SC-MAX5000 This illustration shows SC-MAX5000. Thank you for purchasing this product. For optimum performance and safety, please read these instructions carefully. Please keep this manual for future reference. RQT0A63-1B...
-
Page 2: Safety Precautions
• Do not stare directly at the illumination LED to avoid Panasonic has no authority to and does not grant you eyes discomfort. that permission and explicitly disclaims any right, ability or intention to obtain such permission on your behalf. -
Page 3: Table Of Contents
Bluetooth SIG, Inc. and any use • Do not use this system near an equipment or in an of such marks by Panasonic Corporation is under environment that is sensitive to radio frequency license. Other trademarks and trade names are those of interference (example: airports, hospitals, laboratories, their respective owners. -
Page 4: Supplied Accessories
SC-MAX9000 8 Speaker feet (Except for Australia and New Zealand) SC-MAX9000 Protection layer SC-MAX7000 (not supplied) 1 Power plug adapter SC-MAX7000 16 Speaker feet The left and right speakers are the same. Keep your speakers more than 10 cm from the main unit ... - Page 5 Setup 2 SC-MAX7000 SC-MAX5000 You can put the speakers in a vertical position as well as Put the speakers so that the tweeter is on the outside. on a shelf. Keep your speakers more than 10 mm from the main unit for ventilation.
-
Page 6: Making The Connections
Making the connections Connect the AC power supply cord only after all the other connections have been made. SC-MAX5000 SC-MAX7000 Connect the AM loop antenna. Stand the antenna up on its base until it clicks. TO SPEAKERS Connect the speaker cables to Connect the FM indoor antenna. -
Page 7: Preparing The Remote Control
Connect the AC power supply cord. Do not use any other AC power supply cords except the supplied one. SC-MAX9000 SC-MAX7000 For Australia and New Zealand For others Insert the AC power supply cord up to a point just before the round hole. -
Page 8: Overview Of Controls
Overview of controls Do the procedures with the remote control. You can also use the buttons on the main unit if they are the same. Standby/on switch [`], [1] Press to switch the unit from on to standby mode or vice versa. - Page 9 Top View For Australia and New Zealand Front View NFC touch area Switch on the DJ function To cancel, press the button again. Turntable for DJ and multi control AUX IN 2 jack Select MP3 album or track Microphone jack Press [ALBUM/TRACK] to select album or track.
-
Page 10: Preparing Media
Using the main unit Preparing media Press and hold [ –PAIRING] until “PAIRING” is shown. Select “SC-MAX9000”, “SC-MAX7000” or Disc “SC-MAX5000” from the Bluetooth menu of the ® device. Press [CD x] (main unit: [x OPEN/CLOSE]) to Note: open the disc tray. -
Page 11: Media Playback
Android device version lower than 4.1 requires the Internal memory (refer to “Recording” for MEMORY installation of the “Panasonic MAX Juke” app (free of adding tracks to the internal memory). charge). Enter “Panasonic MAX Juke” in the search box of Basic playback Google Play™... - Page 12 █ Note on disc Play menu • This system can play CD-R/RW with CD-DA or MP3 CD USB MEMORY format content. • Before playback, finalize the disc on the device it was Press [PLAY MENU]. recorded on. • Some CD-R/RW cannot be played because of the Press [Y, U] to select the setting and then press condition of the recording.
-
Page 13: Radio
Improving the sound quality Radio When “FM” is selected Preparation Press [PLAY MENU] to select “FM MODE”. Press [CD/RADIO/AUX] to select “FM” or “AM”. Press [Y, U] to select “MONO” and then press [OK]. Manual tuning To cancel, select “STEREO”. “MONO”... -
Page 14: Recording
Stop recording Press [8]. “WRITING” is shown. Recording Pause Press [MEMORY REC 7/9] or recording [USB REC 7/9] during recording. This system can record up to 800 folders (maximum 999 Press again to continue recording. tracks in an album) or a total of 8000 tracks, depending on the available storage capacity of the internal memory Note: or the USB device in... -
Page 15: Sound And Illumination Effects
The selected item to be deleted is shown. Or turn [MULTI CONTROL] to select the effect. Note: Press [OK]. SC-MAX7000 “SURE? NO” is shown. To ensure the illumination effects are shown properly, make Press [Y, U] to select “SURE? YES” and then sure to arrange the speakers accordingly as in “Placement of... -
Page 16: Dj Functions
Using the “Panasonic MAX Juke” app (Except for AUX 1 and AUX 2 source) You can download and install the free Android app “Panasonic MAX Juke” on Google Play for additional By main unit only features, such as to request song playback from By turning [MULTI CONTROL], you can apply a scratch multiple devices simultaneously. -
Page 17: Using A Microphone
Play timer and record timer Using a microphone (Except for Bluetooth , AUX 1 and AUX 2 source) ® Preparation You can set the timer to come on at a certain time to: Decrease the volume of the system to its minimum before •... -
Page 18: External Equipment
Components and cables are sold separately. portable audio equipment. Using the auxiliary input You can connect a VCR, DVD player etc. and listen to the audio through this system. SC-MAX9000 SC-MAX7000 Audio cable Rear panel of (not supplied) this main unit... -
Page 19: Others
Others Troubleshooting Before requesting service, make the following checks. If you are in doubt about some of the check points, or if the Auto off solutions indicated do not solve the problem, consult your dealer for instructions. This system automatically switches off when you do not use it for approximately 20 minutes. - Page 20 • For some built-in Bluetooth ® devices, you have to set the “F61” audio output to “SC-MAX9000”, “SC-MAX7000” or • Examine and correct the speaker cords connection. “SC-MAX5000” manually. Read the operating instructions • Disconnect the USB device. Switch off the system and then of the device for details.
-
Page 21: Specifications
350 W per channel (3 Ω), 1 kHz, 30% THD Mid Ch 500 W per channel (2 Ω), 100 Hz, 30% THD When other Panasonic equipment responds to the Low Ch remote control of this system, change the remote control... - Page 22 Recording file format MP3 (*.mp3) █ General █ Power supply Speaker section SC-MAX9000 SC-MAX7000 SB-MAX9000 AC 220 V to 240 V, 50 Hz For Australia and New Zealand Speaker unit(s) AC 110 V to 240 V, 50/60 Hz For others...
-
Page 23: Limited Warranty (Australia)
Panasonic Warranty 1. The product is warranted for 12 months from the date of purchase. Subject to the conditions of this warranty Panasonic or its Authorised Service Centre will perform necessary service on the product without charge for parts or labour, if in the opinion of Panasonic, the product is found to be faulty within the warranty period. - Page 24 1-801-811-7262 Uruguay www.panasonic.com/uy/soporte/ 0-800-7262 Paraguay www.panasonic.com/uy/soporte/ 0-800-11-7262 Chile www.panasonic.com/cl/soporte/ 800-390-602 022-797-5000 Peru www.panasonic.com/pe/soporte/ 0800-00726 Venezuela www.panasonic.com/ve/soporte/ 800-7262-800 Mexico www.panasonic.com/mx/soporte/ 01800-847-7262 55-5000-1200 Argentina www.panasonic.com/ar/soporte/ 0800-333-7262 0810-321-7262 Dominican Republic www.panasonic.com/do/soporte/ 809-200-8000 Panasonic Corporation Web Site: http://www.panasonic.com RQT0A63-1B © Panasonic Corporation 2015 L1215CH1026...