Table of Contents
Advertisement
Quick Links
Advertisement
Table of Contents

Related Manuals for NEFF B57CS24.0B


Summary of Contents for NEFF B57CS24.0B
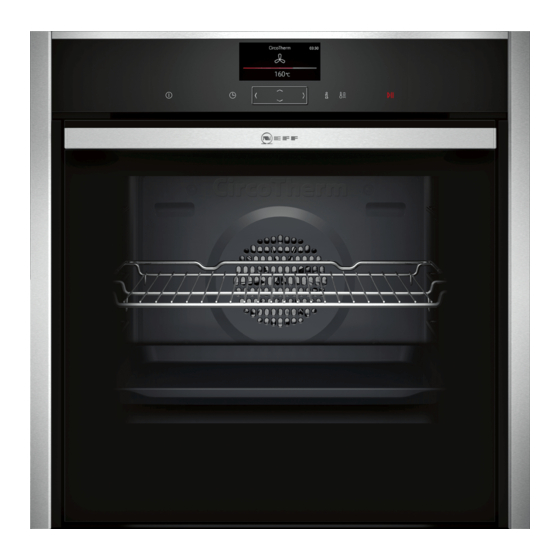
- Page 1 Oven [en] User manual and installation instructions B57CS24.0B...
-
Page 2: Table Of Contents
en Safety 1.2 Intended use Table of contents This appliance is designed only to be built into kitchen units. Read the special installation instructions. USER MANUAL Only a licensed professional may connect ap- Safety .............. 2 pliances without plugs. Damage caused by in- correct connection is not covered under the Preventing material damage ....... -
Page 3: Safety
Safety en contact with the heating element and catch Components inside the appliance door may fire. have sharp edges. ▶ Never place greaseproof paper loosely ▶ Wear protective gloves. over accessories when preheating the ap- WARNING ‒ Risk of electric shock! pliance and while cooking. Incorrect repairs are dangerous. -
Page 4: Preventing Material Damage
en Preventing material damage ing on baking trays and tins is destroyed and Children may breathe in or swallow small noxious gases are released. parts, causing them to suffocate. ▶ Never clean non-stick baking trays or bak- ▶ Keep small parts away from children. ing tins using the cleaning function. -
Page 5: Environmental Protection And Saving En- Ergy
Environmental protection and saving energy en If the seal is very dirty, the appliance door will no Sitting or placing objects on the appliance door may longer close properly during operation. This may dam- damage it. age the front of adjacent kitchen units. Do not place or hang objects on the appliance door. - Page 6 en Familiarising yourself with your appliance 4 Familiarising yourself with your appliance 4.1 Control panel You can use the control panel to configure all functions of your appliance and to obtain information about the operat- ing status. Display Buttons Control element 4.2 Buttons The buttons are touch-sensitive areas.
-
Page 7: Familiarising Yourself With Your Appliance
Familiarising yourself with your appliance en Button Name Right Navigate to the right on the display Navigate upwards on the display Down Navigate downwards on the display 4.4 Main menu The main menu provides an overview of your appliance's functions. Press the button to open the main menu. - Page 8 en Accessories Symbol Heating function Temperature Top/bottom heating 50 - 275 °C For gently cooking selected types of food. Heat is emitted from above and below. This heating function is most effective between 150 and 250 °C. This heating function is used to measure the energy consump- tion in the standard mode.
-
Page 9: Accessories
Accessories en Accessories Wire rack ¡ Cake tins ¡ Ovenproof dishes ¡ Cookware ¡ Meat, e.g. roasting joints or steak ¡ Frozen meals Universal pan ¡ Moist cakes ¡ Baked items ¡ Bread ¡ Large roasts ¡ Frozen meals ¡ Catch dripping liquids, e.g. fat when grilling food on the wire rack. -
Page 10: Before Using For The First Time
You will find a comprehensive range of products for your appliance in our brochures and online: www.neff-international.com Accessories vary from one appliance to another. When purchasing accessories, always quote the exact product number (E no.) of your appliance. -
Page 11: Basic Operation
Basic operation en 7 Basic operation 7.1 Switching on the appliance 7.5 Changing the temperature Press to switch the appliance on. You can also change the temperature once you have ▶ started the appliance. Notes ¡ In the basic settings, you can specify whether the Use the button to select the temperature heating functions or the main menu should appear... -
Page 12: Time-Setting Options
en Time-setting options 8 Time-setting options Your appliance has different time-setting options, with Press . which you can control its operation. Select the default value. Button Default value 8.1 Overview of the time-setting options 10 minutes When you are setting a time, the time values will in- 30 minutes crease by greater increments as you scroll through the Use the or button to select the required cooking... -
Page 13: Baking And Roasting Assistant
Baking and roasting assistant en Use the or button to change the end time. Use the button to reset the end time. a The setting will then be applied. a The end time corresponds to the current time plus the set cooking time. Cancelling the Ready at time for delayed starts a The appliance will start heating using the set cook- Press... -
Page 14: Childproof Lock
en Childproof lock 10 Childproof lock You can secure your appliance to prevent children Press to switch the appliance on and then start it from accidentally switching it on or changing the set- tings. 10.4 Deactivating the automatic childproof 10.1 Locks lock Your appliance has two different locks: Press and hold the button until "Childproof lock deactivated"... -
Page 15: Sabbath Mode
Sabbath mode en 11.2 Activating the "Rapid heat-up" function 11.4 Activating the "PowerBoost" function Set Top/bottom heating and a temperature of at Place the food on a single level in the cooking com- least 100 °C. partment. Press to start. Set CircoTherm hot air or the Bread-baking set- ting ... -
Page 16: Home Connect
en Home Connect Use the button to navigate to the next row. Basic setting Selection Use the or button to change the setting. Lighting ¡ On during operation Press . ¡ Off during operation To save your settings, use the button to select Childproof lock ¡... - Page 17 Home Connect en Download the Home Connect app. Open the Home Connect app and scan the follow- ing QR code. Follow the instructions in the Home Connect app. 14.2 Home Connect Settings You can adjust the settings and network settings for Home Connect by going to your appliance's basic settings. Which settings the display shows will depend on whether Home Connect has been set up and whether the appliance is connected to your home network.
- Page 18 14.7 Declaration of Conformity you are using the appliance. Tip: For further information and details about the avail- Constructa Neff Vertriebs-GmbH hereby declares that ability of Remote Diagnostics in your country, please the appliance with Home Connect functionality meets visit the service/support section of your local website: the essential requirements and other relevant provi- www.home-connect.com...
-
Page 19: Cleaning And Servicing
Cleaning and servicing en Appliance front Surface Suitable cleaning agents Information Stainless steel ¡ Hot soapy water To prevent corrosion, remove any limescale, grease, starch or albu- min (e.g. egg white) stains on stainless steel fronts immediately. ¡ Special stainless steel cleaning products Apply a thin layer of the stainless steel cleaning product with a soft cloth. - Page 20 en Cleaning functions For some surfaces, you can use alternative 15.2 Cleaning the appliance ‒ cleaning agents. In order to avoid damaging the appliance, you must → "Suitable cleaning agents", Page 18 clean your appliance only as specified, and with suit- Dry with a soft cloth. able cleaning products.
- Page 21 Cleaning functions en Select a higher cleaning setting if the cooking com- Note: The vertical bar must be to the front of the ac- partment is particularly dirty or has not been cessory supports. cleaned for a while. You cannot change the duration of the cleaning function.
- Page 22 en Rails Remove any accessories from the cooking compart- Wiping down the cooking compartment ment. ATTENTION! ATTENTION! The prolonged presence of moisture in the cooking Distilled water in the cooking compartment leads to compartment leads to corrosion. corrosion. After using the cleaning aid, wipe the cooking com- ▶...
- Page 23 Appliance door en Ensure that the hook is hooked onto the pin . Clean the rail. → "Cleaning products", Page 18 Attaching the rails Note: The rails only fit on the right or left and must be pulled out towards the front. First, push the rail into the middle of the rear socket ...
- Page 24 en Appliance door Hold the screwdriver horizontally and use it to Insert the coin in the gap in the lock and rotate as push the door lock (black component) on each side far as it will go . of the door upwards as far as it will go ...
- Page 25 Appliance door en Rotate the door handle upwards slightly . WARNING ‒ Risk of injury! The appliance door has a weight of 7–10 kg and may fall if it is not handled carefully. Handle the appliance door carefully. ▶ The door handle is not suitable for carrying the ap- pliance door.
- Page 26 en Appliance door Remove the spacers and seals for cleaning, if 18.3 Removing the door panes required. To facilitate cleaning, you can remove the door pane. WARNING ‒ Risk of injury! Components inside the appliance door may have sharp edges. Wear protective gloves. ▶ Requirement: The appliance door is detached.
-
Page 27: Troubleshooting
Troubleshooting en Check the fit of the four spacers and two seals. Push down lightly on the first intermediate pane Place the spacers on the centre of the lines . around , slide the retainer in at an angle and ‒... - Page 28 en Troubleshooting 19.1 Malfunctions Fault Cause and troubleshooting The appliance is not working. The circuit breaker is faulty. Check the circuit breaker in the fuse box. ▶ There has been a power cut. Check whether the lighting in your kitchen or other appliances are working. ▶...
-
Page 29: Disposal
Next time, set lower or higher values. ▶ Tip: A lot of information about the food preparation and corresponding set- ting values can be found on our website www.neff-international.com. 20 Disposal Find out here how to dispose of old appliances cor- This appliance is labelled in accord- rectly. - Page 30 en How it works 22 How it works Here, you can find the ideal settings for various types Baking on two or more levels Shelf position of food as well as the best accessories and cookware. 3 levels We have perfectly tailored these recommendations to ¡...
-
Page 31: How It Works
How it works en ¡ Glass cookware is best. ¡ When grilling several food items, choose pieces that are of a similar weight and thickness. The grilled ¡ Follow the manufacturer's instructions for your roast- food will brown evenly and will remain succulent ing dishes. - Page 32 en How it works Food Accessory/cookware Shelf pos- Heating Temperature in Cooking time in ition function °C mins → Page 7 Quiche Dark coated quiche 190–210 35–45 Bread or white bread Loaf tin, 1 x 900 g or 190–210 25–40 2 x 450 g Bread or white bread Loaf tin, 1 x 900 g or 180–200 20–30...
- Page 33 How it works en Heat 1 litre of whole milk (3.5% fat) to 90 °C on the 22.6 Special cooking methods and other hob and then leave it to cool down to 40 °C. applications It is sufficient to heat UHT milk to 40 °C. Information and recommended settings for special Mix 150 g of chilled yoghurt into the milk.
- Page 34 en How it works Defrosting ¡ When defrosting food, use the following shelf posi- tions: You can defrost frozen food in your appliance. – 1 wire rack: Shelf position 2 Tips for defrosting food – 2 wire racks: Shelf positions 3 + 1 ¡...
-
Page 35: Installation Instructions
Installation instructions en Food Accessory/cookware Shelf pos- Heating Temperature in Cooking time in ition function °C mins → Page 7 Small cakes, on 3 levels x 2 4+3+1 35 - 45 Baking tray x 1 Universal pan Hot water sponge cake Springform cake tin, 160 - 170 25 - 35 diameter 26 cm Hot water sponge cake... - Page 36 en Installation instructions 23.2 Appliance dimensions You will find the dimensions of the appliance here ¡ Wear protective gloves so that you do not cut yourself. Parts that are accessible dur- ing installation may have sharp edges. ¡ Dimensions of the figures in mm. 23.3 Installation below a worktop WARNING ‒ Danger: Magnetism! Observe the installation dimensions and the installation...
- Page 37 Installation instructions en 23.4 Installation underneath a hob If the appliance is installed under a hob, the following minimum dimensions must be adhered to (including substructure, if applicable). The minimum worktop thickness a is based on the required minimum clearance . Hob type a raised in mm a flush in mm...
- Page 38 en Installation instructions ¡ The appliance must only be connected using the If required, you can adjust the gap between the ap- power cable provided. pliance door and the panels using the adjustment ¡ The power cable must be plugged in at the rear of screws on the left and right.
- Page 39 Installation instructions en If required, you can adjust the height of the appli- ance door using the adjustment screws on the left and right. Turning the screws clockwise makes the gap smal- Turning the screws anti-clockwise makes the gap larger Screw the appliance into place. Open the appliance door slightly, then refit the pan- els and screw them in place, first at the top and then at the bottom.
- Page 40 Valid within Great Britain: Imported to Great Britain by BSH Home Appliances Ltd. Grand Union House Old Wolverton Road Wolverton, Milton Keynes MK12 5PT United Kingdom *9001613301* 9001613301 Constructa-Neff Vertriebs-GmbH Carl-Wery-Straße 34 010421 81739 München GERMANY...