Table of Contents
Advertisement
Available languages
Available languages
Quick Links
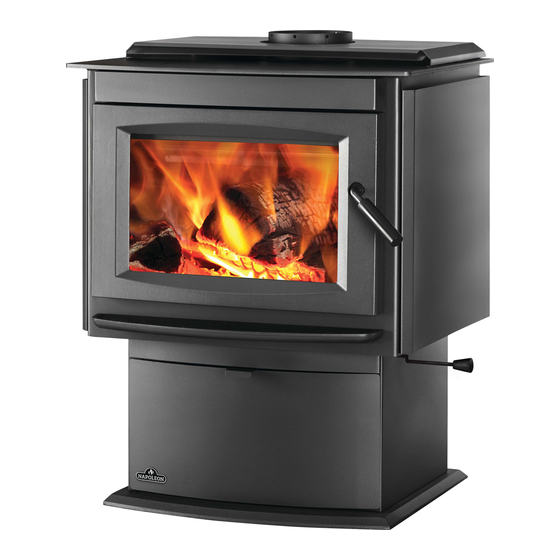
S25
This wood appliance needs periodic inspection and repair. It is against United States federal regulations to operate this wood
appliance in a manner inconsistent with the operating instructions in this manual.
INSTALLER:
Leave this manual with the appliance.
CONSUMER:
Retain this manual for future reference.
SAFETY INFORMATION
WARNING
!
If the information in these instructions are not followed exactly, a fi re
or explosion may result causing property damage, personal injury or
death. Please read the entire manual before you install and use your
appliance. This heater has not been tested with an unvented gas log
set. To reduce risk of fi re or injury, do not install an unvented gas log
set into the heater.
- This heater can be very hot when burning.
- Combustible materials such as fi rewood, wet clothing, etc. placed
too close can catch fi re.
- Children and pets must be kept from touching the heater when it is
hot.
- The chimney must be sound and free of cracks. Before installing this
appliance, contact the local building or fi re authority and follow their
guidelines.
- Always operate this appliance with the door(s) or screen (where
applicable) tightly closed.
- Burn wood behind the log retainer directly on the fi rebricks.
- Do not use an elevated grate or otherwise raise the fi re.
- This appliance is designed to burn natural wood only. Higher
effi ciencies and lower emissions generally result when burning air
dried seasoned hardwoods, as compared to softwoods or to green
or freshly cut hardwoods.
- Do not start a fi re with chemicals or fl uids such as gasoline, engine
oil, etc.
- Do not burn trash or garbage, lawn clippings/waste, rubber,
waste petroleum products, paints or paint thinners/solvents, plastic,
materials containing asbestos, construction debris, railroad ties or
treated wood, manure or animal remains, salt water driftwood or
salted materials, unseasoned wood, coal, charcoal, coloured paper,
cardboard, plywood or particleboard. Burning these materials may
result in release of toxic fumes or render the appliance ineffective and
cause smoke.
- Do not let the appliance become hot enough for any part to glow
red.
Wood Stoves ONLY
- At least 14 squares inches (90.3 square centimeters) of outside air
must be admitted to the room or directly to the appliance through a
4" (101.6mm) diameter pipe.
- KEEP THE STOVE TOP TEMPERATURE BELOW 700°F (371°C).
Attempts to achieve heat output rates that exceed design
specifications can result in steel distortion and damage.
Wolf Steel Ltd., 24 Napoleon Rd., Barrie, ON, L4M 0G8 Canada / 103 Miller Drive, Crittenden, Kentucky, USA, 41030
$10.00
ADD MANUAL TITLE
OPERATION MANUAL
CSA / OMNI
/ INTERTEK
Phone 1 (866) 820-8686 • www.napoleon.com • hearth@napoleon.com
INSTALLATION AND
ADD PRODUCT IMAGE
U.S. ENVIRONMENTAL PROTECTION AGENCY (E.P.A.) CERTIFIED TO COMPLY WITH 2020
ADD SAFETY STANDARD INFORMATION
PARTICULATE EMISSION STANDARDS USING CORD WOOD. THIS APPLIANCE HAS BEEN
TESTED BY POLYTESTS AND LISTED BY CSA GROUP TO STANDARDS: ULC S627 AND
& EPA QUALIFICATION (IF APPLICABLE)
ALT-125 AS REFERENCED INTO 40 CFR PART 60 SUBPART AAA.
THE AUTHORITY HAVING JURISDICTION (SUCH AS MUNICIPAL BUILDING DEPARTMENT,
FIRE DEPARTMENT, FIRE PREVENTION BUREAU, ETC.) SHOULD BE CONSULTED BEFORE
INSTALLATION TO DETERMINE THE NEED TO OBTAIN A PERMIT.
IF INSTALLATION + OPERATION, ADD SERIAL
IF SEPARATE MANUALS, ADD "PLACE
BARCODE LABEL ON THE OWNER'S MANUAL"
LOGO
ENGLISH
FRENCH PG. 45
Product Name / Code
(MUST use title from Price Book)
ADD ____ ILLUSTRATED
FOR INDOOR USE ONLY
UL1482. ASTM E3053-17; ASTM E2515-11 METHODS
NUMBER LABEL HERE
S25
REFERENCE #: 161746
W415-2837 / 08.11.20
Advertisement
Chapters
Table of Contents

Related Manuals for Napoleon S25


Summary of Contents for Napoleon S25
-
Page 1: Overview Part
/ INTERTEK BARCODE LABEL ON THE OWNER’S MANUAL” LOGO Wolf Steel Ltd., 24 Napoleon Rd., Barrie, ON, L4M 0G8 Canada / 103 Miller Drive, Crittenden, Kentucky, USA, 41030 Phone 1 (866) 820-8686 • www.napoleon.com • hearth@napoleon.com W415-2837 / 08.11.20 $10.00... -
Page 2: Overview Part
safety information WARNING • This appliance is hot when operated and can cause WARNING severe burns if contacted. • Any changes or alterations to this appliance or its controls can be dangerous and is prohibited. HOT GLASS WILL • Do not operate appliance before reading and CAUSE BURNS. - Page 3 • Keep the packaging material out of reach of children and dispose of the material in a safe manner. As with ADVERTENCIA: Este producto puede exponerlo a productos químicos, entre ellos, plomo all plastic bags, these are not toys and should be kept away from children and infants. y compuestos con plomo, que el Estado de California reconoce como causantes de cáncer, y safety information •...
-
Page 4: Table Of Contents
table of contents general information maintenance dimensions ash removal procedures specifications 7.1.1 ash removal with ash disposal kit general instructions creosote formation and removal general information runaway or chimney fire rating plate information chimney cleaning door glass replacement installation planning care of glass appliance placement door gasket replacement... -
Page 5: General Information
dimensions 1.0 general information dimensions W415-2837 / 08.11.20... -
Page 6: Specifications
general information specifications * As tested using test Specifications method ALT-125. Emissions 1.30 grams / hour ** Figures will vary con- 76.99% Efficiency siderably with individual 71.56% conditions. 18" x 23 1/2" x 11" Chamber (D.W.H) *** Wolf Steel Ltd. esti- (457mm x 597mm x 279mm) mated realistic BTU/hr Capacity... -
Page 7: General Information
general information • To keep the gasket from sticking to the appliance as the paint is curing, periodically open the door every 5-10 minutes. • For the first two weeks use generous amounts of fuel and burn the appliance with the damper wide open for an hour as the appliance goes through a process of eliminating moisture in the steel and firebricks. -
Page 8: Rating Plate Information
SURCHAUFFEZ PAS L’APPAREIL. SI L’APPAREIL OU LES RACCORDS ROUGEOIENT, L’APPAREIL SURCHAUFFÉE. INSPECTEZ ET NETTOYEZ LA CHEMINÉE FRÉQUEMMENT. DANS CERTAINES CONDITIONS, DES DÉPÔTS DE CRÉOSOTE PEUVENT SE FORMER RAPIDEMENT. SOUFFLERIE OPTIONNELLE: NEP70 (S25) / EPT70 (T25), 115V, 60HZ, 0,82A. TENEZ LE CORDON ÉLECTRIQUE LOIN DE L’APPAREIL. DANGER: RISQUE DE SECOUSSE ÉLECTRIQUE. DÉBRANCHEZ AVANT DE PROCÉDER À L’ENTRETIEN. -
Page 9: Installation Planning
2.0 installation planning appliance placement We recommend having your Napoleon wood burning appliance installed by a qualified technician. However, should you choose to install the appliance yourself, it is extremely important that you follow all installation instructions for the appliance, the chimney and connector if applicable, as well as local building codes. At the very least, draw a detailed plan of your installation, including clearance dimensions to combustibles, and have your authorized dealer review them to confirm that they conform to the relative installation parameters. -
Page 10: Mobile Home (U.s. Only)
installation planning mobile home (U.S. only) THIS APPLIANCE IS APPROVED FOR INSTALLATION IN MOBILE HOMES IN THE UNITED STATES ONLY. WARNING • Do not install in a sleeping room. • The structural integrity of the mobile home floor, walls, and ceiling/roof must be maintained. •... -
Page 11: Minimum Clearance To Combustibles
installation planning minimum clearance to combustibles WARNING • Do not install into any area having less than 7 feet (2.1m) (ceiling to appliance bottom, excluding hearth height). BACK WALL BACK WALL BACK WALL BACK WALL BACK WALL BACK WALL SIDE WALL BACK SIDE WALL BACK... -
Page 12: Floor Protection
installation planning BACK WALL BACK WALL alcove installation Your appliance may be installed using a listed 19" double wall connector (such as Security DL6 in 48” (122cm) (48.3cm) Canada, the Simpson Duravent Plus DVL in the USA, or an equivalent double wall connector) into an alcove having a depth of no more than 4 feet "... - Page 13 3.0 installation WARNING • Wear gloves, protective footwear and safety glasses for protection. • Carefully follow the instructions for assembly of the pipe and other parts needed to install the appliance. Failure to do so may result in a fi re, especially if combustibles are too close to the appliance or chimney and air spacers are blocked, preventing the free movement of cooling air.
-
Page 14: Installation
installation chimney WARNING • Never install a single wall slip section or smoke pipe in a chase structure. The higher temperature of this single wall pipe may radiate sufficient heat to combustible chase materials to cause a fire. • Do not connect this appliance to a chimney system serving another appliance. •... -
Page 15: Chimney Connection
installation 3.1.1 chimney connection Your chimney connector and chimney must have the same diameter as the appliance’s exhaust flue outlet. The appliance pipe must be made of aluminized or cold roll steel with a minimum 24 gauge (0.6mm) thickness. It is strictly forbidden to use galvanized steel. -
Page 16: Adding Sections
installation 3.1.2 adding sections Add chimney sections, according to the manufacturer’s installation instructions. If the chimney system passes through an attic space, a rafter radiation shield or attic insulation shield is required. The chimney must extend at least 3ft (0.9m) above its point of contact with the roof and at least 2ft (0.6m) higher than any wall, roof or building within 10ft (3.1m). -
Page 17: Typical Through The Ceiling
installation 3.1.3 typical through the ceiling Move the stove into position with the flue centered, midpoint between two joists to prevent having to cut them. Use a plumb bob to line up the center. Cut and frame an opening in the ceiling to provide a 2” (50.8mm) clearance between the outside of the chimney and any combustible material. -
Page 18: Typical Through The Wall
installation 3.1.4 typical through the wall If possible, design the installation so that the connector does not pass through a combustible wall. If during your installation you must pass through a combustible wall, check with your building inspector before you begin. -
Page 19: Typical Existing Masonry
installation 3.1.5 typical existing masonry You can also install your appliance using your existing masonry chimney. To do so, use the RAFTER following guidelines. Use a factory-built thimble, or construct your own brick thimble. If you are using a masonry chimney, it is important that it be built in EAVE compliance with the specifications of the Building CLEARANCE WITH FIRESTOP... -
Page 20: Finishing
4.0 finishing door removal WARNING • Burning your appliance in with the doors open or ajar creates a fire hazard that may result in a house and/or chimney fire. • Do not strike or slam door. • Never remove the door when the appliance is hot. note: We strongly recommend using two people to remove and/or install the appliance door as it is very heavy. -
Page 21: Door Handle Installation
finishing door handle installation WARNING • Burning your appliance in with the doors open or ajar creates a fire hazard that may result in a house and/or chimney fire. • Do not strike or slam door. • Never remove the door when the appliance is hot. Front View Back View Spring... -
Page 22: Brick And Baffle Installation
finishing brick and baffle installation WARNING • Operation of the appliance without the bricks and baffles can result in excessive temperatures that could damage the appliance, chimney and the surrounding enclosure. With the appliance and chimney installation completed, move the bricks into place as illustrated below (Fig. -
Page 23: Secondary Air Tubes
finishing secondary air tubes note: The back 3 secondary air tubes are factory-installed; therefore only the front secondary air tube (supplied inside the firebox) will need to be installed. Before beginning installation, note the correct orientation of the secondary air tube. The side with the notch should face to the right, while the side with 2 holes on the end should face to the left. -
Page 24: Ash Lip Removal / Installation
finishing ash lip removal / installation WARNING • To avoid injury or damage, do not lift or carry the appliance using the ash lip. note: The ash lip comes factory-installed. Remove the 2 screws securing the ash lip to the appliance. Set screws and ash lip aside. -
Page 25: Optional Installation
5.0 optional installation blower kit installation WARNING • Risk of fire and electrical shock! • Turn off the gas and electrical power before servicing this appliance. • Use only Wolf Steel approved optional accessories and replacement parts with this appliance. Using non-listed accessories (blowers, doors, louvres, trims, gas components, venting components, etc.) could result in a safety hazard and will void the warranty and certification. -
Page 26: Ash Disposal Kit (Ads2530)
optional installation ash disposal kit (ADS2530) WARNING • Failure to achieve a good seal between the ash opening and ash plug will result in an over-fire condition that could cause damage to the appliance. Provisions have been made on the appliance to install an optional ash disposal kit. The kit allows for convenient removal of excess ash. -
Page 27: Operation
United States to alter this setting or otherwise operate this wood appliance in a manner inconsistent with operating instructions in this manual. Your Napoleon EPA listed product is a Hi-tech appliance, designed with the most advanced technology. The appliance is extremely airtight. -
Page 28: Optimum Burn Method
operation optimum burn method For optimal emissions performance and efficiency follow these simple guidelines when using your appliance: Maintain a 2" (51mm) deep, hot, glowing red coal bed. Burn dry seasoned wood with less than 20% moisture content and burn so that the glass door remains clean. -
Page 29: Air Control
operation air control WARNING • This wood appliance has a manufacturer-set minimum low burn rate that must not be altered. It is against federal regulations in the United States to alter the setting or otherwise operate this wood appliance in a manner inconsistent with operating instructions in this manual. -
Page 30: Fuel
operation fuel WARNING • Do not store fuel within the clearance to combustibles, or in the space required for re-fueling and ash removal. • Burning wet, unseasoned wood can cause excessive creasote accumulation. When ignited, it can cause a chimney fire that may result in a serious house fire. When loading the appliance, ensure that the four upper fibre baffles are not lifted up and off the ledge. -
Page 31: Extended Fire
operation 6.6.2 extended fire Load your larger pieces of wood so they are tightly packed, close enough to prevent the fl ames from penetrating it completely. After approximately 30 minutes, depending on the size of the load, close the draft control completely making sure that the fi re is not extinguished. -
Page 32: Maintenance
7.0 maintenance WARNING • Turn off the power before servicing the appliance. • Appliance may be hot, do not service until appliance has cooled. • Do not use abrasive cleaners. Check your chimney and chimney connector for creosote and soot buildup weekly until a safe frequency for cleaning is established. -
Page 33: Creosote Formation And Removal
maintenance creosote formation and removal When wood is burned slowly, it produces tar and other organic vapors, which combine with expelled moisture to form creosote. The creosote vapors condense in the relatively cooler chimney fl ue or a slow-burning fi re. As a result, creosote residue accumulates on the fl ue lining. -
Page 34: Door Glass Replacement
maintenance door glass replacement WARNING • Do not use substitute materials. • Glass may be hot. Do not touch glass until cooled. • Care must be taken when removing and disposing of any broken door glass or damaged components. Be sure to vacuum up any broken glass from inside appliance before operation. -
Page 35: Care Of Glass
maintenance care of glass WARNING DANGER • Do not clean glass when hot! Do not use abrasive cleaners to clean glass. WARNING If the glass is not kept clean, permanent discolouration and/or blemishes may result. Normally a hot fi re will clean the glass. The HOT GLASS WILL CAUSE BURNS. -
Page 36: Wood
maintenance wood WARNING • This appliance is designed to burn natural wood only. Do not burn treated wood, coal, charcoal, coloured paper, cardboard, solvents or garbage. This appliance has not been tested with an unvented gas log set. To reduce risk of fi re or injury, do not install an unvented gas log set into the appliance. •... -
Page 37: Replacement Parts
8.0 replacement parts WARNING • Failure to position the parts in accordance with this manual or failure to use only parts specifi cally approved with this appliance may result in property damage or personal injury. Contact your dealer for questions concerning prices and policies on replacement parts. Normally, all parts can be ordered through your Authorized dealer / distributor. - Page 38 replacement parts W415-2837 / 08.11.20...
- Page 39 replacement parts W415-2837 / 08.11.20...
-
Page 40: Accessories
9.0 accessories W415-2837 / 08.11.20... -
Page 41: Troubleshooting
10.0 troubleshooting WARNING • Turn off the appliance completely and let cool before servicing. Only a qualifi ed service person should service and repair this electric appliance. • Appliance may be hot, do not service until appliance has cooled. • Do not use abrasive cleaners. -
Page 42: Warranty
During the fi rst 10 years Napoleon will replace or repair the defective parts covered by the lifetime warranty at our discretion free of charge. From 10 years to life, Napoleon will provide replacement parts at 50% of the current retail price. -
Page 43: Notes
12.0 notes 29.1 W415-2837 / 08.11.20... - Page 44 NAPOLEON CELEBRATING OVER 40 YEARS OF HOME COMFORT PRODUCTS 7200, Route Transcanadienne, Montréal, Québec H4T 1A3 24 Napoleon Road, Barrie, Ontario, Canada L4M 0G8 214 Bayview Drive, Barrie, Ontario, Canada L4N 4Y8 103 Miller Drive, Crittenden, Kentucky, USA 41030 De Riemsdijk 22, 4004 LC Tiel, The Netherlands Phone: 1-866-820-8686 napoleon.com...
- Page 45 / INTERTEK BARCODE LABEL ON THE OWNER’S MANUAL” LOGO Wolf Steel Ltd., 24 Napoleon Rd., Barrie, ON, L4M 0G8 Canada / 103 Miller Drive, Crittenden, Kentucky, USA, 41030 Téléphone 1 (866) 820-8686 • www.napoleon.com • hearth@napoleon.com SERIENNUMMER VOM KARTON AUFBRINGEN $10.00...
- Page 46 CAUSE BURNS. DO NOT TOUCH GLASS consignes de sécurité UNTIL COOLED. NEVER ALLOW CHILDREN AVERTISSEMENT TO TOUCH GLASS. • Cet appareil est chaud lorsqu’il fonctionne AVERTISSEMENT et peut causer de graves brûlures en cas de contact. • Toute modifi cation apportée à cet appareil LA VITRE CHAUDE CAUSERA ou aux contrôles peut être dangereux et est DES BRÛLURES.
- Page 47 devra être effectué par un technicien de service certifi é ou qualifi é. WARNING: • Ne frappez pas et ne claquez pas la porte vitrée de l’appareil. This product can expose you to chemicals including lead and lead • Seulement les portes/façades certifi ées pour cet appareil peuvent être utilisées avec cet appareil. consignes de sécurité...
- Page 48 table de matières information générale fonctionnement dimensions méthode de combustion optimale spécifications fonctionnement de soufflerie instructions générales optionnelle information générale contrôle d’air information à propos de la plaque extincteurs et détecteurs de fumée / d’homologation monoxyde de carbon planification d’installation combustible allumer un feu emplacement de l’appareil...
-
Page 49: 1.0 Information Générale
dimensions 1.0 information générale dimensions W415-2837 / 08.11.20... -
Page 50: Spécifications
information générale spécifications * Comme testé en util- Spécifications isant le méthode de test Émissions 1,30 grams / heure ALT-125. 76,99% Efficacité ** Ces données peuvent 71,56% varier considérablement selon les conditions par- 18" x 23 1/2" x 11" Chambre de combustion (P.H.L) ticulières. -
Page 51: Information Générale
information générale • Pour empêcher le joint d’étanchéité de coller à l’appareil lors de la cuisson de la peinture, ouvrez la porte de l’appareil toutes les 5-10 minutes. • Durant les deux premières semaines, faites brûler l’appareil avec beaucoup de bois et ouvrez le contrôle de combustion au maximum pendant une heure pour permettre à... -
Page 52: Information À Propos De La Plaque
SURCHAUFFEZ PAS L’APPAREIL. SI L’APPAREIL OU LES RACCORDS ROUGEOIENT, L’APPAREIL SURCHAUFFÉE. INSPECTEZ ET NETTOYEZ LA CHEMINÉE FRÉQUEMMENT. DANS CERTAINES CONDITIONS, DES DÉPÔTS DE CRÉOSOTE PEUVENT SE FORMER RAPIDEMENT. SOUFFLERIE OPTIONNELLE: NEP70 (S25) / EPT70 (T25), 115V, 60HZ, 0,82A. TENEZ LE CORDON ÉLECTRIQUE LOIN DE L’APPAREIL. DANGER: RISQUE DE SECOUSSE ÉLECTRIQUE. DÉBRANCHEZ AVANT DE PROCÉDER À L’ENTRETIEN. -
Page 53: Planification D'installation
installation planning 2.0 planification d’installation emplacement de l’appareil Nous vous recommandons de faire installer votre appareil au bois Napoléon par un technicien qualifié. Cependant, si vous choisissez d’installer l’appareil vous-même, il est extrêmement important de suivre tous les instructions d’installation de l’appareil, de la cheminée et du raccordement, s’il y a lieu, ainsi que les codes du bâtiment locaux. -
Page 54: Maison Mobile (É.-U. Seulement)
planification d'installation maison mobile (É.-U. seulement) CET APPAREIL EST APPROUVÉ POUR INSTALLATION DANS LES MAISONS MOBILES DANS LES ÉTATS-UNIS SEULEMENT. AVERTISSEMENT • N’installez pas dans une chambre à coucher. • L’intégrité structurelle du plancher, des murs et du plafond / toit de la maison mobile doit être maintenue. •... -
Page 55: Dégagements Minimum Aux
planification d'installation dégagements minimum aux combustibles AVERTISSEMENT • N’installez pas dans une espace ayant moins de 7 pieds (2,1m) (du plafond au bas de l’appareil, excluant la hauteur de la base de protection). MUR ARRIÈRE MUR ARRIÈRE BACK WALL BACK WALL BACK WALL BACK WALL BACK WALL... -
Page 56: Protection De Plancher
planification d'installation BACK WALL BACK WALL installation dans alcôve Votre appareil doit être installé à l’aide d’un conduit de 19" raccordement à double paroi certifié (tel que Security 48” (122cm) (48.3cm) DL6 en Canada, le Simpson Duravent Plus DVL en États-Unis, ou un conduit de raccordement à... -
Page 57: Installation
3.0 installation AVERTISSEMENT • Portez des gants, chaussures et des lunettes de protection. • Suivez attentivement les instructions pour l’assemblage de la cheminée et des autres composants nécessaires à l’installation de l’appareil. Toute omission pourrait causer un incendie, particulièrement si des matériaux combustibles sont trop près de l’appareil ou de la cheminée et que des ouvertures d’air sont bloquées, empêchant la libre circulation de l’air de refroidissement. - Page 58 installation cheminée AVERTISSEMENT • Ne jamais installez un conduit de raccordement à paroi simple dans une enceinte. Les températures plus élevées de ce conduit peuvent irradier suffisamment de chaleur aux matériaux combustibles pour causer un incendie. • Ne raccordez pas le système d’évacuation de l’appareil à tout autre système d’évacuation servant un autre appareil.
-
Page 59: Connexion De Cheminée
installation 3.1.1 connexion de cheminée Votre conduit de raccordement et votre cheminée doivent avoir le même diamètre que le tuyau d’échappement de l’appareil. Le tuyau de l’appareil doit être en acier aluminié ou en acier laminé à froid d’une épaisseur minimale de calibre 24 (0,6mm). -
Page 60: Ajout Les Sections
installation 3.1.2 ajout les sections Ajoutez des sections de cheminée, selon les instructions d’installation du fabricant. Si la cheminée devra dépasser par l’espace grenier un écran protecteur de chevrons ou une bouclier d'isolation du grenier est requis. La cheminée doit dépasser le toit d’au moins 3’ (0,9m) de son point de contact avec la toiture, et 2’ (0,6m) de tout mur, toit ou édifice se trouvant à... -
Page 61: Typique À Travers Un Plafond
installation 3.1.3 typique à travers un plafond Mettez le poêle en place avec le centre de la buse de façon à ne pas avoir à couper les solives. Utilisez un fil à plomb pour aligner le centre de la buse. Découpez et charpentez une ouverture dans le plafond de façon à... -
Page 62: Typique À Travers Un Mur
installation 3.1.4 typique à travers un mur Si possible, l’installation des conduits de raccordement ne doit pas passer à travers un mur combustible. S’il faut absolument passer à travers un mur combustible, consultez votre inspecteur en bâtiment avant de procéder. Consultez aussi le fabricant des conduits de raccordement pour connaître toutes les exigences particulières. -
Page 63: Typique Dans Cheminée De Maçonnerie Existante
installation 3.1.5 typique dans cheminée de maçonnerie existante Vous pouvez aussi installer votre appareil en utilisant votre cheminée de maçonnerie existante. CHEVRON Pour ce faire, suivez les directives suivantes. Nous vous conseillons d’installer un coupe-feu préfabriqué ou d’en construire un. Si vous utilisez AVANT-TOIT une cheminée en maçonnerie, vous devez vous DÉGAGEMENT AVEC... -
Page 64: Finitions
4.0 finitions enlèvement de porte AVERTISSEMENT • Faire fonctionner cet appareil avec les portes ouvertes ou entrouvertes crée un risque d’incendie de cheminée ou du domicile. • Ne frappez pas et ne claquez pas la porte. • N’enlevez jamais la porte lorsque l’appareil est chaud. note: Nous recommandons fortement d’utiliser deux personnes d’enlever et/ou installer la porte de l’appareil parce- qu’elle est très lourde. -
Page 65: Installation De Poignée De Porte
finitions installation de poignée de porte AVERTISSEMENT • Faire fonctionner cet appareil avec les portes ouvertes ou entrouvertes crée un risque d’incendie de cheminée ou du domicile. • Ne frappez pas et ne claquez pas la porte. • N’enlevez jamais la porte lorsque l’appareil est chaud. Vue de Face Vue d’Arrière Poignée de... -
Page 66: Installation De Briques Et Déflecteur
finitions installation de briques et déflecteur AVERTISSEMENT • L’opération de l’appareil sans les briques peut causer des températures excessives qui pourraient endommager l’appareil, la cheminée, et l’enceinte. Avec l’installation de l’appareil et la cheminée completé, déplacez les briques en place comme illustré... -
Page 67: Tuyaux D'air Secondaire
finitions tuyaux d’air secondaire note: Les 3 tuyaux d’air secondaire arrière sont installés en usine; par conséquent, seul le tuyau d’air secondaire avant (fourni à l’intérieur de la chambre de combustion) devra être installé. Avant de commencer l’installation, notez l’orientation correcte du tuyau d’air secondaire. Le côté avec l’encoche doit être tourné... -
Page 68: Installation / Enlèvement De Tablette
finitions installation / enlèvement de tablette à cendres AVERTISSEMENT • Afin d’éviter des blessures ou dommages, ne soulevez pas l’appareil en utilisant la tablette à cendres. note: La tablette à cendres est installée en usine. Retirez les 2 vis servant à fixer la tablette à cendres à... -
Page 69: Installation Optionnelle
5.0 installation optionnelle installation d’ensemble de soufflerie AVERTISSEMENT • Risque d’incendie et de choc électrique! • Coupez l’alimentation en gaz et l’alimentation électrique avant de procéder à l’entretien de l’appareil. • N’utilisez que les accessoires optionnels et les pièces de rechange approuvés par Wolf Steel pour cet appareil. -
Page 70: Ensemble D'évacuation De Cendres (Ads2530)
optional installation ensemble d’évacuation de cendres (ADS2530) AVERTISSEMENT • L’échez d’atteindre un bon joint entre l’ouverture de cendres et la prise de cendres va résulter dans une condition de surchauffe qui peut causer les dommages à l’appareil. Les dispositions ont été faits sur l’appareil d’installer un ensemble d’évacuation de cendres optionnel. Cet en- semble permet un retrait pratique des cendres excès. -
Page 71: Fonctionnement
6.0 fonctionnement AVERTISSEMENT • Faites toujours fonctionner cet appareil avec la porte fermée et verrouillée sauf durant l’allumage et le ravitaillement ou lorsque vous utilisez le pare-étincelles. Portez toujours des gants pour prévenir les blessures. Ne laissez pas l’appareil sans supervision lorsque les portes sont déverrouillées ou lorsque vous utilisez le pare- étincelles. -
Page 72: Méthode De Combustion Optimale
fonctionnement Vous n’arrivez pas à faire partir votre feu? Utilisez un peu plus de bois d’allumage et de papier. Si la cheminée et le tuyau d’évacuation sont de grandeur appropriée, et s’il y a suffisamment d’air comburant, alors la problème est causé par une quantité insuffisante de petits morceaux de bois d’allumage sec. -
Page 73: Contrôle D'air
fonctionnement contrôle d’air AVERTISSEMENT • Cet appareil au bois possède un taux minimale de combustion établi par le fabricant qui ne doit pas être modifié. Les règlements fédéraux interdisent en États-Unis de modifier ce réglage ou d’utiliser cet appareil de chauffage d’une manière allant à l’encontre des instructions de fonctionnement contenues dans ce manuel. -
Page 74: Combustible
fonctionnement combustible AVERTISSEMENT • Ne rangez pas de combustibles à l’intérieur du dégagement aux matériaux combustibles ou dans la zone nécessaire pour procéder au ravitaillement ou à l’enlèvement des cendres. • Brûler du bois vert ou humide peut causer des accumulations excessives de créosote. Lorsqu’allumée, cette dernière peut causer un feu de cheminée et un incendie grave pourrait s’ensuivre. -
Page 75: Feu Continue
fonctionnement 6.6.2 feu continue Chargez vos bûches de dimension plus grande de façon compacte pour empêcher les fl ammes de s’infi ltrer complètement. Après 30 minutes environ, selon la grosseur de la charge, fermez le contrôle de combustion en vérifi ant que le feu ne se soit pas éteint. NE SURCHAUFFEZ PAS L’APPAREIL! Une surchauffe peut se produire : En brûlant de grandes quantités de bois de dimension réduite, tel que des rebuts de bois de meuble, des... -
Page 76: Entretien
7.0 entretien AVERTISSEMENT • Coupez l’alimentation électrique avant de procéder à l’entretien de l’appareil. • L’appareil peut être chaud. N’effectuez aucun entretien jusqu’à ce que l’appareil se refroidi. • N’utilisez pas de nettoyants abrasifs. Vérifiez chaque semaine votre cheminée et votre raccord de cheminée pour toute accumulation de créosote et de suie jusqu’à... -
Page 77: Formation Et Enlèvement De Créosote
entretien formation et enlèvement de créosote Lorsque le bois brûle lentement, il produit du goudron et autres vapeurs organiques qui, se combinant à la vapeur d’eau évacuée, forment la créosote. Ces vapeurs se condensent dans le conduit relativement froid de la cheminée d’un appareil brûlant lentement. -
Page 78: Remplacement De Verre De Porte
entretien remplacement de verre de porte AVERTISSEMENT • N’utilisez pas de matériaux de substitution. • La vitre peut étre chaude, ne touchez pas la vitre jusqu’à ce qu’elle ait refroidi. • Usez de prudence lorsque vous enlevez et jetez des débris de verrou des composants endommagés. Assurez-vous d’aspirer tous les débris deverre à... -
Page 79: Soins De Verre
DANGER WARNING HOT GLASS WILL CAUSE BURNS. DO NOT TOUCH GLASS UNTIL entretien HOT GLASS WILL CAUSE COOLED. BURNS. NEVER ALLOW CHILDREN TO soins de verre DO NOT TOUCH GLASS UNTIL TOUCH GLASS. COOLED. AVERTISSEMENT NEVER ALLOW CHILDREN TO A barrier designed to reduce the risk of burns from the hot viewing glass is provided with this appliance TOUCH GLASS. -
Page 80: Bois
entretien bois AVERTISSEMENT • Cet appareil est conçu de brûler bois naturel seulement. Ne brûlez pas du bois traité, du charbon, du papier de couleur, du carton, du solvant, ou des déchets. Cet appareil n’a pas été testé avec un ensemble de bûches à... -
Page 81: Pièces De Rechange
8.0 pièces de rechange AVERTISSEMENT • Omettre de positionner les pièces conformément à ce manuel ou d’utiliser uniquement des pièces spécifi quement approuvées pour cet appareil peut causer des dommages matériels ou des blessures corporelles. Contactez votre détaillant pour les questions concernant les prix et la disponibilité des pièces de remplace- ment. - Page 82 pièces de rechange W415-2837 / 08.11.20...
- Page 83 pièces de rechange W415-2837 / 08.11.20...
-
Page 84: Accessoires
9.0 accessoires W415-2837 / 08.11.20... -
Page 85: Guide De Dépannage
10.0 guide de dépannage AVERTISSEMENT • Coupez l’alimentation électrique avant de procéder à l’entretien de l’appareil. • L’appareil peut être chaud, attendez qu’il soit refroidi avant d’en faire entretien. • N’utilisez pas de produits d’entretien abrasifs. • Lorsque vous vérifi ez des connexions, que vous installez des fi ls de dérivation (pour effectuer des testes uniquement) ou que vous remplacez des composants, débranchez l’appareil du réceptacle afi n d’éviter les chocs électriques ou des dommages aux composants. -
Page 86: Garantie
11.0 garantie Les produits Napoléon sont fabriqués conformément aux normes strictes du Système de Gestion de la Qualité mondialement reconnu ISO 9001 : 2015. Les produits Napoléon sont conçus avec des composants et des matériaux de qualité supérieure, assemblés par des artisans qualifi és qui sont fi ers de leur travail. -
Page 87: Notes
12.0 notes 29.1 W415-2837 / 08.11.20... - Page 88 NAPOLÉON CÉLÈBRE PLUS DE 40 ANS D’EXISTENCE CONSACRÉS À LA CONCEPTION DE PRODUITS DE CONFORT 7200, Route Transcanadienne, Montréal, Québec H4T 1A3 24 Napoleon Road, Barrie, Ontario, Canada L4M 0G8 214 Bayview Drive, Barrie, Ontario, Canada L4N 4Y8 103 Miller Drive, Crittenden, Kentucky, USA 41030 De Riemsdijk 22, 4004 LC Tiel, Pays-Bas Téléphone: 1-866-820-8686...