Table of Contents
Advertisement
Quick Links
Advertisement
Table of Contents

Related Manuals for NEFF B4AVH1AH0B


Summary of Contents for NEFF B4AVH1AH0B
- Page 1 BUILT-IN OVEN [en] INSTRUCTION MANUAL B4AVH1AH0B...
-
Page 3: Table Of Contents
Table of contents [ e n ] I N S T R U C T I O N M A N U A L Intended use ......4 Childproof lock. -
Page 4: Intended Use
This appliance is intended for domestic use replacement parts and services can be found at only. The appliance must only be used for the www.neff-international.com and in the online shop www.neff-eshop.com preparation of food and drink. The appliance must be supervised during operation. Only use this appliance indoors. -
Page 5: Important Safety Information
Important safety information Warning – Risk of scalding! (Important safety The accessible parts become hot during ■ information operation. Never touch the hot parts. Keep children at a safe distance. When you open the appliance door, hot G eneral information Risk of scalding! ■... -
Page 6: Halogen Lamp
Causes of damage Warning – Hazard due to magnetism! ]Causes of damage Permanent magnets are used in the control panel or in the control elements. They may G eneral information affect electronic implants, e.g. heart C a u s e s o f d a m a g e pacemakers or insulin pumps. -
Page 7: Steam
Environmental protection Steam 7Environmental protection Caution! Baking tins: Ovenware must be heat and steam Y our new appliance is particularly energy-efficient. ■ resistant. Silicone baking tins are not suitable for E n v i r o n m e n t a l p r o t e c t i o n Here you can find tips on how to save even more combined operation with steam. -
Page 8: Environmentally-Friendly Disposal
Environmental protection Open the appliance door as infrequently as possible ■ when the appliance is in use. It is best to bake several cakes one after the other. ■ The cooking compartment stays warm. This reduces the baking time for the second cake. You can place two cake tins next to each other in the cooking compartment. -
Page 9: Getting To Know Your Appliance
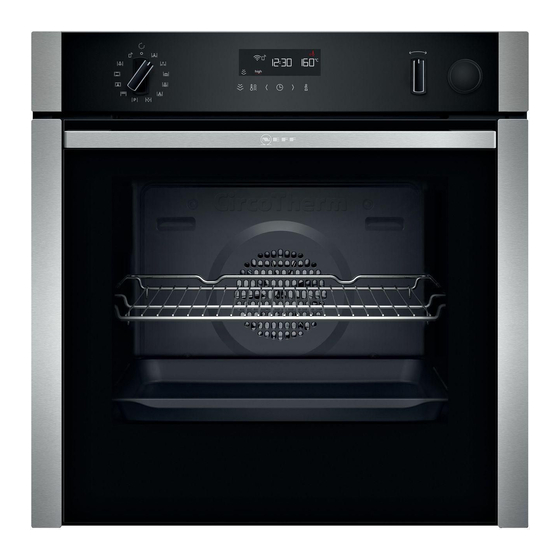
Getting to know your appliance Control panel *Getting to know your You can set your appliance's various functions on the appliance control panel. Below, you will see an overview of the control panel and the layout of the controls. I n this section, we will explain the indicators and G e t t i n g t o k n o w y o u r a p p l i a n c e controls. -
Page 10: Types Of Heating And Functions
Getting to know your appliance In addition, you can read the settings for the time-setting the v button several times. If there is a red bar above options. The value that can be set at the present time or or below a symbol, this means that the value being that is elapsing will be shown in large digits on the shown in large digits on the display refers to the display. -
Page 11: Temperature
Accessories Temperature _Accessories Use the temperature selector to set the temperature in the cooking compartment. It can also be used to select Y our appliance is accompanied by a range of the grill and cleaning settings, for example. A c c e s s o r i e s accessories. -
Page 12: Optional Accessories
Accessories Optional accessories Locking function The accessories can be pulled out approximately You can purchase optional accessories from the after- halfway until they lock in place. The locking function sales service and specialist retailers, or on the Internet. prevents the accessories from tilting when they are You will find a comprehensive range of products for pulled out. -
Page 13: Before Using For The First Time
Before using for the first time KBefore using for the first Setting Water hardness range mmol/l German French (°fH) time (°dH) ™‚‚ ‹ = softened B efore you can use your new appliance, you must ™‚‚ ‚ = soft Up to 1.3 Up to 7.3 Up to 13 B e f o r e u s i n g f o r t h e f i r s t t i m e... -
Page 14: Operating The Appliance
Operating the appliance Changing 1Operating the appliance The heating function and temperature can be changed at any time using the relevant selector. Y ou have already learnt about the controls and how If you change the heating function, the temperature will O p e r a t i n g t h e a p p l i a n c e they work. -
Page 15: Steam
Steam Finishing `Steam To switch off the appliance, turn the function selector to the "Off" position. ~ "After every steam operation" C ook food with steam assistance. on page 16 S t e a m Warning – Risk of scalding! Reheating When you open the appliance door, hot steam can escape. -
Page 16: After Every Steam Operation
Steam Press on the water tank (Fig. After every steam operation Pull out the water tank (Fig. " Warning – Risk of scalding! When you open the appliance door, hot steam can escape. Steam may not be visible, depending on its temperature. -
Page 17: Time-Setting Options
Time-setting options Note: When the set time has elapsed, a signal sounds. OTime-setting options To end the timer, press the 0 button. Y our appliance has different time-setting options. Setting the cooking time T i m e - s e t t i n g o p t i o n s Time-setting option Use Once the set cooking time has elapsed, the appliance switches off automatically. -
Page 18: Setting The Time
Childproof lock Setting the time AChildproof lock You can only change the time when no other time- setting option is active and the function selector is at Y our appliance is equipped with a childproof lock so the "Off" position. C h i l d p r o o f l o c k that children cannot switch it on accidentally or change any settings. -
Page 19: Basic Settings
Basic settings Note: If your appliance is equipped with the Home QBasic settings Connect function, you will find the Home Connect settings at the end of the basic settings for your appliance. ~ Page 22 T here are various settings available to you in order to B a s i c s e t t i n g s The Home Connect settings begin with •’. -
Page 20: Programmes
Programmes It is therefore important that you use heat-resistant PProgrammes ■ cookware. Information on the right kind of cookware to use and ■ tips and tricks for preparing your food can be found Y ou can prepare food very easily using the various P r o g r a m m e s at the end of the instruction manual. -
Page 21: Setting A Program
Sabbath mode Programme Food Cookware Weight range Shelf posi- Set weight Information tion Fillet of beef, medium Ready to cook, Roasting dish 0.8–2.0 kg Meat The meat does not need ˜‚ƒ seasoned without lid or weight to be seared beforehand. universal pan Fish, whole Ready to cook,... -
Page 22: Home Connect
Home Connect Note: If you open the appliance door 15 minutes after oHome Connect remote start activation or the end of operation, the remote start is automatically deactivated. T his appliance is Wi-Fi-capable and can be remotely H o m e C o n n e c t Warning –... -
Page 23: Remote Diagnostics
Home Connect app. down. Keep children at a safe distance. Declaration of Conformity Area Cleaning Constructa Neff Vertriebs-GmbH hereby declares that Appliance exterior the appliance with functionality meets the basic Stainless steel Hot soapy water: requirements and other relevant provisions of Directive... -
Page 24: Surfaces In The Cooking Compartment
Cleaning agent Notes Door panels Hot soapy water: Slight differences in colour on the front of the ■ Clean with a dish cloth and then dry with a soft appliance are caused by the use of different cloth. materials, such as glass, plastic and metal. Do not use a glass scraper or a stainless steel Shadows on the door panels, which look like ■... -
Page 25: After Cleaning
Cleaning function When the cooking compartment has cooled down, .Cleaning function remove the brown or white residue with water and a soft sponge. Y our appliance has the "Descaling" operating mode. Note: During operation, reddish spots form on the C l e a n i n g f u n c t i o n You can use the "descaling"... -
Page 26: Rails
Rails Turn the temperature selector. pRails "‹Ÿ" appears on the display. Descaling starts after a few seconds. After operation of the descaling programme, "2/4" W ith good care and cleaning, your appliance will retain R a i l s appears on the display. Remove the water tank and its appearance and remain fully functional for a long clean thoroughly with water. -
Page 27: Appliance Door
Appliance door Attaching the rails qAppliance door The rails only fit on the right or the left side. For both rails, ensure that the curved rods are at the front. W ith good care and cleaning, your appliance will retain A p p l i a n c e d o o r First, insert the rail in the middle of the rear socket ‚, its appearance and remain fully functional for a long... - Page 28 Appliance door Open the appliance door approx. 45° (fig. Warning Risk of injury! The door handle may break off. Do not carry the appliance door by the door handle. To carry or remove the appliance door, take hold of it with both hands, one on the left and one on the right.
-
Page 29: Removing And Installing The Door Panels
Appliance door Open the appliance door slightly until you hear a Push the intermediate panel downwards in the ‚ quiet click. Close the appliance door. area, carefully lift the ƒ holder until it can be pulled out (Fig. Warning Lift the intermediate panel from below (Fig. ) and Risk of injury if the door locks are not closed! remove it. -
Page 30: Trouble Shooting
Trouble shooting Insert the inner glass into the holder „ on the left and 3Trouble shooting right (Fig. Push the inner glass downwards until it locks into place (Fig. I f a fault occurs, there is often a simple explanation. T r o u b l e s h o o t i n g Before calling the after-sales service, please refer to the fault table and attempt to correct the fault yourself. -
Page 31: Maximum Operating Time
Trouble shooting Error messages on the display No settings can The child- Press and hold the v button until If an error message with "“" appears on the display, be made on the proof lock is the 1 symbol goes out in the dis- e.g. -
Page 32: Customer Service
Customer service Place a tea towel in the cold cooking compartment 4Customer service to prevent damage. Turn the glass cover anti-clockwise to remove it (figure O ur after-sales service is there for you if your appliance C u s t o m e r s e r v i c e Pull out the bulb –... -
Page 33: Tested For You In Our Cooking Studio
Tested for you in our cooking studio Remove unused accessories from the cooking JTested for you in our compartment. This will ensure that you achieve the best cooking studio possible cooking results and energy savings of up to 20 per cent. Accessories H ere, you can find a selection of dishes and the ideal T e s t e d f o r y o u i n o u r c o o k i n g s t u d i o... -
Page 34: Baking
Tested for you in our cooking studio Baking Here, you can find recommended settings for many dishes. In addition, refer to the information in the section on proving dough. Baking on one level When baking on one level, use the following shelf positions: Tall baked goods or tin on wire rack: Level 2 ■... - Page 35 Tested for you in our cooking studio Food Dish Shelf po- Type of Temperature Steam in- Time in minutes sition heating in °C tensity Puff pastry slices Universl pan 200-220* 15-25 … ™ Jam tarts 12-cup-tin 170-190* 15-25 ‚ Meringue Baking sheet on wire rack 80-90* 120-150...
-
Page 36: Roasting, Braising And Grilling
Tested for you in our cooking studio The baked item is too light on top, and Bake the cake one level higher in the oven the next time. too dark underneath. The baked item is too dark on top, Bake the cake one level lower in the oven the next time. Select a lower temperature and extend the baking and too light underneath. - Page 37 Tested for you in our cooking studio It is best to use glass cookware. Place hot glass Notes cookware onto a dry mat after cooking. The glass may The grill element switches itself continuously on and ■ crack if placed on a cold or wet surface. off;...
- Page 38 Tested for you in our cooking studio Roasting, braising and grilling Roasting and Braising Food Dish Shelf po- Type of Temperature in °C Time in minutes sition heating Slow roast joint (beef) Cookware, uncovered 50+50 ‚ Beef top side / top rump Cookware, uncovered 40+30 ‚...
- Page 39 Tested for you in our cooking studio Food Dish Shelf posi- Type of heat- Grill setting Time in minutes tion Beef burger, height 1-2cm Wire rack ‚Ÿ£/‰ * 1. side 8-9 ˆ 2. side 4-5 Lamb chops, height 1-2cm Wire rack ‚Ÿ£/‰...
-
Page 40: Ready Meals
Tested for you in our cooking studio Food Dish Shelf posi- Type of heat- Tempera- Steam in- Time in minutes tion ture in °C tensity Lamb leg (bone-in), 1,5 kg Wire rack 180-190 ‚ ™ 60-70 Rack of lamb (each 700 g) Wire rack ‚... -
Page 41: Desserts
Tested for you in our cooking studio Baking Food Dish Shelf po- Type of Temperature Steam in- Time in minutes sition heating in °C tensity Pizza, chilled Wire rack 190-210 15-20 „ Pizza, frozen, thin base Wire rack 210-230 15-20 „... -
Page 42: Drying
Tested for you in our cooking studio Tips for keeping acrylamide to a minimum Biscuits With top/bottom heating at max. 190 °C. With hot air at max. 170 °C. Egg or egg yolk reduces the production of acrylamide. Oven chips Spread out a single layer evenly on the baking tray. -
Page 43: Prove Dough
Tested for you in our cooking studio Vegetables: After a short while, small bubbles will form them from draughts. Only remove the clamps once the at short intervals. As soon as all preserving jars are jars are cold. bubbling, reduce the temperature to 120 °C and allow The indicated times in the settings table are average the jars to continue to bubble in the closed cooking values for preserving fruit and vegetables. -
Page 44: Defrosting
Tested for you in our cooking studio Defrosting Tip: Food that has been frozen in thinner pieces or in portions defrosts more quickly than food items frozen in For defrosting frozen fruit, vegetables and baked items. a block. Poultry, meat and fish should ideally be defrosted in the refrigerator. - Page 45 Tested for you in our cooking studio Baking Meal Accessories/cookware Shelf posi- Type of Tempera- Steam inten- Cooking tion heating ture in °C sity time in mins Piped cookies Baking tray 140-150* 25-35 ƒ Piped cookies Baking tray 140-150* 20-30 ‚...
- Page 48 *9001437040* 9001437040 990115...