Table of Contents
Advertisement
Quick Links
Advertisement
Table of Contents

Related Manuals for NEFF B4ACM5HH0B


Summary of Contents for NEFF B4ACM5HH0B
- Page 1 BUILT-IN OVEN [en] INSTRUCTION MANUAL B4ACM5HH0B...
-
Page 3: Table Of Contents
Table of contents [ e n ] I N S T R U C T I O N M A N U A L Intended use ......4 Meat thermometer . -
Page 4: Intended Use
Additional information on products, accessories, warranty. replacement parts and services can be found at This appliance is intended for domestic use www.neff-international.com and in the online shop www.neff-eshop.com only. The appliance must only be used for the preparation of food and drink. The appliance must be supervised during operation. -
Page 5: Important Safety Information
Important safety information Water in a hot cooking compartment may Risk of scalding! (Important safety ■ create hot steam. Never pour water into the information cooking compartment when the cooking compartment is hot. G eneral information Warning – Risk of injury! I m p o r t a n t s a f e t y i n f o r m a t i o n Scratched glass in the appliance door may Warning –... -
Page 6: Meat Thermometer
Causes of damage Cooling with the appliance door open: Following Warning – Risk of electric shock! ■ operation at high temperatures, only allow the When replacing the cooking compartment cooking compartment to cool down with the door bulb, the bulb socket contacts are live. Before closed. -
Page 7: Environmental Protection
Environmental protection Open the appliance door as infrequently as possible 7Environmental protection ■ when the appliance is in use. Y our new appliance is particularly energy-efficient. E n v i r o n m e n t a l p r o t e c t i o n Here you can find tips on how to save even more energy when using the appliance, and how to dispose of your appliance properly. -
Page 8: Getting To Know Your Appliance
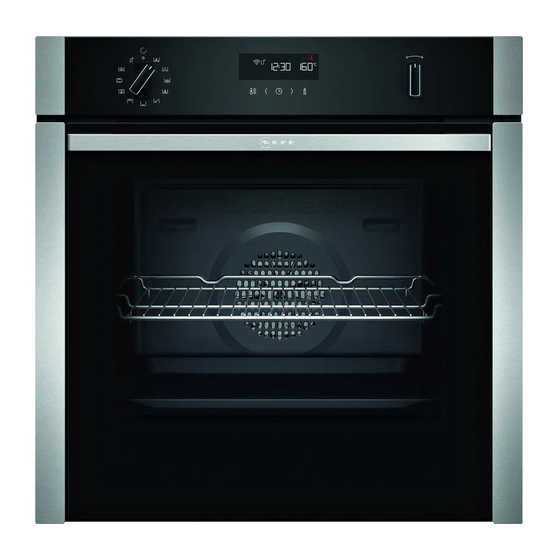
Getting to know your appliance Note: Depending on the appliance model, individual *Getting to know your details and colours may differ. appliance Control panel I n this section, we will explain the indicators and You can set your appliance's various functions on the G e t t i n g t o k n o w y o u r a p p l i a n c e controls. -
Page 9: Types Of Heating And Functions
Getting to know your appliance Types of heating and functions Use the function selector to set the types of heating and To make sure you always use the right type of heating other functions. to cook your food, we have explained the differences and applications below. -
Page 10: Cooking Compartment
Accessories Cooking compartment Meat thermometer Enables precision roasting to your exact Various functions in the cooking compartment make requirements. your appliance easier to use. For example, the cooking Its use is described in the relevant sec- compartment is well lit and a cooling fan prevents the tion. -
Page 11: Optional Accessories
Accessories Notes Combining accessories Make sure that you always insert the accessories ■ You can insert the wire rack and the universal pan at into the cooking compartment the right way round. the same time to catch drops of liquid. Always insert the accessories fully into the cooking ■... -
Page 12: Before Using For The First Time
Before using for the first time KBefore using for the first 1Operating the appliance time Y ou have already learnt about the controls and how O p e r a t i n g t h e a p p l i a n c e they work. -
Page 13: Temperature Display
Time-setting options Changing OTime-setting options The heating function and temperature can be changed at any time using the relevant selector. Y our appliance has different time-setting options. If you change the heating function, the temperature will T i m e - s e t t i n g o p t i o n s be changed to the corresponding default value. -
Page 14: Setting The Cooking Time
Childproof lock Note: When the set time has elapsed, a signal sounds. Use the ( or ) button to change the time. To end the timer, press the 0 button. The appliance applies the time after a few seconds. Note: You can go to the basic settings to specify Setting the cooking time whether or not the time should be shown in the display. -
Page 15: Basic Settings
Basic settings To set, activate or deactivate the one-time childproof ™‚‚ Water hardness** ‹ = softened lock, the function selector must be at the "Off" position. ‚ = soft (up to 1.3 mmol/l) ƒ = medium (1.3 - 2.5 mmol/ Activating Press and hold the v button until the 1 symbol „... -
Page 16: Inserting The Meat Probe Into The Food
Meat thermometer Temperature Food Core temperature in The meat thermometer measures the temperature on °C the inside of the food between 30 °C and 99 °C. You can set the desired core temperature in the display. Pork Shoulder of pork 85-90 Inserting the meat probe into the food Fillet of pork, medium rare... -
Page 17: Sabbath Mode
Sabbath mode The appliance starts heating after a few seconds. oHome Connect Once the set core temperature has been reached, a signal sounds and the appliance stops the operation T his appliance is Wi-Fi-capable and can be remotely automatically. The current core temperature in the H o m e C o n n e c t controlled using a mobile device. -
Page 18: Home Connect Settings
Home Connect Warning – Risk of fire! Setting Selection/display Combustible objects that are left in the cooking Remote control ‹ = Monitoring •’‹… compartment may catch fire. Never store combustible behaviour You can display the operating sta- objects in the cooking compartment. tuses of your appliance in the Home Connect app. -
Page 19: Declaration Of Conformity
Cleaning agent Declaration of Conformity Area Cleaning Constructa Neff Vertriebs-GmbH hereby declares that Appliance exterior the appliance with functionality meets the basic requirements and other relevant provisions of Directive Stainless steel Hot soapy water: 2014/53/EU. front Clean with a dish cloth and then dry with a soft cloth. -
Page 20: Surfaces In The Cooking Compartment
Cleaning agent Cleaning self-cleaning surfaces Pull-out system Hot soapy water: The self-cleaning surfaces are coated with a porous, Clean with a dish cloth or a brush. matte ceramic layer. This coating absorbs and dispels Do not remove the lubricant while the pull-out rails splashes from baking and roasting while the appliance are pulled out –... -
Page 21: Cleaning Function
Cleaning function Caution! .Cleaning function Do not use oven cleaner on the self-cleaning surfaces. This will damage the surfaces. If oven cleaner does get onto these surfaces, dab it off immediately using water Y our appliance is equipped with EcoClean and Base C l e a n i n g f u n c t i o n and a sponge cloth. -
Page 22: Rails
Rails Start CircoTherm hot air at 50 °C. Setting Base clean After five minutes, switch off the appliance and close Notes the appliance door. Base clean ® can only be started once the cooking ■ compartment is cold (room temperature) and the Removing heavy deposits of dirt appliance door is closed. -
Page 23: Fitting And Removing The Pull-Out Rails
Rails Attaching the rails Removing the pull-out rails The rails only fit on the right or the left side. For both Push on the tab marked "PUSH" behind the end of rails, ensure that the curved rods are at the front. the rail, and push the rail away from you (fig. -
Page 24: Appliance Door
Appliance door Fitting the pull-out rails qAppliance door The rails are designed to fit on either the right- or the left-hand side (not both).Make sure when you fit them W ith good care and cleaning, your appliance will retain that you can pull them out towards you. A p p l i a n c e d o o r its appearance and remain fully functional for a long The rail must sit between the two bars (fig. - Page 25 Appliance door Open the appliance door approx. 45° (fig. Warning Risk of injury! The door handle may break off. Do not carry the appliance door by the door handle. To carry or remove the appliance door, take hold of it with both hands, one on the left and one on the right.
-
Page 26: Removing And Installing The Door Panels
Appliance door Open the appliance door slightly until you hear a Push the intermediate panel downwards in the ‚ quiet click. Close the appliance door. area, carefully lift the ƒ holder until it can be pulled out (Fig. Warning Lift the intermediate panel from below (Fig. ) and Risk of injury if the door locks are not closed! remove it. -
Page 27: Trouble Shooting
Trouble shooting Insert the inner glass into the holder „ on the left and The appliance is Demo mode Briefly disconnect the appliance right (Fig. not heat- is activated. from the mains (switch off the cir- Push the inner glass downwards until it locks into ing."DEMO"... -
Page 28: Replacing The Bulb In The Top Of The Cooking Compartment
Customer service Replacing the bulb in the top of the cooking 4Customer service compartment If the cooking compartment light bulb fails, it must be O ur after-sales service is there for you if your appliance replaced. Heat-resistant, 25 watt, 230 V halogen bulbs C u s t o m e r s e r v i c e needs to be repaired. -
Page 29: Tested For You In Our Cooking Studio
Tested for you in our cooking studio Accessories JTested for you in our Only use original accessories supplied with your cooking studio appliance. These have been tailored to the cooking compartment and the operating modes of your appliance. H ere, you can find a selection of dishes and the ideal Ensure that you always use suitable accessories and T e s t e d f o r y o u i n o u r c o o k i n g s t u d i o settings for them. - Page 30 Tested for you in our cooking studio Baking on 3 levels: Baking tins Baking tray: Level 4 ■ For optimal cooking results, we recommend using dark- Universal pan: Level 3 coloured metal baking tins. Baking tray: Level 1 Tinplate baking tins, ceramic dishes and glass dishes You can cut energy use by up to 45% by preparing extend baking time and mean that the baked item will items at the same time.
- Page 31 Tested for you in our cooking studio Baking on two or more levels Food Dish Shelf posi- Type of heat- Temperature Time in minutes tion in °C Victoria sponge cake, 2 levels 4x Ø20cm tins 150-160* 20-30 ‚ Scones, 2 levels 2 baking sheets on 2 wire racks 160-180* 10-20...
-
Page 32: Roasting, Braising And Grilling
Tested for you in our cooking studio Roasting, braising and grilling Here, you will find information on roasting, braising and Warning – Risk of scalding! grilling poultry, meat and fish. The settings tables list the Very hot steam may escape when opening the lid after optimal settings for a wide range of dishes. - Page 33 Tested for you in our cooking studio lower, with the slanted edge facing the appliance door. The setting values are based on the assumption that Any dripping fat will be caught. unstuffed, chilled, ready-to-roast poultry, meat or fish is placed into a cold cooking compartment. When grilling, try wherever possible to use pieces of food which are of a similar thickness and weight.
- Page 34 Tested for you in our cooking studio Food Dish Shelf po- Type of Temperature in °C Time in minutes sition heating Duck, 2-3 kg Cookware, uncovered 180-190 25+20 ‚ Turkey, crown Wire rack 140-150**** 20+25 ‚ Turkey, thighs Cookware, uncovered 180-190 40+25 ‚...
-
Page 35: Ready Meals
Tested for you in our cooking studio Food Dish Shelf posi- Type of heat- Temperature Time in minutes tion in °C Lamb, shoulder (bone-in) Cookware, uncovered 170-180 15+15 ‡ Lamb, shoulder (boned and rolled) Cookware, uncovered 160-170 20+15 ‡ Rack of lamb** Cookware, uncovered 170-190* 15+25... -
Page 36: Desserts
Tested for you in our cooking studio Food Dish Shelf posi- Type of heat- Temperature Time in minutes tion in °C Hash browns, frozen Universal pan 210-230 30-40 ‚ Fish fingers, frozen Universal pan 200-220 20-25 ‚ Chicken nuggets, frozen Universal pan 190-210 20-25... -
Page 37: Preserving
Tested for you in our cooking studio Turn very juicy fruit and vegetables several times. After the food to be dried, the better it will be preserved. The drying, remove the dried fruit and vegetables from the thinner the slices are, the quicker the drying process paper immediately. -
Page 38: Prove Dough
Tested for you in our cooking studio Meal Accessory/cookware Shelf posi- Type of Step Tempera- Cooking time in mins tion heating ture in °C Vegetables, e.g. cucumbers 1-litre preserving jars 160-170 Before it starts bubbling: 30- ‚ Residual heat: 30 Stone fruit, e.g. -
Page 39: Test Dishes
Tested for you in our cooking studio Test dishes These tables have been produced for test institutes to facilitate appliance testing. As per EN 60350-1. Baking Items that are placed in the oven on baking trays or in baking tins/dishes at the same time will not necessarily be ready at the same time. - Page 40 *9001462370* 9001462370 000225...