Table of Contents
Advertisement
Quick Links
Owner's Manual
4. 1 -megapixel digital camera (2272x1704 pixels)
3x zoom lens 8-24mm (38-114mm in 35mm terms),
Macro down to 0.08 m
Automatic flash unit with five modes
Automatic exposure control, single frames, continuous shooting and multishot
images
Various autofocus and exposure modes
Shutter speeds 2 – 1/500 s, apertures f/3.4-3.6 to f/15
1.8-inch TFT screen (220 x 280 pixels)
Type I CompactFlash™ cards as storage medium
Professional image management with camera folders
Video Out for TV/beamer
Power supplied by four size AA alkaline or rechargeable NiCd or NiMH batteries
Optional external 6V DC power supply
USB image transfer to PC or Macintosh
Advertisement
Table of Contents

Related Manuals for CONCORD 4330z


Summary of Contents for CONCORD 4330z
- Page 1 Owner‘s Manual 4. 1 -megapixel digital camera (2272x1704 pixels) 3x zoom lens 8-24mm (38-114mm in 35mm terms), Macro down to 0.08 m Automatic flash unit with five modes Automatic exposure control, single frames, continuous shooting and multishot images Various autofocus and exposure modes Shutter speeds 2 –...
-
Page 2: Proper And Safe Use
Warnings Caution ! Be sure to read all hints and warnings carefully. Improper use may cause batteries to heat up or explode. • Exclusively use the types of battery mentioned in this manual. • Be sure to load the batteries with proper orientation of negative and positive poles. •... -
Page 3: Before You Start
Everything complete? Check the packing to see whether everything is complete. Should something be missing, please contact your dealer or an authorized service center. • Camera (1x) • Size AA alkaline batteries (4x) • Video cable (1x) • Wrist strap (1x) •... -
Page 4: Table Of Contents
Contents Proper and safe use ----------------------------------------------------------------------------------------------- 2 Before you start ---------------------------------------------------------------------------------------------------- 3 Contents Names of parts and controls, camera front ------------------------------------------------------ 8 Names of parts and controls, camera back ------------------------------------------------------ 9 Terminals, bottom plate -----------------------------------------------------------------------------10 LCD monitor -------------------------------------------------------------------------------------------11 Viewfinder ---------------------------------------------------------------------------------------------12 Focus/flash-ready indicators ------------------------------------------------------------------------13 Brief instructions --------------------------------------------------------------------------------------14 Getting ready -----------------------------------------------------------------------------------------14... - Page 5 Digital zoom ------------------------------------------------------------------------------------------ 26 Shooting digital images ----------------------------------------------------------------------------- 27 Autofocus photography ---------------------------------------------------------------------------- 28 Switching to spot autofocus ----------------------------------------------------------------------- 29 Switching from autofocus to manual focusing---------------------------------------------------30 Switching to macro autofocus -------------------------------------------------------------------- 31 Using the built-in flash unit ------------------------------------------------------------------------ 32 More details about flash photography ---------------------------------------------------------- 33 Using the different shooting modes ------------------------------------------------------------- 35 Automatic exposure control ----------------------------------------------------------------------- 37 Exposure compensation ---------------------------------------------------------------------------- 38...
- Page 6 Tips and tricks How to handle batteries --------------------------------------------------------------------------- 64 Notes on the use of CompactFlash™cards ---------------------------------------------------------75 Care of TFT screen ----------------------------------------------------------------------------------- 75 Taking care of your digital camera ----------------------------------------------------------------66 Cleaning your digital camera -----------------------------------------------------------------------66 Questions and service -------------------------------------------------------------------------------66 Troubleshooting ------------------------------------------------------------------------------------- 67...
-
Page 8: Names Of Parts And Controls, Camera Front
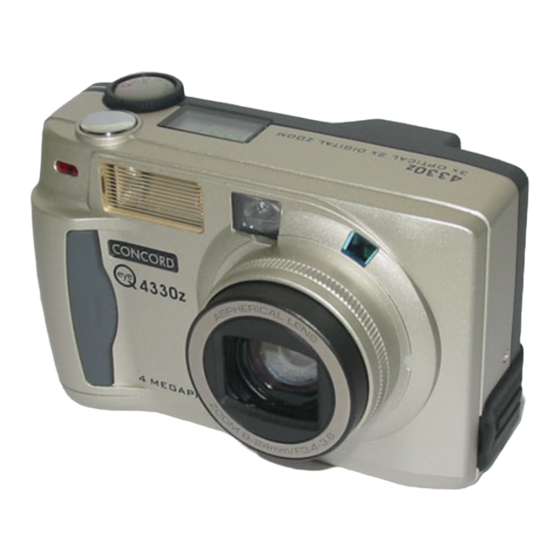
Names of parts and controls Camera front Shutter release Mode dial LCD monitor Viewfinder window Flash unit* Lens* Self-timer indicator Terminal cover Flash sensor* * Do not touch! -
Page 9: Names Of Parts And Controls, Camera Back
Names of parts and controls Camera back Flash-ready indicator Focus indicator (green) Power switch Strap lug Viewfinder* button TFT screen* button Display button Card slot Four-way control Note: The four-way control has a number of different functions: In the camera mode it controls zooming, helps you navigate through the display of stored images and select camera functions. -
Page 10: Terminals, Bottom Plate
Names of parts and controls Camera terminals / bottom plate Power-supply terminal Video Out USB terminal Battery cover Tripod socket... -
Page 11: Lcd Monitor
LCD monitor Image size Frame counter*/ No card The number of remaining images is approximate as the number will vary according to the compression selected. Names of parts and controls Flash mode Battery status Self-timer... -
Page 12: Viewfinder
Names of parts and controls Viewfinder Focus indicator (green) Flash indicator (orange) Parallax marks At distances of less than 1 m, only the subject detail below these marks will be recorded. It is therefore advisable to use the TFT screen for framing at short range. Parallax marks... -
Page 13: Focus/Flash-Ready Indicators
Focus/Flash-ready indicators Focus indicator (green) Lights Blinks rapidly (approx. 8x per second) Blinks slowly (approx. 2x per second) Focus area Flash indicator (orange) Lights Blinks rapidly (approx. 8x per second) Blinks slowly (approx. 2x per second) Names of parts and controls Subject in focus. -
Page 14: Brief Instructions
Brief instructions This is how it works: This is how it looks: Load batteries Insert memory card Shoot Turn mode dial to camera icon Press power switch... - Page 15 Brief instructions This is how it works: This is how it looks: Frame your subject in the viewfinder or on the TFT screen If necessary, zoom in or out pressing the four-way control: Right telephoto Left wide-angle Press shutter release until the green lamp beside the viewfinder eyepiece lights green...
-
Page 16: Playback
Brief instructions This is how it works: This is how it looks: Playing back images Turn the mode dial to the Playback icon If the camera is still off, press the power switch Your last shot will be displayed; using the four-way control, you can navigate between all the pictures stored on your... -
Page 17: Deleting Images
This is how it works: Deleting images Turn mode dial to Playback icon Press button on camera back; 2) Right-hand arrow of four-way control on Delete item of menu 3) Right-hand arrow of four-way control once more on Select Image item of submenu An overview of six images will be displayed, the image... -
Page 18: Power Supply
Power supply This is how it works: Loading alkaline or rechargeable batteries Your camera uses four size AA alkaline batteries or four NiMH batteries or four rechargeable batteries, type NiCd. Should you use rechargeable batteries, make sure that these have been fully charged in a suitable charger. -
Page 19: Checking Battery Power
This is how it works: Checking battery power With batteries loaded, the camera will automatically check their status and display it on the LCD monitor. Full power. Declining battery power, but the camera is fully opera- tional. If the display disappears, followed by the battery icon blinking for five seconds and disappearing once more,... -
Page 20: Using The Optional Power-Supply Unit
Power supply This is how it works: Using the optional power-supply unit The camera can be operated on external power with the aid of the optional power- supply unit. This is advisable for prolonged shooting sessions to save battery power. The power-supply unit is particularly helpful when the camera is linked up with a PC. -
Page 21: Memory Card
This is how it works: Using the CompactFlash ™ memory card Always switch off your camera before inserting or changing a Com- pactFlash™ card! Other- wise, the data on the card may be lost or the card itself damaged. Open the card slot as shown. -
Page 22: Basic Functions
Basic functions The TFT screen in Camera mode Live image (Camera settings not shown) Each depression of the Display button the screen display as follows. TFT screen turned off Live image (Camera settings displayed) will change... -
Page 23: Screen Settings
Screen settings Image size (see page 40) Image quality (see page 40) Focusing mode (see page 42) White balance (see page 43) Flash mode (see page 33) Drive-Modus (siehe Seite 36) Basic functions Exposure compensation (see page 39) Frame counter... -
Page 24: Taking Pictures
Taking pictures This is how it works: Focusing As the shutter release is pressed halfway, the camera automatically focuses on your subject. The green lamp near the viewfinder eyepiece signals the focus status. If the lamp lights green (after a few fractions of a second), focus is set and you may press the shutter release to take your picture. -
Page 25: Special Focusing Situations
Mode dial set to Camera icon This is how it works: Special focusing situations The autofocus system is center-weighted and uses image contrast (the difference between dark and bright details) to detect focus. This is why there are some subjects that make autofocusing impossible. -
Page 26: Digital Zoom
Taking pictures This is how it works: Digital zoom The camera has a digital zoom which allows zooming in on your subject beyond the longest focal length of the camera‘s zoom lens. The digital zoom is operative only with the TFT screen switched on. -
Page 27: Shooting Digital Images
Mode dial set to Camera icon This is how it works: Shooting digital images Turn the mode dial to the red camera icon Switch the camera on. Look through the viewfinder or switch the TFT screen on by pressing the screen icon on the camera back. -
Page 28: Autofocus Photography
Taking pictures This is how it works: Autofocus photography The shutter release operates in two stages: Half depressed, the camera will start automatic focusing. This always takes a second or so (approx. 1.5 second for a subject 3 m away). Once the camera has focused on your subject, a green lamp will light beside... -
Page 29: Switching To Spot Autofocus
Mode dial set to Camera icon This is how it works: Switching to spot autofocus While autofocusing is normally center-weighted, it may also be switched to spot focusing. Press the MENU button on the camera back and use the four-way control to select Focusing. -
Page 30: Switching From Autofocus To Manual Focusing
Taking pictures This is how it works: Switching from autofocus to manual focusing As an alternative to autofocusing, you may also focus manually. Press the MENU button on the camera back and use the four-way control to select Focusing. Then select Focus and from there Manual. -
Page 31: Switching To Macro Autofocus
Mode dial set to Camera icon This is how it works: Switching to macro autofocus For close-up shots, switch to macro autofocus. Press the MENU button on the camera back and use the four-way control to select Focusing. Then select Focus and from there Close-up. -
Page 32: Using The Built-In Flash Unit
Taking pictures This is how it works: Using the built-in flash unit Press the MENU button and use the four-way control to select Flash. Then select the Mode subfunction. When the light is low, the flash will then fire auto- matically. -
Page 33: More Details About Flash Photography
Mode dial set to Camera icon This is how it works: More details about flash photography The ready lamp beside the viewfinder eyepiece lights red as soon as the flash is fully charged and ready to fire. While the flash is recycling – for example when you take several flash pictures in short order –... - Page 34 Taking pictures This is how it works: More details about flash photography Flash output is controlled automatically, but flash exposure compensation is possible. Press the MENU button on the camera back and use the four-way control to select the Flash mode. Then select the Power subfunction where you can choose between the following...
-
Page 35: Using The Different Shooting Modes
Mode dial set to Camera icon This is how it works: Using the different shooting modes Switching the camera on sets it to single frames (SingleShot). In addition, there are the Continuous, Multishot 16 and Self-timer modes. To select one of these modes, press the MENU button on the camera back and use the four-way control... - Page 36 Taking pictures This is how it works: Using the different shooting modes In the Multishot 16 mode, 16 pictures will be taken at intervals of approx. two seconds. However, these will all be combined in one frame (multishot). Flash is not available in this mode.
-
Page 37: Automatic Exposure Control
Mode dial set to Camera icon This is how it works: Automatic exposure control The camera automatically controls the exposure of your digital photos with an equivalent sensitivity of ISO 100/21°. Programmed AE will automatically select shutter speeds from 2 s to 1/500 s and apertures of f/3.4, f/4.8, f/7.7 and f/15 (wide-angle) as well as f/3.6, f/4.8, f/7.7... -
Page 38: Exposure Compensation
Taking pictures This is how it works: Exposure compensation Automatic exposure can be compensated over a range of +2.0 to –2.0. Press the MENU button on the camera back and use the four-way control to select the Exposure mode. In the EV subprogram you then can choose between the following compensation... -
Page 39: Selecting Resolution / File Size
Mode dial set to Camera icon This is how it works: Selecting resolution / file size The camera has a 1/1.8-inch CCD sensor with 3.87 megapixels (1704 x 2272) and an aspect ratio of 4:3. The maximum resolution / file size of 1704 x 2272 pixels can be reduced to 1200 x 1600 or 480 x 640 pixels. -
Page 40: Selecting The Compression Level
Taking pictures This is how it works: Selecting the com- pression level The data provided by the camera‘s CCD sensor can be saved at three different compression levels: Fine = 1:6, Standard = 1:12 and Economy = 1:25. These compression levels are available for each of the three different resolutions (1704 x 2272, 1200 x 1600... -
Page 41: Selecting Pixel Sharpness
Mode dial set to Camera icon This is how it works: Selecting pixel sharpness A special mode of the camera allows the pixels provided by the CCD sensor to be saved with different sharpness characteristics (digital sharpening). This feature should, however, not be confounded with focusing of the lens. -
Page 42: Selecting White Balance
Taking pictures This is how it works: Selecting white balance With its automatic white balance, the camera automatically adjusts to the color temperature of available light sources. To optimize your results and make allowance for special lighting conditions, you may set the camera to special light sources by pressing the MENU button on the... -
Page 43: Resetting Camera Functions To Default Settings
Mode dial set to Camera icon This is how it works: Resetting camera functions to default settings All shooting modes of the camera can be reset to their default values. Press the MENU button on the camera back and use the four-way control to select Default and then Yes or No. -
Page 44: Default Camera Settings
Taking pictures Mode dial set to Camera icon This is how it works: Default camera settings Upon reset, the shooting modes default to the following settings: Flash Autoflash with red-eye reduction Focus Mode Autofocus Focus Area Center-weighted Drive Mode Single frames Image size Full format (1704 x 2272 pixels) Quality... -
Page 45: Selecting Screen Brightness
Mode dial set to Camera icon This is how it works: Selecting screen bright- ness The brightness of the TFT screen on the camera back can be varied. Press the MENU button on the camera back and use the four-way control to select LCD and Brightness, where values from 0 to 9 can be set on a scale. -
Page 46: Image Playback
Image playback This is how it works: Displaying individual images Turn the mode dial to the Playback icon. Switch the camera on. The TFT screen will auto- matically display your last shot, including the frame number, the shooting date and time. Pressing the screen display button again will display... -
Page 47: Displaying Several Images (Index Mode)
Mode dial set to Playback icon This is how it works: Displaying several images (Index Mode) If you press the screen display button twice with the mode dial set to Playback , nine images will be displayed in the Index mode. -
Page 48: Magnified Playback
Image playback This is how it works: Zoom-magnifier playback Recorded images can also be displayed at 2x magni- fication. In Playback mode (with the mode dial set to the Playback icon), press the MENU button, then select Zoom using the four-way control. -
Page 49: Slide Show
Mode dial set to Playback icon This is how it works: Slide show The camera can display all the pictures on your memory card in the form of an automatic slide show. In Playback mode (with the mode dial set to the Playback icon) press the MENU button and use the four-way control to select... -
Page 50: Playback Via Tv Set Or Video Beamer
Image playback You may view the pictures captured with your camera on a TV screen. The camera has a video output ter- minal via which it can be connected to a TV set using the video cable. This terminal can be switched to either NTSC or PAL. -
Page 51: Deleting Images
Mode dial set to Playback icon This is how it works: Deleting images one by The images stored on your memory card can be selected via the camera screen and deleted either separately or all at once. In Playback mode, press the MENU button and use the four-way control to select Delete. -
Page 52: Deleting All The Images On Your Memory Card
Deleting images This is how it works: Deleting all the images on your memory card All the images stored on your memory card can be deleted at once with a single menu command. In Playback mode (with the mode dial set to Playback icon), press the MENU button, then select Delete using the four-way control. -
Page 53: Image Printout
Mode dial set to Playback icon This is how it works: Preparing images for direct printout in DPOF‘ format Your camera is capable of preparing images for direct printout in DPOF‘ format (Digital Print Order Format). In Playback mode (mode dial set to Playback icon), press the MENU button and select Print using the four-way... -
Page 54: Image Management
Image management This is how it works: Saving and managing images in folders The camera saves your pictures on the memory card in folders. In addition to the folders generated auto- matically by the camera, further folders can be created and named to facilitate image manage- ment. -
Page 55: Deleting Folders From The Memory Card
(in the camera). Folders created on your card in a PC will not be displayed. Note regarding the use of memory cards in different digital camera systems: Since nearly all digital camera systems and manufacturers create their own folders and folder... -
Page 56: Dcf Standard For Digital Image Storage
Image management Mode dial set to Playback icon This is how it works: DCF standard for digital image storage The DCF standard (Design rule for Camera File System) has been adopted for storing images in digital cameras. This worldwide standard guarantees that: •... - Page 57 Mode dial set to Playback icon This is how it works: Setting camera-screen brightness The brightness of the TFT screen on the camera back can be varied. Press the MENU button on the camera back and use the four-way control to select LCD and Brightness, where values from 0 to 9 can be set on a scale.
-
Page 58: Basic Settings
Basic settings This is how it works: Basic camera settings and functions The basic camera settings and functions are combined in the Set menu (mode dial set to Set icon). To select the different menus, turn the mode dial and activate/confirm by pressing the Right arrow of the four-way control. - Page 59 Mode dial set to icon This is how it works: Basic camera settings and functions Date/Time This is where you can set the date and time. These will be saved together with each image. Beep This menu lets you switch the beeps on or off.
-
Page 60: Default Settings For Playback, Set And Transfer Modes
Basic settings Mode dial set to icon This is how it works: Default settings for Playback, Set and Transfer modes In the Set menu, the following defaults are reset in the Playback, Set and Transfer modes: In Playback menu: Delete Selected image: single frame Slide Show Time Screen time 5 seconds... -
Page 61: Pc Linkup
Mode dial set to This is how it works: Connecting the camera to PC/Macintosh Install driver software. For Windows® 98/Windows® 98 SE/Windows® 2000 Prof./Windows® proceed in the following way: Insert software CD in your computer drive. Double-click on Setup icon to start installation. - Page 62 PC linkup This is how it works: The following steps apply to both OS 8.6 and OS 9. Select the driver for your system. Start installation with a double click. When the Welcome box appears, click [Continue]. Start installation by clicking on Install.
-
Page 63: Connecting The Camera To Pc
PC linkup This is how it works: Connecting the camera to PC/Macintosh For as long as the camera is connected to your computer or data are being exchanged between camera and computer, observe the following warnings: • Do not switch the camera off! •... -
Page 64: Tips And Tricks
This is how it works: How to handle batteries • Battery power drops at low temperatures. When shooting in a cold environment, keep fresh batteries ready, preferably in a warm pocket inside your clothing. • The power of rechar- geable NiMH batteries drops more slowly, so that these are therefore preferable. -
Page 65: Notes On The Use Of Compactflash™Cards
Tips and Tricks Notes on the use of CompactFlash™ cards In the following cases, data may be lost or your memory card may be damaged: • If the card is used improperly. • If the card is near electrostatic discharges or electrical fields. -
Page 66: Taking Care Of Your Digital Camera
Taking care of your digital camera • Your camera is sensitive to shock and should therefore be handled with care. • Switch the camera off for carrying, and remove the batteries. • Your camera is neither splashwater-proof, nor watertight. • Inserting or removing... -
Page 67: Troubleshooting
Problem If you have any trouble with your camera, try to solve the problem with the aid of the following table. Should this be unsuccessful, please consult your dealer. Problem Automatic focusing impossible (green focus lamp blinking rapidly – approx. 8x per second) when shutter release is depressed halfway. - Page 68 Troubleshooting Problem Shutter does not release. No live image on screen. Cause CF card is full. Is camera switched on? Are batteries spent? Have batteries been inserted with wrong polarity? Is LCD screen switched off? Camera has turned off automatically to save power.
- Page 69 Problem Shutter does not release. Green focus lamp blinks slowly (about twice per second), and PLAYBACK blinks on screen. Flash picture comes out underexposed. Cause Is there a CF card in the camera? Was your subject within fl ash range? Troubleshooting Remedy If NO CARD appears on the...
- Page 70 Troubleshooting Problem Zoom playback does not work. All images are over or underexposed. Lens moves out, but data monitor remains blank, and camera does not work. Image fi le damaged. Camera does not work properly. Cause Was the picture taken with digital zoom? Did you use exposure compensation?
-
Page 71: Specifications
Camera CCD: Lens: Shutter: Exposure control: Camera TFT screen: Storage medium: Image files: Shooting modes Mode: Self-timer: Built-in flash unit Recycling time: Flash modes: Interfaces Video Out: PC interface: Power sources Batteries: External power source: Operating temperature: Dimensions and weight Dimensions (wxhxd): Weight: All data at time of going to print, subject to change without notice. -
Page 72: System Requirements
System requirements for Windows® • For Windows® 98/98SE/2000Prof./Me /XP • 16MB RAM, preferably 32 MB • 110 MB free disk space • VGA color monitor • CD-ROM drive • 3.5“ diskette drive • USB and Video Out terminals System requirements for iMac, ibook, G3 blue & white series, G4 series •... -
Page 73: Transferring Pictures To Your Computer
At the prompt click on Finish to complete the installation. 6) An icon will automatically be created on your desktop. 7) Click on the "4330Z" Icon to view your images. 8) Select the pictures you would like to save to your computer by clicking on the pictures while holding down the Shift key. - Page 74 WINDOWS XP USERS: When this window appears, click [Continue Anyway] tocontinue installation.
- Page 75 Technical Suppor t Hot Line: Toll Free In the USA & Canada 1-866-522-6372 Toll Free In Europe UK: 0800-169-6482 BELGIUM: 0800-787-57 FRANCE: 0800-917-599 GERMANY: 0800-1800-563 SPAIN: 900-973-195 ITALY: 800-781-883 All Other Countries - Toll 31-53-482-9779...