Table of Contents
Advertisement
Quick Links
48HC*D17-D28
Nominal 15 to 25 Tons
with Puron (R---410A) Refrigerant
Service and Maintenance Instructions
TABLE OF CONTENTS
STAGED AIR VOLUME (SAV) CONTROL: 2- - SPEED
. . . . . . . . . . . . . . . . . . . . . . . . . .
. . . . . . . . . . . . . . . . . . . . . . . . . . . . . . . . . . . . . .
. . . . . . . . . . . . . . . . . . . . . . . . .
. . . . . . . . . . . . . . . . . . . . . . . . . . . . . . . . . . . .
. . . . . . . . . . . . . . . . . . . . . . . . . . . . . .
. . . . . . . . . . . . . . . . . . . . . . . . .
. . . . . . . . . . . . . . . . . . . . . . . . . . . . . . . .
. . . . . . . . . . . . . . . . . . . . . . .
. . . . . . . . . . . . . . . . . . . . . . . . . . . . . .
. . . . . . . . . . . . . . . . . . . . . . . .
. . . . . . . . . . . . . . . . . . . .
. . . . . . . . . . .
. . . . . . . . . . . . . .
. . .
. . . . . . . . . . . . . . . . . . .
10
12
. . . .
18
. . . . . . . . . . . . .
20
. . . . . . . . . . . . . . . .
22
26
. . . . . . . . . . . . . . . . . . . .
29
30
36
37
. . . . . . . . . . . . . . . . . . .
39
. . . . . . . . . . . . . . . .
40
. . . . . . . .
40
. . . . . . . . . . . . . . . . . . . . . .
42
. . . . . . . . . . . . . . . . . . . . . .
53
62
62
. . . . . . . . .
64
. . . . . . . . . . . . . .
65
. . . . . . . . . . . . . . . . .
65
.
66
1
3
4
. . . . . . . . . . . . . . . . . . . . . . . . . . . . . . . . .
6
SAFETY CONSIDERATIONS
7
Installation and servicing of air-conditioning equipment
7
can be hazardous due to system pressure and electrical
9
components. Only trained and qualified service personnel
should
install,
repair,
equipment. Untrained personnel can perform the basic
maintenance functions of replacing filters. Trained service
personnel should perform all other operations.
When working on air-conditioning equipment, observe
precautions in the literature, tags and labels attached to
the unit, and other safety precautions that can apply.
Follow all safety codes. Wear safety glasses and work
gloves. Use quenching cloth for unbrazing operations.
Have fire extinguishers available for all brazing
operations.
Follow all safety codes. Wear safety glasses and work
gloves. Use quenching cloth for brazing operations. Have
fire extinguisher available. Read these instructions
thoroughly and follow all warnings or cautions attached to
the unit. Consult local building codes and National
Electrical Code (NEC) for special requirements.
Recognize safety information. This is the safety- - ALERT
symbol
. When you see this symbol on the unit and in
instructions or manuals, be aware of the potential for
physical injury hazards.
Understand the signal words DANGER, WARNING, and
CAUTION. These words are used with the safety- - ALERT
symbol. DANGER indicates a hazardous situation which,
if not avoided, will result in death or severe personal
injury. WARNING indicates a hazardous situation which,
if not avoided, could result in death or personal injury.
CAUTION indicates a hazardous situation which, if not
avoided, could result in minor to moderate injury or
product and property damage. NOTICE is used to address
practices not related to physical injury. NOTE is used to
. . . . . . . . . . . . . . . .
67
. . . . . . . . . . .
70
. . . . . . . . . . . .
75
88
. . . . . . . . . . . . . . . . . .
89
or
service
air-conditioning
Advertisement
Table of Contents

Related Manuals for Carrier 48HC D17 Series


Summary of Contents for Carrier 48HC D17 Series
-
Page 1: Table Of Contents
48HC*D17–D28 Nominal 15 to 25 Tons with Puron (R---410A) Refrigerant Service and Maintenance Instructions TABLE OF CONTENTS APPENDIX II. PHYSICAL DATA ....APPENDIX III. FAN PERFORMANCE . - Page 2 highlight suggestions which will result in enhanced CAUTION installation, reliability, or operation. CAUTION UNIT DAMAGE HAZARD Failure to follow this caution can result in reduced unit performance or unit shutdown. CUT HAZARD High velocity water from a pressure washer, garden Failure to follow this caution can result in personal hose, or compressed air should never be used to injury.
-
Page 3: Unit Arrangement And Access
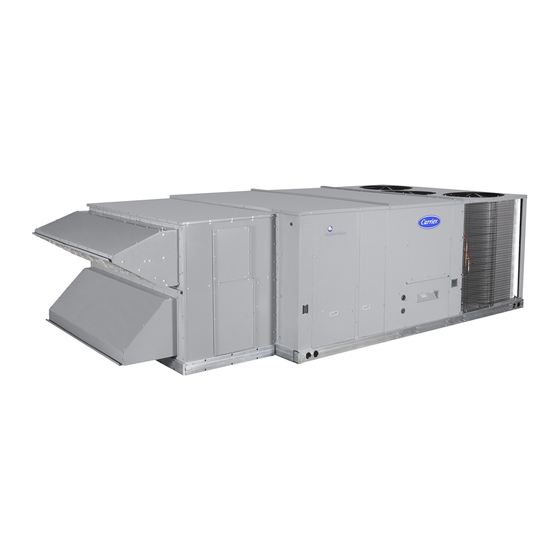
UNIT ARRANGEMENT AND ACCESS Seasonal Maintenance These items should be checked at the beginning of each General season (or more often if local conditions and usage Fig. 1 and Fig. 2 show general unit arrangement and patterns dictate): access locations. Air Conditioning S Condenser fan motor mounting bolts tightness SUPPLY FAN... -
Page 4: Supply Fan (Blower) Section
3. Replace the filters, as required, with similar replace- centrifugal blower wheels mounted on a solid blower shaft ment filters of the same size. that is supported by two greaseable pillow block concentric bearings. A fixed- - pitch driven fan pulley is 4. - Page 5 Adjusting the Belt Tension match as- - installed ductwork systems. The pulley consists of a fixed flange side that faces the motor (secured to the Use the following steps to adjust the V- - belt tension. See motor shaft) and a movable flange side that can be rotated Fig.
-
Page 6: Fan With Variable Frequency Drive (Vfd)
screw bridging the split portion of the collar. The cap Identifying Factory Option screw has a Torx T25 socket head. To tighten the locking This supplement only applies to units that meet the collar: Hold the locking collar tightly against the inner criteria detailed in Table 1. -
Page 7: Additional Vfd Installation And Troubleshooting
THIS UNIT’S MODEL NUMBER Enter Unit’s Model Number: Position: 9 10 11 12 13 14 15 16 17 18 Example: Factory Assigned Product Type Electrical Options Product Series A = None Heat Options C = Non-Fused Disconnect D = Thru-The-Base Connections Refrig. - Page 8 16. Secure the pulley to the motor by tightening the Changing Fan Wheel Speed by Changing Pulleys pulley setscrew to the motor shaft. The horsepower rating of the belt is primarily dictated by 17. Insert four bolts and flat washers through mounting the pitch diameter of the smaller pulley in the drive holes on the motor into holes on the motor mounting system (typically the motor pulley in these units).
-
Page 9: Condenser Coil Service
This cleaner available from Carrier Replacement Components Division as part number P902- - 0301 for a one gallon container, and part number P902- - 0305 for a 5 gallon container. It is recommended that all coils,... -
Page 10: Evaporator Coils
1. Proper eye protection such as safety glasses, gloves coil cleaner is essential to extend the life of the coils. This and protective clothing are recommended during cleaner is available from Carrier Replacement Parts mixing and application. Division (p/n: P902- - 0301 for one gallon (3.8L) container, 2. - Page 11 as the enzymatic activity will be destroyed. A frost pattern should develop uniformly across the face of the coil starting at each horizontal header tube. Failure 5. Thoroughly apply Totaline environmentally sound to develop frost at an outlet tube can indicate a plugged or coil cleaner solution to all coil surfaces including a missing orifice.
-
Page 12: Humidi- - Mizer Adaptive Dehumidification System
CORE SEAT (Part No. EC39EZ067) 1/2-20 UNF RH 0.596 WASHER DEPRESSOR PER ARI O-RING 1/2” HEX 720 + 0.01/-0.035 5/8” HEX 0.47 FROM FACE OF BODY 7/16-20 UNF RH This surface provides a metal to metal seal when torqued into the seat. Appropriate handing is required to not scratch or dent the surface. - Page 13 Humidi- - MiZer System Components Subcooler/Reheat Coil The Humidi- - MiZer uses the standard unit compressor(s), The Subcooler/Reheat Coil is mounted across the leaving evaporator coil and Round Tube- - Plate Fin (RTPF) face of the unit’s evaporator coil. The coil is a one- - row condenser coil.
- Page 14 RH2.x VALVE RH1.x VALVE HUMIDI-MIZER COIL CONDENSER COIL OUTDOOR AIR COMPRESSOR VALVE EVAPORATOR COIL = CLOSED VALVE = OPEN VALVE INDOOR AIR = 3-WAY VALVE C07122A ® Fig. 16 - - Normal Cooling Mode - - Humidi- - MiZer System RH2.x VALVE RH1.x...
- Page 15 RH2.x VALVE RH1.x VALVE HUMIDI-MIZER COIL CONDENSER COIL OUTDOOR AIR COMPRESSOR VALVE EVAPORATOR COIL = CLOSED VALVE = OPEN VALVE INDOOR AIR = 3-WAY VALVE C07124A ® Fig. 18 - - Hot Gas Reheat Mode (Reheat 2) - - Humidi- - MiZer System...
- Page 16 Fig. 19 - - Humidi- - MiZer Reheat Control Board I/O Point Name Type Connection Unit Note Pin Number Connection Humidistat/LTLO DI, 24VAC J1A ---1 (1) LTLO Thermostat W1 DI, 24VAC J1A ---2 (2) CTB---REHEAT---4 Econ Y1 DI, 24VAC J1A ---6 (6) CTB---REHEAT---5 Thermostat G DI, 24VAC...
- Page 17 Table 2 – Humidi-MiZer Troubleshooting PROBLEM CAUSE REMEDY General cooling mode problem. See Cooling Service Analysis (Table 3). No dehumidification demand. See No Dehumidification Demand, below. Subcooling Reheat Mode Will Not Activate. CRC relay operation. See CRC Relay Operation, below. Circuit RLV, CLV or LDV valve problem.
-
Page 18: Thermostatic Expansion Valve (Txv)
(R- - 410A) refrigerant, recover all refrigerant from the to the underside of the diaphragm. system.. 3. The needle valve on the pin carrier is spring loaded, 3. Remove TXV support clamp. exerting pressure on the underside of the diaphragm. - Page 19 use a tubing cutter to remove the mechanical flare nut 13. Check for leaks. from the equalizer. Then use a coupling to braze the 14. Evacuate system completely and then recharge. equalizer line to the stub (previous equalizer line) in 15.
-
Page 20: Puronr (R- - 410A) Refrigerant
CORE SEAT (Part No. EC39EZ067) 1/2-20 UNF RH 0.596 WASHER DEPRESSOR PER ARI 720 O-RING +.01/-.035 1/2” HEX FROM FACE OF BODY 5/8” HEX 7/16-20 UNF RH This surface provides a metal to metal seal when torqued into the seat. Appropriate handing is required to not scratch or dent the surface. - Page 21 If suction temperature is low, carefully recover some of NOMINAL TON SIZE DESIGNATION REFERENCE the charge. Recheck the suction pressure as charge is adjusted. 17.5 Select the appropriate unit charging chart from Fig. 25, 26, 27, 28, 29 30 31 and 32. Take the outdoor ambient temperature and read the EXAMPLE: suction pressure gauge.
-
Page 22: Cooling Charging Charts
COOLING CHARGING CHARTS 115F / 46.1C 185.0 105F / 40.6C 175.0 95F / 35.0C 85F / 29.4C 165.0 75F / 23.9C 65F / 18.3C 155.0 55F / 12.8C 45F / 7.2C 145.0 135.0 125.0 115.0 105.0 95.0 85.0 75.0 ° °... - Page 23 COOLING CHARGING CHARTS 115F / 46.1C 185.0 105F / 40.6C 175.0 95F / 35.0C 85F / 29.4C 165.0 75F / 23.9C 65F / 18.3C 155.0 55F / 12.8C 45F / 7.2C 145.0 135.0 125.0 115.0 105.0 95.0 85.0 75.0 ° °...
- Page 24 COOLING CHARGING CHARTS 115F / 46.1C 180.0 105F / 40.6C 95F / 35.0C 170.0 85F / 29.4C 75F / 23.9C 160.0 65F / 18.3C 55F / 12.8C 150.0 45F / 7.2C 140.0 130.0 120.0 110.0 100.0 90.0 80.0 ° ° 10.5 12.8 15.6...
- Page 25 COOLING CHARGING CHARTS 115F / 46.1C 105F / 40.6C 180.0 95F / 35.0C 170.0 85F / 29.4C 75F / 23.9C 65F / 18.3C 160.0 55F / 12.8C 45F / 7.2C 150.0 140.0 130.0 120.0 110.0 100.0 90.0 80.0 ° ° 12.8 15.6 18.3...
-
Page 26: Compressors
COMPRESSORS WARNING Lubrication FIRE, EXPLOSION HAZARD Compressors are charged with the correct amount of oil at Failure to follow this warning the factory. could result in death, serious per- sonal injury and/or property WARNING damage. Never use non- - certified refrigerants in this product. FIRE, EXPLOSION HAZARD Non- - certified refrigerants could contain contaminates Failure to follow this... - Page 27 The suction and discharge pressure levels should now move to their normal start- - up levels. NOTE: When the compressor is rotating in the wrong direction, the unit makes an elevated level of noise and does not provide cooling. Filter Drier Replace the Filter Drier whenever refrigerant system is exposed to atmosphere.
- Page 28 Table 3 – Cooling Service Troubleshooting PROBLEM CAUSE REMEDY Power failure. Call power company. Fuse blown or circuit breaker tripped. Replace fuse or reset circuit breaker. Defective thermostat, contactor, transformer, or Compressor and Replace defective component. control relay. Condenser Fan Will Not Start.
-
Page 29: Convenience Outlets
CONVENIENCE OUTLETS WARNING ELECTRICAL OPERATION HAZARD Failure to follow this warning could result in personal injury or death. Units with convenience outlet circuits can use multiple disconnects. Check convenience outlet for power status before opening unit for service. Locate the disconnect switch, and disconnect all electrical power to the switch. -
Page 30: Smoke Detectors
The primary leads to the convenience outlet transformer GFCI RECEPTACLE NOT INCLUDED are not factory- - connected. Selection of primary power COVER - WHILE-IN-USE WEATHERPROOF source is a customer- - option. If local codes permit, the transformer primary leads can be connected at the line- - side terminals on a unit- - mounted non- - fused disconnect or circuit- - breaker switch. - Page 31 housing with a single captive screw for easy access to the from a fire, causes the sensor to signal an alarm state, but wiring terminals. The controller has three LEDs: Power, dust and debris accumulated over time does not. Trouble and Alarm. A manual test/reset button is located on the cover face.
- Page 32 FIOP Smoke Detector Wiring and Response Return Air Without Economizer The sampling tube is located across the return air opening All units: The FIOP smoke detector is configured to on the unit basepan. See Fig. 40. The holes in the automatically shut down all unit operations when a smoke sampling tube face downward, into the return air stream.
- Page 33 RETURN AIR SENSOR (Operating Position Shown) CONTROLLER MODULE SCREWS (2) SAMPLE TUBE C12050 Fig. 41 - - Return Air Sampling Tube Location in Unit with Economizer 48TM502525 C12559 Fig. 42 - - Typical Smoke Detector System Wiring...
- Page 34 Sensor and Controller Tests NOTICE Sensor Alarm Test The sensor alarm test checks a sensor’s ability to signal an OPERATIONAL TEST NOTICE alarm state. This test requires that you use a field provided Failure to follow this NOTICE can result in an SD- - MAG test magnet.
- Page 35 Changing the Dirty Sensor Test By default, the dirty sensor test results are indicated by: S The sensor’s Dirty LED flashing. S The controller’s Trouble LED flashing. S The controller’s supervision relay contacts toggle. The operation of a sensor’s dirty test can be changed so that the controller’s supervision relay is not used to indicate test results.
-
Page 36: Indicators
Alarm State NOTICE The smoke detector enters the alarm state when the amount of smoke particulate in the sensor’s sensing OPERATIONAL TEST NOTICE chamber exceeds the alarm threshold value. See Table 5. Failure to follow this NOTICE can result in an Upon entering the alarm state: unnecessary evacuation of the facility. -
Page 37: Protective Devices
Table 5 – Detector Indicators CONTROL OR INDICATOR DESCRIPTION Resets the sensor when it is in the alarm or trouble state. Activates or tests the sensor when it is in Magnetic test/reset switch the normal state. Alarm LED Indicates the sensor is in the alarm state. Trouble LED Indicates the sensor is in the trouble state. - Page 38 Supply (Indoor) Fan Motor Protection Troubleshooting Supply Fan Motor Overload Trips The supply fan used in 48HC units is a forward- - curved CAUTION centrifugal wheel. At a constant wheel speed, this wheel has a characteristic that causes the fan shaft load to PERSONAL INJURY HAZARD DECREASE when the static pressure in the unit- - duct system increases and to INCREASE when the static...
-
Page 39: Premierlinkt Control
The PremierLink controller (see Fig. 46) is compatible The PremierLink control is factory- - mounted in the 48HC with Carrier Comfort Networkr (CCN) devices. This unit’s main control box to the left of the LCTB. Factory control is designed to allow users the access and ability to... -
Page 40: Rtu- - Open Control System
Open enables the unit to run in 100% stand- - alone control connectors and then reconnect the connectors to the board. mode, Carrier’s I- - Vu Open network, or a Third Party See Fig. 47. Building Automation System (BAS). On- - board DIP... - Page 41 Board Power (AO-1) DO-6 (Dehumidification) DO-7 (Reversing Valve) DO-8 (Power Exhaust) SPT (temp Input) Protocol Selector *Remove BACnet, Modbus, or N2 both for 0-5V SPT (common) (LON connection J15) SPT (offset input) C10818 Fig. 47 - - RTU- - Open Control Module...
-
Page 42: Gas Heating System
Fuel Types and Pressures GAS HEATING SYSTEM Natural Gas General The 48HC unit is factory- - equipped for use with Natural The heat exchanger system consists of a gas valve feeding Gas fuel at elevation under 2000 ft (610 m). See section multiple inshot burners off a manifold. - Page 43 Limit Switch This switch also prevents operation when the propane tank level is low which can result in gas with a high Remove blower access panel. Limit switch is located on concentration of impurities, additives, and residues that the fan deck for sideshot units and on the vestibule plate have settled to the bottom of the tank.
- Page 44 HEATER TUBE ASSEMBLY SEAL STRIPS (SPONGE RUBBER) REGULATOR GASKET REGULATOR RETAINER WIND CAP ASSEMBLY (SHOWN INVERTED AS SHIPPED) MOUNTING SCREWS (2) SUPPORT INSULATION ASSEMBLY VESTIBULE PLATE INDUCER FAN MOTOR ASSEMBLY BURNER ASSEMBLY GAS VALVE C12066A Fig. 53 - - Typical Heat Exchanger Assembly Burners and Igniters Orifice Projection Refer to Fig.
- Page 45 8. Slide the burner tray out of the unit. See Fig. 56. CAUTION 9. To reinstall, reverse the procedure outlined above. Cleaning and Adjustment PERSONAL INJURY HAZARD 1. Remove burner rack from unit as described in Re- Failure to follow this caution can result in personal moval and Replacement of Gas Train section, above.
- Page 46 IGC Board IGC Board C10337 Fig. 57 - - Unit Control Box/IGC Location Gas Valve including the main service connection, gas valve, gas spuds, and manifold pipe plug. All leaks must be repaired All unit sizes are equipped with 2- - stage gas valves. See before firing unit.
- Page 47 When replacing unit (see Fig. 61) on the IGC provides a visual display of orifices, order the necessary parts through the Carrier operational or sequential problems when the power supply Replacement Components Division (RCD). See Table 12 is uninterrupted.
- Page 48 Table 12 – Orifice Sizes ORIFICE CARRIER DRILL DRILL PART NUMBER DIA. (in.) SIZE LH32RF129 0.1285 LH32RF125 0.1250 LH32RF120 0.1200 LH32RF116 0.1160 LH32RF113 0.1130 LH32RF111 0.1110 LH32RF110 0.1100 LH32RF105 0.1065 LH32RF104 0.1040 LH32RF102 0.1015 LH32RF103 0.0995 LH32RF098 0.0980 LH32RF096 0.0960 LH32RF094 0.0935...
- Page 49 Red LED-Status C08452 Fig. 61 - - Integrated Gas Control (IGC) Board Table 13 – IGC Connections CONNECTION TERMINAL LABEL POINT DESCRIPTION SENSOR LOCATION TYPE OF I/O PIN NUMBER INPUTS RT, C Input power from TRAN 1 control box 24 VAC —...
- Page 50 Table 14 - - Altitude Compensation* (17 - - 30) - - Natural Gas NATURAL GAS NOMINAL HEAT INPUT ELEVATION 220k BTUH 310k BTUH 400k BTUH Orifice Input Orifice Input Orifice Input Feet Meters Size (btu/hr) Size (btu/hr) Size (btu/hr) 0 --- 2000 0 --- 610 220,000...
- Page 51 Fig. 62 - - OATL Connections Troubleshooting Heating System Refer to Tables 16 and 17 for additional troubleshooting topics. Table 16 – Heating Service Troubleshooting PROBLEM CAUSE REMEDY Check flame ignition and sensor electrode positioning. Misaligned spark electrodes. Adjust as needed. Check gas line for air, purge as necessary.
- Page 52 Table 17 – IGC Board LED Alarm Codes ACTION TAKEN BY FLASH DESCRIPTION RESET METHOD PROBABLE CAUSE CONTROL CODE Normal Operation — — — Loss of power to the IGC. Check 5 amp fuse on IGC, power to unit, 24V circuit Hardware Failure No gas heating.
-
Page 53: Economi$Er Systems
ECONOMI$ER SYSTEMS ECONOMI$ER IV CONTROLLER OUTSIDE AIR IMPORTANT: Any economizer that meets the WIRING TEMPERATURE SENSOR HARNESS economizer requirements as laid out in California’s Title LOW AMBIENT SENSOR 24 mandatory section 120.2 (fault detection and ACTUATOR diagnostics) and/or prescriptive section 140.4 (life- - cycle tests, damper leakage, 5 year warranty, sensor accuracy, etc), will have a label on the economizer. - Page 54 BLACK TRANSFORMER GROUND BLUE 500 OHM RESISTOR VIOLET NOTE 1 PINK OAT SENSOR 24 VAC NOTE 3 50HJ540573 ACTUATOR ASSEMBLY 4-20 mA WHITE DIRECT DRIVE 4-20mA SIGNAL TO J9 ON ACTUATOR PremierLink BOARD ECONOMISER2 PLUG NOTES: 1. Switch on actuator must be in run position for economizer to operate. 2.
- Page 55 EconoMi$er is shown in Fig. 65. Typical SUPPLY AIR settings, sensor ranges, and jumper positions are also TEMPERATURE shown. An EconoMi$er IV simulator program is available SENSOR from Carrier to help with EconoMi$er IV training and (SEALED troubleshooting. INSIDE CRIMP END) Outdoor Air Temperature (OAT) Sensor...
- Page 56 supplied from the factory with a supply- - air temperature sensor and an outdoor- - air temperature sensor. This allows for operation of the EconoMi$er IV with outdoor air dry bulb changeover control. Additional accessories can be added to allow for different types of changeover control and operation of the EconoMi$er IV and unit.
- Page 57 (29) (32) (35) (38) (41) (43) CONTROL CONTROL POINT CURVE APPROX. deg. F (deg. C) AT 50% RH (27) 73 (23) 70 (21) 67 (19) 63 (17) (24) (21) (18) (16) (13) (10) HIGH LIMIT CURVE (10) (13) (16) (18) (21) (24) (27)
- Page 58 To determine the minimum position setting, perform the CO SENSOR MAX RANGE SETTING following procedure: 6000 1. Calculate the appropriate mixed air temperature 5000 using the following formula: 4000 ) + (TR 800 ppm ) =T 900 ppm 3000 1000 ppm = Outdoor-Air Temperature 1100 ppm 2000...
- Page 59 Use setting 1 or 2 for Carrier equipment. See Table 19. ventilation rate at design conditions. Exceeding the 1. Press Clear and Mode buttons. Hold at least 5 required ventilation rate means the equipment can seconds until the sensor enters the Edit mode.
- Page 60 4. Use the Up/Down button to toggle through each of 2. Set the enthalpy potentiometer to A (fully CCW). The the nine variables, starting with Altitude, until the Free Cool LED should be lit. desired setting is reached. 3. Set the enthalpy potentiometer to D (fully CW). The 5.
- Page 61 1. Make sure EconoMi$er IV preparation procedure has been performed. 2. Set the Enthalpy potentiometer to A. The Free Cool LED turns on. The actuator should drive to between 20 and 80% open. 3. Remove the 5.6 kilo- - ohm resistor and jumper T to T1.
-
Page 62: Pre- - Start- - Up
PRE- - START- -UP/START- -UP 3. Make the following inspections: a. Inspect for shipping and handling damages such as broken lines, loose parts, or disconnected WARNING wires, etc. b. Inspect for oil at all refrigerant tubing connec- PERSONAL INJURY HAZARD tions and on unit base. - Page 63 Gas Piping Refrigerant Service Ports Check gas piping for leaks. Each unit system has two 1/4” SAE flare (with check valves) service ports: one on the suction line, and one on WARNING the compressor discharge line. Be sure that caps on the ports are tight.
-
Page 64: Start- -Up, Premierlink Controls
45 seconds. The Integrated Gas Unit During start- - up, the Carrier software can also be used to Controller (IGC) modifies this value when abnormal limit verify communication with PremierLink controller. -
Page 65: Start- - Up, Rtu- - Open Control
START- -UP, RTU- - OPEN CONTROLS NOTICE SET- - UP INSTRUCTIONS Refer to the following manuals for additional installation, wiring and troubleshooting information for the RTU- - OPEN Controller.: “Controls, Start- - up, Operation and Troubleshooting Instructions,” “RTU Open Installation Start- - up Guide”... -
Page 66: Appendix I. Model Number Significance
APPENDIX I. MODEL NUMBER NOMENCLATURE 9 10 11 12 13 14 15 16 17 18 H C D D Product Type Packaging 48 --- Gas Heat Pkg. Rooftop 0 --- Standard Model Series --- WeatherMaster Electrical Options HC --- High Efficiency A --- None B --- HACR breaker Heat Size... -
Page 67: Appendix Ii. Physical Data
APPENDIX II. PHYSICAL DATA TABLE 21 – PHYSICAL DATA (COOLING) 15 - - 25 TONS 48HC*17 48HC*20 48HC*24 48HC*28 Refrigeration System # Circuits / # Comp. / Type 2 / 2 / Scroll 2 / 2 / Scroll 2 / 2 / Scroll 2 / 2 / Scroll R--- 410a charge A/B (lbs) 17/16.4... - Page 68 APPENDIX II. PHYSICAL DATA Table 6 – PHYSICAL DATA (cont.) (COOLING) 15 - - 25 TONS 48HC*17 48HC*20 48HC*24 48HC*28 HORIZONTAL 1 / Belt 1 / Belt 1 / Belt 1 / Belt Motor Qty / Drive type Max BHP 514--- 680 622--- 822 690--- 863...
- Page 69 APPENDIX II. PHYSICAL DATA TABLE 22 – PHYSICAL DATA (HEATING) 15 - - 25 TONS 48HC*D17 48HC*D20 48HC*D24 48HC*D28 Gas Connection # of Gas Valves Nat. gas supply line press (in. w.g.)/(PSIG) 5 --- 13 / 0.18--- 0.47 5 --- 13 / 0.18--- 0.47 5 --- 13 / 0.18--- 0.47 5 --- 13 / 0.18--- 0.47 Propane supply line press (in.
-
Page 70: Appendix Iii. Fan Performance
APPENDIX III. FAN PERFORMANCE TABLE 23 – 48HC*D17 VERTICAL SUPPLY / RETURN 15 TON Available External Static Pressure (in. wg) 4500 0.76 1.07 1.41 1.79 2.19 4900 0.92 1.24 1.60 1.99 2.41 5250 1.08 1.42 1.79 2.19 2.62 5600 1.26 1.61 2.00 2.42... - Page 71 APPENDIX III. FAN PERFORMANCE (cont.) TABLE 25 – 48HC*D24 VERTICAL SUPPLY / RETURN 20 TON Available External Static Pressure (in. wg) 1.48 1.77 6000 2.08 2.41 2.74 6500 1.82 2.14 2.47 2.81 3.17 7000 2.22 2.56 2.91 3.28 3.65 7500 2.68 3.04 3.41...
- Page 72 APPENDIX III. FAN PERFORMANCE (cont.) TABLE 27 – 48HC*D17 HORIZONTAL SUPPLY / RETURN 15 TON Available External Static Pressure (in. wg) 4500 1.13 1.56 2.03 2.55 3.10 3.44 4900 1.38 1.84 2.33 2.87 5250 1.62 2.11 2.63 3.18 3.77 5600 1.90 2.41 2.95...
- Page 73 APPENDIX III. FAN PERFORMANCE (cont.) TABLE 29 – 48HC*D24 HORIZONTAL SUPPLY / RETURN 20 TON Available External Static Pressure (in. wg) 6000 2.25 2.78 3.35 3.96 4.60 6500 2.77 3.33 3.94 4.57 5.24 7000 3.37 3.96 4.60 5.27 5.97 7500 4.05 4.67 5.34...
- Page 74 APPENDIX III. FAN PERFORMANCE (cont.) TABLE 31 – PULLEY ADJUSTMENT VERTICAL MOTOR PULLEY TURNS OPEN MODEL MOTOR/DRIVE COMBO SIZE Standard Static Medium Static 3 phase High Static 1009 Standard Static Medium Static 3 phase High Static 1078 1058 1039 1019 1000 Standard Static Medium Static...
-
Page 75: Appendix Iv. Wiring Diagrams
APPENDIX IV. WIRING DIAGRAMS Table 33 – Wiring Diagrams 48HC ---D17/48HC ---D28 UNITS HUMIDI---MIZER ® DUAL CIRCUIT SIZE VOLTAGE CONTROL POWER CONTROL POWER 208/230---3---60 50HE500751---J 50HE500889---I 50HE502181---E 50HE502186---B 460---3---60 50HE500751---J 50HE500752---I 50HE502181---E 50HE502183---C 575---3---60 50HE500751---J 50HE500888---I 50HE502181---E 50HE502184---C 208/230---3---60 50HE500751---J 50HE500889---I 50HE502181---E 50HE502186---B... - Page 76 APPENDIX IV. WIRING DIAGRAMS C12615 Fig. 76 - - 48HC D17 - - D28 Control Diagram - - 208/230- - 3060; 460/575- - 3- - 60...
- Page 77 APPENDIX IV. WIRING DIAGRAMS C12616 Fig. 77 - - 48HC D17 - - D28 Power Diagram - - 208/230- - 3- - 60...
- Page 78 APPENDIX IV. WIRING DIAGRAMS C12617 Fig. 78 - - 48HC D17 - - D28 Power Diagram - - 460- - 3- - 60...
- Page 79 APPENDIX IV. WIRING DIAGRAMS C12618 Fig. 79 - - 48HC D17 - - D28 Power Diagram - - 575- - 3- - 60...
- Page 80 APPENDIX IV. WIRING DIAGRAMS C14061 ® Fig. 80 - - 48HC D17 - - D28 Control Diagram with Humidi- - MiZer...
- Page 81 APPENDIX IV. WIRING DIAGRAMS C12620 ® Fig. 81 - - 48HC D17 - - D28 Power Diagram 208/230- - 3- - 60 with Humidi- - MiZer...
- Page 82 APPENDIX IV. WIRING DIAGRAMS C12621 ® Fig. 82 - - 48HC D17 - - D28 Power Diagram - - 460- - 3- - 60 with Humidi- - MiZer...
- Page 83 APPENDIX IV. WIRING DIAGRAMS C12622 ® Fig. 83 - - 48HC D17 - - D28 Power Diagram - - 575- - 3- - 60 with Humidi- - MiZer...
- Page 84 APPENDIX IV. WIRING DIAGRAMS 50HE500751 50HE500891 C12263 Fig. 84 - - PremierLinkt System Control Wiring Diagram...
- Page 85 APPENDIX IV. WIRING DIAGRAMS C13766 ® Fig. 85 - - PremierLinkt System Control Wiring Diagram with Humidi- - MiZer...
- Page 86 APPENDIX IV. WIRING DIAGRAMS C13767 Fig. 86 - - RTU- - OPEN Wiring Diagram...
- Page 87 APPENDIX IV. WIRING DIAGRAMS C13768 ® Fig. 87 - - RTU- - OPEN Wiring Diagram with Humidi- - MiZer...
-
Page 88: Appendix V. Motormaster Sensor Locations
Fig. 89 - - MotorMaster Sensor Locations - - D28 Catalog No: 48HC ---17---28---01SM Copyright 2014 Carrier Corp. S 7310 W. Morris St. S Indianapolis, IN 46231 Edition Date: 04/14 Manufacturer reserves the right to change, at any time, specifications and designs without notice and without obligations. -
Page 89: Unit Start-Up Checklist
UNIT START-UP CHECKLIST I. PRELIMINARY INFORMATION MODEL NO.: SERIAL NO.: DATE: TECHNICIAN: II. PRE-START-UP (insert checkmark in box as each item is completed) j VERIFY THAT JOBSITE VOLTAGE AGREES WITH VOLTAGE LISTED ON RATING PLATE j VERIFY THAT ALL PACKAGING MATERIALS HAVE BEEN REMOVED FROM UNIT j REMOVE ALL SHIPPING HOLD DOWN BOLTS AND BRACKETS PER INSTALLATION INSTRUCTIONS j VERIFY THAT CONDENSATE CONNECTION IS INSTALLED PER INSTALLATION INSTRUCTIONS j VERIFY THAT FLUE HOOD IS INSTALLED... - Page 90 Catalog No: 48HC ---17---28---01SM Copyright 2015 Carrier Corp. S 7310 W. Morris St. S Indianapolis, IN 46231 Edition Date: 04/15 Manufacturer reserves the right to change, at any time, specifications and designs without notice and without obligations. Replaces: NEW...