Table of Contents
Advertisement
Quick Links
Advertisement
Table of Contents

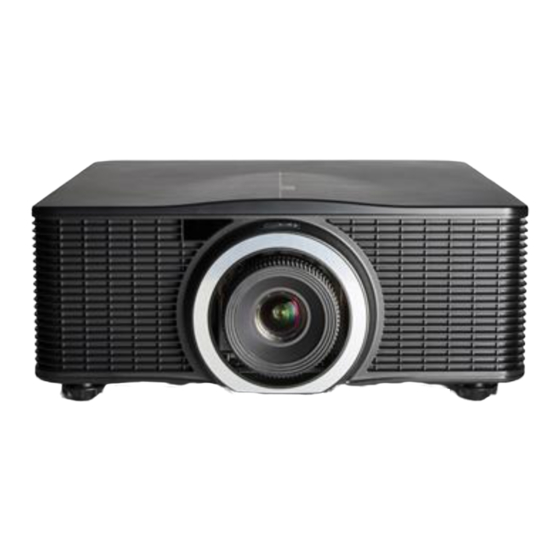
Related Manuals for Barco G60 W Series


Summary of Contents for Barco G60 W Series
- Page 1 G60 W series Warp and Blend Tool User manual ENABLING BRIGHT OUTCOMES...
- Page 2 Barco NV Beneluxpark 21, 8500 Kortrijk, Belgium www.barco.com/en/support www.barco.com Registered office: Barco NV President Kennedypark 35, 8500 Kortrijk, Belgium www.barco.com/en/support www.barco.com...
-
Page 3: Table Of Contents
General settings ....................................22 Warp settings ......................................22 Warp settings, Moving Cursors..............................24 Warp settings,Test Pattern ................................24 Edge Blending ....................................25 Edge Blending, Enable Marker ..............................28 Black Level ......................................28 3.10 Black level, transparent .................................30 3.11 Saving and opening settings ..............................31 R5910890 /01 G60 W series... - Page 4 R5910890 /01 G60 W series...
-
Page 5: Warping And Blending
Manipulating the projected images using the Warping and Blending Tool allows the user to create a seamless, unified image in arbitrarily shape. Overview • Image Warping • Edge Blending • Black Level • Image Stacking R5910890 /01 G60 W series... -
Page 6: Image Warping
Adjusting the grid point to change the image shape. Image 1-2 1.2 Edge Blending About blending Using the edge blending function, the overlapped edges of two or more images from multiple projectors can be seamlessly blended into a single, unified image. R5910890 /01 G60 W series... -
Page 7: Black Level
The black level function allows the user to adjust the black level of the images to achieve better black uniformity. Image 1-4 1.4 Image Stacking About image stacking Image Stacking increases the image brightness in a fixed image size by stacking two or more projectors. R5910890 /01 G60 W series... - Page 8 Warping and Blending Image 1-5 R5910890 /01 G60 W series...
-
Page 9: Getting Started
Installing the Warping and Blending Tool • Set up projectors and network • Network configuration, assign IP address for projectors • Network configuration, assign IP address for the computer • Network configuration, verifying the IP settings R5910890 /01 G60 W series... -
Page 10: System Requirements
2.2 Installing the Warping and Blending Tool About the tool Download the installation file for Warping and Blending Tool from the product page on the Barco website. How to install Double click the installation file to open the setup wizard. Click Next. - Page 11 Getting started Image 2-2 To confirm the installation, click Next. Image 2-3 When the installation is completed, click Close to exit the wizard. R5910890 /01 G60 W series...
-
Page 12: Set Up Projectors And Network
For wired connection, use Cat 5 or higher category Ethernet cable. Source connection Use a computer installed with a graphic card that supports image overlap in the same way as the input source. Connect the computer to projectors with video cables. R5910890 /01 G60 W series... -
Page 13: Network Configuration, Assign Ip Address For Projectors
Assign network IP address for the computer and projectors. Make sure each device in the network is assigned with a unique IP address. How to assign Press Menu on the projector’s keypad or remote control. Select Communications from the SETUP menu. Select LAN. Image 2-7 Select IP Address. R5910890 /01 G60 W series... -
Page 14: Network Configuration, Assign Ip Address For The Computer
Go to Network and Sharing Center and click Manage network connections. Image 2-10 Right click the Local Area Connection and click Properties from the drop down menu. Image 2-11 Highlight Internet Protocol Version 4 (TCP/IPv4) then click Properties. R5910890 /01 G60 W series... - Page 15 Getting started Image 2-12 Set IP address, and Click OK. Image 2-13 Click Close to exit Local Area Connection Properties and the IP settings will go into effect. R5910890 /01 G60 W series...
-
Page 16: Network Configuration, Verifying The Ip Settings
After assigning IP address for the computer and projectors, you can verify the IP settings by using the “ping” command at the command prompt. How to verify Open windows command prompt. Image 2-15 Type in “ping” and IP address to verify the IP setting. R5910890 /01 G60 W series... - Page 17 Getting started Image 2-16 R5910890 /01 G60 W series...
- Page 18 Getting started R5910890 /01 G60 W series...
-
Page 19: Using The Warping And Blending Tool
• General settings • Warp settings • Warp settings, Moving Cursors • Warp settings,Test Pattern • Edge Blending • Edge Blending, Enable Marker • Black Level • Black level, transparent • Saving and opening settings R5910890 /01 G60 W series... -
Page 20: Registering A Projector
How to register? Click File and select New Multi-Function to register a single projector to the network. Image 3-1 Set up projector’s native resolution. Image 3-2 Type in the projector’s IP Address, and click Connect. R5910890 /01 G60 W series... -
Page 21: Selecting And Deleting The Projector
The projector is selected. 3.2 Selecting and deleting the projector How to delete Click on the projector at the status bar (1). Image 3-3 Press Ctrl + Shift + Delete on your keyboard click Edit → Delete (2). R5910890 /01 G60 W series... -
Page 22: General Settings
When a previously saved configuration file (CFG file) is opened, click Reconfigure to apply the settings to the connected projectors. 3.4 Warp settings Start up Select the Warp tab to configure the warping settings for the selected projector. R5910890 /01 G60 W series... - Page 23 Check the box to enable project black pattern (5). Test pattern Check the box to enable test pattern, and select color for the test pattern (6). For more info, see “Warp settings,Test Pattern”, page 24. R5910890 /01 G60 W series...
-
Page 24: Warp Settings, Moving Cursors
Test pattern helps to tune the edge blending. When performing edge blending, test pattern helps to align the two projection screen as shown in the example below. • Enabling the test pattern to assist in tuning the edge blending. R5910890 /01 G60 W series... -
Page 25: Edge Blending
Using the Warping and Blending tool Image 3-7 • Two projection screens are aligned using test patterns. Image 3-8 3.7 Edge Blending Start up Switch to the Edge Blending tab to configure the settings for edge blending. R5910890 /01 G60 W series... - Page 26 Sets the starting position of the blending area. Type in the value and press Enter on the keyboard. The default value is set to 0. Width Sets the width of the blending area. Type in the value and press Enter on the keyboard. The default value is set to 100 pixels. R5910890 /01 G60 W series...
- Page 27 Check the box to enable Gamma function (5) to control the gamma curve of the blending area. Type in the value and press Enter on the keyboard to apply. The default value is set to 2.2. For adjacent projectors, set the same gamma value. R5910890 /01 G60 W series...
-
Page 28: Edge Blending, Enable Marker
• The overlapping area is adjusted using the markers. Image 3-11 3.9 Black Level Start up Click on Black Level tab to adjust the back level of the projection screens to achieve better black uniformity. R5910890 /01 G60 W series... - Page 29 There are five palettes for the user to set color for the adjust area (4). The default color is black. Click the palette row and a color palette dialog will pop out. In the color palette dialog, select a color and click R5910890 /01 G60 W series...
-
Page 30: Black Level, Transparent
Image 3-14 Covered by a bright layer By giving the bright layer a transparent value, the projector will apply transparent effect to the layer to reduce its brightness. R5910890 /01 G60 W series... -
Page 31: Saving And Opening Settings
The user can save the current settings and open the previously saved settings. Save settings Click Save (1) from the File menu to save the current settings. Image 3-16 Open settings Click Open from the File menu to open previously saved settings (CFG files). R5910890 /01 G60 W series... - Page 32 Using the Warping and Blending tool Image 3-17 Enter the IP address of the projector and click Connect. Click Reconfigure to apply the opened settings. R5910890 /01 G60 W series...
- Page 33 Using the Warping and Blending tool R5910890 /01 G60 W series...
- Page 34 R5910890 /01 | 2019-02-26 Barco NV | Beneluxpark 21, 8500 Kortrijk, Belgium Registered office: Barco NV | President Kennedypark 35, 8500 Kortrijk, Belgium www.barco.com...