Barco G62 Series Installation Manual
Hide thumbs
Also See for G62 Series:
- User manual (124 pages) ,
- Installation manual (22 pages) ,
- User manual (104 pages)
Table of Contents
Advertisement
Quick Links
Advertisement
Table of Contents

Related Manuals for Barco G62 Series


Summary of Contents for Barco G62 Series
- Page 1 G62 series Installation manual ENABLING BRIGHT OUTCOMES...
- Page 2 Registered office: Barco NV President Kennedypark 35, 8500 Kortrijk, Belgium www.barco.com/en/support www.barco.com...
- Page 3 Barco. Changes Barco provides this manual 'as is' without warranty of any kind, either expressed or implied, including but not limited to the implied warranties or merchantability and fitness for a particular purpose. Barco may make improvements and/or changes to the product(s) and/or the program(s) described in this publication at any time without notice.
-
Page 5: Table Of Contents
3.11 Initially adjusting the boresight screws ..........................53 3.12 Installing the UST lens .................................55 3.13 Adjusting the UST lens ................................57 3.13.1 Adjusting the image position and focus......................57 3.13.2 Adjusting the boresight ............................58 3.13.3 Finalizing the image adjustment.........................59 R5914654 /04 G62 series... - Page 6 UST lens support adjustment..............................71 5 Powering On/Off the projector ..............................75 Powering On the projector .................................76 Powering Off the Projector.................................77 6 Adjusting the projected image..............................79 Adjusting the projector’s position ............................80 Ajusting the lens offset.................................81 Boresight (Scheimpflug) adjustment............................83 R5914654 /04 G62 series...
-
Page 7: Introduction
Introduction Clarification of the term “G62” used in this document When referring in this document to the term “G62” means that the content is applicable for following Barco products: • G62 W9, G62 W11, G62-W14 Barco provides a guarantee relating to perfect manufacturing as part of the legally stipulated terms of guarantee. -
Page 8: Installation Requirements
The manufacturer reserves the right to refuse repair if a projector has been subject to knowingly neglect, abandon or improper use. R5914654 /04 G62 series... - Page 9 (5) times the complete load of the system. Projector Weight (without lens) G62-W9 17.6 kg / 38.8 lb G62-W11 22.7 kg / 50.0 lb G62-W14 21.4 kg / 47.2 lb R5914654 /04 G62 series...
-
Page 10: Projector Package Overview
The product Safety Manual and Quick Start Guide are also included. Download the complete and latest updated installation manual and user guide form the Barco website. The projection lens is an optional item, not a standard accessary in the package. -
Page 11: Main Unit
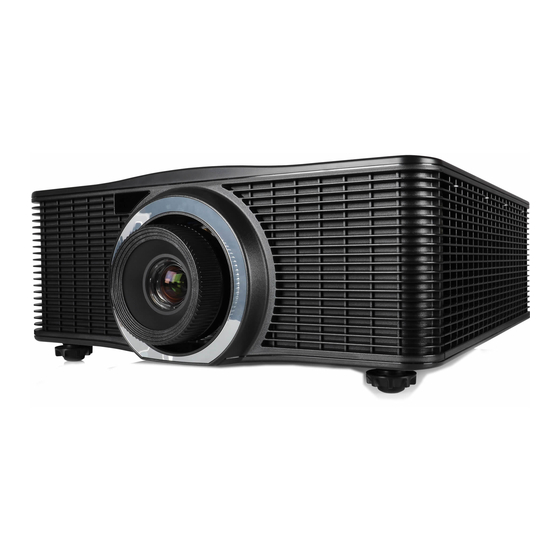
3G-SDI IN 3D SYNC 3D SYNC RS232 REMOTE ETHERNET MENU EXIT INPUT LENS FOCUS ENTER Image 1–8 LED Status Indicator Control panel Input/Output (I/O) Panel Power socket (AC100-240V, 50-60Hz) Remote receiver (Top) Power switch Adjustable feet R5914654 /04 G62 series... - Page 12 Introduction Airflow Image 1–9 R5914654 /04 G62 series...
-
Page 13: Input/Output (I/O) Panel
HDBaseT connector Network connector RJ45 HDMI out connector USB Type A connector HDMI 2 in connector 3D Sync out connector HDMI 1 in connector 3D Sync in connector DVI-D connector RS232 connector 3G SDI in connector R5914654 /04 G62 series... -
Page 14: Control Panel
Select an input source. ZOOM Adjust the image size. FOCUS Adjust the image focus. LEFT Navigate left through the menu. Navigate up through the menu. DOWN Navigate down through the menu. RIGHT Navigate right through the menu. R5914654 /04 G62 series... -
Page 15: Remote Control Unit (Rcu)
Adjust the image size. Shutter Momentarily turn off/on the screen (AV Mute). User1 Press to assign custom functions. See user guide for more info. User2 Press to assign custom functions. See user guide for more info. R5914654 /04 G62 series... -
Page 16: Lenses
Introduction 1.7 Lenses The table below is subject to changes and was last updated on 2019-01-03. Consult Barco's web site for the most recent information about available lenses. Available lenses Description Image Order No Throw Ratio R9801840 G Lens - Short Throw 0.75 - 0.95 : 1 (WUXGA) - Page 17 6.22 11.95 11.87 22.51 3.07 3.89 2.69 4.31 1.56 4.09 5.26 5.26 6.55 6.55 12.58 12.49 23.69 3.23 4.09 This lens is sold as a package containing lens, lens support and safety cable (package number: =R9409750) R5914654 /04 G62 series...
- Page 18 2.42 3.88 2.52 2.91 2.56 4.09 2.66 3.07 2.69 4.31 2.80 3.23 3.37 5.38 3.50 4.04 4.04 6.46 4.20 4.85 4.71 7.54 4.89 5.65 5.38 8.62 5.60 6.46 6.06 9.69 6.30 7.27 6.73 10.17 7.00 8.08 R5914654 /04 G62 series...
-
Page 19: Installation
Installation RCU battery installation ........................20 Installing the lens safety cable .......................21 Installing the lens..........................25 Connecting the projector with the power net..................27 Connecting to a computer or laptop....................28 Connecting to video sources......................29 Ceiling mount installation ......................30 R5914654 /04 G62 series... -
Page 20: Rcu Battery Installation
If the infrared receiver is exposed to fluorescent lamp or strong sunlight, the remote control may not operate normally. • Refer to the regulations enforced by your local government on the disposal of used batteries; improper disposal could damage the environment. R5914654 /04 G62 series... -
Page 21: Installing The Lens Safety Cable
Only four pieces are needed to assemble the safety cable to a lens. When the safety cable is used on another lens, you should not remove the cable clips. Instead, use four new ones. There are enough cable clips in the kit to secure up to five different lenses. R5914654 /04 G62 series... - Page 22 Pull the lasso tight around the lens body and install the U-bolt on the lens holder, with the open ends oriented outwards (reference 3). Make sure that both a part of the loop end and the outgoing part of the safety cable are placed in the enclosure. R5914654 /04 G62 series...
- Page 23 Paste two cable clips on both sides of the lens as illustrated (reference 1). Orient the open side of the clips towards the outside of the lens. Image 2–8 Image 2–9 Paste two extra cable clips on the motor block of the lens. Orient the open side to the outside of the lens. R5914654 /04 G62 series...
- Page 24 Lead the cable end with the shackle around rigging frame bar or truss bar Snap the shackle to the straight part of the cable. Secure the shackle by screwing the safety ring of the shackle over the open end. R5914654 /04 G62 series...
-
Page 25: Installing The Lens
Gently insert the lens in the lens holder. Ensure that the label “TOP” (reference 1) is upwards oriented while inserting the lens. Image 2–13 Rotate the lens clockwise to lock the lens. Image 2–14 Put the lens ring on the lens. An audible click should be noticed. R5914654 /04 G62 series... - Page 26 Installation Image 2–15 CAUTION: Do not transport the projector with any lens installed. R5914654 /04 G62 series...
-
Page 27: Connecting The Projector With The Power Net
Connect the male side of the power cord to the local power net. Caution: Ensure that the power net meets the power requirements of the projector. WARNING: Do not attempt operation if the AC supply and cord are not within the specified voltage and power range. R5914654 /04 G62 series... -
Page 28: Connecting To A Computer Or Laptop
Due to the difference in applications for each country, the accessories required in some regions may be different from those shown. • This diagram is for illustrative purposes only, and does NOT indicate that these accessories are supplied with the projector. R5914654 /04 G62 series... -
Page 29: Connecting To Video Sources
Due to the difference in applications for each country, the accessories required in some regions may be different from those shown. • This diagram is for illustrative purposes only, and does NOT indicate that these accessories are supplied with the projector. R5914654 /04 G62 series... -
Page 30: Ceiling Mount Installation
Installation 2.7 Ceiling mount installation Requirements To prevent damage to your projector, please use a Barco recommended ceiling mount. Ensure the screws used to install the mount to the projector meet the following specifications: • Screw type: M6 x 4 •... -
Page 31: Ust Lens R9801785(1)
Installation of the UST lens pogo pin adapter (G60 + LSM type2, G62 + LSM type2) ......47 3.10 Mounting the UST lens support system ..................49 3.11 Initially adjusting the boresight screws....................53 3.12 Installing the UST lens ........................55 3.13 Adjusting the UST lens........................57 R5914654 /04 G62 series... -
Page 32: Specifications Of The Ust Lens
624,6 3690,4 19,9 154,4 138,1 220,8 82,6 349,6 646,2 404,0 19,9 160,0 145,5 228,1 82,6 361,9 667,7 417,3 19,9 165,7 152,8 235,4 82,6 374,3 689,3 430,8 19,9 171,3 160,1 242,7 82,6 386,7 feet turned completely in R5914654 /04 G62 series... - Page 33 3. Set up the projector, refer to the lens specification table Wall Wall ground ground Image 3–2 Projection screen Target screen Screen center Corner 90° feet turned completely in R5914654 /04 G62 series...
- Page 34 UST lens R9801785(1) 242,0 280.0 484,0 140.0 280.0 4-M6X1.0P L10 Image 3–3 R5914654 /04 G62 series...
-
Page 35: Safety Precautions
Make sure no personnel or object is in the light path of the projector during the operation. • Do not place the projector on an unstable surface to prevent product damage and human injury. • Failure to follow the control, adjustment or operation procedures may cause damage by the exposure. R5914654 /04 G62 series... -
Page 36: Product Version Identification
LSM 1 has a lens cable plugged to the circuit board on the top left corner. Image 3–5 LSM type 1 Type 2 Lens Shift Module (LSM 2) • boresight plate is secured with four screws. R5914654 /04 G62 series... - Page 37 UST lens R9801785(1) Image 3–6 LSM Type2 R5914654 /04 G62 series...
-
Page 38: Required Accessories And Tools
Description Quantity UST lens Lens mount bracket Bracket Lens support M3 x L8 screw M3 x L8 hex screw M6 x L22 hex screw M3–3.7 x 0.8 x 18 washer M6-6.7 x 1 x 16 washer R5914654 /04 G62 series... - Page 39 The following tools are required for installing the UST lens: • #2 Philip screwdriver with magnetic tip (long neck) • L shape tool (provided in the lens package) • 2.5 mm Allen wrench • 5 mm Allen wrench R5914654 /04 G62 series...
-
Page 40: Necessary Steps When Installing The Ust-Lens On The G60/G62
In this part, a lot of steps need to be done to correctly install the UST-lens. Adjust the lens optically. In this part, the UST lens is adjusted in sheimpflug and back focal distance by using the correct procedure. R5914654 /04 G62 series... -
Page 41: Software Preparation Of The Projector To Receive The Ust Lens
A lens calibration is performed automatically. After the calibration, the projector will automatically shut down. If not, press the “Exit” key on the remote control to power off the projector and making it ready for the install of the UST-lens. R5914654 /04 G62 series... - Page 42 UST lens R9801785(1) Switch off the AC power button. The projector is now in the mode for an UST lens. Remove the power cord. R5914654 /04 G62 series...
-
Page 43: Remove The Non-Ust Boresight Module
LSM type1 LSM type2 Image 3–10 Note: To have better visibility for the lens holder, you can stand the projector with the lens opening facing up. Remove the non-UST lens boresight module from the projector. R5914654 /04 G62 series... - Page 44 UST lens R9801785(1) LSM Type1 LSM Type2 Image 3–11 R5914654 /04 G62 series...
-
Page 45: Installation Of The Ust Lens Boresight Module (G60 + Lsm Type 1)
Note: Ensure the cable is not wrapped or pinched when replacing the lens boresight module. Insert the UST lens boresight module to the projector. Image 3–13 On the UST lens boresight module, install and tighten the 3 screws with a Philips # 2 screwdriver. R5914654 /04 G62 series... - Page 46 UST lens R9801785(1) Image 3–14 Connect the lens cable to the lens holder. Image 3–15 R5914654 /04 G62 series...
-
Page 47: Installation Of The Ust Lens Pogo Pin Adapter (G60 + Lsm Type2, G62 + Lsm Type2)
Insert the UST lens pogo pin adapter to the projector. Note: Before installing the pogo pin adapter, make sure the middle screw on the adapter is turned counter-clockwise for at least 3 turns. Image 3–17 Tighten the side screws on the pogo pin adapter. R5914654 /04 G62 series... - Page 48 UST lens R9801785(1) Image 3–18 Tighten the middle screw on the pogo pin adapter. Note: Please tighten the side screws before tightening the middle screw. Image 3–19 R5914654 /04 G62 series...
-
Page 49: Mounting The Ust Lens Support System
Image 3–20 UST lens Lens bracket M3xL8 screws Place the projector upside down on a flat and clean surface. To avoid the lens supporter touching the surface, rotate the adjustment feet counter-clockwise at least five turns. R5914654 /04 G62 series... - Page 50 M3-3.7 x 0.8 x18 washer M3 x L8 hex screw To mount the lens supporter to the bottom of the projector, install and tighten two M6 x L22 hex screws and two M6 washers with a 5 mm Allen wrench. R5914654 /04 G62 series...
- Page 51 For G60 + LSM type 1, face the socket heads of the extenders towards the projector. • For G60 + LSM type 2, G62 + LSM type 2, face the red rubber rings on the extenders toward the projector. R5914654 /04 G62 series...
- Page 52 UST lens R9801785(1) G60 + LSM type1 G60 + LSM type 2 G62 + LSM type 2 Image 3–25 R5914654 /04 G62 series...
-
Page 53: Initially Adjusting The Boresight Screws
Table top Portrait (L) 8 + 1/2 8 + 1/2 5 + 1/4 Portrait (R) 8 + 1/2 5 + 1/2 8 + 1/2 Ceiling mount 5 + 1/2 6 + 1/2 Upright 9 + 1/2 R5914654 /04 G62 series... - Page 54 Table top Portrait (L) 5+ 1/4 5 + 1/4 Portrait (R) Ceiling mount 7 + 1/2 Upright 5+ 1/2 The optical adjustments of the UST lens need to be done in the actual position of the projector. R5914654 /04 G62 series...
-
Page 55: Installing The Ust Lens
To connect the lens bracket and the lens support assembly, install two M3 x L8 hex screws and two M3 washers with a 2.5 mm allen wrench. Do not tighten the screws, as the lens still needs to be adjusted optically. R5914654 /04 G62 series... - Page 56 UST lens R9801785(1) Image 3–29 M3 x L8 hex screw M3-3.7 x 0.8 x 18 washer Adjust the lens optically. See “Adjusting the UST lens”, page R5914654 /04 G62 series...
-
Page 57: Adjusting The Ust Lens
2. Press Focus keys to adjust the image focus untill the screen corners (point 1, 3, 7, and 9) are clear and sharp. 3. Repeat step a and b to balance the image focus at the center and corners. R5914654 /04 G62 series... -
Page 58: Adjusting The Boresight
U-shape tool and the three boresight extenders. Note: Use the silver L shape key for the LSM type 1 and the black L shape or U-shape tool for the LSM type 2. Image 3–32 R5914654 /04 G62 series... -
Page 59: Finalizing The Image Adjustment
After the boresight adjustment is complete, fix the lens support system and fine tune the image focus. Required tools Allen wrench 2.5 mm How to finalize Tighten the three M3 screws securing the lens support system with a 2.5 mm Allen wrench. R5914654 /04 G62 series... - Page 60 Fine tune the image focus as bolting the support system changes the lens position slightly. To restore the image brightness, press the Exit key twice on the remote control. The projector now can receive and display input sources. R5914654 /04 G62 series...
- Page 61 UST lens support adjustment......................71 UST sales kit The sales kit contains: • The UST lens • The UST lens support • Safety cable The UST lens must always be mounted with the UST lens support and the safety cable. R5914654 /04 G62 series...
-
Page 62: Ust Lens R9801830 G Lens (0.37 - 0.40 : 1) Ust 90
Possible mounting positions This lens can be mounted on the G60/G62 series of projectors and can be mounted in two positions: facing upwards and to the left. The motor housing must be turned to the correct position before the lens is mounted in the projector. -
Page 63: Lens Rotation Mechanics
Interface unit Wire clamper PCBA module 8 M3 cap screws Apply some glue on the head of the screws to prevent loosening when cap screws refastened. Standard position Image 4–3 Standard position Wire clamper PCBA module R5914654 /04 G62 series... - Page 64 Slide the interface back to the front of the lens to re-engage focusing gear and motor gear. Turn in 8 M3 cap screws with some glue. The lens is ready to be mounted in the projector. R5914654 /04 G62 series...
- Page 65 UST lens R9801830 G lens (0.37 - 0.40 : 1) UST 90° Image 4–6 90° rotated position wire clamper PCBA module Image 4–7 Up mark on the lens R5914654 /04 G62 series...
- Page 66 UST lens R9801830 G lens (0.37 - 0.40 : 1) UST 90° Image 4–8 Wire routing Projection orientation : Up R5914654 /04 G62 series...
-
Page 67: Lens Support Installation
Turn the projector up side down. To avoid damage, lay it on a blanket or a foam rubber. Mount both beams on the bottom of the projector. Use 2 bolts M6x12 and 2 washers M6 for each beam. Tighten with a torque between 3.5 and 9.8 Nm R5914654 /04 G62 series... - Page 68 Image 4–12 For left projection: mount the lens clamp module on the lens holder module by inserting 2 screws M6x22, 2 spring washers M6 and 2 washers M6. Tighten with a torque between 3.5 and 9.8 Nm R5914654 /04 G62 series...
- Page 69 To continue, go to step 9 Image 4–17 Turn the projector up side down and mount the safety bar with 2 screws M4x10. This safety bar will be used to mount the safety cable. R5914654 /04 G62 series...
- Page 70 If it is not possible to the truss or rigging frame, mount it to the lens support. Turn it a few times around the support so the play is at a minimum and hook the shackle on the cable. Image 4–20 R5914654 /04 G62 series...
-
Page 71: Ust Lens Support Adjustment
Shift the UST lens to the target position. Vertically lift the lens by hand to have the image as good as possible (reference A). Tighten the vertical shifting screws 2 & 3 to secure this target position (reference B). R5914654 /04 G62 series... - Page 72 Use the focus ring at the end of the lens to help focus the image. • If necessary, loosen screws 2 and 3 a bit to push the lens a bit upward or downward to spot any variation in image quality. R5914654 /04 G62 series...
- Page 73 Tighten screws 1 and 4 when you have an acceptable image quality. Image 4–26 Adjust Focus function in OSD and Focus Ring to have the best image quality. If the image quality is still unacceptable, please restart the procedure. R5914654 /04 G62 series...
- Page 74 UST lens R9801830 G lens (0.37 - 0.40 : 1) UST 90° CAUTION: Do not execute any lens movements when the UST lens is fixed in the Lens Support. R5914654 /04 G62 series...
-
Page 75: Powering On/Off The Projector
Powering On/Off the projector Powering On the projector ......................76 Powering Off the Projector......................77 This chapter assumes that the power cord and (all) signal cables are securely connected. For detailed instructions see installation manual. R5914654 /04 G62 series... -
Page 76: Powering On The Projector
Note: If you connect multiple sources at the same time, press “Input” key on the control panel or on the remote control to switch inputs. WARNING: Do not look directly into the lens when the projector is turned on. The strong light might cause permanent eye damage. R5914654 /04 G62 series... -
Page 77: Powering Off The Projector
ENTER Image 5–4 Press the POWER button or OFF key again to confirm, otherwise the message disappears after 5 seconds and the projector remains on. CAUTION: Don’t turn on the projector immediately after entering Standby mode. R5914654 /04 G62 series... - Page 78 Powering On/Off the projector R5914654 /04 G62 series...
-
Page 79: Adjusting The Projected Image
Adjusting the projected image Adjusting the projector’s position....................80 Ajusting the lens offset ........................81 Boresight (Scheimpflug) adjustment....................83 R5914654 /04 G62 series... -
Page 80: Adjusting The Projector's Position
Position the projector to the desired distance from the screen. The distance between the lens and the screen, the zoom settings, and the video format determine the size of the projected image. For projection distances of each lens, see chapter “Lenses”, page • 360 degree free orientation installation: Image 6–1 R5914654 /04 G62 series... -
Page 81: Ajusting The Lens Offset
Please refer below for the image offset (shift) range for G62 projectors. Vertical Image Offset: 0% Lens Center Image 6–2 Vertical Image Offset: +/-50% +50% +50% Lens Center -50% -50% Image 6–3 R5914654 /04 G62 series... - Page 82 Adjusting the projected image Horizontal Image Offset: +/-15% Lens Center -15% +15% 100% Image 6–4 R5914654 /04 G62 series...
-
Page 83: Boresight (Scheimpflug) Adjustment
Allen key, hex size 4mm For lens G LENS (0.65-0.75 : 1), you need 3 boresight extenders (64 mm) and 1 L shape tool. For G LENS (0.65-0.75 : 1) the floating ring indication must be checked. R5914654 /04 G62 series... - Page 84 ②&③ CW in half circle). • If clear position is in the screen(far from projector), rotate screw ① CW and then screw ②&③ CCW for half amount that① rotated. → repeat until both A and C are clear. R5914654 /04 G62 series...
- Page 85 ① &③ CW in half circle) • If clear position is in the screen(far from projector), rotate screw ② CW and then screw ① &③ CCW for half amount that ② rotated. → repeat until both D and E are clear. R5914654 /04 G62 series...
- Page 86 • If clear position is in the screen(far from projector), rotate screw ③ CW and then screw ① & ② CCW for half amount that ③ rotated. → repeat until both H and I are clear. R5914654 /04 G62 series...
- Page 87 Please turn the boresight screws ① to ③ counterclockwise to the end (STOP), and then turn clockwise 2 circles to the design value position. To improve the focus, go to step 2 and repeat the complete procedure. R5914654 /04 G62 series...
- Page 88 Adjusting the projected image R5914654 /04 G62 series...
- Page 90 R5914654 /04 | 2022-10-18 www.barco.com...