Barco G62 User Manual
Hide thumbs
Also See for G62:
- User manual (114 pages) ,
- Installation manual (90 pages) ,
- Installation manual (22 pages)
Table of Contents
Advertisement
Advertisement
Table of Contents

Related Manuals for Barco G62


Summary of Contents for Barco G62
- Page 1 User guide ENABLING BRIGHT OUTCOMES...
- Page 3 Barco. If the purchaser or a third party carries out modifications or repairs on goods delivered by Barco, or if the goods are handled incorrectly, in particular if the systems are operated incorrectly or if, after the transfer of risks, the goods are subject to influences not agreed upon in the contract, all guarantee claims of the purchaser will be rendered invalid.
- Page 4 FCC responsible: Barco Inc. 3059 Premiere Parkway Suite 400 30097 Duluth GA, United States Tel: +1 678 475 8000 Patent protection Please refer to www.barco.com/about-barco/legal/patents EMC notices EN55032/CISPR32 Class A MME (MultiMedia Equipment) Warning : This equipment is compliant with Class A of CISPR 32. In a residential environment this equipment may cause radio interference.
-
Page 5: Table Of Contents
Table of contents 1 Safety ........................................... 9 General considerations ................................10 Important safety instructions..............................11 Product Safety Labels ..................................15 Risk Group 3 Safety ..................................16 1.4.1 General considerations............................16 1.4.2 High Brightness precautions: Hazard Distance ..................16 1.4.3 HD for fully enclosed projection systems.......................18 Compliance ......................................19 2 Product overview ....................................21 Main unit.......................................22... - Page 6 Geometry Correction..................................46 Multi-Projection ....................................48 Test Pattern ......................................49 7.10 Freeze Screen ....................................49 7.11 Reset........................................49 8 User control — Image menu...............................51 Color Mode ......................................52 Brightness ......................................52 Contrast........................................52 Saturation......................................52 Tint...........................................52 Sharpness......................................52 Gamma.........................................53 White Balance....................................53 Advanced Color ....................................53 8.10 Advanced Image .....................................55 8.11 Save to User ......................................57 8.12 Apply to User .....................................57 8.13...
- Page 7 12.2 LED indication chart ..................................77 A Specifications ......................................79 Specifications for G62-W9.................................80 Specifications for G62-W11...............................81 Dimensions of the G62 ................................83 Ceiling mount ....................................84 Compatibility modes..................................85 B Communication protocols................................89 Serial control......................................90 LAN ........................................110 C Environmental information.................................113 China RoHS compliance................................114 Taiwan RoHS compliance ................................115 Turkey RoHS compliance.................................116...
- Page 8 R5914653 /02...
-
Page 9: Safety
Ensure that you understand and follow all safety guidelines, safety instructions and warnings mentioned in this chapter before installing the G62 projector. Clarification of the term “G62” used in this document When referring in this document to the term “G62” means that the content is applicable for following Barco products: •... -
Page 10: General Considerations
• Before operating this equipment please read this manual thoroughly and retain it for future reference. • Installation and preliminary adjustments should be performed by qualified Barco personnel or by authorized Barco service dealers. • All warnings on the projector and in the documentation manuals should be adhered to. -
Page 11: Important Safety Instructions
HIGH BRIGHTNESS PROJECTORS) in performing a task, and of measures to minimize the potential risk to themselves or other persons. Only Barco authorized SERVICE PERSONNEL, knowledgeable of such risks, are allowed to perform service functions inside the product enclosure. The term USER and OPERATOR refers to any person other than SERVICE PERSONNEL. - Page 12 Do not place flammable or combustible materials near the projector! • Barco large screen projection products are designed and manufactured to meet the most stringent safety regulations. This projector radiates heat on its external surfaces and from ventilation ducts during normal operation, which is both normal and safe.
- Page 13 CO2 or dry powder fire extinguishers. Never use water on an electrical fire. Always have service performed on this projector by authorized Barco service personnel. Always insist on genuine Barco replacement parts. Never use non- Barco replacement parts as they may degrade the safety of this projector.
- Page 14 Replacement parts: When replacement parts are required, be sure the service technician has used original Barco replacement parts or authorized replacement parts which have the same characteristics as the Barco original part. Unauthorized substitutions may result in degraded performance and reliability, fire, electric shock or other hazards.
-
Page 15: Product Safety Labels
Safety 1.3 Product Safety Labels Light beam related safety labels For G62-W9 Label image Label description Risk Group 2, IEC60825-1:2014. Do not look into the laser light. The extremely high brightness may cause permanent eye damage. IEC 60825-1:2014 CLASS 1 LASER PRODUCT RISK GROUP 2 Complies with 21 CFR 1040.10 and 1040.11 except fro conformance... -
Page 16: Risk Group 3 Safety
Safety 1.4 Risk Group 3 Safety 1.4.1 General considerations Notice on optical radiation from G62 Projector when it becomes Risk Group 3. • For RG3, no direct exposure to the beam shall be permitted. For RG3, operators shall control access to the beam within the hazard distance or install the product at a height that will prevent eye exposure within the hazard distance. - Page 17 Safety For example, projectors that have a HD greater than 1 m and emit light into an uncontrolled area where persons may be present should be positioned in accordance with “the fixed projector installation” parameters, resulting in a HD that does not extend into the audience area unless the beam is at least 2.0 meter above the floor level.
-
Page 18: Hd For Fully Enclosed Projection Systems
The LIP shall be installed by Barco or by a trained and Barco-authorized installer or shall only be transferred to laser light show variance holders. This is applicable for dealers and distributors since they may need to install the LIP (demo install) and/or they transfer (sell, rent, lease) the LIP. -
Page 19: Compliance
5000 diffuse cd/m² or 15000 LUX. 1.5 Compliance UK Compliance This product is fit for use in the UK. Authorised Representative: Barco UK Ltd Address: Building 329, Doncastle Road Bracknell RG12 8PE, Berkshire, United Kingdom R5914653 /02... - Page 20 Safety R5914653 /02...
-
Page 21: Product Overview
Product overview Main unit ............................22 R5914653 /02... -
Page 22: Main Unit
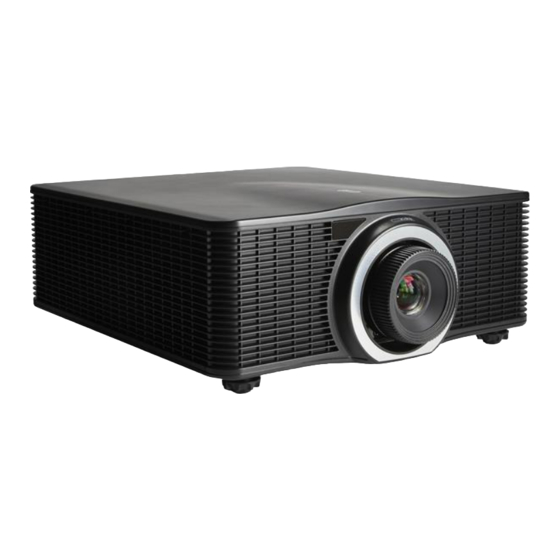
Product overview 2.1 Main unit Component locations Image 2–1 Remote receiver (Front) Projection lens DVI-D DC 12V HDBaseT HDMI OUT HDMI-2 IN HDMI-1 IN 3G-SDI IN 3D SYNC 3D SYNC RS232 REMOTE ETHERNET MENU EXIT INPUT LENS FOCUS ENTER Image 2–2 LED Status Indicator Control panel Input/Output (I/O) Panel... - Page 23 Product overview Airflow Image 2–3 R5914653 /02...
- Page 24 Product overview R5914653 /02...
-
Page 25: Input & Communication
Input & Communication Input/Output (I/O) Panel ........................26 Control panel..........................26 R5914653 /02... -
Page 26: Input/Output (I/O) Panel
Input & Communication 3.1 Input/Output (I/O) Panel Input and output ports location DVI-D DC 12V HDBaseT HDMI OUT HDMI-2 IN HDMI-1 IN 3G-SDI IN 3D SYNC 3D SYNC RS232 REMOTE ETHERNET Image 3–1 DC 12V connector Wired remote connector HDBaseT connector Network connector RJ45 HDMI out connector USB Type A connector... - Page 27 Input & Communication Button Function EXIT Return to previous menu or exit menu if at top level. ENTER Confirm the settings. INPUT Select an input source. ZOOM Adjust the image size. FOCUS Adjust the image focus. LEFT Navigate left through the menu. Navigate up through the menu.
- Page 28 Input & Communication R5914653 /02...
-
Page 29: Remote Control Unit (Rcu)
Remote Control Unit (RCU) RCU battery installation ........................30 Overview of the RCU ........................31 Projector Address (ID)........................31 Using the RCU ..........................32 R5914653 /02... -
Page 30: Rcu Battery Installation
Remote Control Unit (RCU) 4.1 RCU battery installation How to install the batteries of the Remote Control Unit Remove the cover by sliding it in the direction indicated by the arrow Insert two new AAA batteries (observe the polarity). Replace the cover. Image 4–1 Notes for the Remote Control Unit •... -
Page 31: Overview Of The Rcu
Remote Control Unit (RCU) 4.2 Overview of the RCU Button identification Button location Button Function Turn the projector on. Standby Turn the projector off. Number Input numbers (0-9) Info Display information on the source image. Set the projector address. Auto Automatically synchronize the projector to an input source. -
Page 32: Using The Rcu
Remote Control Unit (RCU) to the same number. The default ID code of the RCU (also known as the broadcast address) is 00. This specific address allows the RCU to control all projectors within its effective range. How to set the projector address on the RCU Keep ID Key pressed in. - Page 33 Remote Control Unit (RCU) Image 4–2 R5914653 /02...
- Page 34 Remote Control Unit (RCU) R5914653 /02...
-
Page 35: Powering On/Off The Projector
Powering On/Off the projector Powering On the projector ......................36 Powering Off the Projector......................36 This chapter assumes that the power cord and (all) signal cables are securely connected. For detailed instructions see installation manual. R5914653 /02... -
Page 36: Powering On The Projector
Powering On/Off the projector 5.1 Powering On the projector How to power On the projector Power on the AC switch (1) and wait until the power button on the control panel is solid red. Image 5–1 Turn on the projector by pressing the POWER button (2) on the control panel or the ON key (3) on the remote control. - Page 37 Powering On/Off the projector MENU EXIT INPUT LENS FOCUS ENTER Image 5–4 Press the POWER button or OFF key again to confirm, otherwise the message disappears after 5 seconds and the projector remains on. CAUTION: Don’t turn on the projector immediately after entering Standby mode. R5914653 /02...
- Page 38 Powering On/Off the projector R5914653 /02...
-
Page 39: User Controls
User controls On-Screen Display Menus......................40 R5914653 /02... -
Page 40: On-Screen Display Menus
User controls 6.1 On-Screen Display Menus About OSD The projector has On-Screen Display (OSD) menus that allow you to make image adjustments and change a variety of settings. Follow the steps below to use the OSD menu to configure the projector settings. How to operate To open the OSD menu, press Menu key on the control panel or remote control. -
Page 41: User Controls - Installation
User controls — Installation Lens ............................43 Orientation ...........................43 Aspect Ratio..........................43 Scale ............................44 Signal ............................44 Edge Mask...........................46 Geometry Correction ........................46 Multi-Projection ..........................48 Test Pattern..........................49 7.10 Freeze Screen..........................49 7.11 Reset............................49 R5914653 /02... - Page 42 User controls — Installation Overview INSTALLATION Lens Orientation Aspect Ratio Auto Scale Signal Edge Mask Geometric Correction Multi-Projection Test Pattern Freeze Screen Reset Enter Select Adjust Return Image 7–1 R5914653 /02...
-
Page 43: Lens
User controls — Installation 7.1 Lens About lens settings Configure the lens settings to adjust the image quality and position. Focus Adjust the focus of the image. Zoom Adjust the size of the projected image. Lens Shift Adjust the lens position to shift the projected area. Lens Memory This projector can save up to five lens settings, which records the lens position. -
Page 44: Scale
User controls — Installation • Letter boxing • Native Select Auto to display the detected image size. 7.4 Scale About scale Digitally scale the image size and position to fit onto the actual projection surface. Digital Zoom Digitally adjust the size of the projected image. •... - Page 45 User controls — Installation Note on backup input function: • Only HDMI1, HDMI2, DVI, and HDBaseT inputs support the Backup Input function. The 3G-SDI input does not support the Backup Input function. • To activate the Backup Input function, the conditions below must be met between two backup input sources (First Input and Second Input): Resolution, Horz Refresh (horizontal refresh rate), Color Space, and HDR data must be the same.
-
Page 46: Edge Mask
User controls — Installation • Due to Resolution/Color space/ Horizontal Refresh difference between two input sources, in some case, auto switch and resync may take seconds from HDMI1 to HDMI2 when HDMI1 signal is lost. HDMI Setup the projector’s HDMI ports. •... - Page 47 User controls — Installation Image 7–7 • Pincushion: Pincushion function is used to adjust the image with barrel or pincushion distortion. Horizontal: Correct the projected image with horizontal barrel or pincushion distortion Image 7–8 Vertical: Correct the projected image with vertical barrel or pincushion distortion. Image 7–9 •...
-
Page 48: Multi-Projection
User controls — Installation Overlap Grid Number: Set the blend overlap grid number. Gamma: Set the gamma value of the blend area to adjust the curvature of the blending effect. Width Blend area Gamma Image 7–11 Memory The projector allows the user to save up to five geometry memories, including the ones set directly on the projector and the ones configures via external software tool. -
Page 49: Test Pattern
User controls — Installation White Balance Adjust the white color performance of the projectors to have them looks as the same as possible. Advanced Color Adjust the advanced color settings of the projectors to unify the color performance. Lens Set up the lens of each projector to adjust the image focus, size, and position. Scale Digitally change image size and position of each projector. - Page 50 User controls — Installation R5914653 /02...
-
Page 51: User Control - Image Menu
User control — Image menu Color Mode ..........................52 Brightness............................52 Contrast............................52 Saturation ............................52 Tint ..............................52 Sharpness ...........................52 Gamma ............................53 White Balance ..........................53 Advanced Color..........................53 8.10 Advanced Image ..........................55 8.11 Save to User ..........................57 8.12 Apply to User ..........................57 8.13 Reset............................57 R5914653 /02... -
Page 52: Color Mode
User control — Image menu 8.1 Color Mode About color mode There are a number of color modes that are preset for different types of images. • Presentation: Best for displaying presentation slides in a bright room. • Bright: Best for the installations requiring high brightness images. •... -
Page 53: Gamma
User control — Image menu 8.7 Gamma About gamma Adjust the gamma levels of the image. The available options are: • 1.8, • 2.0, • Standard 2.2, • 2.4, • 2.6, • Graphic, • Video, • CRT(Vivid), • Enhanced (default), •... - Page 54 User control — Image menu • RGB (16 - 235), • REC709, • REC601 Wall Color Set the wall color of the projector to achieve best color performance for a specific wall. The available options are: • Off (default), • Blackboard, •...
-
Page 55: Advanced Image
User control — Image menu 8.10 Advanced Image About advanced image Configure advanced image settings to correctly project specific image formats for more complicated applications. Dynamic Contrast Set up the Dynamic Contrast to maximizing the contrast for dark content. • Dynamic Black: Enable the function to automatically adjust the contrast ratio for video sources. - Page 56 User control — Image menu PIP / PBP PIP/PBP (picture in picture/picture by picture) allows simultaneously displaying two images from two input sources. • PIP/PBP: Select the appropriate PIP/PBP mode or disable the function. Off: Disable PIP/PBP mode. PIP: Display one input source on the main screen and the other input source in an inset window. PBP: Display two images of the same size on the screen.
-
Page 57: Save To User
User control — Image menu PIP/BPB HDMI-1 HDMI-2 DVI-D 3G-SDI HDBaseT Matrix DVI-D — 3G-SDI — HDBaseT — • Sub Brightness: Adjust the luminous brightness of the sub image to adapt to different ambient light. • Sub Contrast: Adjust the contrast ratio of the sub image. •... - Page 58 User control — Image menu R5914653 /02...
-
Page 59: User Controls - Communication Menu
User controls — Communication menu Projector ID..........................60 Remote Setup ..........................60 Network Setup..........................60 Control............................61 Using the web control center ......................62 Using RS232 command by Telnet ....................63 Baud Rate............................63 Reset............................64 R5914653 /02... -
Page 60: Projector Id
User controls — Communication menu 9.1 Projector ID About projector ID Assign an remote code for the projector from 00 to 99. Use this code as the projector ID when controlling the projector by RS232, HDBaseT, Telnet or other control methods. 9.2 Remote Setup About remote setup Configure the settings of the Infra-Red (IR) remote control. -
Page 61: Control
User controls — Communication menu • DHCP: Turn on DHCP to automatically acquire IP address, subnet mask, gateway, and DNS. • IP Address: Assign the projector’s IP address. • Subnet Mask: Assign the projector’s subnet mask. • Gateway: Assign the projector’s gateway. •... -
Page 62: Using The Web Control Center
User controls — Communication menu Telnet Control the projector using RS232 commands though Telnet connection (port 3023). HTTP Control the projector with web browser (port 80). Reset Reset the function settings to default factory values. – Crestron is a registered trademark of Crestron Electronics, Inc. of the United States. –... -
Page 63: Using Rs232 Command By Telnet
User controls — Communication menu Directly connect the projector to a computer When a network is not available to you, connect the projector to you computer directly using a RJ-45 cable, and configure the network settings manually. Assign IP address to the projector •... -
Page 64: Reset
User controls — Communication menu • 9600 • 19200 • 38400 • 57600 • 115200 (default) 9.8 Reset About reset Reset all the communication settings to factory default values. R5914653 /02... -
Page 65: System Menu
System menu 10.1 Language ............................66 10.2 Date and Time..........................66 10.3 On Screen Display........................67 10.4 Logo Setup ..........................67 10.5 Schedule .............................67 10.6 Standby Mode ..........................70 10.7 Power Settings ..........................70 10.8 Light Source Settings........................70 10.9 Shutter............................70 10.10 Security ............................71 10.11 Backlight............................71 10.12 High Altitude..........................71 10.13 12V Trigger ..........................71 10.14 User Data ............................72 10.15 Reset............................72... -
Page 66: Language
System menu 10.1 Language About language Select a language for the OSD menu. The available languages are: • English, • Simplified Chinese, • French, • German, • Italian, • Japanese, • Korean, • Russian, • Spanish, • Portuguese, • Indonesian, •... -
Page 67: On Screen Display
System menu 10.3 On Screen Display About on screen display Set up the on screen display menus. Menu Location Select the menu location from Top Left, Top Right, Center, Bottom Left, and Bottom Right. Menu Transparency Set the menu transparency level. Menu Timer Set the length of time the menu displays on the screen. - Page 68 System menu Schedule Date and Time 2019/11/06 14:00 Schedule Mode View Today Monday Monday Power On + Tuesday Wednesday Thursday Friday Saturday Sunday Special Dates 2019/11/12 + Reset Schedule Enter Select Return Enter Exit Image 10–1 Date and Time Check or adjust the date and time for the projector. Schedule Mode Enable or disable the schedule function.
- Page 69 System menu • Event 01-08 / Event 09-16: Select an event record number, and set up the schedule details. Time: Set the time for the event. Function: Set the function. The available functions are Power Settings, Input Source, Light Source Mode, and Shutter.
-
Page 70: Standby Mode
System menu 10.6 Standby Mode About standby mode Setup the projector standby mode. • Standby Mode: Minimum power consumption (0.5 Watt) which does not allow network controlling. • Network Standby Mode: Low power consumption (< 2 Watt) which allows the LAN module to enter sleep mode and supports to be woken by Wake on LAN (WoL). -
Page 71: Security
System menu Fade-In This function allows the fading in effect when turning off shutter. The time for the fading effect can be adjusted from 0.5s to 5s. Fade-Out This function allows the fading out effect when turning on shutter. The time for the fading effect can be adjusted from 0.5s to 5s. -
Page 72: User Data
System menu 10.14 User Data About user data User can save the projector settings as user data and reload the settings later. • Save All Settings: Save all of the projector settings as user data. User can save up to 5 records. •... -
Page 73: Information Menu
Information menu 11.1 Projector information and status.....................74 R5914653 /02... -
Page 74: Projector Information And Status
Information menu 11.1 Projector information and status Overview View the projector information about its status and settings. The projector information is read only. • Projector Model Name Serial Number Total Projector Hours • System Status Standby Mode Light Source Mode Light Source Hours Temperature •... -
Page 75: Troubleshooting
Troubleshooting 12.1 Projector Problems ........................76 12.2 LED indication chart........................77 If you experience a problem with your projector, please refer to the following information. If a problem persists, please contact your local re-seller or service center. R5914653 /02... -
Page 76: Projector Problems
Troubleshooting 12.1 Projector Problems No image appears on-screen • Check if all the cables and the AC power are correctly connected. For more details, refer to the installation manual. • Check if the pins of the connectors are not crooked or broken. •... -
Page 77: Led Indication Chart
Troubleshooting Image is reversed • To reverse the image, enable rear projection by selecting “Installation > Orientation > Direction > Rear Projection” from the OSD menu. The projector stops responding to all controls • If possible, turn off the projector, then unplug the power cord and wait at least 60 seconds before reconnecting power. - Page 78 Troubleshooting Light LED Status LED AV Mute LED Message Orange Orange Orange Green Green Green Projector Steady Flash- Steady communication Firmware upgrade Flash- Flash- Error Steady (Over temperature) Error Flash- (Fan failure) Power key of the keypad is in steady red light when the projector enters standby mode. R5914653 /02...
-
Page 79: A Specifications
Specifications Specifications for G62-W9......................80 Specifications for G62-W11 ......................81 Dimensions of the G62........................83 Ceiling mount ..........................84 Compatibility modes ........................85 R5914653 /02... -
Page 80: Specifications For G62-W9
Specifications A.1 Specifications for G62-W9 Overview Projector type Single chip DLP laser phosphor projector Technology 0.67" Resolution 1,920 x 1,200 (WUXGA) Brightness 8,000 ANSI lumens 8,900 center lumens 9,500 ISO lumens Contrast ratio 1,200:1 sequential; 6,000:1 dynamic; Extreme black: 750,000:1... -
Page 81: Specifications For G62-W11
Standard accessories Power cord, wireless remote control Certifications CE, FCC Class A, cTUVUS, CCC, EAC, KCC, RCM, BIS, BSMI Warranty Limited 3 years parts and labor A.2 Specifications for G62-W11 Overview Projector type Single chip DLP laser phosphor projector Technology 0.67"... - Page 82 Specifications Color correction CLO (constant light output) Light source Laser phosphor Light source lifetime Up to 20,000hrs Light source warranty 20.000hrs or 3 years, whatever comes first Sealed DLP™ core Optical dowser laser dimming Orientation 360° rotation, no restrictions DMX 512 Active stereoscopic 3D Image processing Embedded warp &...
-
Page 83: Dimensions Of The G62
Power cord, wireless remote control Certifications CE, FCC Class A, cTUVUS, CCC, EAC, KCC, RCM, BIS, BSMI Warranty Limited 3 years parts and labor A.3 Dimensions of the G62 CAUTION: Avoid installing the projector near a heat source. Front view 242.0 111.3 73.6... -
Page 84: Ceiling Mount
Specifications Top view 484.0 529.0 509.0 Image A–3 Dimensions given in millimeters. Left view Image A–4 Dimensions given in millimeters. A.4 Ceiling mount About ceiling mount CAUTION: Be sure to use the correct screw size. Screw Length will vary depending on the thickness of the mounting plate. -
Page 85: Compatibility Modes
Specifications Projector mounting holes 280.0 140.0 100.0 100.0 310.0 310.0 99.0 99.0 4 - M6 x1.0P L10 280.0 Image A–5 Dimensions given in millimeters. A.5 Compatibility modes Timing table Signal Signal Format V sync (Hz) Resolution HDMI1/2 HDBaseT 3G-SDI type 640x350 640x400 640x480... - Page 86 Specifications Signal Signal Format V sync (Hz) Resolution HDMI1/2 HDBaseT 3G-SDI type SXGA 1152x864 1152x870 WXGA 1280x768 WXGA 1280x800 SXGA 1280x960 1280x1024 WXGA 1360x768 1366x768 SXGA+ 1400x1050 WXGA+ 1440x900 1440x900 1440x900 WXGA++ 1600x900 UXGA 1600x1200 1600x1200 WSXGA+ 1680x1050 WSXGA RB 1920X1200RB NTSC NTSC (M,...
- Page 87 Specifications Signal Signal Format V sync (Hz) Resolution HDMI1/2 HDBaseT 3G-SDI type 1080p 1920x1080 23,98 29,97 59,94 Manda- Frame Packing 1920x1080 23,98 tory 3D 1080p Frame Packing 1280x720 720p 59,94 Side by Side 1920x1080 1080i 50,94 Side by Side 1920x1080 23,98 1080p 59,9...
- Page 88 Specifications Signal Signal Format V sync (Hz) Resolution HDMI1/2 HDBaseT 3G-SDI type HDTV 1080p 1080p Ycb- 23.98 Cr422 10bit 29.97 HDTV 1080sF 1080sF Ycb- Cr422 10bit 29.97 3GA-SDI HDTV 1080p 1080p Ycb- Cr422 10bit 59.94 3GB-SDI HDTV 1080p 1080p Ycb- Cr422 10bit 59.94 With 352M...
-
Page 89: B Communication Protocols
Communication protocols R5914653 /02... -
Page 90: Serial Control
Communication protocols B.1 Serial control RS232 Configuration RS232 protocol 115200 bps (default) Baud Rate Data Length 8 bit Parity Check None Stop Bit 1 bit Flow Control None UART command list Installation menu Level 2 Level 3 Level 4 Level 5 Level 6 Default Uart Command... - Page 91 Communication protocols Level 2 Level 3 Level 4 Level 5 Level 6 Default Uart Command [CEMO2] Direction Front Front [REPJ0] Projection Projec- tion Rear [REPJ1] Projection Aspect Auto [ASPR0] Auto Ratio [ASPR1] [ASPR2] 16:9 [ASPR3] 16:10 Letter [ASPR4] Boxing [ASPR5] Native Scale Digital...
- Page 92 Communication protocols Level 2 Level 3 Level 4 Level 5 Level 6 Default Uart Command HDBa- [BKSI2] Display- [BKSI3] Port Resolution N.A. [BKSR?] Horz Refresh N.A. [BKSH?] Rate Color Space N.A. [BKSC?] Backup Input N.A. [BKIS?] Status [PHAS***] Phase [HPOS***] H.
- Page 93 Communication protocols Level 2 Level 3 Level 4 Level 5 Level 6 Default Uart Command Bottom Bottom Right Horz: [BRCX***] Horizontal Right Bottom Right Vert: [BRCY***] Vertical Grid Points [WGPG0] vanced [WGPG1] Warp [WGPG2] [WGPG3] [WGPG4] 17x17 Warp Inner [WWIG0] / [WWIG1] Off / On Warp [WWSG*]...
- Page 94 Communication protocols Level 2 Level 3 Level 4 Level 5 Level 6 Default Uart Command Memory [GMAG5] Clear Cancel Yes / [GMCG0] Memory Cancel Reset Yes / Cancel Cancel [GCRT1] Multi- Please check COMMUNICATION Projector Projec- \Projector ID tion Please check COMMUNICATION Remote \Remote Setup\Remote Code Code...
- Page 95 Communication protocols UART command list Image menu Level 2 Level 3 Level 4 Level 5 Default Uart Command Color mode Presentation Bright [DPMO0] Bright [DPMO1] Super Bright [DPMO2] Cinema [DPMO3] [DPMO4] sRGB [DPMO5] DICOM SIM. [DPMO6] Blending [DPMO7] [DPMO8] 2D High Speed [DPMO9] User [DPMO10]...
- Page 96 Communication protocols Level 2 Level 3 Level 4 Level 5 Default Uart Command REC601 [CSPA4] Wall Color [CCAG+WALL0] Auto Wall Color Yes / Cancel (dialog box) Blackboard [CCAG+WALL1] Light Yellow [CCAG+WALL2] Light Green [CCAG+WALL3] Light Blue [CCAG+WALL4] Pink [CCAG+WALL5] Gray [CCAG+WALL6] Custom Auto Test...
- Page 97 Communication protocols Level 2 Level 3 Level 4 Level 5 Default Uart Command Magenta Ref OE Color [HGMH***] table ,By Color Mode Saturation Ref OE Color [HGMS***] table ,By Color Mode Gain Ref OE Color [HGMG***] table ,By Color Mode Reset Yes / Cancel Cancel...
- Page 98 Communication protocols Level 2 Level 3 Level 4 Level 5 Default Uart Command Reset Yes / Cancel Cancel [TDRT1] (dialog box) PIP / PBP PIP / PBP [PIBP0] [PIBP1] [PIBP2] Main Source [MSRC0] HDMI1 [MSRC1] HDMI2 [MSRC2] DVI-D [MSRC3] Display Port [MSRC4] 3G-SDI [MSRC5]...
- Page 99 Communication protocols Level 2 Level 3 Level 4 Level 5 Default Uart Command User-Super [DPAU2] Bright User-Cinema [DPAU3] User-HDR [DPAU4] User-sRGB [DPAU5] User-DICOM [DPAU6] SIM. User-Blending [DPAU7] User-3D [DPAU8] User-2D High [DPAU9] Speed Reset Image Yes / Cancel Cancel [IMRT1] Settings (dialog box) UART command list Communication menu...
- Page 100 Communication protocols Level 2 Level 3 Level 4 Level 5 Default Uart Command Orientation [HKSB9] Custom [HKSB10] RGBCMY Multi-Projection [HKSB11] Reset Selective [HKSB12] Network Ethernet LAN Interface RJ-45 RJ-45 [LANI0] HDBaseT [LANI1] MAC Address N.A. [LMAC?] Network Status N.A. [LMNS?] DHCP Checkbox Unchecked...
- Page 101 Communication protocols Level 2 Level 3 Level 4 Level 5 Default Uart Command 57600 [SPBI6] 115200 [SPBI7] Serial Port Out 1200 115200 [SPBO0] 2400 [SPBO1] 4800 [SPBO2] 9600 [SPBO3] 19200 [SPBO4] 38400 [SPBO5] 57600 [SPBO6] 115200 [SPBO7] Multi Projector Sync Reset Yes / Cancel Cancel...
- Page 102 Communication protocols Level 2 Level 3 Level 4 Level 5 Default Uart Command UTC+13:00 [DTTZ1] UTC+12:45 [DTTZ2] UTC+12:00 [DTTZ3] UTC+11:00 [DTTZ4] UTC+10:30 [DTTZ5] UTC+10:00 [DTTZ6] UTC+09:30 [DTTZ7] UTC+09:00 [DTTZ8] UTC+08:45 [DTTZ9] UTC+08:00 [DTTZ10] UTC+07:00 [DTTZ11] UTC+06:30 [DTTZ12] UTC+06:00 [DTTZ13] UTC+05:45 [DTTZ14] UTC+05:30 [DTTZ15]...
- Page 103 Communication protocols Level 2 Level 3 Level 4 Level 5 Default Uart Command Menu [MNTP*] Transparency Menu Timer [METI0] [METI1] [METI2] [METI3] Show Message Checkbox Checked [SMSG0] / [SMSG1] Background Blue Logo [BGCL1] Black [BGCL2] White [BGCL3] Logo [BGCL0] Reset Yes / Cancel Cancel [BGRT1]...
- Page 104 Communication protocols Level 2 Level 3 Level 4 Level 5 Default Uart Command [SCW6 +MODE0]/ [SCW6 +MODE1] Event 01-08 Time - -:- - (If event is (Write Event) off) [SCW0 Event 09-16 +EVWR"$$,****, Function ##"] [SCW1 Event Off (Function = +EVWR"$$,****, Off) ##"] [SCW2...
- Page 105 Communication protocols Level 2 Level 3 Level 4 Level 5 Default Uart Command /[SCW5 +EVRD?] / [SCW6+EVRD?] SCW0 ~ SCW6 : Sunday ~ Saturday Reset Cancel SCW0 ~ SCW6 : Sunday to Saturday [SCW0 +EVRT*] , * = 1 ~ 16 (Reset Event 01 to Event 16) [SCW1+EVRT*]...
- Page 106 Communication protocols Level 2 Level 3 Level 4 Level 5 Default Uart Command , * = 0 ~ 6 (Sunday to Saturday) [SCW6+CPWD*] , * = 0 ~ 6 (Sunday to Saturday) Reset the day Cancel SCW0 ~ SCW6 : Sunday to Saturday [SCW0 +REST1] [SCW1...
- Page 107 Communication protocols Level 2 Level 3 Level 4 Level 5 Default Uart Command Memory 2 [UDSA1] Memory 3 [UDSA2] Memory 4 [UDSA3] Memory 5 [UDSA4] Load All Settings Memory 1 Memory 1 [UDLD0] Memory 2 [UDLD1] Memory 3 [UDLD2] Memory 4 [UDLD3] Memory 5 [UDLD4]...
- Page 108 Communication protocols Level 2 Level 3 UART Command Remote Code [PJAD?] Ethernet LAN Interface [LANI?] MAC Address [LMAC?] Network Status [LMNS?] DHCP [LDHC?] IP Address [LIPA?] Subnet Mask [LSUB?] Gateway [LGAT?] [DNSG?] Control Crestron [CREN?] Extron [EXEN?] PJ Link [PJEN?] [AXEN?] Telnet [TEEN?]...
- Page 109 Communication protocols Other UART Commands Range or Explanation Command [POWR1] Power On [POWR0] Power Off [PMUT1] AV Mute Enable [PMUT0] AV Mute Disable [FRZE1] Freeze Screen [FRZE0] Unfreeze Screen Power Off KEYG 50 KEYG 51 KEYG 52 KEYG 53 KEYG 54 KEYG 55 KEYG 56 KEYG 57...
-
Page 110: Lan
Communication protocols Range or Explanation Command Shutter(AV Mute) KEYG 24 USER 1 KEYG 70 USER 1 KEYG82 Pattern KEYG 71 Freeze can be released by menu key, exit key and direct source key. B.2 LAN LAN function Specifications Item Crestron RoomView, Port: 41794 Control system PJ-Link... - Page 111 Communication protocols Type Item Join Number Enter Digital 5156 Exit Digital 5155 Firmware Version Serial 5056 Freeze Off Digital 5106 Freeze On Digital 5105 IP Address Serial 5040 Lamp Hours Serial 5004 Lamp Mode Serial 5003 Left Digital 5153 Location Serial 5052 MAC Address...
- Page 112 Communication protocols PJ-Link command list Description Command Power control instruction POWR Power status query POWR? Input switch instruction INPT Input switch query INPT? Mute instruction AVMT Mute status query AVMT? Error status query ERST? Lamp number/lighting hour query LAMP? Input toggling list query INST? Projector name query NAME?
-
Page 113: C Environmental Information
Environmental information China RoHS compliance ......................114 Taiwan RoHS compliance......................115 Turkey RoHS compliance......................116 Disposal information ........................116 Production address........................117 Contact information........................117 Download Product Manual ......................117 R5914653 /02... -
Page 114: China Rohs Compliance
Electronic Products” (Also called RoHS of Chinese Mainland), the table below lists the names and contents of toxic and/or hazardous substances that Barco’s product may contain. The RoHS of Chinese Mainland is included in the MCV standard of the Ministry of Information Industry of China, in the section “Limit Requirements of toxic substances in Electronic Information Products”. -
Page 115: Taiwan Rohs Compliance
Chinese Mainland, marked with the Environmental Friendly Use Period (EFUP) logo. The number inside the EFUP logo that Barco uses (please refer to the photo) is based on the “General guidelines of environment-friendly use period of electronic information products”... -
Page 116: Turkey Rohs Compliance
備考3.〝—〞係指該項限用物質為排除項目。 Note 3:The “—” indicates that the restricted substance corresponds to the exemption. 備註: 此RoHS表格適用於以下產品型號: G62-W9, G62-W11 Hint: This RoHS table is suitable for following models: G62-W9, G62-W11 C.3 Turkey RoHS compliance Turkey RoHS compliance Türkiye Cumhuriyeti: AEEE Yönetmeliğine Uygundur. -
Page 117: Production Address
Registered office address: President Kennedypark 35, 8500 Kortrijk, Belgium Contact address: Beneluxpark 21, 8500 Kortrijk, Belgium Importers contact information To find your local importer, contact Barco directly or one of Barco's regional offices via the contact information given on Barco's web site, www.barco.com. C.7 Download Product Manual Download Product Manual Product manuals and documentation are available online at www.barco.com/td. - Page 118 Environmental information R5914653 /02...
-
Page 119: Index
Index Numbers/Symbols Date 66 12V trigger 71 Dimensions 83 Download Product manual 117 Address 117 Advanced color 53 Advanced image 55 Edge mask 46 Apply to user 57 Electrical shock 11 Aspect ratio 43 Enclosed projection 18 Environmental information 113 Disposal information 116 RoHS compliance China 114... - Page 120 Index ID 31 On screen display 67 Image menu 51 On/Off 35 Advanced color 53 Orientation 43 Advanced image 55 OSD 40 Apply to user 57 Overview 31 Brightness 52 Color mode 52 Contrast 52 Gamma 53 Personal injury 12 Reset 57 Power 35 Saturation 52...
- Page 121 Schedule menu Security 71 Serial control 90 Service 72 Sharpness 52 Shutter 70 Signal 44 Specifications 79 G62 W11 81 G62 W9 80 Standby mode 70 System Logo setup 67 On screen display 67 System menu 65 Language 66 Schedule 67...
- Page 122 Index R5914653 /02...
- Page 124 R5914653 /02 | 2022-01-26 www.barco.com...