
Related Manuals for 3Com 3100


Summary of Contents for 3Com 3100
- Page 1 Entry Telephone Guide ® NBX Networked Telephony Solutions System Release 6.0 Part Number 900-0338-01 Published July 2006 http://www.3com.com/...
- Page 2 3Com Corporation. 3Com Corporation reserves the right to revise this documentation and to make changes in content from time to time without obligation on the part of 3Com Corporation to provide notification of such revision or change.
-
Page 3: Table Of Contents
Setting Up Your Password and Voice Mail for the First Time NBX NetSet Utility Starting the NBX NetSet Utility Navigating the NBX NetSet Utility Setting Your Accessibility Options Quick Reference Guide 3100 E NTRY Telephone Buttons and Controls Hook Switch Features Hold a Call Transfer a Call... - Page 4 Forwarding Incoming Calls Putting a Call on Hold Transferring a Call Direct Mail Transfer Listening from Your 3Com Telephone Listening from Any Internal 3Com Telephone Listening from an External Location Managing Your Messages Information About Your Messages Viewing System Groups...
- Page 5 Establishing a Conference Call Disconnecting the Last Person That You Called More About Conference Calls Using Camp On Initiating Camp On With Call Transfer Initiating Direct Camp On More About Camp On Using Automatic Callback Initiating Automatic Callback More About Automatic Callback Setting the Volume ERSONALIZING Guidelines About Features on NBX Telephones...
- Page 6 Directed Call Pickup on a Specific Telephone Group Call Pickup Automatic Call Distribution Hunt Groups Calling Groups Group Membership Agent Role for 3Com Entry and Analog Telephones Supervisory Monitoring Terminology Call Privacy Starting a WhisperPage Session More About WhisperPage Paging the System...
- Page 7 Using Feature Codes ELEPHONE NSTALLATION AND Connecting the Telephone Attaching the 3100 Support Bracket Desktop Position Wall-Mount Position Moving Your Telephone Swapping Telephones Cleaning Your Telephone Troubleshooting Problems NDEX AINTENANCE...
-
Page 9: About This Guide
Devices documented in this guide include: Telephones 3Com 3100 Entry Telephone If the information in the release notes (readme.pdf) on the NBX Resource Pack CD differs from the information in this guide, follow the instructions in the release notes. -
Page 10: How To Use This Guide
In some business environments, this person may be a switchboard operator. User A person who has a single 3Com Telephone or an analog telephone connected to the NBX system through an ATC card or the single-port ATA device. -
Page 11: Documentation
Table 3 Table 3 Icons Documentation The documentation set for 3Com NBX Networked Telephony Solutions is designed to help NBX telephone users, installers, and administrators maximize the full potential of the system. The NBX Resource Pack CD contains many guides to the NBX products and their related 3Com applications. - Page 12 BOUT UIDE Page number As always, please address all questions regarding the NBX hardware and software to your 3Com NBX Voice-Authorized Partner.
-
Page 13: Getting Started
As soon as you are given a telephone and extension number, you need to set up a password and record your name announcement and personal greeting. This chapter covers these topics: For how to access NBX® features from an analog telephone, set your password as described next and then see the NBX Feature Codes Guide in the NBX NetSet™... - Page 14 If your system uses a voice messaging application other than NBX Messaging , use this code sequence to set your password for the NBX NetSet utility. 3Com recommends that you use the same password for the NBX NetSet utility and your messaging application.
-
Page 15: Nbx Netset Utility
If your system uses a voice messaging application other than NBX Messaging , use this code sequence to set your password for the NBX NetSet utility. 3Com recommends that you use the same password for the NBX NetSet utility and your messaging application. -
Page 16: Starting The Nbx Netset Utility
1: G HAPTER ETTING TARTED standard and enhanced features that you can monitor and change in the NBX NetSet utility. See If your NBX system uses a messaging application other than NBX Messaging, off-site notification and other voice messaging features are available through your messaging application. -
Page 17: Navigating The Nbx Netset Utility
Navigating the NBX Once you log in to the NBX NetSet utility, you can easily locate the NetSet Utility information you need to use your NBX telephone features. Start by clicking the category you want in the left-hand column. Tabs indicating the specific topics for this category appear at the top of the NBX NetSet window. - Page 18 1: G HAPTER ETTING TARTED...
-
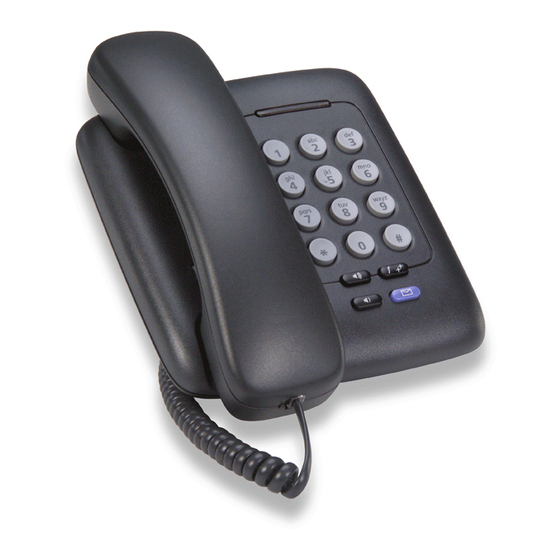
Page 19: Om 3100 Entry Telephone
This chapter describes the buttons, controls, and features on the 3Com® 3100 Entry Telephone. The chapter covers these topics: Telephone Buttons and Controls Hook Switch Features For how these features work on an analog telephone that is connected to the NBX® system, see the NBX Feature Codes Guide for Analog Telephones, which you can access by going to Resources >... -
Page 20: Telephone Buttons And Controls
“Setting the Volume” 5 Message button — Accesses your voice mail messages through the NBX Messaging system. See NTRY ELEPHONE shows the buttons and controls on the 3Com 3100 Entry “Feature Codes with 3Com Telephones” Chapter “Listening to NBX Messages” Chapter... -
Page 21: Hook Switch Features
See 8 Handset Hook Switch Quickly press and release the hook switch on the 3Com Entry Telephone Features to hold a call, transfer a call, or establish a conference call. This is sometimes called hook flash. - Page 22 2: 3C 3100 E HAPTER NTRY ELEPHONE Follow these rules for timing the press and release of the hook switch: If you press and then release the hook switch too quickly, the system ignores the signal. If you press and then hold the hook switch for too long, the system interprets that you have hung up and returns you to dial tone.
-
Page 23: Nbx Messaging
NBX M This chapter describes the NBX messaging features. It covers these topics: NBX Messaging A key component of the NBX Networked Telephony Solutions is the Components NBX Messaging system, which includes voice mail, off-site notification, and several administrative features. Voice mail allows callers to leave voice messages in your voice mailbox when you are not able to answer your telephone. -
Page 24: Changing Your Password
Use the feature code method described in and change the NBX NetSet utility password. 3Com recommends that you use the same password for your voice messaging system and for the NBX NetSet utility. “Setting Up Your Chapter 1 for details. -
Page 25: Security Tips
Security Tips Changing Your You set name announcement and personal greeting when you first set Name your voice mail. See Announcement and for the First Time” Personal Greetings ensure that callers hear up-to-date information. You can record up to five personal greetings and choose which to use from the telephone. -
Page 26: Listening To Nbx Messages
1; you can re-record it through the phone. greeting. Chapter On a 3Com 3100 Entry Telephone — The indicator bar above the key pad is lit. On an analog telephone — Pick up the handset. If you hear the New Messages Tone (rapid stutter tone), you have new messages or messages that you have listened to but have not yet saved or deleted. -
Page 27: Listening From Your Computer
2 At the prompt, dial your password and press #. 3 See your messages. Listening from Any To listen to your messages from any 3Com Telephone other than your Internal 3Com own within your NBX system: Telephone 1 Pick up the handset and press the Message button. -
Page 28: Managing Your Messages
3: NBX M HAPTER ESSAGING Managing Your Use these buttons to manage your messages: Messages Press Press 2 to save the message. Press 3 to delete the message from your mailbox. You cannot retrieve a message after you delete it. Press 4 to reply to the message. -
Page 29: Replying To A Message
Replying to a You can send a reply to a voice mail message, provided that the NBX Message system has received the necessary caller ID information. If you receive a message that is marked Private, you can reply to the originator, but you cannot forward the message to others. -
Page 30: Creating And Sending A Message
3: NBX M HAPTER ESSAGING Press * to cancel your message. 5 When you are ready to forward the message, press 1. 6 Dial one of these destination numbers plus #: For valid site codes in your organization, see your administrator. 7 To forward the message to several recipients, dial each destination number followed by #. -
Page 31: Using Voice Mail Group Lists
For valid site codes in your organization, see your administrator. 7 To send the message to several recipients, dial each destination number followed by #. 8 After the last destination number and its #, press # again to send your message. - Page 32 3: NBX M HAPTER ESSAGING To create a personal voice mail list through the telephone: 1 Log in to your mailbox at your telephone or remotely. 2 Dial 9 for Mailbox Options. 3 Dial 3 for Group Lists, and then 2 for Create Group. 4 Dial a 2-digit number, 01–99, which becomes the Group Number.
-
Page 33: Modifying Or Deleting Personal Groups
4 Enter a Name for the new group. 5 Enter any VPIM extensions in the VPIMs box. 6 Select members from the Non-Members list and move them to the Members list by clicking the left arrow. 7 Click Apply and OK to complete the list. Modifying or You can review your Personal Voice Mail Groups, add members, or delete Deleting Personal... -
Page 34: Marking A Message As Private Or Urgent
3: NBX M HAPTER ESSAGING 6 When you have added or deleted all of the destination numbers, press: OR hang up. To review or modify a Personal Voice Mail Group from the NBX NetSet utility: 1 Log in the NBX NetSet utility and go to NBX Voice Mail Settings > Personal Group List. -
Page 35: Other Ways To Manage Your Voice Mail Messages
1 Follow the steps in 2 In step 4 of those instructions, press 9. 3 To mark the message Urgent, press 1. To mark the message Private, press 2. 4 To send the marked message, press 1, or listen to the prompts for other choices. -
Page 36: Phantom Mailbox
3: NBX M HAPTER ESSAGING When you create the personal greeting, remember to tell callers that they cannot leave messages in this voice mailbox. For instructions on changing the personal greeting, see Personal Greetings” In addition to preventing a caller from leaving a message, a greeting-only mailbox does not allow anyone to forward or create and send a message to it or reply to a message that was sent from its extension Avoid adding a greeting-only mailbox to a personal voice mail group list. - Page 37 Other Kinds of Mailboxes assigns to the appropriate sales people the ability to listen to, forward, or otherwise handle all messages that are directed to the group mailbox.
- Page 38 3: NBX M HAPTER ESSAGING...
-
Page 39: Standard Features
This chapter describes standard features of the NBX® Telephones. It covers these topics: For help on accessing NBX features from an analog telephone or a third-party, SIP-based IP Telephone, see the applicable NBX Feature Codes Guide in the NBX NetSet™ utility. If your system uses a messaging application other than NBX Messaging, use the documentation for your messaging application instead of the instructions in this chapter. -
Page 40: Dialing A Call
2 Dial the number. 3 When you finish speaking, hang up the handset. Redialing a Call On a 3Com Entry Telephone: Forwarding You can choose when and where to forward unanswered incoming calls. Incoming Calls Unanswered calls that come in directly to your extension go to a call coverage point. -
Page 41: Call Coverage Points
NBX NetSet utility to see your call forwarding settings. Forward to Mail From the telephone, you can set your 3Com Telephone so that all incoming calls go directly to your default call coverage point, usually your voice mailbox. You can change the destination to the Auto Attendant or receptionist or a different telephone number. - Page 42 All Calls to VM. When Forward to Mail is in effect, your telephone rings once before forwarding the call to your default call coverage point. On a 3Com Entry Telephone: 1 Pick up the handset. 2 Press Feature + 440.
-
Page 43: Setting Call Forward From The Nbx Netset Utility
Call Forward Busy To set Call Forward Busy: 1 Pick up the handset, and press Feature + 467. 2 Dial the number that you want to forward calls to and press . 3 To turn off Call Forward Busy, pick up the handset and press Feature + 467 again. - Page 44 4: S HAPTER TANDARD EATURES 3 Select the call coverage point: The number that you choose may be limited by your call permissions. To view your permissions, go to My Calling Privileges > Call Permissions. 4 Click Apply to enter your changes. If you select Forward to voicemail box, the caller can leave a message.
-
Page 45: Call Forward Precedence
Override To set the call forward override: 1 Log in to the NBX NetSet utility and go to Call Forward > Call Forward Override. 2 Select your call forward conditions: If you select Call Forward All, calls will not ring at all on your extension and will be immediately forwarded to the extension or external phone number you specify in the box. -
Page 46: Putting A Call On Hold
Putting a Call You can put a call on hold for any reason. on Hold On a 3Com 3100 Entry Telephone: 1 Press and release the hook switch. 2 To return to the call, press and release the hook switch again. -
Page 47: Announced (Screened) Transfer
If the recipient wants to take the call, hang up the handset to complete the transfer. If you are on a 3Com 3100 Entry Telephone and the recipient does not want to take the call, press and release the hook switch to disconnect the attempted transfer and retrieve the original call. -
Page 48: Establishing A Conference Call
3Com SIP Conference Server. For more information on making Conference calls with SIP enabled, see your NBX administrator. On 3Com Telephones, either press and release the hook switch or use the Feature Code. From a 3Com Entry Telephone, follow these steps: 1 Dial a call, or receive a call from someone else. -
Page 49: Disconnecting The Last Person That You Called
This feature is helpful if, when you add a party, That You Called your call is answered by someone else. On a 3Com Entry Telephone or a telephone that does not have a button programmed for Conference Drop: 1 Press Feature + 431. -
Page 50: Initiating Camp On With Call Transfer
In this example, the user at extension 1004 simply initiates Camp On after receiving the call from extension 1001. Initiating Camp On If you have a 3Com Basic, Business, or Manager Telephone, or Attendant With Call Transfer Console, you can initiate Camp On with Call Transfer to queue a call to an in use destination extension. -
Page 51: Initiating Direct Camp On
You can initiate Camp On to directly queue a call on to a destination Camp On extension that is in use or busy. On a 3Com Entry Telephone: 1 While on a call, press , and Feature + 468. 2 Enter the three-digit or four-digit extension that you want to Camp On. - Page 52 4: S HAPTER TANDARD EATURES For additional tips and considerations on using Camp On, see your NBX system administrator. You can initiate a Camp On call only to an internal NBX extension. However, the originating call can originate from either an external or internal number.
-
Page 53: Using Automatic Callback
You can initiate Automatic Callback while making a direct call to an Callback extension that is in use or unanswered. On a 3Com Entry Telephone: 1 While on a call to an extension that is in use or unanswered, press , and Feature + 469. -
Page 54: Setting The Volume
NBX system administrator. Setting the Volume On any 3Com Telephone, use the Volume Control buttons to raise or lower one of these volumes: for a call back. The range for this timer is 1 minute to 24 hours with the default being 12 hours. - Page 55 Setting the Volume ringing, until the volume is at the level that you prefer. To read how ringer volume is different from ringer tone, see “Ringer Tones” Chapter Handset Volume — To raise or lower the volume of the dial tone or the sound that you hear when you are using the handset, pick up the handset and then press the up or down Volume Control button repeatedly until the volume is at the level that you prefer.
- Page 56 4: S HAPTER TANDARD EATURES...
-
Page 57: Personalizing Your Telephone
Your Networked Telephony System has many features that can make your telephone easier to use. This chapter describes: For help on accessing NBX features from an analog telephone, see the NBX Feature Codes Guide for Analog Telephones in the NBX NetSet utility. -
Page 58: Ringer Tones
ERSONALIZING Ringer Tones To help you to distinguish the ring tone of your 3Com telephone from the sound of other phones, use the NBX NetSet utility to select one of nine ringing tones. You can also choose Silent Ring to disable audible ringing. -
Page 59: System-Wide Speed Dials
To assign or change a personal speed dial number: 1 Log in to the NBX NetSet utility and go to Directory > Personal Speed Dial. 2 In the Personal Speed Dial page, select an unassigned speed dial ID number, or select the speed dial ID number for which you want to change the speed dial number. -
Page 60: Printing Speed Dial Lists
5: P HAPTER ERSONALIZING Printing You may find it useful to have a paper list of personal or system speed Speed Dial Lists dials. To print a list of speed dials: 1 Log in to the NBX NetSet utility and go to Directory > Personal Speed Dial or System-wide Speed Dial. - Page 61 5 In the Number/Address field: If you selected Pager for Method in step 4: Enter a pager number. Do not use parentheses, hyphens, or spaces. Ask your administrator if you need to include the area code and any other digits that your system needs to dial an outside number, such as 9, 8, 1, or 0.
- Page 62 5: P HAPTER ERSONALIZING 6 From the Interval drop-down list box, select the number of minutes that you want the system to wait after each attempt before it moves to the next attempt. The “best” time interval depends on the Attempt method that you choose.
- Page 63 If you specify EMail for the first attempt: Attempt Method E-mail and then you configure attempt: 2 through 5 as E-mail 2 through 5 as Pager 2 through 5 as VoiceMail If you specify Pager or VoiceMail for the first attempt: Attempt Method Pager or...
-
Page 64: Managing Off-Site Notification Using The Telephone
5: P HAPTER ERSONALIZING Resetting the Off-Site Notification Cycle When you log in to your voice mailbox and hang up or log out (regardless of whether you listen to or delete messages), you start the off-site notification cycle again. You will be notified about the next message that comes into your voice mailbox. -
Page 65: Preventing Unauthorized Use Of Your Telephone
To view your current Do Not Disturb setting even if you do not have a 3Com Telephone or if you are away from your desk, log in to the NBX NetSet utility and go to My Calling Privileges > Feature Settings. -
Page 66: Call Permissions
My Calling Privileges > Call Permissions. Class of Service The Class of Service Override feature allows you to apply the features Override of your own 3Com Telephone temporarily to another 3Com Telephone on the same local network. Example: ELEPHONE When Telephone Locking is activated, a person using your telephone... -
Page 67: Using A Headset
If your system uses a messaging application other than NBX Messaging, use the documentation for your messaging application instead of these instructions. To activate the one-call-only Class of Service Override from a 3Com Telephone: 1 Pick up the handset. 2 Press Feature + 433. -
Page 68: Returning To The Headset After A Long Delay
If the handset is on hook, pick it up, set it on your desk, and begin to speak. On a 3Com Entry Telephone or an analog telephone, hang up the handset or press Feature + 111. The headset amplifier buttons for Mute and On are both set to On. - Page 69 buttons on the amplifier to Off and hang up the handset on your telephone. When you are ready to receive calls again, set up the headset for receiving calls: 1 Pick up the handset on your telephone and set it on your desk. 2 Put on the headset.
- Page 70 5: P HAPTER ERSONALIZING ELEPHONE...
-
Page 71: Getting More From Your Telephone System
ETTING ELEPHONE This chapter covers these topics: Listening to Your Messages in Your E-mail Account (Billing) Codes Caller ID Call Pickup Automatic Call Distribution Groups, Hunt Groups, and Calling Groups Supervisory Monitoring WhisperPage Call Park Paging Configurable Operators Using Message Waiting Indicator to Telephone Dialing a Call to a Remote Office Using Pulse Dialing Additional Applications... -
Page 72: Listening To Your Messages In Your E-Mail
To enter a forced account code for an outgoing external call: 1 Dial the phone number. For a 3Com Entry Telephone or analog telephone, you hear the feature tone as the system waits for the required account code. 2 Dial the account code that has been assigned by your administrator, and... -
Page 73: Caller Id
CLIR settings on your telephone to override this option. On a 3Com Entry Telephone or analog telephone, if the account code is incorrect you may have to dial the phone number, dial the correct account code, and press again. -
Page 74: Call Pickup
6: G HAPTER ETTING ORE FROM CLIR for All External Calls To enable CLIR-All for all calls from your telephone: 1 Pick up the handset, and press Feature + 889. The Confirmation Tone plays. 2 Dial the number that you want to call. The NBX system does not send caller ID information on this call or any future calls until you disable this feature. -
Page 75: Directed Call Pickup On A Specific Telephone
To view the list of Call Pickup groups of which you are a member: 1 Log in to the NBX NetSet Utility and go to System Group Settings > Call Pickup. 2 Click the group name that you want to view from the Call Pickup Group list to view the members of that group. -
Page 76: Automatic Call Distribution
An agent becomes available to receive ACD calls by logging in to the ACD group. To log in to an ACD group using your 3Com Telephone: 1 Pick up the handset. 2 Press Feature + the feature code for the ACD group. Your administrator can tell you which feature code to use. - Page 77 Automatic Call Distribution Groups, Hunt Groups, and Calling Groups Viewing ACD User Status Using the NBX NetSet Utility, go to Group Membership > ACD Groups to see each ACD group that you are a member of. Click each column heading to arrange the information in ascending or descending order. Extension —...
-
Page 78: Hunt Groups
6: G HAPTER ETTING ORE FROM Wrap-Up Time Wrap-Up Time is a feature that allows time for an agent to complete follow-up actions after a call. If this feature is enabled by the ACD administrator, you can activate Wrap-Up Time once per call for a duration specified by the administrator. - Page 79 If you are in a dynamic hunt group, you must log in to the group to be part of it. To log in to a dynamic hunt group using your 3Com Telephone: 1 Pick up the handset. 2 Press Feature + the feature code for the hunt group. Your administrator can tell you which feature code to use.
-
Page 80: Calling Groups
6: G HAPTER ETTING ORE FROM 3 Dial the hunt group password. 4 Hang up the telephone. To log in to a dynamic hunt group using the NBX NetSet utility: 1 Go to Group Memberships > Hunt Groups. 2 Select the hunt group to which you want to log in. 3 Click Login. -
Page 81: Group Membership
Figure 3 Figure 3 Sample Calling Group Configuration 1 Incoming Telephone Call 2 Telephone #1 3 Telephone #2 4 Telephone #3 5 After a specified number of rings with no answer 6 Receptionist Group Membership To view the list of users that belong to a calling group: 1 Go to Group Membership >... -
Page 82: Agent Role For 3Com Entry And Analog Telephones
Your organization may be legally required to add an announcement to tell callers that their call may be monitored. Agent Role for 3Com 3Com telephones that do not have a display panel and appropriate soft Entry and Analog buttons such as, the 3Com Entry Telephone or an analog telephone, can Telephones operate only as endpoint devices for Supervisory Monitoring. -
Page 83: Call Privacy
Supervisory Monitoring monitoring domain that has the agent (user) listed. The supervisor must use a 3Com Telephone with a display panel and appropriate soft buttons; not a 3Com Entry Telephone, 3Com Cordless Telephone, or an analog telephone. Customers — are people who make an incoming call to an agent (supervisory monitoring domain member). -
Page 84: Whisperpage
6: G HAPTER ETTING ORE FROM In the case of an incoming call, Call Privacy cannot be activated while the session is alerting. In this case, you must answer the incoming call before activating Call Privacy. To deactivate (toggle off) Call Privacy: While Call Privacy is on, press Feature + 428 again. -
Page 85: Starting A Whisperpage Session
The NBX NetSet administrator can enable or disable the alert tone and specify the Decline Time, which ranges from 0 to 9.9 seconds. For additional tips and considerations on using WhisperPage, see About WhisperPage” Starting a WhisperPage Session 1 Pick up the handset. 2 Press , and Feature + 426. -
Page 86: Call Park
Use the internal paging feature, the external paging feature, or both, to announce the call. The recipient can retrieve the call from any 3Com telephone or analog telephone by dialing the Call Park extension that you give during your announcement. -
Page 87: Paging
Paging is the general term used to describe the act of broadcasting a voice message through audio speakers. The 3Com 3100 Entry Telephone does not have a speaker. You can broadcast pages to other 3Com Telephones on your system that do have speakers. -
Page 88: Paging The System
Paging codes, as described in for each destination. Table 6 Paging Codes To page, perform the following steps using your 3Com Telephone: 1 Pick up the handset. 2 Dial the appropriate paging code on your system. 3 Speak the broadcast message into your handset and hang up. -
Page 89: Configurable Operators
2 Dial the appropriate extension to page the zone. 3 Speak the broadcast message into your handset. 4 Hang up. 3Com Cordless Telephones, 3Com Entry Telephones, and analog telephones can initiate but cannot receive a zone page. Configurable The Configurable Operators feature gives a caller who is directed to voice Operators mail the option of going to another destination. -
Page 90: Configuring The Operators
6: G HAPTER ETTING ORE FROM Configuring the You can view the operators’ settings, and modify those settings if your Operators administrator allows it. The operator’s call-handling rules (such as call coverage) may apply to the voice mail caller. Also, you must have external-to-external permissions in order for transfers to external phone numbers to complete successfully. -
Page 91: Using Message Waiting Indicator To Telephone
3 The display panel on your 3Com Telephone shows Success. The Confirmation Tone plays. Retrieving an MWI To receive and retrieve an MWI message, you must have a 3Com Message Telephone with a display panel and a programmable access button with status light configured for MWI Retrieve. -
Page 92: Dialing A Call To A Remote Office
6: G HAPTER ETTING ORE FROM You can cancel an MWI message only from the same extension from which you sent the MWI message. To cancel an MWI message: 1 Pick up the handset and press Feature + 413. The Feature Entry Tone plays. -
Page 93: Using Site Codes
Figure 4 Using Unique Extensions to Dial Remote Offices 1 NBX System in Chicago Extensions: 1000–1999 2 Wide Area Network (WAN) 3 NBX System in Atlanta Extensions: 2000–2999 4 NBX System in Dallas Extensions: 3000–3999 Using Site Codes If some users have overlapping telephone extensions, your administrator can configure your telephone system to use site codes for you to dial people at remote offices. -
Page 94: Using Pulse Dialing
6: G HAPTER ETTING ORE FROM Figure 5 Using Site Codes to Dial Remote Offices 1 NBX System in Chicago 2 Wide Area Network (WAN) 3 NBX System in Atlanta 4 NBX System in Dallas Using Pulse Dialing In some locations, analog telephone users must dial telephone calls using pulse dialing instead of tone dialing (also called Dual Tone Multi Frequency, or DTMF, dialing). -
Page 95: Additional Applications
To change from pulse dialing to DTMF during a call: 1 Press Feature + 891. 2 Your connection is switched from pulse to tone (DTMF) for the remainder of the call. When you hang up, the port you were using on the Analog Line Card reverts to pulse dialing mode. - Page 96 6: G HAPTER ETTING ORE FROM ELEPHONE YSTEM...
-
Page 97: Feature Codes
SIP-based IP telephone, see the applicable NBX Feature Codes Guide in the NBX NetSet™ utility. NBX Tones As you use your 3Com Telephone to receive voice mail and use the feature codes on the NBX system, you hear these tones: EATURE... -
Page 98: Feature Codes With 3Com Telephones
A large number of telephone features are available by pressing the 3Com Telephones Feature button on a 3Com telephone and entering a three-digit feature code. These feature codes are listed in Error Tone — You hear the “fast busy” tone, also called the “congestion”... -
Page 99: 3Com Entry Telephone
3Com Entry Some of the features that are listed in Telephone Flash on a 3Com Entry Telephone like Hold, Transfer, and Conference. For all other NBX features, use the preprogrammed Feature button and the feature codes listed in Using Feature... - Page 100 7: F HAPTER EATURE ODES Table 7 NBX Feature Codes (continued) Feature Caller ID Restriction (CLIR — All) — On/Off Caller ID Restriction — for Next External Call Only Camp On — Direct Class of Service Override Conference Call — Add Conference Call —...
- Page 101 Table 7 NBX Feature Codes (continued) Feature Pulse to Tone Redial Release Speed Dial — Personal List F + personal speed dial number Speed Dial — System-Wide List Transfer Volume Up or Down WhisperPage Wrap-Up Time Feature Code Make or receive a call + F + 891 F + 401 F + 111 F + system-wide speed dial number...
- Page 102 7: F HAPTER EATURE ODES...
-
Page 103: Nstallation And
Although the connector layout varies between telephones, all 3Com Telephone telephones and attendant consoles use these symbols to identify the connectors: Figure 6 Connection details for each type of 3Com device are listed on the packing sheet that is shipped with the device. ELEPHONE NSTALLATION AND AINTENANCE... - Page 104 6 Tabs for the support bracket AINTENANCE For information about the underside of each 3Com Telephone, and for information about how to connect any 3Com Telephone or Attendant Console to a Power over Ethernet source, see the packing sheet that comes with the device.
-
Page 105: Attaching The 3100 Support Bracket
The 3100 support bracket is common to the following devices: Support Bracket The 3100 support bracket can be attached in desktop or wall mount positions. Tabs on the underside of the telephone slip into slots on the bracket, and the opposite mounting points snap into place. Secure the bracket to the telephone with screws. -
Page 106: Wall-Mount Position
Swapping Because your extension number and personal settings are associated with Telephones your physical telephone, only your administrator can move phone extension settings from one telephone to another. AINTENANCE shows how to install the support bracket on an 3Com 3100... -
Page 107: Cleaning Your Telephone
Cleaning Your Always unplug your telephone from the power source and from the Telephone network before you clean it. Use a soft cloth dampened with mild detergent. WARNING: Failure to unplug the telephone before you clean it could result in electrical shock. Troubleshooting Table 8 Problems... - Page 108 After I call another user in my organization, I hear a tone but no ringing. On my 3Com Business Telephone or 3Com Manager’s Telephone, all incoming internal calls come over my speaker phone.
- Page 109 57 billing and account codes 72 blocking internal and external ID 73 unauthorized outbound calls 65 bracket 3100, telephone support 105 branch offices, calling 92 broadcasting announcements 87, 88 busy line (call forwarding) 41 buttons 3100 Entry Telephone 20...
- Page 110 10 CoS override (feature code) 100 creating voice mail messages 30 customer (supervisory monitoring) 83 dial tone 97 troubleshooting a 3Com Telephone 107 dialing calls other methods 40 redial 40 release with headset 67 switching from pulse to tone 94...
- Page 111 33 group voice mailbox 36 handset volume 55 headset using 67 volume 55 hold 3100 Entry Telephone 46 introduction 46 hunt groups and the Do Not Disturb feature 65 calling groups 80 dynamic 79 introduction 78 logging in to or out of 80...
- Page 112 NDEX sending 91 message waiting indicators 3100 Entry Telephones 20, 26 messages creating and sending 30 forwarding 29 listening, from a remote location 27 listening, from telephone 27 listening, NBX NetSet utility 26 maximum length 24 private 34 replying to 29...
- Page 113 (call forwarding) 41 ringer tone, choosing 58 volume 54 ringing Do Not Disturb 64 RJ-11 jack caution, avoiding use with 3Com Telephones 104 RJ-45 jack caution, using instead of RJ11 104 security passwords 24, 25 preventing unauthorized outbound calls 65...
- Page 114 NDEX wall-mount bracket 106 whisperpage 84 (feature code) 101 access privileges 84 wrap-up time 78 zone paging 87...