3Com NBX 1105 Telephone Manual
3com business telephone telephone guide
Hide thumbs
Also See for NBX 1105:
- Telephone manual (96 pages) ,
- Telephone manual (154 pages) ,
- Telephone manual (96 pages)
Table of Contents
Advertisement
Quick Links
Advertisement
Table of Contents
Troubleshooting

Related Manuals for 3Com NBX 1105


Summary of Contents for 3Com NBX 1105
- Page 1 Telephones Attendant Consoles http://www.3com.com/ Part No. 900-0079-01 Published: 09-2001 Telephone Guide ® NBX 1102 Business Telephone NBX 2102 Business Telephone NBX 2102-IR Business Telephone NBX 2101 Basic Telephone NBX 1105 Attendant Console NBX Complement Attendant Software...
- Page 2 3Com Corporation reserves the right to revise this documentation and to make changes in content from time to time without obligation on the part of 3Com Corporation to provide notification of such revision or change. 3Com Corporation provides this documentation without warranty, term, or condition of any kind, either implied or expressed, including, but not limited to, the implied warranties, terms, or conditions of merchantability, satisfactory quality, and fitness for a particular purpose.
-
Page 3: Table Of Contents
ONTENTS BOUT UIDE Conventions Documentation ETTING TARTED Setting Up Your Voice Mail The NetSet Utility Quick Reference Sheet NBX B USINESS ELEPHONES Telephone Buttons and Controls Status Lights on the NBX Business Telephone Programmable Access Buttons NBX B ASIC ELEPHONE Telephone Buttons and Controls Status Icons on the NBX Basic Telephone Programmable Access Buttons... - Page 4 Greeting-Only Mailbox Phantom Mailbox Group Mailbox TANDARD EATURES Setting the Volume Dialing a Call Calling Inside Your Organization Dialing an External Call Redialing a Call Answering a Call Creating Your Call Forward Path Placing a Call on Hold Transferring a Call Establishing a Conference Call ERSONALIZING Label Makers for Telephones...
- Page 5 Hunt Groups and Calling Groups Call Park Paging Dialing a Call to a Remote Office Bridged Extensions Delayed Ringing Pulse Dialing TTENDANT ONSOLES NBX 1105 Attendant Console Complement Attendant Software ELEPHONE NSTALLATION ROUBLESHOOTING Connecting the Telephone Moving Your Telephone Swapping Telephones Cleaning Your Telephone...
- Page 7 This guide is intended for anyone using NBX Telephones, the NBX 1105 Attendant Console, or the NBX Complement Attendant Software. It includes information about using the NBX Voice Mail system and the NBX NetSet If the information in the release notes (readme.pdf) on the Resource Pack CD differs from the information in this guide, follow the instructions in the release notes.
-
Page 8: About This Guide
The telephone may be an NBX Business Telephone or an NBX Basic Telephone. The NBX 25 Communications System The NBX 100 Communications System The 3Com SuperStack 3 NBX Networked Telephony Solution Table 4 list conventions that are used throughout this guide. -
Page 9: Documentation
The Resource Pack CD for each NBX product contains online versions of the paper documents, additional documentation, system software and the related Help files, and some additional 3Com applications. NetSet Utility When you log in to the NetSet utility as a user, you can view the... - Page 10 Your suggestions are important to us. They help us to make our Documentation documentation more useful to you. Send e-mail comments about this guide or any of the 3Com NBX documentation and Help systems to: NBX_Techpubs_comments@3com.com Include the following information with your comments: Example: of your screen.
-
Page 11: Getting Started
ETTING The first time that you use your NBX telephone, you are prompted to set up your voice mailbox. After you have initialized your mailbox and password, you may want to browse through the NetSet utility, which is described later in this chapter. This chapter covers these topics: Setting Up Your Voice Mail The NetSet Utility... -
Page 12: Setting Up Your Voice Mail
ETTING TARTED Setting Up Your Pick up the handset on your telephone and follow the voice prompts to Voice Mail set up these voice mail features: To set up voice mail: 1 Pick up the handset and press MSG (Message) button. You are prompted to enter a personal password. -
Page 13: The Netset Utility
The NetSet Utility Using the NetSet utility, which is part of the NBX system software, your administrator manages and configures system-wide telephone settings along with many of your personal telephone settings and permissions. As a telephone user, you can use the NetSet utility to: To use the NetSet utility, you need a computer connected to your local area network (LAN) and a web browser, but you do not need Internet access. - Page 14 ETTING TARTED Figure 1 NBX NetSet Login Screen with Password Dialog Box 4 Type your user name, which is always your 3-digit or 4-digit telephone extension. 5 Type your voice mail password, and click OK. 6 The Personal Settings window appears and displays the User Information tab.
-
Page 15: Quick Reference Sheet
The shortcut icons on the lower left of the browser screen link you to the following features of the Personal Settings window: One-touch Speed Dials Off-Site Notification Telephone Guide online Quick Reference To open and print a copy of the Quick Reference Sheet for voice mail Sheet features and for your NBX Telephone: 1 Log in to the NetSet utility. - Page 16 ETTING TARTED...
-
Page 17: Nbx Business Telephones
NBX B You can manage some of the features of your telephone on the telephone itself. This chapter describes the buttons, controls, and features on the following telephones: NBX 1102 Business Telephone NBX 2102 Business Telephone NBX 2102-IR Business Telephone Unless otherwise noted, the features discussed in this chapter apply to all NBX Business Telephones and to the SuperStack 3 NBX, NBX 100, and NBX 25 Networked Telephony Solutions. -
Page 18: Telephone Buttons And Controls
2: NBX B HAPTER USINESS Telephone Buttons Figure 2 and Controls Figure 2 NBX The NBX Business Telephones have these features: 1 Handset 2 MSG (Message) button — Accesses your voice mail messages through the Voice Mail System. See 3 Display panel — Provides telephone status messages, Caller ID information (if enabled), and the number of messages that you have in your voice mail mailbox. - Page 19 5 Soft buttons —Allow you to select names from the internal user directory. “Calling Inside Your Organization” from left to right, are: Slct (Select) Back (reserved for future use) Exit 6 Telephone key pad 7 Scroll buttons — Allow you to scroll through user names in the internal user directory.
-
Page 20: Status Lights On The Nbx Business Telephone
2: NBX B HAPTER USINESS 18 Infrared Port (NBX 2102-IR Telephones only) — Receives infrared signals from a handheld device running the Palm Operating System. See “Palm Integration” 19 Mute button — Enables you prevent callers from hearing what you are saying during a telephone call. -
Page 21: Programmable Access Buttons
Programmable Figure 3 Access Buttons figure gives the default features. The One-touch Speed Dials screen in the NetSet utility shows your telephone’s current button mappings. For details, see Figure 3 Access Buttons Access buttons 1 through 6 have these default settings, which can be changed by your administrator: 1 Feature button —... - Page 22 2: NBX B HAPTER USINESS ELEPHONES...
-
Page 23: Nbx Basic Telephone
NBX B ASIC ELEPHONE You can manage many of the features of your telephone on the telephone itself. This chapter describes the buttons, controls, and features that are specific to the NBX 2101 Basic Telephone. Unless otherwise noted, the features discussed in this chapter apply to the SuperStack 3 NBX, NBX 100, and NBX 25 Networked Telephony Solutions. -
Page 24: Telephone Buttons And Controls
3: NBX B HAPTER ASIC ELEPHONE Telephone Buttons Figure 4 and Controls Figure 4 NBX Basic Telephone (Model 2101) The NBX Basic Telephone has these features: 1 Handset 2 Display panel — Provides telephone status messages, Caller ID information (if enabled), and the number of messages in your voice mail mailbox. -
Page 25: Status Icons On The Nbx Basic Telephone
4 Scroll buttons — Allow you to scroll through user names in the internal user directory. See 5 MSG (Message) button — Accesses your voice mail messages through the Voice Mail System. See 6 Telephone key pad 7 Volume control buttons — Adjust the volume of the ringer and the handset. -
Page 26: Programmable Access Buttons
3: NBX B HAPTER ASIC ELEPHONE To pick up a second incoming call while you are using your telephone: 1 Press Call Toggle button. 2 Your first call is put on hold, and you are connected to the second call. a The telephone icon next to the b The telephone icon next to the To return to the first call:... -
Page 27: Voice Mail
OICE A key component of the NBX Networked Telephony Solutions is the NBX Messaging System, which includes voice mail, off-site notification, and several administrative features. Voice mail allows callers to leave voice messages in your voice mailbox when you are not able to answer your telephone. You can listen to, save, and forward those messages from any touch-tone telephone. -
Page 28: Changing Your Password
4: V HAPTER OICE This chapter covers these topics: Changing Your You use the same password to access your voice mail and to log in to the Password NetSet utility. You can change this password from your telephone or through the NetSet utility. To change your password using the telephone: 1 Pick up the handset, and then press MSG button. -
Page 29: Listening To Messages
Security Tips Listening to You can listen to your voice mail messages from any touch-tone Messages telephone. After you listen to messages, you can save or delete them to clear them from the new messages queue. From Your NBX When you have messages in your mailbox: Telephone To listen to your messages: 1 Pick up the handset and press MSG button to access the mailbox. - Page 30 4: V HAPTER OICE From a Remote To listen to your messages from other telephones: Location 1 If you call the main telephone number of your organization and 2 If you can call your telephone extension directly, during the time that you hear your greeting, press *, and continue with step 3.
-
Page 31: Replying To A Message
Information About You can hear date, time, and sender information for the messages that Your Messages are in your mailbox. To listen to this information, press 6 while or after you listen to a message, and then press one of these buttons: Replying to a You can send a reply to the originator of a voice mail message or to Message... -
Page 32: Forwarding A Message
4: V HAPTER OICE Forwarding a You can forward most messages to other users on the system and add Message your comments to introduce the message to the other users. If a message is marked Private, you cannot forward it. To forward a message with comments: 1 Dial 5. -
Page 33: Creating And Sending A Message
Creating and To create and send a message directly to an internal user’s voice mailbox: Sending a Message 1 Pick up your handset. 2 Press MSG button on your telephone and log in to your voice mailbox. 3 Dial your password, and then press #. 4 Dial 2 to select Create and Send Message. -
Page 34: Creating Personal Voice Mail Lists
4: V HAPTER OICE To select a message delivery option: 1 Record your message, and press #. 2 Press 9 for Message Delivery Options. 3 You are prompted to press one of the following buttons to: Creating Personal A Personal Voice Mail List, also called a mail group, is a collection of Voice Mail Lists extensions to which you assign a special “group number.”... -
Page 35: Forwarding Calls Directly To Your Voice Mailbox
Modifying Groups You can review each of your voice mail groups, add or remove members, or delete a group. To modify a voice mail group: 1 Pick up the handset, and press MSG button to access your mailbox. 2 Dial your password, and press #. 3 Dial 9 for Mailbox Options. -
Page 36: Accessing Voice Mail Messages Through E-Mail
4: V HAPTER OICE Accessing Voice (NBX 100 and SuperStack 3 NBX) You can listen to your voice mail Mail Messages from any computer that allows you to access your e-mail. Your e-mail Through E-mail software must be IMAP compliant. Voice mail messages are sent as sound files, so your computer must have a sound card. -
Page 37: Phantom Mailbox
Phantom Mailbox A phantom mailbox is a voice mailbox that does not have an actual telephone associated with it. Example: You retrieve messages from a phantom mailbox the same way you retrieve messages from a personal mailbox. See earlier in this chapter. Group Mailbox A group mailbox is a voice mailbox from which a group of users can retrieve messages, rather than one user. - Page 38 4: V HAPTER OICE...
-
Page 39: Standard Features
TANDARD This chapter describes standard features of the NBX Business and Basic Telephones. It covers these topics: Setting the Volume Dialing a Call Answering a Call Creating Your Call Forward Path Placing a Call on Hold Transferring a Call Establishing a Conference Call Unless otherwise noted, these features are available on the NBX 100, NBX 25, and SuperStack 3 NBX systems. -
Page 40: Setting The Volume
5: S HAPTER TANDARD EATURES Setting the Volume Use Volume Control buttons to raise or lower the volume of the ringer, the handset, or the speaker. Ringer Volume To raise or lower the volume of the ringer, press the Volume Control buttons repeatedly while your telephone is ringing, until the volume is at the level that you prefer. - Page 41 Using the Internal Name Directory On the telephone display panel, you can use the view a directory of users on your system, scroll through it, and dial a co-worker quickly. User names appear in alphabetical order, last name first. The system updates the directory when your administrator adds or removes users.
-
Page 42: Dialing An External Call
5: S HAPTER TANDARD EATURES Dialing an To dial an external call: External Call 1 Pick up the handset or, if you are using an NBX Business Telephone, you can press Speaker button. If your telephone defaults to an internal line, dial 9 or 8 to access an external line. -
Page 43: Creating Your Call Forward Path
Creating Your Call Use the Call Forward feature to specify: Forward Path To change the number of rings or the call forwarding path: 1 Log in to the NetSet utility. 2 Select User Information > Call Forward. 3 Select Number of rings before forwarding a call. 4 Select a call forward path. -
Page 44: Placing A Call On Hold
5: S HAPTER TANDARD EATURES Placing a Call on To place a call on hold: Hold On an NBX Business Telephone: 1 Press Hold button. 2 To return to the call, press the Access button on which the call originated. On an NBX Basic Telephone: 1 Press Hold button. - Page 45 Announced Transfer Before you complete a transfer, you can announce to the recipient that you are transferring a call. The recipient then can decide whether to take the call. To announce a transfer: 1 While on a call, press Transfer button. The system places the caller on hold and selects a new line.
-
Page 46: Establishing A Conference Call
5: S HAPTER TANDARD EATURES Establishing a You can establish a Conference Call with up to four parties, including Conference Call yourself. The other three parties can be any combination of internal and external calls. To set up a conference call: From an NBX Business Telephone: 1 Dial a call, or receive a call from someone else. - Page 47 More About Conference Calls To place your part of a conference call on hold, press Hold button. The other people can talk among themselves, but they cannot hear you. When a conference call is placed on hold, there is no music on hold.
- Page 48 5: S HAPTER TANDARD EATURES...
-
Page 49: Personalizing Your Telephone
ERSONALIZING Your NBX Networked Telephony System has many features that can increase the functionality of your telephone. This chapter describes: Label Makers for Telephones Ringer Tone Speed Dials Off-Site Notification Do Not Disturb Preventing Unauthorized Use of Your Telephone Class of Service Override Palm Integration Using a Headset Important... -
Page 50: Label Makers For Telephones
6: P HAPTER ERSONALIZING Label Makers for You can print labels for your telephone using the label maker forms in the Telephones NetSet utility or on the NBX Resource Pack CD. You need Adobe Acrobat Reader 3.0 or 4.0 to open and edit the label makers. Acrobat Reader is available from the Adobe web site or the on NBX Resource Pack CD. -
Page 51: Speed Dials
Speed Dials The NBX system has three types of Speed Dials: One-touch Speed (NBX Business Telephones only) Dials A one-touch speed dial is a telephone number that the NBX system dials for you when you press the Access button that you have assigned to that number. - Page 52 6: P HAPTER ERSONALIZING To assign or change the one-touch speed dial numbers on your telephone: 1 Log in to the NetSet utility. 2 Select Speed Dials > One Touch. 3 In the text box under Number, type the telephone number that you want to assign a speed dial button to.
- Page 53 To use personal speed dials: 1 Pick up the handset or, if you are using an NBX Business telephone, you can press Speaker button. 2 Press Feature button. 3 Dial the 3-digit speed dial code for the number that you want to call. Personal speed dial codes range from 601 through 699.
-
Page 54: Off-Site Notification
6: P HAPTER ERSONALIZING Off-Site When you enable Off-Site Notification, the NBX system sends a notice to Notification inform you that you have received a voice mail message. You can specify one or more notification paths, for example: The system makes up to five attempts to reach you by using either the pager or the telephone method. -
Page 55: Do Not Disturb
Important When you activate the Telephone Locking feature, the NBX system Considerations sends messages to you only if the notification number (for example, your pager number) is a toll-free telephone number. See later in this chapter for details. If you choose several notification methods, and you do not include an email address as one of your choices, then you are notified only about the first voice mail message that you receive. -
Page 56: Preventing Unauthorized Use Of Your Telephone
6: P HAPTER ERSONALIZING To enable and disable Do Not Disturb using the feature code: 1 Pick up the handset. 2 Press Feature button and 446. 3 Hang up. Your telephone is now in Do Not Disturb mode. 4 To disable Do Not Disturb mode, repeat these steps. Preventing You can prevent others from dialing long-distance or other unauthorized Unauthorized Use... -
Page 57: Class Of Service Override
Class of Service The Class of Service Override feature allows you to apply the features of Override your own NBX telephone temporarily to another NBX telephone on the same LAN. Example: To activate Class of Service Override from any NBX telephone: 1 Pick up the handset. -
Page 58: Using A Headset
6: P HAPTER ERSONALIZING Using a Headset You can use a headset with a microphone with any NBX telephones These instructions are for a typical headset and amplifier. You may need to modify some of these instructions for some types of headset or amplifier equipment. - Page 59 If you do not plan to use the headset for a long time, 3Com recommends that you set the mute and headset buttons on the amplifier to Off and hang up the handset on your telephone.
- Page 60 6: P HAPTER ERSONALIZING ELEPHONE...
-
Page 61: Getting More From Your Telephone System
ETTING ELEPHONE The following features are described in this chapter: Account (Billing) Codes Caller ID Call Pickup Hunt Groups and Calling Groups Call Park Paging Dialing a Call to a Remote Office Bridged Extensions Delayed Ringing Pulse Dialing Several of the features described in this chapter include having a telephone line appear on more than one NBX Business Telephone. -
Page 62: Account (Billing) Codes
7: G HAPTER ETTING ORE FROM Account (Billing) (NBX 100 and SuperStack 3 NBX) The Account Codes feature allows Codes your administrator to tracks calls associated with an individual client or account. When you answer your telephone or when you dial a call, you dial a numeric account code which allows the system to track time spent on the telephone with a client, perhaps to be associated with a billable account. -
Page 63: Call Pickup
CLIR for All External Calls To enable CLIR-All for all calls from your telephone: 1 Pick up the handset, press Feature button and 889. 2 Dial the number that you want to call. The NBX system does not send caller ID information on this call or any future calls until you disable this feature. - Page 64 7: G HAPTER ETTING ORE FROM There are two types of Call Pickup: Directed Call Pickup To answer a call that is ringing on another user’s telephone using the Feature Code: 1 Pick up the handset. 2 Press Feature button followed by 455 and the user’s extension. The call is directed to your telephone.
-
Page 65: Hunt Groups And Calling Groups
Hunt Groups and Your administrator can establish informal “call centers” so that incoming Calling Groups calls can be directed to several phones. Hunt Groups Incoming calls ring to one member of the hunt group. If that member’s telephone is in use, or if that member does not answer the call, the system “hunts”... - Page 66 7: G HAPTER ETTING ORE FROM Hunt groups can be static or dynamic. To log in to a dynamic hunt group using your NBX Telephone: 1 Pick up the handset. 2 Press Feature button followed by the hunt group number that is assigned by your administrator.
- Page 67 To log out of a dynamic hunt group using the NetSet utility: 1 Log in to the NetSet utility. 2 Select User Information > Hunt Groups. 3 Click on the 3-digit extension number of the hunt group you are logging out of.
-
Page 68: Call Park
7: G HAPTER ETTING ORE FROM To view the list of users that belong to a group: 1 Select a group. 2 Click Details. If you have logged in to a dynamic hunt group and do not answer a call when it rings on your telephone, the system logs you out. -
Page 69: Paging
To park a call: 1 While you are on a call, press Feature button and 444, or press the Access button assigned to Call Park. 2 Use the telephone key pad to dial a Call Park extension from the list shown in If you select a Call Park extension that is already in use, the display panel displays... - Page 70 7: G HAPTER ETTING ORE FROM External Paging If your location has a paging amplifier and speaker system connected to the NBX system, you can broadcast a message over the speakers. To page externally: 1 Pick up the handset. 2 Dial the External Paging extension shown in 3 Speak into the handset.
-
Page 71: Dialing A Call To A Remote Office
Dialing a Call to a (NBX 100 and SuperStack 3 NBX) The NBX 100 and SuperStack 3 NBX Remote Office Networked Telephony Solutions provide options that allow users to dial calls between sites that are separated geographically but that are linked by a Wide Area Network (WAN) connection. -
Page 72: Bridged Extensions
7: G HAPTER ETTING ORE FROM prevents conflicts between the remote extension number and an identical extension number at the local site (Chicago). Figure 12 Using Site Codes to Dial Remote Offices Bridged Extensions (NBX Business Telephones only) With a bridged extension, buttons and status lights on one telephone are associated with buttons and status lights on another telephone, and you can perform the same operations (such as dialing telephone calls, placing calls on hold, forwarding calls,... -
Page 73: Delayed Ringing
Delayed Ringing (NBX Business Telephones only) The Delayed Ringing feature prevents a telephone on a shared line from ringing on a specific telephone until the incoming call rings on another telephone a specified number of times first. Example: Pulse Dialing In some locations, users must dial telephone calls using pulse dialing instead of tone dialing (also called Dual Tone Multi Frequency, or DTMF, dialing). - Page 74 7: G HAPTER ETTING ORE FROM Using a Personal Speed Dial You can configure a personal speed dial in the NetSet utility to dial a number in pulse dial mode and then to switch to DTMF. You can also include the digits that you want the system to dial after switching to DTMF.
-
Page 75: Attendant Consoles
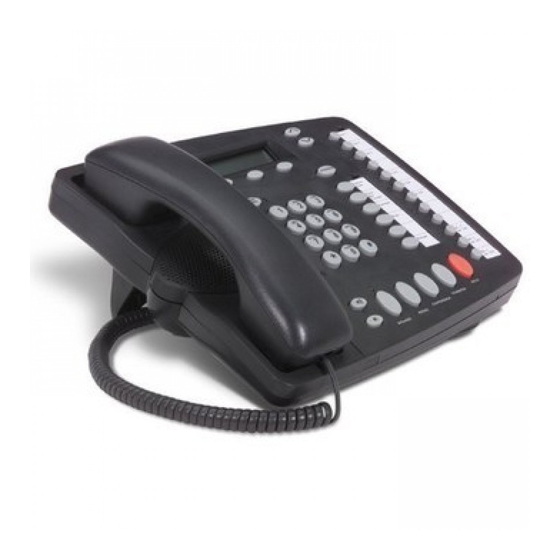
NBX 1105 Attendant Console Complement Attendant Software The NBX 1105 Attendant Console is a device that works along with NBX Telephones to increase call handling. In most offices the Attendant Console is used by a receptionist or switchboard operator, referred to in this guide as “the receptionist.”... -
Page 76: Nbx 1105 Attendant Console
HAPTER TTENDANT NBX 1105 The NBX 1105 Attendant Console has 50 Access buttons, each of which Attendant Console can handle two assignments, for total functionality of 100 buttons. The buttons support the same functions and have the same behavior as the 12 Access buttons on the NBX Business Telephone. - Page 77 Print the label template, cut the labels along the dotted lines, and place them in the label holders on the telephone. The free Adobe Acrobat Reader allows you to print files but not to save changes. To save files, you must purchase Adobe Acrobat. NBX 1105 Attendant Console Table 5 Chapter...
-
Page 78: Complement Attendant Software
8: A HAPTER TTENDANT 3 Shift button — Enables you to toggle between the two sets of Access buttons on the console. Press Shift button for Access buttons 1 through 50, and then press Shift button again for Access buttons 51 through 100. - Page 79 Table 10 Elements of the Complement Attendant Screens (continued) Field Purpose Last Tab Sorts the list of users in alphabetical order by last name. Department Tab Sorts the directory by the user department. Hidden Tab Hides entries in the NBX directory that you do not want to appear on other tabs, such as conference room phones.
- Page 80 8: A HAPTER TTENDANT ONSOLES Managing Calls To manage incoming calls using the Complement Attendant Software, click the buttons at the bottom of the screen, as described here: 1 Select a sort method by clicking on the appropriate tab. For example, to select a user by last name, click on the Last tab.
-
Page 81: Telephone Installation , Maintenance , And Troubleshooting
ELEPHONE ROUBLESHOOTING This chapter covers the following topics: Connecting the Telephone Moving Your Telephone Swapping Telephones Cleaning Your Telephone Troubleshooting Possible Problems NSTALLATION AINTENANCE... -
Page 82: Connecting The Telephone
9: T HAPTER ELEPHONE NSTALLATION Connecting the The underside of the NBX Business Telephone is shown in Telephone Figure 14 Underside of the NBX Model 1102 Business Telephone The underside of the NBX Business Telephone includes: 1 Handset cord (connects to the handset) 2 Computer cable (connects to your desktop computer) 3 Ethernet cable (to the LAN jack) 4 Power cord (to an electrical power source) - Page 83 Connecting the Telephone Attaching and The NBX Model 1102 Business Telephone has a support bracket that you Adjusting the can attach to the telephone’s underside in low profile, high profile, or Support Bracket wall mount positions. Tabs on the underside slip into slots on the bracket, and the opposite mounting points snap into place.
- Page 84 9: T HAPTER ELEPHONE NSTALLATION Wall-Mount Position To mount the Model 1102 Telephone on a wall, pull and twist the knob on the underside of the phone 90 degrees loaded peg projects out on the top of the phone (Item 1 in Figure 16 Knob for the Handset Support Peg Figure 17 wall-mounted position.
-
Page 85: Moving Your Telephone
Moving Your All NBX telephones have the Automatic Telephone Relocation feature. Telephone Each telephone has a unique “address.” You can move your telephone to another location, connect it to any Ethernet jack on the LAN, and still maintain all of your personalized features, speed dials, and extension number. - Page 86 9: T HAPTER ELEPHONE NSTALLATION Table 12 Troubleshooting Quick Reference (continued) Possible Problem My telephone has “locked up.” Callers cannot leave messages on my voice mail. When I park a call, the display panel shows, Park xtn in use, and the call returns to my telephone.
- Page 87 Table 12 Troubleshooting Quick Reference (continued) Possible Problem My telephone is not forwarding my incoming calls to my voice mailbox. On my NBX Business Telephone, I added a one-touch speed dial, but the telephone does not dial that number. I try to pick up a call ringing on another telephone using Directed Call Pickup, but it fails.
- Page 88 9: T HAPTER ELEPHONE NSTALLATION AINTENANCE ROUBLESHOOTING...
-
Page 89: Eature Odes And Paging
Your NBX Networked Telephony Solution provides a wide range of features and options that are accessible from the Access buttons, or you can activate the features by pressing Feature button on your telephone and then dialing the appropriate code listed in the tables below. Feature Codes for General Use Table 13 Feature Codes - General Telephone Features... -
Page 90: Feature Codes For Outbound Calls
A: F PPENDIX EATURE ODES AND Feature Codes for Outbound Calls Table 14 Feature Codes - Managing Outbound Telephone Calls Feature Account Codes Caller ID - restrict all calls (CLIR All Calls) Caller ID - restrict next call (CLIR Next Call) Class of Service Override Conference Call Add Conference Call Drop... -
Page 91: Feature Codes For Incoming Calls
Feature Codes for Incoming Calls Table 15 Feature Codes - Managing Incoming Telephone Calls Feature Call Park Direct Mail Transfer Directed Call Pickup Do Not Disturb Forward All Calls to Voice Mail Group Call Pickup - Use the same code to activate and to deactivate this feature. Description Place a call on hold so that it can be picked up from another... -
Page 92: Paging Codes
A: F PPENDIX EATURE ODES AND Table 15 Feature Codes - Managing Incoming Telephone Calls (continued) Hunt Groups and Calling Groups Transfer - Use the same code to activate and to deactivate this feature. Paging Codes Use the Paging feature to make an announcement over your public address system, over NBX Business Telephones, or both. -
Page 93: Index
NDEX access buttons attendant console 76, 77 Basic Telephone 26 Business Telephone 19 Account Codes 62, 90 Acrobat Reader 50, 77 administrator, definition 8 Adobe Software 50, 77 All Ports Busy message 86 announcements, broadcasting 69 answering calls 42 attendant console 75, 76 access buttons 77 Automatic Telephone Relocation 49 Billing Codes 62, 90... - Page 94 NDEX Delayed Ringing 73 dial codes external paging 69 internal paging 69 simultaneous paging 69 dial tone 85 dialing calls 40 redial 42 release with headset 58 switching from Pulse to Tone 73 Direct Mail Transfer button on attendant console 78 button on Business Telephone 21 feature code 91 overview 45...
- Page 95 icons, status on Basic Telephone 25 incoming calls answering 42 calling groups 65 hunt groups 65 on a Basic Telephone 26 transferring 44 infrared port 20 installing phones 81 intercom 20 Internal Caller ID 62 internal name directory 41 Internal Paging dial code 69, 92 overview 70 internal telephone calls, dialing 40...
- Page 96 NDEX pager, off-site notification 54 paging broadcasting over telephone speakers 70 overview 69 using a public address system 70 Paging Codes, summary 92 Palm integration 57 parking a call 68 passwords changing in voice mail 28 creating for voice mail 12 NetSet utility 14 security tips 29 Personal Greetings, voice mail 12...
- Page 97 tabs, Complement Attendant Software screens 78 telephone bracket 83 telephone icons on Basic Telephone 26 telephone maintenance 81 telephone, ringer tone 50 telephones cleaning 85 connecting 82 moving 85 moving and swapping 85 terms, commonly used 8 Toggle button 26 toll calls, preventing others from dialing 56 tones, ringer selection 50 Transfer button...
- Page 98 NDEX...