3Com 3102 Manual
3com vcx telephone guide
Hide thumbs
Also See for 3102:
- User manual (138 pages) ,
- Instructions (3 pages) ,
- Reference manual (2 pages)
Table of Contents
Advertisement
VCX
Telephone Guide
Telephones
3102 Business Telephone
2102 Business Telephone
3101 Basic Telephone
2101 Basic Telephone
Attendant Consoles
3105 Attendant Console
VCX Complement Attendant Software
VCX
™
IP Telephony Module
System Release 6.0
Part Number 900-0287-01 Rev AB
Published July 2005
http://www.3com.com/
Advertisement
Table of Contents

Related Manuals for 3Com 3102


Summary of Contents for 3Com 3102
- Page 1 Telephone Guide Telephones 3102 Business Telephone 2102 Business Telephone 3101 Basic Telephone 2101 Basic Telephone Attendant Consoles 3105 Attendant Console VCX Complement Attendant Software ™ IP Telephony Module System Release 6.0 Part Number 900-0287-01 Rev AB Published July 2005 http://www.3com.com/...
- Page 2 3Com Corporation reserves the right to revise this documentation and to make changes in content from 01752-3064 time to time without obligation on the part of 3Com Corporation to provide notification of such revision or change. 3Com Corporation provides this documentation without warranty, term, or condition of any kind, either implied or expressed, including, but not limited to, the implied warranties, terms, or conditions of merchantability, satisfactory quality, and fitness for a particular purpose.
-
Page 3: Table Of Contents
Access Buttons Line Status Lights VCX B — M 3101 3101SP ASIC ELEPHONES ODELS Buttons and Controls Access Buttons Status Lights for System Appearance Buttons VCX B — M 3102 USINESS ELEPHONE ODEL Buttons and Controls Access Buttons Status Lights... - Page 4 VCX A — M 3105 TTENDANT ONSOLES ODEL OMPLEMENT TTENDANT VCX Attendant Console Access Buttons Feature Buttons Printing Labels Attendant Console Status Lights Complement Attendant Software ASIC ELEPHONE PERATION Logging In to Your Telephone Changing Your Password Answering a Call Answering a Second Call Making Calls Making Internal Calls...
- Page 5 EATURE ODES Feature Code Overview Using Feature Codes Feature Codes TANDARD EATURES Viewing the Call History Viewing the User Directory Controlling Caller ID Setting up a Conference Call Unannounced Conference Announced Conference Transferring Your Phone Settings to Another Phone Forwarding Calls to Voice Mail Transferring a Call to Another User’s Voice Mail Call Waiting Speed Dialing...
- Page 6 MWI and Bridged Line Calls Logging Out ELEPHONE NSTALLATION AND AINTENANCE Connecting the Telephone Installing the 3102 Telephone Label Plate Attaching and Adjusting the Support Bracket Attaching and Adjusting the Support Bracket Low-Profile and High-Profile Positions Wall-Mount Position Security Wall-Mount Bracket...
-
Page 7: About This Guide
BOUT UIDE This guide describes how to set up and use 3Com® VCX™ telephones and consoles. This guide is for users of the following VCX hardware and software: VCX 2101 Basic Telephone VCX 2102 Business Telephone VCX 3101 Basic Telephone... -
Page 8: Figures
BOUT UIDE Conventions Table 1 and Table 2 list conventions that are used throughout this guide. Table 1 Icons Icon Type Description Information note Information about important features or instructions. Caution Alerts you to potential loss of data or potential damage to an application, system, device, or network. -
Page 9: Related Documentation
Related These 3Com documents contain additional information about the Documentation products in this release that are a part of or support the 3Com Convergence Application Suite. The following documents are a part of the VCX IP Telephony Module: VCX Installation and Maintenance Guide... -
Page 10: Comments
Document part number (found on the front page) Page number Your name and organization (optional) Example: VCX Telephone Guide System Release 6.0 Part Number 900-0287-01 Rev AA Page 25 Please address all questions regarding the 3Com software to your authorized 3Com representative. -
Page 11: Getting Started
ETTING TARTED This chapter provides a general description of your VCX telephone and describes the steps you must complete to use your phone. This chapter includes the following topics: VCX Telephone Overview Initial Voice Mailbox Setup Configuration Options Additional Information Sources... -
Page 12: Vcx Telephone Overview
In addition, your account includes a voice mailbox. Voicemail features are provided by 3Com IP Messaging software. These features, such as listening to or sending messages, are described in the IP Messaging guide associated with your messaging system. -
Page 13: Initial Voice Mailbox Setup
Initial Voice Mailbox Setup Initial Voice When a caller dials your telephone number and you are unable to answer Mailbox Setup the call, the caller hears recording and is prompted to leave a message. Before you can listen to messages in your voice mailbox, you must record your name, a personal greeting, and change the default password you use to access your mailbox. -
Page 14: Additional Information Sources
Model 2101 and Model 3101 telephone features. IP Messaging Module User Guide - 3Com Native Interface or the IP Messaging Module User Guide - 3Com Native Interface — Provides information about the voicemail system and features available on your phone. -
Page 15: Vcx Basic Telephone - Model
— ASIC ELEPHONE 2101 ODEL This chapter describes the physical layout of the 3Com® VCX™ Model 2101 Basic Telephone and includes the following topic: Buttons and Controls For information about the 3101 and 3101SP Basic Telephones, see Chapter For information about the 3105 Attendant Console, see... -
Page 16: Buttons And Controls
2: VCX B — M 2101 HAPTER ASIC ELEPHONE ODEL Buttons and Figure 1 shows the buttons and controls on the VCX Model 2101 Basic Controls Telephone. Figure 1 VCX 2101 Basic Telephone The 2101 Basic Telephone includes the following features: 1 Handset 2 Hook switch (under the handset) —... - Page 17 Buttons and Controls Feature + 410 (410 is a feature code; see Chapter 8 for information on using feature codes). The following features are available: User Directory — Displays a directory of the people in your organization. See Viewing the User Directory.
- Page 18 Disturb. To enable a feature, press the Feature button and then press the code on the telephone keypad. For more information on feature codes, Chapter The telephone LabelMaker, available through the 3Com web site, enables you to print labels for the feature buttons. See Printing...
- Page 19 This chapter includes the following topics: Buttons and Controls Access Buttons Line Status Lights For information about the Model 3102 Business Telephone, see Chapter For information about the 3105 Attendant Console, see Chapter To verify the model number of your telephone, refer to the label under...
-
Page 20: Vcx Business Telephone - Model
Buttons and Figure 2 shows the buttons and controls on the Model 2102 Business Controls Telephone. Business Figure 2 3Com 2102 Telephone 5 6 7 8 10a–f The Model 2102 Business Telephone includes the following features: 1 Handset 2 MSG (Message) button and Message Waiting Light — Press MSG to access your messages through the voice mail system;... - Page 21 Buttons and Controls Program button (see number 8 below). The following features are available: User Directory — Displays a directory of the people in your organization. See Viewing the User Directory. Call History — Displays logs of your recent missed, answered, and dialed calls.
- Page 22 10 Access buttons without indicator lights — See Programmable Access Buttons. For both sets of buttons, the telephone LabelMaker, available through the 3Com web site, enables you to define and print a new label for your Access buttons. See Printing Labels.
-
Page 23: Access Buttons
Access Buttons 16 Speaker button — Enables you to use the speaker phone feature. Press the Speaker button before you dial a call, when your telephone is ringing, or while a call is in progress. To turn the speaker off and resume the conversation, pick up the handset. -
Page 24: Line Status Lights
3: VCX B — M 2102 HAPTER USINESS ELEPHONE ODEL 5 Feature — Enables you to access features that are not directly assigned to an Access button on your telephone. For more information on feature codes, see Chapter 6 Directory — Lists, in the Display Panel, all the users in your organization and their extensions. -
Page 25: Vcx Basic Telephones - Models 3101 And 3101Sp
ASIC ELEPHONES 3101 3101SP ODELS This chapter describes the buttons, controls, and features on the 3Com® VCX™ Model 3101 and Model 3101SP Basic Telephones. The chapter includes the following topics: Buttons and Controls Access Buttons Status Lights for System Appearance Buttons... - Page 26 4: VCX B — M 3101 3101SP HAPTER ASIC ELEPHONES ODELS Buttons and Figure 4 shows the buttons and controls on the VCX Model 3101SP Basic Controls Telephone. The VCX Model 3101 Basic Telephone does not include a microphone, 8, or a speaker button and its indicator light, 10. All other controls are identical on the two telephones.
- Page 27 Buttons and Controls 2 Message Waiting Indicator (MWI) — When lit, indicates that you have at least one unreviewed message (voice, e-mail, or fax) in your mailbox. Also, this indicator flashes when your telephone rings. 3 Display Panel — Displays telephone status messages, Caller ID information (if enabled), and the number of new messages (voice, e-mail, and fax) that you have in your mailbox (see Using the Telephone Display...
- Page 28 6 Hold button — Places a caller on hold. See Putting a Call on Hold. 7 Label area for Access buttons — The telephone LabelMaker, available through the 3Com web site, enables you to define and print a new label for your Access buttons. See Printing Labels.
- Page 29 Buttons and Controls The VCX Model 3101SP Basic Telephone includes a microphone and supports speaker phone operation. The VCX Model 3101 Basic Telephone does not support speaker phone operation and it does not have a button. 11 Telephone key pad 12 Volume down —...
-
Page 30: Access Buttons
4 Transfer button — Sends the currently active call to another telephone. Transferring a Call. The telephone LabelMaker, available through the 3Com web site, enables you to define and print a new label for your Access buttons. See Printing Labels. - Page 31 Status Lights for System Appearance Buttons Table 4 Status Indicator Lights for System Appearance Buttons If the light is The line is Available for use Steady In use Blinking quickly Ringing Blinking slowly On hold...
- Page 32 4: VCX B — M 3101 3101SP HAPTER ASIC ELEPHONES ODELS...
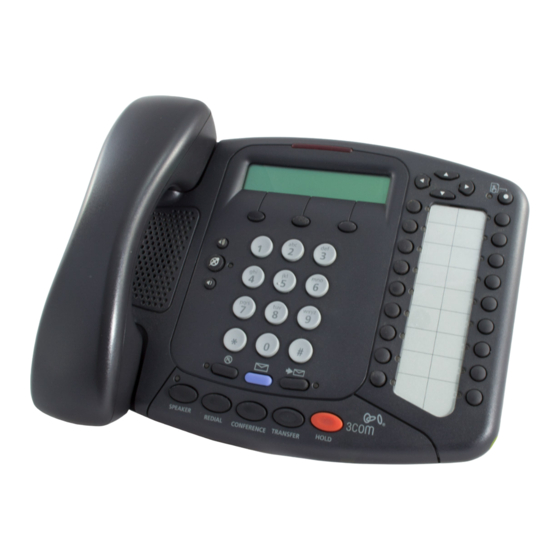
- Page 33 VCX B — USINESS ELEPHONE 3102 ODEL This chapter describes the buttons, controls, and features on the 3Com® VCX™ Model 3102 Business Telephone. This chapter includes the following topics: Buttons and Controls Access Buttons Status Lights For information about the Model 2102 Business Telephone, see...
- Page 34 HAPTER USINESS ELEPHONE ODEL Buttons and Figure 6 shows the buttons and controls on the VCX Model 3102 Controls Business Telephone. Figure 6 VCX Model 3102 Business Telephone June 29 10:34 am Extension : 1085 1 Soft buttons — Use the soft buttons to navigate through Display Panel options.
- Page 35 Buttons and Controls 3 Display Panel — Displays telephone status messages, Caller ID information (if enabled), and the number of new messages (voice, e-mail, and fax) that you have in your mailbox (see Using the Telephone Display Panel for more information on how message status determines the message list).
- Page 36 Speaker button) or the Hands Free button. For best results, keep the area around the microphone free of obstructions. 8 Label area for Access buttons — The telephone LabelMaker, available through the 3Com web site, enables you to define and print a new label for your Access buttons. See Printing Labels.
- Page 37 Buttons and Controls 16 MSG (Message) button and Message Waiting Light — Press this button to access your messages through the voice mail system (refer to the IP Messaging Module User Guide for information on messaging). The light next to the MWI light remains red as long as there is at least one new, unreviewed message (voice, e-mail, or fax) in your mailbox, or in a mailbox monitored by your phone (for example, a hunt group mailbox or the mailbox associated with a bridged line).
-
Page 38: Vcx Business Telephone - Model
5: VCX B — M 3102 HAPTER USINESS ELEPHONE ODEL Access Buttons Figure 7 shows the 18 Access buttons on the phone. Figure 7 Access Buttons Access buttons have the following settings: 1 The first three buttons in this group (starting from the bottom) are lines for incoming and outgoing calls (System Appearance buttons;... -
Page 39: Status Lights
Status Lights 9 Call Forward button — Allows you for forward calls to different destinations. See Call Forwarding. 10 Do Not Disturb — Enables the Do Not Disturb feature. See Activating Do Not Disturb. 11 Headset — Enables the use of a headset connected to the telephone. Using a Headset. - Page 40 5: VCX B — M 3102 HAPTER USINESS ELEPHONE ODEL...
-
Page 41: Vcx Attendant Consoles - Model 3105 And Complement Attendant
VCX A — TTENDANT ONSOLES 3105 ODEL OMPLEMENT TTENDANT The VCX Attendant Console (Model 3105) and the VCX Complement Attendant Software (CAS) application enable a receptionist to handle high call volumes efficiently. Although receptionists are the primary users of the Attendant Console and the CAS, the two can also be used by busy sales representatives and others who receive a high volume of telephone calls or who make frequent calls to the same telephone numbers. -
Page 42: Vcx Attendant Console
6: VCX A — M 3105 HAPTER TTENDANT ONSOLES ODEL OMPLEMENT TTENDANT VCX Attendant The VCX 3105 Attendant Console has 50 Access buttons and 4 Console preprogrammed Feature buttons. In effect, the Attendant Console is an extension of the VCX Business Telephone or VCX Basic Telephone with which it is associated. - Page 43 Call Park. 5 Labels — You can print labels for your Attendant Console using the LabelMaker utility, which is available through the 3Com web site. See Printing Labels. 6 Label cover tabs — Allow you to unsnap the plastic cover to insert labels.
-
Page 44: Printing Labels
In the Select a Product Category list box, select Convergence/IP Telephony. c In the Enter a Filename text box, enter labels.exe. d Click Search. 4 When the search results page is displayed, locate the labels.exe file for 3Com VCX V7000 IP Telephony Solution, and download it to your... -
Page 45: Attendant Console Status Lights
LabelMaker to a new location. To reuse your saved LabelMaker, run the file that you saved to your computer. If you download the LabelMaker from the 3Com web site, you always get the default version. If you save the default version to the same place you saved an earlier edited version, you overwrite the earlier version. -
Page 46: Complement Attendant Software
6: VCX A — M 3105 HAPTER TTENDANT ONSOLES ODEL OMPLEMENT TTENDANT Complement The Complement Attendant Software (CAS) application is an optional Attendant VCX component, which requires a license. On your personal computer, Software the Complement Attendant Software displays your telephone directory in a series of tabs. - Page 47 Complement Attendant Software The Directory List appears on the bottom of the window and lists phone extensions and users in the system directory. See Table The Call List and Command Buttons are separated from the Directory List by a horizontal bar that allows you to resize the lists. This is very useful if you want to display more of the Call List and less of the Directory List.
- Page 48 6: VCX A — M 3105 HAPTER TTENDANT ONSOLES ODEL OMPLEMENT TTENDANT 1 If your VCX system includes multiple sites (for example, regional and branch offices), each with one or more VCX call processors, CAS can display a global directory of all the users in your organization.
-
Page 49: Basic Telephone Operation
ASIC ELEPHONE PERATION This chapter describes how to use the basic telephone functions available on all VCX telephone models and includes the following topics: Logging In to Your Telephone Answering a Call Making Calls Terminating Calls Using the Telephone Display Panel Controlling the Volume Using the Hands Free Feature Using a Headset... -
Page 50: Logging In To Your Telephone
7: B HAPTER ASIC ELEPHONE PERATION Logging In to Your Your administrator assigns an extension (telephone number) and initial Telephone password to your phone. If the Display Panel on your phone shows the date, time, and a telephone extension, you are logged in and can make calls: Feb 17 08:12:00 Extension: 1001 Note that your administrator initially determines the format for the date... -
Page 51: Changing Your Password
Logging In to Your Telephone In this case, use the following steps to log in to your phone: 1 Press Program + 5 + 4. For phones without a Program button, press Feature + 410 + 5 + 4. The Display Panel shows: Local Phone Number: 2 Enter your extension and press #. -
Page 52: Answering A Call
7: B HAPTER ASIC ELEPHONE PERATION Answering a Call To answer an incoming call, lift the handset. If your phone includes multiple access lines, press the Access button for the line on which the new call is arriving (the line next to the button will be flashing). -
Page 53: Redialing A Call
Making Calls b Pick up the handset, press one of the access buttons that is not currently in use, and dial the number. If your phone includes a speaker, you can use one of the following options. For Model 2101, press Feature + 104 to activate the speaker. Model 3101 does not support speaker operation. -
Page 54: Making A Call To A Remote Office
7: B HAPTER ASIC ELEPHONE PERATION 3 To end the call, replace the handset, or press the Speaker button, or press the Release button. Making a Call to a You can dial calls between sites in your organization that are separated Remote Office geographically but that are linked by a Wide Area Network (WAN) connection. -
Page 55: Class Of Service Override
Making Calls Phones at the Atlanta office use an extension range from 1000 through 3999. The site code for Atlanta is 62. Phones at the Dallas office use an extension range from 1000 through 3999. The site code for Dallas is 63. In this example, to call someone in Atlanta, a user in Chicago dials the site code 62 and then the appropriate extension (1000 through 3999). -
Page 56: Terminating Calls
7: B HAPTER ASIC ELEPHONE PERATION Terminating Calls You can terminate a call (hang up) by replacing the handset, pressing the Release button, or if the call is on Speaker, turning the Speaker off by pressing the Speaker button. Using the The Display Panel shows the current date and time, and your extension Telephone Display number. - Page 57 Using the Telephone Display Panel shows . If you press the first button below the Display Panel, the Missed 1 display scrolls through the list of missed calls and shows you the calling extension. Press the first button again to automatically dial the listed extension.
-
Page 58: Controlling The Volume
You can change the volume during a conversation or by listening to the dial tone. Headset Volume (Model 3102 only) — During a call, press the up or down Volume Control buttons repeatedly until the volume is at the level you prefer. -
Page 59: Using The Hands Free Feature
To disable Hands Free Active on Intercom, press Feature + 100 again. Using a Headset The Model 3102 Business Telephone has a headset jack located on the underside of the telephone. To prepare the headset for all calls on either phone: 1 Plug the headset connector into the headset jack on the underside of the telephone. -
Page 60: Putting A Call On Hold
If you plan to not use the headset for a long time, 3Com recommends that you set the mute and headset buttons on the amplifier to Off and hang up the handset on your telephone. -
Page 61: Answering A New Call While On A Call
Transferring a Call Answering a New You can put your current call on hold, answer a second call, and then Call While on a Call toggle between the two calls: 1 When a new call arrives, press the Hold button to put the current call on hold. -
Page 62: Muting Calls
7: B HAPTER ASIC ELEPHONE PERATION To announce a transfer: 1 While on a call, press Transfer or press Feature + 420. The system places the call on hold. 2 Dial the extension number to which you want to transfer the call and then press OK (or press Feature + 120). - Page 63 1 Press the Do Not Disturb Access button on the phone. The red light is lit next to the Do not Disturb button (Model 3102 only). If you phone does not have a Do Not Disturb button, press Feature + 446.
- Page 64 7: B HAPTER ASIC ELEPHONE PERATION...
-
Page 65: Feature
EATURE ODES This chapter describes how to use VCX feature codes on a VCX telephone to enhance the operation of your phone. A feature code is a sequence of numbers you enter on the telephone keypad to enable a feature that is not mapped to a button. -
Page 66: Feature Code Overview
8: F HAPTER EATURE ODES Feature Code Some common telephone features are mapped to buttons (Hold and Overview Transfer, for example). However, the number of buttons varies on each model of VCX phone. Furthermore, the number of VCX features exceeds the number of buttons available on any phone. -
Page 67: Feature Codes
Feature Codes Feature + 446 *446 Then, either press Ok or press Feature + 120 to complete the command. Some features require additional information. For example, if you want to enable call forwarding when your phone is busy, you must designate the extension to which you want your calls forwarded. - Page 68 8: F HAPTER EATURE ODES Table 9 VCX Feature Codes (Alphabetical by Feature or Task) Feature Feature Code Entry Description Barge In Feature + 428 Used with Silent Monitor. See Silent Monitor and Barge Beep — Configure Feature + 330 Prompts you to enter the extension you want to page.
- Page 69 Feature Codes Table 9 VCX Feature Codes (Alphabetical by Feature or Task) Feature Feature Code Entry Description Conference Call Feature + 430, then <destination>, then Setting up a Conference Call. Feature + 430 Directed Call Pickup Feature + 455, then <security code>, Directed Call Pickup then <destination>...
- Page 70 8: F HAPTER EATURE ODES Table 9 VCX Feature Codes (Alphabetical by Feature or Task) Feature Feature Code Entry Description Program Feature + 410 Displays the Program menu in the Display Panel. Redial Feature + 401 Making a Call to a Remote Office.
- Page 71 Feature Codes Table 9 VCX Feature Codes (Alphabetical by Feature or Task) Feature Feature Code Entry Description Speed Dial — Display Feature + 463 Lists the configured speed dial numbers in the Display Panel. Transfer Feature + 420, then <destination> + This is an unattended transfer.
- Page 72 8: F HAPTER EATURE ODES...
-
Page 73: Standard Features
TANDARD EATURES This chapter describes the standard VCX telephone features that you can set up and access through the Telephone User Interface (TUI) on your telephone. Chapter 10 describes the telephone features that require configuration through the VCX User Interface. This chapter contains the following topics: Viewing the Call History Viewing the User Directory... -
Page 74: Viewing The Call History
9: S HAPTER TANDARD EATURES Viewing the Call You can use the Call History feature to display your call logs. These are History the logs of the 10 most recent calls to and from your telephone. From the call logs you can select calls and the phone automatically dials them. To access and use the Call History: 1 Use one of the following Call History access options: a If you have a Basic Telephone Model 3101, press the Center scroll... -
Page 75: Viewing The User Directory
If you have a Basic Telephone Model 2101, press Feature + 461 and select User Directory from the Main menu. If you have a Business Telephone (either Model 2102 or 3102), press the Directory button. For any telephone model, you can press Feature + 461 and select User Directory from the Main menu. -
Page 76: Controlling Caller Id
9: S HAPTER TANDARD EATURES Display Panel have the following functions when viewing the User Directory: Use the Slct button to select a user and dial that user’s extension. Use the Back button to display sort order options. Press the Slct button to sort by first name. Press the Back button to sort by last name. -
Page 77: Setting Up A Conference Call
Setting up a Conference Call If transmission of Caller ID information is disabled and you want to send your Caller ID for the next call only: 1 Pick up the handset. 2 Press Feature + 890. 3 Dial the number. Your ID is sent to the caller. Setting up a The conference feature enables you to have three people on one call Conference Call... -
Page 78: Transferring Your Phone Settings To Another Phone
Access button (or, for the Model 2101, the Toggle button) for that call. Transferring Your This feature enables you to use any 3Com phone attached to the same Phone Settings to VCX system (call processor) as your phone with all your phone’s settings. -
Page 79: Transferring A Call To Another User's Voice Mail
To forward incoming calls to your voice mailbox for a Business Telephone (either Model 2102 or 3102): 1 Press Fwd Mail. The red light next to the button comes on. All future calls are sent to your voice mailbox. - Page 80 9: S HAPTER TANDARD EATURES The caller hears the mailbox greeting of the target subscriber but the subscriber’s phone does not ring. Alternatively, you can use the following procedure: 1 While on a call, press Transfer. 2 Enter the transfer to another subscriber’s voice mail feature code in the following format: *441*<extension>...
-
Page 81: Call Waiting
Access button on your phone. Pressing the button dials the call. One-touch speed dialing is available on the Business phones (Models 2102 and 3102), but not on the Basic phones (Models 2101 and 3101). Personal Speed Dials — With this type of speed dialing, a number (internal or external) is mapped to a feature code value. -
Page 82: Configuring Speed Dial Numbers
9: S HAPTER TANDARD EATURES Chapter 10 for information on accessing the VCX User Interface; see the online Help for information on creating speed dials. Note that the two interfaces are synchronized. A speed dial created or modified in one interface appears in the other interface. A speed dial deleted in one interface is deleted in the other interface. -
Page 83: Dialing Speed Dial Numbers
Speed Dialing To replace an existing speed dial number, use the second soft button to delete each digit. 3 Press the second soft button under the Display Panel (or press #), then enter the number you want to associate with this speed dial. Include all prefix numbers that you would normally dial, such as a 9 or 8 or 1 to access an outside line, and, if necessary, the country code or area code. -
Page 84: Call Forwarding
9: S HAPTER TANDARD EATURES Alternatively, you can skip pressing the Feature button and enter: *601*2 Note that, with this syntax, you cannot enter *602. You can also use the following method to dial a speed dial number on any VCX phone: 1 Press the Program button (or press Feature + 410). -
Page 85: Call Forward Ring No Answer
Call Forwarding Ring No Answer — Redirects incoming calls to another destination when your phone rings for a configured time period (the default is 20 seconds). You can forward all unanswered calls by entering the Ring No Answer feature code (466) and then entering the number to which you want the calls forwarded. -
Page 86: Call Forward Busy Line
Main menu, press 4 to select Call Features, then press 2 to select Forward Universal. b Press the Call Forward button (Model 3102 and Model 2102). c Press Feature + 465 (all phones). 2 Use the keypad to enter the phone number to which you want to forward your calls. -
Page 87: Directed Call Pickup
Directed Call Pickup are 800 through 899 inclusive. Ask your administrator to verify the Call Park extensions for your location. If the specified Call Park extension is in use or if no extension is specified, VCX selects the next available Call Park extension. -
Page 88: Silent Monitor And Barge In
9: S HAPTER TANDARD EATURES You can answer a call that is ringing on another telephone only if you and that user both are members of the same Call Pickup group. Your administrator configures call pickup groups and can tell you your group security code number. - Page 89 Silent Monitor and Barge In If a supervisor attempts to monitor an agent’s extension, the supervisor phone LCD will display the error message no calls to supervise The agent is not logged in. The agent is not on a call. The agent is currently monitored by another supervisor.
-
Page 90: Monitoring A Call
9: S HAPTER TANDARD EATURES Monitoring a Call Silent Monitor allows a supervisor to listen to calls that come in to an agent’s extension. The supervisor must be granted explicit permission by the VCX administrator to monitor one or more extensions. If you have been granted monitoring privileges, your administrator will give you a list of the extensions you can monitor. -
Page 91: Remote Call Forward
Remote Call Forward Remote Call The Remote Call Forward feature allows you to configure the forwarding Forward options of a phone from another phone in the network. This is useful if, for example, a person A is on vacation and all of person A’s calls must be forwarded to person B. -
Page 92: Hunt Groups
9: S HAPTER TANDARD EATURES a Press Feature + 468. b Enter the extension whose calls you no longer want to remotely forward (in this case, 1000) and press #. The Display Panel shows the extension of the phone receiving the forwarded calls (in this case, 1002). -
Page 93: Hunt Group Types
Hunt Groups available, pending faxes may be queued until a machine becomes available or they may be sent to the call coverage point. The method used to hunt for an available hunt group member is determined by an administrator-configured call coverage pattern for that group. - Page 94 9: S HAPTER TANDARD EATURES value configured for the group is reached or the last hunt group member fails to answer (whichever happens first), the call is routed to the call coverage point (see the discussion of timeout values and call coverage points later in this section).
-
Page 95: Logging In To A Hunt Group
Hunt Groups Ask your administrator for information on timeout values and your hunt group’s default call coverage point. Table 10 summarizes how the three hunt group types route incoming calls. Table 10 Hunt Group Behavior Linear Hunt Group Circular Hunt Group Calling Group Condition Result... -
Page 96: Hunt Group Interaction With Other Features
9: S HAPTER TANDARD EATURES You log in to a hunt group by entering feature code followed by hunt group number. If you are already logged in, entering the same feature code and hunt group number logs you out. You can also log in to and log out of a hunt group through the VCX User Interface (see Viewing Hunt Group Membership and... -
Page 97: Viewing Hunt Group Membership And Status
Hunt Groups If the VCX phone has Hands Free enabled, an incoming call to a hunt group will not be picked up automatically. A hunt group member’s personal phone settings (for example, Call Forward, Call Coverage point, and Do Not Disturb) are not invoked on Hunt Group calls An external call to a private user (someone not in the hunt group) can be transferred to a hunt group. - Page 98 9: S HAPTER TANDARD EATURES Press soft button 1 below the Display Panel to change your current login status. Press soft button 2 or 3 below the Display Panel to exit from the hunt group display. When you change your login status, the Display Panel shows HuntGroup .
- Page 99 VCX U SING THE NTERFACE This chapter describes how to access the VCX User Interface application. It also provides a description of the options available to manage your user account and VCX telephone from this web-based application. Features that require configuration through the application and, subsequently, on the telephone itself are described in more detail.
-
Page 100: Using The Vcx User Interface
10: U VCX U HAPTER SING THE NTERFACE Accessing the VCX You can use the VCX User Interface to access and manage advanced VCX User Interface telephone features, change your web login password, and modify your personal account information. The VCX User Interface is a web-based application. Before you begin, obtain the following information from your system administrator: Web login username Web login password... -
Page 101: Vcx User Interface Overview
VCX User Interface Overview Figure 11 VCX User Interface Welcome Window VCX User Interface The Welcome window shown in Figure 11 illustrates the general structure Overview of the VCX V User Interface. The left column displays four options: Welcome My Extensions Calling Features Log Out Each option (except Log Out) is associated with a set of tabbed pages... - Page 102 10: U VCX U HAPTER SING THE NTERFACE information on a page, click Help to launch the VCX User Interface online Help system. The following list provides a brief description of the features you can manage on each tabbed page. For detailed information, refer to the online Help.
- Page 103 VCX User Interface Overview You should not bridge an extension to a Basic phone (Models 2101 or 3101) because these phones have no programmable access buttons. Therefore, a Basic phone has no way of distinguishing a call to its extension and a bridged call. Registrations —...
-
Page 104: Enable Call Forwarding
10: U VCX U HAPTER SING THE NTERFACE Enable Call This section describes how to enable and use call forwarding features set Forwarding up through the VCX User Interface. You can also configure and enable call forwarding through your phone’s Telephone User Interface (TUI). -
Page 105: Configuring A Call Coverage Point
Configuring a Call Coverage Point You can configure the Call Forward, Fall Back to Coverage feature through the VCX User Interface only. This feature cannot be configured through the TUI. To set up call forwarding, log in to the VCX User Interface, select the Calling Features option, then access the Call Forwarding tabbed page. -
Page 106: Enabling Bridged Extensions
10: U VCX U HAPTER SING THE NTERFACE No coverage If the no coverage option is selected and a call is not answered, the caller will hear a busy tone or an error message depending on the reason for the unanswered call. If you enable Do Not Disturb on your phone, calls will automatically go to the call coverage point, which may or may not be voice mail. - Page 107 Enabling Bridged Extensions 2 On the phone that will receive a bridged call (in this example, extension 1001): a Log in to the VCX User Interface, select the My Extensions option, then access the Bridge Mappings tabbed page. b Map the bridged extension (in this example, extension 1000) to an System Appearance (SA) button (either SA 4, SA 5, or both buttons) and click Save.
-
Page 108: Bridged Line Interaction With Other Features
10: U VCX U HAPTER SING THE NTERFACE (BSA) buttons and status lights on the primary phone. Lights on each phone indicate the state of each bridged line: If the light is off, the bridged line is available for use on the primary phone. -
Page 109: Do Not Disturb And Bridged Line Calls
Enabling Bridged Extensions If all the bridge lines are in use, a call to the primary extension rings on a primary phone SA line and does not ring on the secondary phone. If all bridge lines and SA lines are in use on the primary, a call is forwarded to the Call Forward - Busy destination configured for the primary phone. -
Page 110: Hands Free And Bridged Line Calls
10: U VCX U HAPTER SING THE NTERFACE If the primary phone user presses the DND button while the call is ringing, it stops ringing and the BSA light stops blinking but continues to ring on the secondary. If the secondary does not answer, the call goes to the primary phone’s Call Forward destination when the Call Forward - Ring No Answer ring timeout value is reached. -
Page 111: Call Transfer, Call Conferencing, And Bridged Line Calls
Enabling Bridged Extensions If the primary phone enables Forward to Voice Mail, calls ring once on the primary and secondary phones, and then go to voicemail. If the primary phone enables Call Forward Universal, calls to the primary go to the Call Forward Universal destination immediately and do not ring on the primary or secondary phones. -
Page 112: Call Park And Bridged Line Calls
10: U VCX U HAPTER SING THE NTERFACE Call Park and Bridged Line Calls Either the primary phone user or the secondary phone user can park a call. When either a primary or secondary phone user parks a call and the call park timeout value is reached (the default is 5 minutes), the parked call rings back only on the phone that parked the call. -
Page 113: Hunt Groups And Bridged Line Calls
Logging Out Hunt Groups and Bridged Line Calls A primary or a secondary phone can belong to a hunt group. If a primary phone is a member of a hunt group, a call coming to the hunt group rings on an SA line on the primary phone. A secondary phone cannot receive a hunt group call directed to a primary phone. - Page 114 10: U VCX U HAPTER SING THE NTERFACE...
-
Page 115: Telephone Nstallation And Maintenance
ELEPHONE NSTALLATION AND AINTENANCE This chapter covers these topics: Connecting the Telephone Installing the 3102 Telephone Label Plate Attaching and Adjusting the Support Bracket Attaching and Adjusting the Support Bracket Moving Your Telephone Swapping Telephones Cleaning Your Telephone Troubleshooting Problems... -
Page 116: Connecting The Telephone
Console. Network connection. Connects the device to the network. VCX 3101 and 3102 Telephones and the 3105 Attendant Console, as well as older VCX telephones that include “PE” in the part number, can accept a powered Ethernet cable that conforms to the Power over Ethernet (IEEE 802.3af) standard. -
Page 117: Installing The 3102 Telephone Label Plate
The underside of an VCX telephone or attendant console includes: 1 AC power adapter connection (optional on the 3101, 3102, and 3105) 2 Ethernet connector for connection to the LAN 3 Ethernet connector for an optional connection to your desktop computer... - Page 118 3, on the stand. Figure 15 Figure 16 show the VCX 3102 Telephone. The instructions also apply to the 3105 Attendant Console and the 3101 and 3101SP Basic Telephones. Figure 15 Adjusting the Support Bracket To adjust the support...
-
Page 119: Attaching And Adjusting The Support Bracket
Attaching and Adjusting the Support Bracket Figure 16 Wall Mounting a 3102 Telephone When you mount a 3101, 3101SP, or 3102 telephone on a wall, attach the support bracket and adjust it so that the bottom of the support bracket rests against the bottom supports on the telephone, 1. -
Page 120: Wall-Mount Position
A: T HAPTER ELEPHONE NSTALLATION AND AINTENANCE Figure 17 Low-Profile and High-Profile Desktop Positions Wall-Mount Position To mount an VCX 2102 telephone on a wall, put the bracket on the opposite end of the telephone in the low-profile position. Pull and twist the knob on the underside of the phone 90 degrees (Figure 18) so that... -
Page 121: Security Wall-Mount Bracket
Bracket security wall-mount bracket that ensures that the device cannot be removed by unauthorized persons. For how to order this bracket, consult your 3Com VCX Voice-Authorized Partner. Read and follow the instructions that come with the bracket. Opening the 3105... -
Page 122: Moving Your Telephone
A: T HAPTER ELEPHONE NSTALLATION AND AINTENANCE Figure 20 3105 Attendant Console Label Cover Tabs After you print the labels and then cut them out, remove the plastic cover from the Attendant Console by pulling up on the two tabs at the top of the Attendant Console until the top of the... -
Page 123: Troubleshooting Problems
Troubleshooting Problems WARNING: Failure to unplug the telephone before you clean it could result in electrical shock. Troubleshooting Table 11 lists possible problems that you may encounter and the most Problems likely solutions. Where possible, each solution refers to the section in this guide where you can find detailed information. - Page 124 A: T HAPTER ELEPHONE NSTALLATION AND AINTENANCE Table 11 Possible Problems (continued) Possible Problem Suggested Solutions On my VCX Business Verify that you have correctly set up speed dialing. For Telephone, I added a details, see Speed Dialing. One-Touch speed dial, but the telephone does not dial that number.
- Page 125 62 Barge In 89 parking 86 bracket redialing 54 1102, 2102, 2102-IR, security wall-mount 121 transferring 61 3101 and 3102, telephone support 117 circular Hunt Group 94 bridging extensions Class of Service enabling 106 overriding 55 busy line (call forwarding)
- Page 126 48 using 59 features 46 headset interface 47 retuning after a long delay 59 conference call using (3102 phone only) 59 announced 77 holding a call 60 setting up 77 Hunt Groups unannounced 77 access numbers 93...
- Page 127 78 position, wall-mount bracket 120 problems, solving 115 telephone maintenance 115 programmable access buttons telephone support brackets, 3101 and 3102 117 2102 Business Telephone 23 telephones 3101 Basic Telephones 30 cleaning 122 3102 Business Telephones 38...
- Page 128 2101 Basic Telephone VCX 2102 Business Telephone see 2102 Business Telephone VCX 3101 Basic Telephones see 3101 Basic Telephone VCX 3102 Business Telephones see 3102 Business Telephone VCX 3105 Attendant Console see 3105 Attendant Console VCX Complement Attendant Software...