
Related Manuals for Saeco AULIKA EVO TOP HSC


Summary of Contents for Saeco AULIKA EVO TOP HSC
- Page 1 Automatic machine for espresso coffee and hot beverages WARNING: Read these instructions carefully before using the machine.
-
Page 2: Table Of Contents
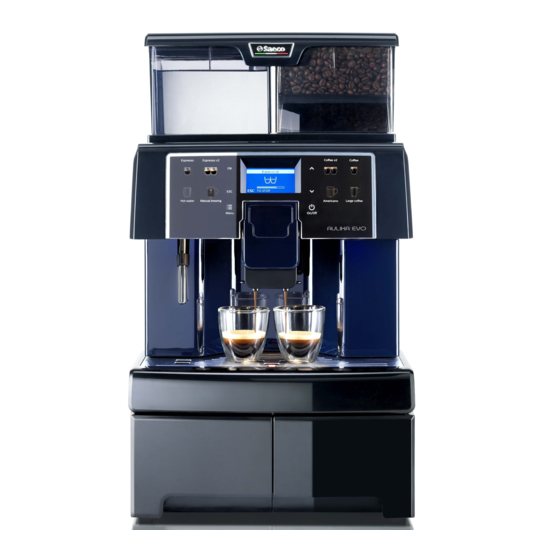
US English MAIN PARTS Tank lid with lock Drip tray Water tank Accessory drawer Display Coffee grounds drawer Control panel Coffee bean hopper Service compartment door (to be used by the Service Cappuccinatore compartment cover provider only) Hot water/Steam wand Front cover Coffee dispensing spout Cappuccinatore... - Page 3 US English SAFETY INSTRUCTIONS Never allow water to Children must never play come into contact with the appliance. with Children cannot clean or electrical parts of the service the machine out of machine: danger supervision of an adult. short circuit! water and steam may cause scalding! Intended Use...
- Page 4 US English Do not pass the power Do not touch the hot cord around corners, over water wand with bare sharp edges or over hot hands. Always use the objects and keep it away handles or knobs provided. from oil. Do not use the power Danger of Burning cord to carry or pull the...
- Page 5 US English The machine may only be The machine must only be moved service installed in places where it provider. checked qualified staff. Do not use the machine outdoors. Cleaning the machine Do not install the machine Before cleaning in a location where water machine, switch OFF (0) jets may be used.
- Page 6 US English Using Milk Store the machine in a dry place, out of the reach of Milk must be used and children. stored in accordance with the instructions given on Keep it protected from the manufacturer's original dust and dirt. packaging.
- Page 7 US English WARNING or CAUTION Marking: The signal words WARNING,CAUTION,DANGER if in the latin aplphabet shall be in uppercase having a height not less than 2.4 mm in the colored contrasting manner. The words shal be at least 12.7 mm without colored contrasting and the text explaining the signal word shall be no smaller than 2.8 mm.
- Page 8 US English CONTENTS 9.1 TURNING ON THE MACHINE MAIN PARTS 9.2 WARM-UP AND RINSING 1 INTRODUCTION TO THE MANUAL 1.1 PREAMBLE 9.3 RINSE/SELF-CLEANING CYCLE 1.2 ICONS USED 9.4 ECO-FRIENDLY: STAND-BY 9.5 PAYMENT SYSTEMS 2 INFORMATION ABOUT THE APPLIANCE 2.1 INFORMATION FOR THE MAINTENANCE 9.6 TYPES OF LED LIGHT / MACHINE OPERATION TECHNICIAN 9.7 BREWING COFFEE...
-
Page 9: Introduction To The Manual
This product has been manufactured by SaGa Coffee S.p.A. and sold under its own responsibility. SaGa Coffee S.p.A. is the guarantor of the product. Saeco is a registered trademark of Koninklijke Philips N.V. and its use is licensed by Koninklijke Philips N.V. -
Page 10: Icons Used
US English Icons Used Various kinds of warnings are contained in this manual to highlight the different hazard or competence levels. Each icon is followed by a message suggesting operating and behaviour procedures and providing useful information for the correct operation of the machine. Warning It is used to highlight danger situations for the persons in charge of using, refilling and servicing the machine. -
Page 11: Information About The Appliance
US English INFORMATION ABOUT THE APPLIANCE Information for the Description and Intended Use Maintenance Technician This machine is automatically used to brew: The appliance must be • coffee and espresso coffee using instantly ground coffee installed well-lit, beans; sheltered and dry place •... -
Page 12: Appliance Identification
US English Appliance Identification The appliance is identified by the model name and serial number shown on the special plate. The plate contains the following data: • name of the Manufacturer; • marks of conformity; • model; • serial number; •... -
Page 13: Water Tank
US English Technical Specifications Size (w x h x d) 334 x 571 x 452 mm 25 capsules approx. 21 kg Machine housing material Metal - Thermoplastic material Power Rating See the data plate Supply Voltage See the data plate Power cord length approx. -
Page 14: Safety
US English SAFETY It is mandatory to: General Safety Instructions • check conformity of the power supply; It is forbidden to: • use original spare parts; • carefully read the instructions contained in this manual and • tamper with or disable the safety systems installed on the in the attached documents;... -
Page 15: Operator Requirements
US English case failure Maintenance technician malfunctioning, please refer The maintenance technician is the only person authorised to service the machine, start the programming procedures and only qualified perform the adjustment, set up and maintenance operations. Access to the internal area personnel of the technical is restricted to persons service. -
Page 16: Handling And Storage
US English HANDLING AND STORAGE Storage operations described in this chapter The machine is packed in cardboard and expanded polystyrene packaging. must performed If the appliance is not immediately installed, it shall be kept exclusively by the service in a sheltered place according to the following instructions: provider or a specialised •... -
Page 17: Installation
US English INSTALLATION operations should neither described in this chapter installed in places where must performed water jets are used for exclusively by the service cleaning operations provider or a specialised where there is a risk of fire technician, shall or explosion. -
Page 18: Unpacking And Positioning
US English The following illustration shows the required access distances: Unpacking and Positioning • to the keypad on the front of the appliance; • to the service units in the event of failure. The machine consists of 2 parts packed in 2 different packages which should be assembled as described in section... - Page 19 US English Cappuccinatore: allows you to dispense milk-based beverages. Lubricating grease: to lubricate the Brew Group at periodic intervals. Milk circuit cleaning powder: allows a correct and thorough cleaning of the circuit, removing all possible milk Left-hand fitting for Cappuccinatore: allows the milk residues.
-
Page 20: Installing The Container Base
US English Lift the rear side of the inner drawer to unlock it. Installing the Container Base The containers have to be installed at the base of the machine before starting to use the machine. Remove the drip tray to be able to install the containers. Fix the base with the drawers by using the screws supplied with the machine. -
Page 21: Installation Of Payment Systems
US English Installation of Payment Before carrying out the steps Systems below, please make sure the This machine is designed to manage specific payment systems according to the needs of the service provider. machine is switched off. The payment system must Remove the drip tray. - Page 22 US English Remove the screw shown in the picture. Remove the lid on the left-hand side by loosening the 2 screws. Remove the coffee dispensing spout. Install the spacer on the left-hand side of the machine and fix it using the 4 screws supplied. Remove the front cover by pushing on its sides to disengage the fixing elements.
- Page 23 US English Place the wiring harnesses as shown in the figure and pass Fix the coiner box to the spacer using the 2 screws the longer one through the hole. supplied. Prepare the box containing the coiner. The connecting cable must be properly inserted in the box.
- Page 24 US English After installing the coiner, enable the products dispensed Remove the drip tray. upon payment their price. Access programming mode to carry out this procedure. The machine allows you to select a price line (0, 1, 2) whose associated value is set by the payment system through dedicated...
- Page 25 US English Remove the coffee dispensing spout. Insert the front cover and fix it by means of the screw previously removed. Insert the coffee dispensing spout. Reassemble the drip tray. Remove the front cover by pushing on its sides to disengage the fixing elements.
-
Page 26: Connection To The Electric Network
US English Connection to the Electric Network This operation must only be performed by specialised technical personnel or by the service provider. The Maintenance Technician, who is in charge of the appliance's installation, shall make sure that: • the power supply system complies with the safety instructions in force;... -
Page 27: Description Of Controls
US English DESCRIPTION OF CONTROLS Power button "Stand-by" button "Milk" button "Latte Macchiato" button It is located in the rear of the machine. If set to the "I" position the machine turns on (electrical functions enabled). Button Description during If set to the "O" position the machine turns off (electrical Normal Operation functions disabled). - Page 28 US English "Up" button brewing Press this button to scroll up the user menu options. beverage comprising two It can also be used to increase the configurable numerical parameters in the menu (for example, brightness). products that "Extra" button simultaneously brewed is When this button is pressed, the menu for preparing other types of beverages is accessed.
-
Page 29: Supply And Start Up
US English SUPPLY AND START UP • Use the special blends for espresso machines to obtain a Opening the Upper Lid strong and aromatic coffee. • Keep coffee in a cool place in an airtight sealed container. The upper protection cover should be removed in order to fill the containers. -
Page 30: Filling The Water Tank
US English Pour the coffee beans into the hopper. Filling the Water Tank Before using the machine for the first time, wash the water tank carefully. Fill the water tank with fresh drinking water only. Hot or carbonated water, as well other liquids, will... -
Page 31: Measuring And Adjusting Water
US English Rinse and fill it with fresh water; do not exceed the level Check how many squares change colour and then consult (MAX) indicated on the tank. the table. When filling the water The numbers correspond to the settings indicated in the tank, use sterile disposable following machine adjustments. -
Page 32: Intenza+" Water Filter
Water is a key element for a good espresso coffee. Therefore, it should always be filtered in a professional manner. That is why all Saeco machines can be equipped with the INTENZA+ filter. This filter is easy to use and its sophisticated technology is effective in preventing limescale Press the "OK"... - Page 33 US English The anti-scale filter should replaced whenever indicated by the machine. Before descaling, remove the anti-scale filter from the water tank. Measuring water hardness is very important in order Switch to machine programming mode as described in to correctly manage the section "Access to the Technical Menu".
- Page 34 US English Press the "OK" button to enter. To exit the procedure, press the "ESC" button. Press the "OK" button to continue. Press the "DOWN" button until the "WATER MENU" option is selected. Remove the tank from the machine and empty it. Remove the small white filter from the tank and store it in a dry place sheltered from dust.
-
Page 35: Closing The Upper Lid
US English Fill the tank with fresh drinking water and reinsert it into the machine. Press the "OK" button to confirm the insertion of the new filter. At the end of the cycle, remove the container previously placed under the hot water wand. procedure display Remove and empty the drip tray. -
Page 36: Coffee Grind Adjustment
US English Coffee Grind Adjustment pour ground and/or instant coffee into the coffee bean hopper. Do not put any material Adjusting the "Aroma" - other than coffee beans Amount of Ground Coffee into the hopper. The machine allows you to program the amount of coffee to be ground for preparing each cup of coffee. -
Page 37: Adjusting The Coffee Dispensing Spout
US English The reference marks indicate the amount of ground coffee • When using mugs. which has been set. You can set different amounts with the following references: 3 - Minimum coffee amount (about 6 grams) 4 - Maximum coffee amount (about 11 grams) Two cups can be placed under the dispensing spout to 7.10 Adjusting the Coffee... -
Page 38: Turning On/Off The Machine
US English 7.12 Setting the Language (Upon Before brewing First Use) product and/or when At first start-up, the desired display language of the bringing dispensing messages must be selected and stored. This allows the beverage parameters to be adjusted to the specific taste of spout back to its normal the country where the machine is in use. -
Page 39: Washing The Parts Coming Into Contact With Food
US English These simple operations will allow you to always brew When the hot water dispensing procedure has been excellent coffee. completed, empty the container. They have to be performed: The machine is now ready for use. • at first start-up; •... -
Page 40: Programming Menu
US English PROGRAMMING MENU Button Description in This chapter contains Programming Mode instructions on how to set Use the buttons described below to scroll the appliance change menus. programming parameters of the appliance. Therefore it is necessary to carefully read it and to understand exact sequence... -
Page 41: User Menu Programming
US English Button 4: Down The PASSWORD will not This button allows you to: • browse the pages within a menu; be requested if set on the • change the parameters when they are made editable using default value (0000). It the "OK"... - Page 42 US English PASSWORD forgotten, you can reset it by entering a PUK code. You have to request the PUK code to the Saeco service centre, who will guide you through the procedure. 8.2.2 Structure of the User Menu The main options of the user menu are:...
- Page 43 US English 8.2.3 Description of Messages in the User Menu MENU ITEM Description This function allows you to perform the brew group wash cycle (see section "Brew Group Cleaning with the Brew Group Clean "Coffee Oil Remover""). This function manages the cleaning cycle of the Cappuccinatore, which is used to prepare Cappuccinatore Cleaning milk-based beverages (see section "Thorough Cleaning of the Cappuccinatore").
-
Page 44: Technical Menu Programming
US English Technical Menu The PASSWORD will not Programming be requested if set on the The structure of the technical menu is detailed in the "Structure of the Technical Menu" section. default value (0000). It The "Description of Messages in the Technical Menu" section describes all the options in the technical menu. - Page 45 Prebrewing by entering a PUK code. COFFEE TEMPERATURE COFFEE LENGTH You have to request the MILK QUANTITY Pause PUK code to the Saeco High Speed Milk Default service centre, who will HOT WATER WATER QUANTITY guide you through the Default milk procedure.
- Page 46 US English MENU ITEM Factory settings Payment system DECOUNT LED BEVERAGE Price Menu Espresso Espresso x2 Coffee LARGE COFFEE AMERICAN COFFEE HOT WATER Cappuccino Latte Macchiato milk CAFFE LATTE Statistics PRODUCT COUNTERS Total Espresso Espresso x2 Coffee LARGE COFFEE AMERICAN COFFEE HOT WATER Cappuccino Latte Macchiato...
- Page 47 US English 8.3.3 Description of Messages in the Technical Menu MENU ITEM Description Settings This menu allows you to access all machine configuration parameters This menu allows you to activate the use of virtual credits, load them onto the machine, reset them and view Credits Menu them on the "Ready for use"...
- Page 48 US English MENU ITEM Description EXTRA This menu allows you to save Extra beverages in beverage mode LARGE COFFEE A Large Coffee will be brewed once the length of the beverage has been saved NOTE: the length of the beverage may be numerically adjusted using the "CONFIG. WITH PARAMETERS"...
- Page 49 US English MENU ITEM Description Pre-brewing: Prebrewing coffee is slightly dampened before brewing so as to bring out the full aroma of the coffee that acquires an excellent taste. pre-brewing is not performed. active. High longer in order to bring out the coffee taste. COFFEE TEMPERATURE This section allows the coffee brewing temperature to be adjusted lowest brewing temperature...
- Page 50 US English MENU ITEM Description This setting can only be adjusted for beverages containing milk and allows you to MILK QUANTITY program the amount of milk dispensed for each selected beverage. The bar allows you to set the exact amount of milk to be dispensed (the value is measured in seconds).
- Page 51 US English MENU ITEM Description This section allows you to program the amount of coffee to be brewed for each selected COFFEE LENGTH beverage. The bar allows you to set the exact amount of coffee to be brewed (the value is measured in turbine pulses).
- Page 52 US English MENU ITEM Description Milk and coffee are dispensed in two separate steps. NOTE: in this case, the various dispensing stages (coffee or milk) can be individually stopped. Milk and coffee are dispensed at the same time. NOTE: in this case, the user can only stop dispensing the beverage as a whole. Setting ECOMODE to OFF brings down the dispensing time of mixed products.
- Page 53 US English MENU ITEM Description To set the user menu access PASSWORD. SET USER PASSWORD NOTE: if the PASSWORD is set to (0000), it will not be requested upon access. If the PASSWORD is forgotten, a restoring procedure must be started. Please contact customer service. SET TECHNICAL To set the technical menu access PASSWORD.
- Page 54 US English MENU ITEM Description To activate the function that enables machine operation with the water network (only Water Net for models designed accordingly). NOTE: Use this function with utmost care, as a wrong setting may cause malfunctions. The "ON" option must only be activated if the "Water Network" kit is installed and connected properly.
- Page 55 US English MENU ITEM Description Latte Macchiato To manage the price of Latte Macchiato. milk To manage the price of Milk. CAFFE LATTE To manage the price of Caffe Latte. Statistics This function allows the user to view: - Product Counters - Error counters - Descaling and Washing counters PRODUCT COUNTERS...
- Page 56 US English MENU ITEM Description NUMBER OF EXECUTION Indicates the number of brew group washing cycles performed SINCE LAST This indicates the number of turbine pulses processed since the last time a full brew group wash cycle was completed SINCE PRODUCTION This indicates the total number of turbine pulses processed by the machine since it was started up WATER FILTER This function allows the user to view the counters relating to the water filters.
-
Page 57: Setting The User Menu Password
US English Press the "OK" button to access the "GENERAL MENU". Setting the user menu password The PASSWORD must be set by the service provider in order to prevent access by unauthorised personnel who could change the machine settings and cause malfunctions. To set the PASSWORD, proceed as follows: Switch to machine programming mode as described in section "Access to the Technical Menu". -
Page 58: Setting The Technical Menu Password
US English When the "OK" button is pressed on the last number, the To select the "MACHINE MENU" option, press the machine saves the code and displays the following page. "DOWN" button. Press the "OK" button to enter. Press the "ESC" button several times to exit; you will now need to enter the PASSWORD to access the user menu. - Page 59 US English Press the "OK" button to enter. Now the PASSWORD can be set. Press the "DOWN" button or the "UP" button to set the desired number. Press the "OK" button to confirm the highlighted number and to move on to the next number. Carry out the procedures described in the previous steps to set the chosen numbers.
-
Page 60: Operation And Use
US English OPERATION AND USE Turning on the Machine The use by children older than 8 years or by persons Connection to the power with reduced physical, supply should be carried mental or sensory abilities exclusively or with lack of experience service provider! skills allowed,... -
Page 61: Warm-Up And Rinsing
US English Before turning on the machine, ensure that the plug is If some or all of the correctly inserted in the power socket. To turn on the machine, move the power button on the back of the machine buttons are off machine to "I". -
Page 62: Rinse/Self-Cleaning Cycle
US English Rinse/Self-Cleaning Cycle This cycle allows the internal coffee circuits to be rinsed with fresh water. The cycle is carried out: • At machine start-up (with cold boiler); • After priming the circuit (with cold boiler); • During the Stand-by preparation phase (if at least one coffee-based product has been brewed);... -
Page 63: Payment Systems
US English 9.5.1 With Coiner Time can be programmed according to your needs (see instructions in chapter "Programming Menu"). Simply press a button on the control panel to restart the machine (if the power button is set to "I"). In this case the machine will go through the rinse cycle only if the boiler is cold. -
Page 64: Types Of Led Light / Machine Operation
US English Brewing Coffee To brew coffee, press: the "Espresso" button for an espresso; the "Espresso x2" button to brew two espressos; the "Coffee" button to brew a coffee; Then the brewing cycle starts: To brew 2 coffees, the machine automatically grinds doses... -
Page 65: Cappuccinatore
US English Cappuccinatore 9.8.1.1 Cappuccinatore without Coiner This chapter explains how to use the milk Cappuccinatore The machine is normally installed without coiner. In this to prepare a cappuccino, a Latte Macchiato or to froth case, the left-hand fitting must be installed on the milk. -
Page 66: Hot Water/Steam Wand
US English 9.8.1.2 Cappuccinatore with Coiner Brewing Cappuccino When the machine is equipped with a coiner, milk must be The machine can dispense cappuccino quickly and easily managed in a different way in order to be able to reach the with the touch of a button. - Page 67 US English Remove the cover from the front side. Before using Cappuccinatore, clean it as described in the "Cleaning The cover can be placed the Cappuccinatore (After on the machine side using Each Use)" section. the integrated magnet. Insert the clean tube directly into the milk container. Insert the Cappuccinatore into its seat until it locks into place.
- Page 68 US English Place the cup under the dispensing spout. Remove the container and clean it if necessary. The machine can dispense both milk and coffee at the same time. This function must be activated by the service provider. In this case, press the "Cappuccino" button to brew a cappuccino.
-
Page 69: Brewing Latte Macchiato
US English Remove the cover from the front side. 9.10 Brewing Latte Macchiato The machine can dispense Latte Macchiato quickly and easily with the touch of a button. Danger burning! Dispensing preceded by small jets of hot water. Clean the Cappuccinatore immediately after using it to froth milk (see section "Cappuccinatore Cleaning... -
Page 70: Dispensing Milk
US English We recommend using tall glasses for this type of preparation, thus properly moving the coffee dispensing spout. When the machine is ready, press the "Latte Macchiato" Before using button to start dispensing the Latte Macchiato. The machine prepares the Latte Macchiato automatically. Cappuccinatore, clean it as After using the Cappuccinatore, clean it as described in the "Cleaning the Cappuccinatore (After Each Use)"... - Page 71 US English Clean the suction hose The cover can be placed externally with a damp on the machine side using cloth. This way, all parts the integrated magnet. will be perfectly clean and free of any milk residue. If Insert the Cappuccinatore into its seat until it locks into place.
-
Page 72: Hot Water Dispensing
US English Insert the clean tube directly into the milk container. 9.12 Hot Water Dispensing Danger burning! Dispensing preceded by small jets of hot water. The hot water wand reach high temperatures. Place a container under the hot water wand. To ensure better results when preparing milk, use cold milk. -
Page 73: Extra" Products
US English When the desired beverage has been selected, press the 9.13 "Extra" products "OK" button to start the preparation. The machine is designed to also brew products other than Refer to the section describing those displayed on the control panel. After pressing the "Extra"... - Page 74 US English Caffè Latte Dispensing can be stopped This programme allows you to prepare a coffee with hot milk. by pressing the "Extra" Danger burning! button "ESC" Dispensing button. preceded by small jets of hot water. American Coffee This programme allows you to prepare an American coffee.
- Page 75 US English Press the "Extra" button to access the menu. Press the "DOWN" button to select "CAFFE LATTE". Place a suitable cup under the dispensing spout. Before using Cappuccinatore, clean it as described in the "Cleaning the Cappuccinatore (After Each Use)" section. Insert the clean tube directly into the milk container.
-
Page 76: Adjusting Brewed Products
US English 9.14 Adjusting Brewed Products Danger burning! Dispensing The machine allows you to adjust the product length according to your needs and to the type of cup used. preceded by small jets of water. steam The product length in the cup or glass can be set by two methods: wand reach... - Page 77 US English Press the "OK" button to enter. To select the "Cappuccino" option, press the "DOWN" button multiple times. Press the "OK" button to access the CONFIG. BREWING MODE menu. Press the "OK" button to enter. The machine is now in programming mode.
- Page 78 US English To select the "BEVERAGE MENU" option, press the The length of all products, "DOWN" button. except for "AMERICAN COFFEE" and "STEAM", can be programmed by following above procedure. 9.14.2 CONFIG. WITH Press the "OK" button to enter. PARAMETERS To set the length with this method, enter the "BEVERAGE MENU"...
- Page 79 US English To select the "Cappuccino" option, press the "DOWN" Press the "OK" button to enter. button multiple times. Press the "DOWN" button or the "UP" button to select the desired value. Then press the "OK" button to confirm Press the "OK" button to enter. and exit.
- Page 80 US English Press the "DOWN" button to select the "MILK Press the "DOWN" button or the "UP" button to select QUANTITY" menu. the desired value. Press the "DOWN" button to select the "HIGH SPEED MILK" menu. Press the "OK" button to enter. Press the "OK"...
-
Page 81: Using The Machine With Credits
US English The factory settings can be Resetting the ESPRESSO restored for each single beverage factory beverage and the restored settings will also reset the settings will be applied only ESPRESSO settings, to that specific beverage. To apart from the price line. restore the other beverages' settings, enter the menu and restore the settings. -
Page 82: Emptying The Coffee Grounds Drawer
US English Remove the coffee grounds drawer and empty out the 9.16 Emptying the Coffee coffee grounds in a suitable container. Grounds Drawer This operation must be performed with machine turned on and/or in stand-by mode. The machine will indicate when the coffee grounds drawer has reached its maximum capacity. -
Page 83: Cleaning And Maintenance
US English CLEANING AND MAINTENANCE 10.1 General Notes for Correct Before performing Operation maintenance and/or Non-removable cleaning operation, unplug components the power cord. machine itself must be cleaned, when differently specified, only The Manufacturer is not by using cold or lukewarm liable damage water, with a non-abrasive... -
Page 84: Coffee Bean Hopper
US English 10.2 Cleaning and Scheduled 10.2.1 Maintenance Schedule Maintenance Operation to be carried out All parts requiring cleaning Emptying and cleaning the coffee grounds drawer are easily accessible, so no Thorough Cleaning of the Cappuccinatore Water tank cleaning tools are needed. Brew group cleaning Brew group lubrication Coffee bean hopper cleaning... - Page 85 US English 10.2.2 Cleaning the Hot 10.2.4 Cleaning the Drip Tray Water/Steam Wand The hot water/steam wand must be cleaned externally Empty and wash the drip tray daily; this operation must with a damp cloth after each use and, in any case, once a also be performed when the float is raised.
- Page 86 US English Place a container under the dispensing spout. 10.2.5 Cleaning the Cappuccinatore (After Each Use) Failure clean Cappuccinatore after use with milk cause proliferation bacteria which may be harmful for the user. The Cappuccinatore must be washed and cleaned every time it is used.
- Page 87 US English If the machine vends a It is advisable to remove milk-based product, the the Cappuccinatore from wash cycle will use hot the machine when not water only and will not being used, in order to include the suction tube, keep it clean.
- Page 88 US English Remove the ring from the Cappuccinatore. Wash the parts under running water. Make sure any milk deposits/residues are removed. After washing, reassemble the parts following the same procedure used for disassembly, but in reverse order. After washing reassembling Cappuccinatore, it can be installed back...
-
Page 89: Cappuccinatore
Thorough Cleaning of the Cappuccinatore Clean all the Cappuccinatore parts thoroughly every month using the Saeco detergent. The Saeco detergent may be purchased at your local dealer or at authorised service centres. The lack of cleaning before and after each use can affect the correct operation of the machine. - Page 90 US English Press the "OK" button to access. Wait for the bag content to dissolve completely and then press the "OK" button to confirm. Press the "OK" button to start the Cappuccinatore Insert the clean tube directly into the container. cleaning cycle.
- Page 91 US English The bar shows the washing progress. Place an empty container under the dispensing spout and Wait until the cycle stops automatically. When the cycle press the "OK" button to confirm. has been completed, the display shows: The machine performs a Cappuccinatore rinse cycle. The Rinse the water tank and fill it with fresh drinking water.
- Page 92 US English Lift the rear side of the inner drawer to unlock it. 10.2.8 Brew Group Cleaning The brew group should be cleaned whenever the coffee bean hopper is filled, or at least once a week. Turn off the machine by switching the power button to the "O" position and remove the plug from the socket.
- Page 93 Make sure that the hook which locks the brew group is in properties. For descaling, the correct position. firmly press the "PRESS" button to check its position. use the Saeco descaling solution and follow the procedure described in the "Descaling" chapter.
- Page 94 US English Press the "OK" button to access the brew group cleaning Remove the brew group by pulling it by the handle and cycle. pressing the «PRESS» button. Press the "OK" button to access. Press the "OK" button to confirm the removal of the brew group.
- Page 95 At the end of the cycle, Before lubricating the brew group, clean it under running water as described in the "Brew Group Cleaning" chapter. after performing the rinse Lubricate the brew group guides using Saeco grease only. cycle, the machine goes back normal...
- Page 96 This operation needs to be carried out before the appliance stops working properly, as in this case repair is not covered by warranty. Use the Saeco descaling product only. Its formula has been specifically designed ensure better machine performance and operation for its whole operating life.
- Page 97 US English Press the "DOWN" button until the "DESCALING" option is selected. Select the "SETTINGS" option and press the "OK" button. Press the "OK" button to enter. To select the "MACHINE MENU" option, press the Select the "START DESCALE" option; Press the "OK" "DOWN"...
- Page 98 US English Press the "OK" button. Insert the complete Cappuccinatore into the machine and remove the coffee dispensing spout. Put the water tank back into the machine. Press the "OK" Press the "Coffee" button. button. Remove the suction tube from the Cappuccinatore while the descaling cycle is performed.
- Page 99 US English The descaling cycle will If you do not have a begin once this option is container of this capacity, confirmed. Press the "ESC" pause the cycle by pressing button to pause the cycle. the "ESC" button, empty Press the "Stand-by" button the container, put it back to permanently cancel the onto the machine and...
- Page 100 US English Drain any liquids from the drip tray and place it back into A default amount of water the machine. Press the "OK" button. is needed for the rinse phase. This allows an ideal rinse cycle performed in order to ensure the best conditions brew products.
- Page 101 US English The descaling solution is to be disposed of according manufacturer’s instructions and/or regulations in force in the country of use. After completing descaling cycle, wash the brew group as described in the "Brew Group Cleaning" section in the "Cleaning and Maintenance"...
-
Page 102: Troubleshooting
US English TROUBLESHOOTING 11.1 Warning signals This chapter describes all the warning messages that the machine may display to the user and the actions that can and/or must be performed by the user. Warning Signals How to reset the message To restore machine operation, close the service door. - Page 103 US English Warning Signals How to reset the message Fill the coffee bean hopper with coffee beans. The machine requires a descaling cycle. When this message is displayed, it is still possible to use the machine, but its correct operation might be affected.
-
Page 104: Problems - Causes - Solutions
US English 11.2 Problems - Causes - Solutions The following table indicates the possible error or alarm causes which may lead to a partial or total shutdown of the appliance. Problems Causes Solutions The machine does not turn on. The machine is not connected to the electric Connect the machine to the electric network. -
Page 105: Storage - Disposal
US English STORAGE - DISPOSAL 12.1 Location Change Should the machine be placed in a different location, it is necessary to: • disconnect the appliance from the supply network; • carry out the general cleaning of the appliance as indicated in chapter "Cleaning and Maintenance";... -
Page 106: Instructions For End Of Operational Life Disposal
US English INSTRUCTIONS FOR END OF OPERATIONAL LIFE DISPOSAL INFORMATION FOR THE USER in compliance with art. 13 of the Italian Legislative Decree dated 25 July 2005, no. 151 "Implementation of the directives 2002/95/EC, 2002/96/EC and 2003/108/EC on the restriction of the use of certain hazardous substances in electrical and electronic equipment, as well as waste disposal".