Table of Contents
Advertisement
Quick Links
Advertisement
Table of Contents

Related Manuals for Toa TS-D1000 Series


Summary of Contents for Toa TS-D1000 Series
- Page 1 INSTRUCTION MANUAL (BROWSER SETTINGS) DIGITAL CONFERENCE SYSTEM TS-D1000 SERIES Thank you for purchasing TOA’s Digital Conference System. Please carefully follow the instructions in this manual to ensure long, trouble-free use of your equipment.
-
Page 2: Table Of Contents
TABLE OF CONTENTS 1. SUMMARY OF SETTINGS ................3 2. SYSTEM REQUIREMENTS ................ 3 3. CONNECTIONS ....................4 4. SWITCHING THE SCREEN ................ 5 5. DOWNLOADING AND DELETING RECORDED FILES ... 6 6. PERFORMING CONFERENCE SETTINGS ........7 7. LOG CONFIRMATION AND DOWNLOAD ........ -
Page 3: Summary Of Settings
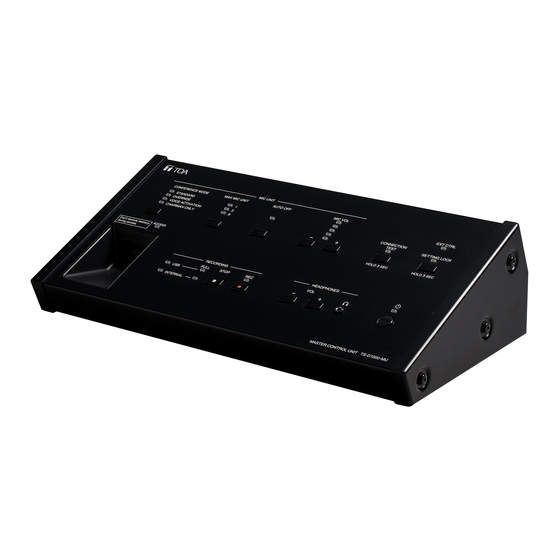
1. SUMMARY OF SETTINGS By connecting a PC to the TS-D1000-MU Master control unit via a LAN cable, the following function settings, operation and maintenance functions can be performed using the PC’s browser: Unit Setting • Network/Account settings • Time setting Function Settings •... -
Page 4: Connections
3. CONNECTIONS Step 1. Start the browser and enter the TS-D1000-MU web address in the address field. Example: ts-d1000.local The login screen is displayed. * This screen is based on Google Chrome. Tips • The factory-default address is: "ts-d1000.local." • To change the address, please refer to "Unit Settings"... -
Page 5: Switching The Screen
4. SWITCHING THE SCREEN After the PC is connected to the TS-D1000-MU (see 4), from the menu bar located at the top of the browser screen, click on the following screen names or icons to switch to each screen. Perform all necessary settings or operations on each screen. -
Page 6: Downloading And Deleting Recorded Files
5. DOWNLOADING AND DELETING RECORDED FILES After the PC is connected to the TS-D1000-MU (see 4), from the menu bar located at the top of the browser screen, click on "REC." The REC screen is displayed, allowing recorded files to be downloaded or deleted. -
Page 7: Performing Conference Settings
6. PERFORMING CONFERENCE SETTINGS After the PC is connected to the TS-D1000-MU (see 4), from the menu bar located at the top of the browser screen, click on "Conference." The Conference screen is displayed, allowing settings related to the Conference unit to be performed. (1) Conference Mode Set the Conference unit’s conference mode. - Page 8 Conference Mode operations are as follows: Conference Mode Description Permits speaking to start in order of Talk key depression. Standard When the Talk key is pressed, if its Conference unit exceeds the preset Max. (Factory default setting) open mic No. that unit cannot be used for speaking (first-in-first-out priority). The Chairman unit can start speaking at any time (up to two Chairman units).
- Page 9 (3) Chairman Unit Name Contents C Priority Speech Set operating mode when Priority speech is enabled at the Chairman unit. Selection: PTT/ALT Factory default setting: PTT PTT and ALT mode operations are as follows: PTT: Unit can only speak while its Priority speech key is pressed. ALT: Unit can speak when its Priority speech key is pressed, and terminate Priority speech when pressed again.
-
Page 10: Log Confirmation And Download
7. LOG CONFIRMATION AND DOWNLOAD After the PC is connected to the TS-D1000-MU (see 4), from the menu bar located at the top of the browser screen, click on "Log." The Log screen is displayed, allowing logs to be downloaded or deleted. (1) Log Type selection Switch the type of log to be displayed and select required logs. - Page 11 (5) Page selection The displayed portion of the log file can be moved backwards or forwards in page units. Clicking "NEXT" displays the next page and clicking "PREV" displays the previous page. (6) Log The selected type of log is displayed.
-
Page 12: Time Settings
8. TIME SETTINGS After the PC is connected to the TS-D1000-MU (see 4), from the menu bar located at the top of the browser screen, click on "Time." The Time Setting screen is displayed, allowing clock-related settings to be performed. (1) Time The current time of the TS-D1000-MU’s internal clock when the Time Setting screen is opened or when the time is set is displayed. -
Page 13: Connection Status Confirmation
9. CONNECTION STATUS CONFIRMATION After the PC is connected to the TS-D1000-MU (see 4), from the menu bar located at the top of the browser screen, click on "Connection Test." The Connection Test screen is displayed. (1) RESET ID button Click to reset the Conference unit ID number. -
Page 14: Resetting The Conference Unit Id Number
9.1. Resetting the Conference Unit ID Number When the microphone indicator does not flash correctly, even when the Conference unit has been correctly connected to the TS-D1000-MU and its corresponding Connection Test button clicked, it may be possible that the Conference unit has been assigned the same ID number as another unit. In such cases, reset all Conference unit ID numbers. -
Page 15: Detail Settings
10. DETAIL SETTINGS 10.1. Detail Settings Screen Displays The following 4 items can be set and displayed on the detail settings screen: • Unit settings • Firmware update • Reversion to factory default settings • Display language After the PC is connected to the TS-D1000-MU (see 4), from the menu bar located at the top of the browser screen, click on the "Detail Settings"... -
Page 16: Unit Settings
10.2. Unit Settings Click the Detail settings icon and select Unit Settings or click Unit Settings on the list on the left of the Detail settings screen. The contents of the Unit Settings are displayed. - Page 17 (1) Network Settings Perform network-related settings. Name Description A Host Name Enter a host name. Factory default setting: ts-d1000 "Host name.local" becomes the TS-D1000-MU’s web address. (See "CONNECTIONS" on p. B Physical Address The TS-D1000-MU’s MAC address is displayed, which cannot be changed. (MAC) C IP Address When acquiring the IP address automatically:...
-
Page 18: Firmware Update
[Unit Setting Procedure] Step 1. Enter the setting contents in the Network and Account setting fields as required. Step 2. Click the SET button. A confirmation dialog will be displayed. Step 3. Click the DONE button. The TS-D1000MU reboots and the set contents are applied. 10.3. - Page 19 10.3.1. Updating the Firmware Step 1. Click the Select File button. The Explorer screen is displayed. Step 2. Select the firmware file to be updated. Step 3. Click the Open button. The firmware file is selected and its filename is displayed on the right-hand side of the Select File button.
-
Page 20: Reversion To Factory Default Settings
10.4. Reversion to Factory Default Settings Click the Detail settings icon and select Factory Default or click Factory Default in the leftmost list of the Detail settings screen. The screen for returning to factory default settings is displayed. Note Returning the equipment settings to their factory-preset state initializes both network and account settings as well, creating the possibility that the PC cannot be connected to the TS-D1000-MU. -
Page 21: Setting The Display Language
The language to be used is set, switching the on-screen characters to the selected language. Traceability Information for Europe Manufacturer: Authorized representative: TOA Corporation TOA Electronics Europe GmbH 7-2-1, Minatojima-Nakamachi, Chuo-ku, Kobe, Hyogo, Suederstrasse 282, 20537 Hamburg, Japan Germany 202002...