Fujitsu ScanSnap iX1500 Basic Operation Manual
Hide thumbs
Also See for ScanSnap iX1500:
- Consumable replacement and cleaning instructions (14 pages) ,
- Basic operation manual (514 pages) ,
- Advanced operation manual (109 pages)
Table of Contents
Advertisement
Advertisement
Table of Contents

Related Manuals for Fujitsu ScanSnap iX1500


Summary of Contents for Fujitsu ScanSnap iX1500
- Page 1 P3PC-6932-01ENZ2 Basic Operation Guide (Mac OS)
-
Page 2: Table Of Contents
Contents About This Manual ......................... 7 Safety Information..........................8 Manuals ...............................9 Trademarks............................11 Manufacturer............................12 Symbols Used in This Manual........................ 13 Arrow Symbols in This Manual....................... 14 Screen Examples in This Manual ......................15 Abbreviations Used in This Manual ......................16 Setting Up the ScanSnap..................... - Page 3 Startup Mode (iX1500)........................94 Sleep Mode..........................95 Automatic Power OFF (iX1500/iX500/iX100/SV600/S1300i) ............... 96 Checking the Remaining Battery Power (iX100) ................99 Screens and Operations on the Touch Panel (iX1500) ................100 Screens on the Touch Panel (iX1500).................... 101 Entering Characters on the Touch Panel (iX1500) ................105 Checking the Notification Displayed on the Touch Panel (iX1500) .............
- Page 4 Using a Proxy Server for the Internet Connection (iX1500) ............... 166 Scanning Documents ......................167 Scanning Documents with iX1500 ......................168 Documents to Scan (iX1500) ......................169 Scanning Documents (iX1500) ..................... 173 Scanning Long Pages (iX1500)..................... 178 Scanning Documents of Different Widths or Lengths in One Batch (iX1500) ........182 Scanning Small Size Documents such as Receipts in One Go (iX1500) ..........
- Page 5 Saving Receipt Data to a Computer...................... 335 Creating a Photo Album and Saving it to a Computer................338 Correcting Scanned Images (SV600) ................341 When a Document Is Scanned (SV600) ....................342 Filling in Fingers Captured in a Scanned Image (When a Document Is Scanned)(SV600)..... 343 When a Book Is Scanned (SV600) .......................
- Page 6 Replacing the Pad Assy (S1300i) ....................432 Replacing the Pick Roller Assembly (S1300i).................. 435 Appendix ..........................440 Updating the Software ........................441 Updating the Firmware ........................442 Uninstalling the Software ........................443 Uninstalling ScanSnap Manager ....................444 Uninstalling ScanSnap Home ....................... 446 Uninstalling ABBYY FineReader for ScanSnap ................
-
Page 7: About This Manual
About This Manual About This Manual "Safety Information" (page 8) "Manuals" (page 9) "Trademarks" (page 11) "Manufacturer" (page 12) "Symbols Used in This Manual" (page 13) "Arrow Symbols in This Manual" (page 14) "Screen Examples in This Manual" (page 15) "Abbreviations Used in This Manual"... -
Page 8: Safety Information
Safety Information Safety Information The attached "Safety Precautions" manual contains important information about the safe and correct use of the ScanSnap. Make sure that you read and understand it before using the ScanSnap. -
Page 9: Manuals
This manual describes operations including various scanning methods and useful Operation Guide usages of the ScanSnap. You can refer to this manual at the following website. https://www.pfu.fujitsu.com/imaging/downloads/manual/advanced/mac/en/topics/ index.html ScanSnap Manager Help This Help file describes the windows, operational troubles and the solutions, as well as messages of the ScanSnap Manager. - Page 10 ScanSnap Home when it is used in conjunction with ScanSnap Manager. You can refer to this manual at the following website. https://www.pfu.fujitsu.com/imaging/downloads/manual/ss_webhelpmgr/en/top/ index.html How to Install PDF Editing This manual describes how to install the following applications for creating, editing, Software managing, and utilizing electronic documents in a PDF format.
-
Page 11: Trademarks
Trademarks Trademarks Apple, App Store, the Apple logo, Mac, Mac OS, OS X, macOS, iPad, iPadOS, iPhoto, iPod touch, and iTunes are trademarks of Apple Inc. Kofax is a registered trademark or trademark of Kofax Limited. Adobe, Acrobat, and Reader are either registered trademarks or trade names of Adobe Systems Incorporated in the United States and/or other countries. -
Page 12: Manufacturer
Manufacturer Manufacturer PFU Limited YOKOHAMA i-MARK PLACE, 4-4-5 Minatomirai, Nishi-ku, Yokohama, Kanagawa, 220-8567, Japan © PFU Limited 2020... -
Page 13: Symbols Used In This Manual
Symbols Used in This Manual Symbols Used in This Manual The following indications are used in this manual to obviate any chance of accident or damage to you and people near you, and your property. Warning labels indicate the warning level and statements. -
Page 14: Arrow Symbols In This Manual
Arrow Symbols in This Manual Arrow Symbols in This Manual Right-arrow symbols (→) are used to connect icons or menu options you should select in succession. Example: From the sidebar in Finder, select [Applications] → [ScanSnap]. -
Page 15: Screen Examples In This Manual
Screen Examples in This Manual Screen Examples in This Manual The screenshots used in this manual are the ones that are displayed when iX1500 is connected. The screenshots used in this manual are of macOS Catalina v10.15. The actual windows and operations may differ depending on the operating system. The screen examples in this manual are subject to change without notice in the interest of product development. -
Page 16: Abbreviations Used In This Manual
Abbreviations Used in This Manual Abbreviations Used in This Manual When a ScanSnap model is referred to in this manual, "Color Image Scanner ScanSnap" is omitted. Also, the following abbreviations are used in this manual. Abbreviation Used Designation Mac OS macOS Catalina v10.15 macOS Mojave v10.14 macOS High Sierra v10.13... -
Page 17: Setting Up The Scansnap
Setting Up the ScanSnap Setting Up the ScanSnap "System Requirements" (page 18) "Setting Up iX1500" (page 20) "Setting Up iX500" (page 26) "Setting Up iX100" (page 29) "Setting Up SV600" (page 34) "Setting Up S1300i" (page 39) "Setting Up S1100i" (page 43) "Connecting the ScanSnap to a Mobile Device or the ScanSnap Cloud Server (iX1500/iX500/ iX100)"... -
Page 18: System Requirements
System Requirements System Requirements The ScanSnap has the following system requirements. For the latest information on requirements, please visit the ScanSnap Support Site at: https://scansnap.fujitsu.com/g-support/en/ Operating system (*1) macOS Catalina v10.15 (*2) macOS Mojave v10.14 (*2) macOS High Sierra v10.13 (*2) macOS Sierra v10.12.4 or later (*2) - Page 19 System Requirements The version of the USB port or the USB hub is USB 1.1. l To scan a document, a disk space that is approximately three times larger than the size of the file to be saved is required.
-
Page 20: Setting Up Ix1500
Setting Up iX1500 Setting Up iX1500 Set up the ScanSnap so that it is ready to scan with ScanSnap Manager. The following preparations are required before you set up the ScanSnap. l Check that all items are included in the package For details, refer to "Package List for iX1500"... - Page 21 Setting Up iX1500 2. Open the ADF paper chute (cover) to turn the power on. ADF Paper Chute (Cover) 3. Configure the settings of the ScanSnap by following the instructions on the touch panel. Set the display language of the touch panel, the startup mode, and a device that is used with the ScanSnap.
- Page 22 1. Turn on the computer and log in as a user with Administrator privileges. 2. Access the download web pages of the software programs. http://scansnap.fujitsu.com/global/dl/ 3. Select your model and operating system and click [Display software list] to display the list of software programs to be installed.
- Page 23 Setting Up iX1500 HINT l If there are available updates for ScanSnap Online Update on the server, you will be asked whether you accept the license agreement terms for ScanSnap Online Update. For details about ScanSnap Online Update, refer to the ScanSnap Online Update Help. l To save images created from documents that you scanned with the ScanSnap to a mobile device or a cloud service directly, you need to connect the ScanSnap to the mobile device or the ScanSnap Cloud server.
- Page 24 Setting Up iX1500 Once the Quick Menu for selecting an application to perform a particular action appears, the check process for the scanning operation is complete. Clicking an icon on the Quick Menu allows you to save images created from documents that you scanned with the ScanSnap to your desired folder, or attach them to an e-mail.
-
Page 25: Package List For Ix1500
Setting Up iX1500 Package List for iX1500 Make sure that all items are included in the package before you set up the ScanSnap. Items that come with the ScanSnap are as follows: 1. ScanSnap 2. USB cable 3. AC cable (*1) 4. -
Page 26: Setting Up Ix500
1. Turn on the computer and log in as a user with Administrator privileges. 2. Access the download web pages of the software programs. http://scansnap.fujitsu.com/global/dl/ 3. Select your model and operating system and click [Display software list] to display the list of... - Page 27 Setting Up iX500 4. Download [ScanSnap Installer] from the software list that is displayed in [Those using ScanSnap Manager] in [Setup Programs] and save it on your computer. By using the installer that you downloaded, you can install the following software programs. l ScanSnap Manager l ScanSnap Online Update l ScanSnap manual...
- Page 28 Setting Up iX500 Checking the Scanning Operation 1. Load a document in the ScanSnap. Load a document face-down and head-first with the back facing you (when loading multiple documents, the last page is on the top). For details about how to scan a document, refer to "Scanning Documents with iX500"...
-
Page 29: Setting Up Ix100
Setting Up iX100 Setting Up iX100 Set up the ScanSnap so that it is ready to scan with ScanSnap Manager. The following preparations are required before you set up the ScanSnap. l Check that all items are included in the package For details, refer to "Package List for iX100"... - Page 30 1. Turn on the computer and log in as a user with Administrator privileges. 2. Access the download web pages of the software programs. http://scansnap.fujitsu.com/global/dl/ 3. Select your model and operating system and click [Display software list] to display the list of software programs to be installed.
- Page 31 Setting Up iX100 HINT l If there are available updates for ScanSnap Online Update on the server, you will be asked whether you accept the license agreement terms for ScanSnap Online Update. For details about ScanSnap Online Update, refer to the ScanSnap Online Update Help. l To save images created from documents that you scanned with the ScanSnap to a mobile device or a cloud service directly, you need to connect the ScanSnap to the mobile device or the ScanSnap Cloud server.
- Page 32 Setting Up iX100 Once the Quick Menu for selecting an application to perform a particular action appears, the check process for the scanning operation is complete. Clicking an icon on the Quick Menu allows you to save images created from documents that you scanned with the ScanSnap to your desired folder, or attach them to an e-mail.
-
Page 33: Package List For Ix100
Setting Up iX100 Package List for iX100 Make sure that all items are included in the package before you set up the ScanSnap. Items that come with the ScanSnap are as follows: 1. ScanSnap 2. USB cable 3. Welcome Guide 4. -
Page 34: Setting Up Sv600
Setting Up SV600 Setting Up SV600 Set up the ScanSnap so that it is ready to scan with ScanSnap Manager. The following preparations are required before you set up the ScanSnap. ATTENTION Do not connect the ScanSnap to the computer before installing the software. l Check that all items are included in the package For details, refer to "Package List for SV600"... - Page 35 1. Turn on the computer and log in as a user with Administrator privileges. 2. Access the download web pages of the software programs. http://scansnap.fujitsu.com/global/dl/ 3. Select your model and operating system and click [Display software list] to display the list of software programs to be installed.
- Page 36 Setting Up SV600 HINT If there are available updates for ScanSnap Online Update on the server, you will be asked whether you accept the license agreement terms for ScanSnap Online Update. For details about ScanSnap Online Update, refer to the ScanSnap Online Update Help. Checking the Scanning Operation 1.
- Page 37 Setting Up SV600 3. Select [Flat] and then click the [Save this image] button. Once the Quick Menu for selecting an application to perform a particular action appears, the check process for the scanning operation is complete. Clicking an icon on the Quick Menu allows you to save images created from documents that you scanned with the ScanSnap to your desired folder, or attach them to an e-mail.
-
Page 38: Package List For Sv600
Setting Up SV600 Package List for SV600 Make sure that all items are included in the package before you set up the ScanSnap. Items that come with the ScanSnap are as follows: 1. ScanSnap 2. USB cable 3. AC cable (*1) 4. -
Page 39: Setting Up S1300I
1. Turn on the computer and log in as a user with Administrator privileges. 2. Access the download web pages of the software programs. http://scansnap.fujitsu.com/global/dl/ 3. Select your model and operating system and click [Display software list] to display the list of software programs to be installed. - Page 40 Setting Up S1300i For the overview for each software program, refer to "Overview of the Software Related to the ScanSnap" (page 82). Installing the Software/Connecting the ScanSnap 1. Run the installer that you saved on your computer. 2. Follow the instructions on the [ScanSnap Installer] window that appears. When you are asked whether you accept the license agreement terms, read the confirmation message and select [I agree to all terms and conditions].
- Page 41 Setting Up S1300i 2. Press the [Scan] button to start scanning. Once the Quick Menu for selecting an application to perform a particular action appears, the check process for the scanning operation is complete. Clicking an icon on the Quick Menu allows you to save images created from documents that you scanned with the ScanSnap to your desired folder, or attach them to an e-mail.
-
Page 42: Package List For S1300I
Setting Up S1300i Package List for S1300i Make sure that all items are included in the package before you set up the ScanSnap. Items that come with the ScanSnap are as follows: 1. ScanSnap 2. USB cable 3. AC cable (*1) 4. -
Page 43: Setting Up S1100I
1. Turn on the computer and log in as a user with Administrator privileges. 2. Access the download web pages of the software programs. http://scansnap.fujitsu.com/global/dl/ 3. Select your model and operating system and click [Display software list] to display the list of software programs to be installed. - Page 44 Setting Up S1100i Installing the Software/Connecting the ScanSnap 1. Run the installer that you saved on your computer. 2. Follow the instructions on the [ScanSnap Installer] window that appears. When you are asked whether you accept the license agreement terms, read the confirmation message and select [I agree to all terms and conditions].
- Page 45 Setting Up S1100i Once the Quick Menu for selecting an application to perform a particular action appears, the check process for the scanning operation is complete. Clicking an icon on the Quick Menu allows you to save images created from documents that you scanned with the ScanSnap to your desired folder, or attach them to an e-mail.
-
Page 46: Package List For S1100I
Setting Up S1100i Package List for S1100i Make sure that all items are included in the package before you set up the ScanSnap. Items that come with the ScanSnap are as follows: 1. ScanSnap 2. USB cable 3. Welcome Guide 4. -
Page 47: Connecting The Scansnap To A Mobile Device Or The Scansnap Cloud Server (Ix1500/Ix500/Ix100)
Connecting the ScanSnap to a Mobile Device or the ScanSnap Cloud Server (iX1500/iX500/iX100) Connecting the ScanSnap to a Mobile Device or the ScanSnap Cloud Server (iX1500/iX500/iX100) Connecting the ScanSnap to a mobile device or the ScanSnap Cloud server allows you to save scanned images to the mobile device or a cloud server directly. -
Page 48: Scansnap Overview
ScanSnap Overview ScanSnap Overview This section provides an overview that you should be aware of before operating ScanSnap. "What You Can Do with the ScanSnap" (page 49) "Parts and Functions" (page 65) "Charging the Battery (iX100)" (page 80) "Overview of the Software Related to the ScanSnap" (page 82) "ScanSnap Manager Icon"... -
Page 49: What You Can Do With The Scansnap
What You Can Do with the ScanSnap What You Can Do with the ScanSnap "What You Can Do with iX1500" (page 50) "What You Can Do with iX500" (page 53) "What You Can Do with iX100" (page 55) "What You Can Do with SV600" (page 58) "What You Can Do with S1300i"... -
Page 50: What You Can Do With Ix1500
What You Can Do with the ScanSnap What You Can Do with iX1500 Scanning Multiple Documents A document stack with a thickness of 5 mm (0.2 in.) or less (for A4 or smaller sizes: up to 50 sheets with 80 g/m [20 lb] paper weight) can be loaded into the ScanSnap for scanning. - Page 51 What You Can Do with the ScanSnap l Documents that are larger than A4/Letter size and not larger than A3 size For details, refer to "Scanning Documents Larger Than A4 or Letter Size (iX1500)" (page 190). l Documents that can be damaged quite easily such as photographs, or non-standard size documents such as clippings For details, refer to "Scanning Documents Such as Photographs and Clippings (iX1500)"...
- Page 52 What You Can Do with the ScanSnap...
-
Page 53: What You Can Do With Ix500
What You Can Do with the ScanSnap What You Can Do with iX500 Scanning Multiple Documents A document stack with a thickness of 5 mm (0.2 in.) or less (for A4 or smaller sizes: up to 50 sheets with 80 g/m [20 lb] paper weight) can be loaded into the ScanSnap for scanning. - Page 54 What You Can Do with the ScanSnap For details, refer to "Scanning Documents Such as Photographs and Clippings (iX500)" (page 221). Connecting the ScanSnap via Wireless LAN You can connect the ScanSnap and a computer or mobile device via wireless LAN. To configure the wireless settings for the ScanSnap, use the ScanSnap Wireless Setup Tool, which is installed together with ScanSnap Manager.
-
Page 55: What You Can Do With Ix100
What You Can Do with the ScanSnap What You Can Do with iX100 Scanning Multiple Documents Continuously When you scan multiple documents with the ScanSnap, you can scan one or two document at a time. To scan two documents at a time, you can insert two documents at a time or you can insert the next document while another document is being scanned. - Page 56 What You Can Do with the ScanSnap Scanned images can be merged only when there is text, diagram, or a table on the fold line of the folded document. For details, refer to "Scanning Documents Larger Than A4 or Letter Size by Directly Inserting Them in the ScanSnap (iX100)"...
- Page 57 What You Can Do with the ScanSnap Connecting the ScanSnap via Wireless LAN You can connect the ScanSnap and a computer or mobile device via wireless LAN. To connect them, you can use either the Access Point Connect mode in which a wireless access point is used for connection or the Direct Connect mode in which a computer or mobile device is directly connected to the ScanSnap.
-
Page 58: What You Can Do With Sv600
What You Can Do with the ScanSnap What You Can Do with SV600 The ScanSnap model that performs overhead scanning has a scanning unit that does not touch documents. The following scanning operations can be performed with this model: l A book or booklet that is up to A3 in size can be scanned without cutting pages out. l Multiple documents such as business cards or other types of cards can be scanned at once. - Page 59 What You Can Do with the ScanSnap Timed Mode The ScanSnap automatically starts scanning after the specified time period passes. This is useful also for scanning multiple documents (of any type) consecutively. There are two types of settings for timed mode: l Setting the time period before the ScanSnap starts scanning a document after the [Scan] button is pressed l Setting the time period for the ScanSnap to start the next scan when a document is scanned...
- Page 60 What You Can Do with the ScanSnap "Splitting a Double-Page Spread Image into Two Page Images (SV600)" (page 353) "Filling in Fingers Captured in a Scanned Image (When a Book Is Scanned)(SV600)" (page 356) When multiple documents are scanned at once "Correcting the Scanned Image Orientation (SV600)"...
-
Page 61: What You Can Do With S1300I
What You Can Do with the ScanSnap What You Can Do with S1300i Scanning Multiple Documents A document stack with a thickness of 1 mm (0.04 in.) or less (for A4 or smaller sizes: up to 10 sheets with 80 g/m [20 lb] paper weight) can be loaded into the ScanSnap for scanning. -
Page 62: What You Can Do With S1100I
What You Can Do with the ScanSnap What You Can Do with S1100i Scanning Multiple Documents Continuously When you scan multiple documents with the ScanSnap, you can scan one or two document at a time. To scan two documents at a time, you can insert two documents at a time or you can insert the next document while another document is being scanned. - Page 63 What You Can Do with the ScanSnap Scanned images can be merged only when there is text, diagram, or a table on the fold line of the folded document. For details, refer to "Scanning Documents Larger Than A4 or Letter Size by Directly Inserting It in the ScanSnap (S1100i)"...
- Page 64 What You Can Do with the ScanSnap...
-
Page 65: Parts And Functions
Parts and Functions Parts and Functions "Parts and Functions of iX1500" (page 66) "Parts and Functions of iX500" (page 68) "Parts and Functions of iX100" (page 70) "Parts and Functions of SV600" (page 73) "Parts and Functions of S1300i" (page 76) "Parts and Functions of S1100i"... -
Page 66: Parts And Functions Of Ix1500
Parts and Functions Parts and Functions of iX1500 This section explains the names and functions of the ScanSnap parts. Front Name Description ADF paper chute (cover) (*1) Open it to use the ScanSnap. Opening it turns on the ScanSnap. Then, you can load a document on it. - Page 67 Parts and Functions Name Description Touch panel Used to display the connection status of the ScanSnap, start scanning documents, or change the settings of the ScanSnap. When the ScanSnap is turned off automatically, press the touch panel to turn it back on. Stacker Pull it out to use it.
-
Page 68: Parts And Functions Of Ix500
Parts and Functions Parts and Functions of iX500 This section explains the names and functions of the ScanSnap parts. Front Name Description ADF paper chute (cover) (*1) Open it to use the ScanSnap. Opening it turns on the ScanSnap. Then, you can load a document on it. - Page 69 Parts and Functions Name Description [Scan] button (*1) Starts scanning. Can be pressed even when the stacker is closed. Indicates the status of the ScanSnap as follows: Blue (lit): Ready Blue (flashing): Scanning Orange (flashing): Error Wi-Fi indicator Indicates the connection status between the ScanSnap and your wireless access point as follows: Blue (lit): Ready Blue (flashing): Standby...
-
Page 70: Parts And Functions Of Ix100
Parts and Functions Parts and Functions of iX100 This section explains the names and functions of the ScanSnap parts. Front Name Description Feed guide (*1) Open it to use the ScanSnap. Opening it turns on the ScanSnap. Then, you can place a document on it to insert the document. - Page 71 Parts and Functions Name Description Output guide Open it to eject documents from the front of the ScanSnap. Select an ejection method depending on the document type you are scanning. For details about documents that can be scanned with the ScanSnap, refer to "Documents to Scan (iX100)"...
- Page 72 Parts and Functions Side Name Description Tape seal Remove this tape seal after installing the software. USB connector Used to connect a USB cable. Back Name Description WPS button Press this button to connect to a WPS compatible device by using the push button method.
-
Page 73: Parts And Functions Of Sv600
Parts and Functions Parts and Functions of SV600 This section explains the names and functions of the ScanSnap parts. Front Name Description Head Neck [Scan] button (*1) l Turns on the ScanSnap. l Starts scanning. [Stop] button (*1) l Turns the ScanSnap on or off. l Stops scanning. - Page 74 Parts and Functions For details, refer to "Automatic Power OFF (iX1500/iX500/iX100/SV600/S1300i)" (page 96). ATTENTION When carrying the ScanSnap, hold its base and neck. Do not carry the scanner by the head. Back Name Description Security cable slot Used to connect an anti-theft security cable (commercially available). USB connector Used to connect a USB cable.
- Page 75 Parts and Functions Name Description Camera Detects page turning and glossy papers. Infrared LED Irradiates the scan area with infrared to detect page turning and glossy papers. Glass Protects the lens used to scan a document. Lamp Illuminates the document to be scanned.
-
Page 76: Parts And Functions Of S1300I
Parts and Functions Parts and Functions of S1300i This section explains the names and functions of the ScanSnap parts. Front Name Description ADF paper chute (cover) (*1) Open it to use the ScanSnap. Opening it turns on the ScanSnap. Then, you can load a document on it. - Page 77 Parts and Functions Back Name Description Tape seal Remove this tape seal after installing the software. Security cable slot Used to connect an anti-theft security cable (commercially available). Power connector Used to connect a power cable. USB connector Used to connect a USB cable.
-
Page 78: Parts And Functions Of S1100I
Parts and Functions Parts and Functions of S1100i This section explains the names and functions of the ScanSnap parts. Front Name Description Feed guide Open it to use the ScanSnap. Opening it turns on the ScanSnap. Then, you can place a document on it to insert the document. - Page 79 Parts and Functions Name Description Top cover Open it to remove jammed documents or clean the inside of the ScanSnap. For details about how to clean the inside of the ScanSnap, refer to "Cleaning the Inside of S1100i" (page 408). [Scan/Stop] button Press this button to start or finish scanning.
-
Page 80: Charging The Battery (Ix100)
Charging the Battery (iX100) Charging the Battery (iX100) The battery of the ScanSnap can be charged by connecting the ScanSnap and the computer with the supplied USB cable. Charge the ScanSnap's battery in the following procedure. ATTENTION l The ScanSnap is powered and charged through a USB port on a computer. Use the USB port that provides a power supply of 500 mA to charge the battery. - Page 81 Charging the Battery (iX100) a The battery indicator lights up in orange. When charging completes, the battery indicator turns off. HINT You can use the optional USB power adapter to charge the battery in a shorter time.
-
Page 82: Overview Of The Software Related To The Scansnap
This is a application for creating, editing, managing, and utilizing PDF format electronic documents. For details about the installation and activation methods of Kofax Power PDF Standard for Mac, Nuance Power PDF Standard for Mac, or Nuance PDF Converter for Mac, refer to the following: How to Install PDF Editing Software https://www.pfu.fujitsu.com/imaging/downloads/manual/install/en... -
Page 83: Scansnap Manager Icon
ScanSnap Manager Icon ScanSnap Manager Icon When ScanSnap Manager is running, the ScanSnap Manager icon is displayed in the Dock. The ScanSnap Manager icon indicates whether or not ScanSnap Manager is successfully communicating with the ScanSnap. The appearance of the icon changes according to the communication status as shown below. -
Page 84: Scansnap Manager Menu
ScanSnap Manager Menu ScanSnap Manager Menu This menu appears when you click the ScanSnap Manager icon in the Dock while holding down the [control] key on the keyboard. By using the ScanSnap Manager menu, you can start scanning documents and can display a window in order to change the scan settings or preferences for the ScanSnap and ScanSnap Manager. - Page 85 ScanSnap Manager Menu Example: When SV600 and iX1500 are connected to a computer...
-
Page 86: Scansnap Setup Window
ScanSnap Setup Window ScanSnap Setup Window When you click the ScanSnap Manager icon while holding down the [control] key on the keyboard, and then select [Settings] from the "ScanSnap Manager Menu" (page 84), the following ScanSnap setup window appears. In the ScanSnap setup window, you can use the [Use Quick Menu] checkbox to specify whether or not to use the Quick Menu. - Page 87 ScanSnap Setup Window...
-
Page 88: Turning The Scansnap On Or Off
Turning the ScanSnap On or Off Turning the ScanSnap On or Off This section explains how to turn the ScanSnap on or off. "Turning the ScanSnap On" (page 89) "Turning the ScanSnap Off" (page 92) "Startup Mode (iX1500)" (page 94) "Sleep Mode"... -
Page 89: Turning The Scansnap On
Turning the ScanSnap On or Off Turning the ScanSnap On Turn on the computer. HINT For iX1500/iX500/iX100, if you connect the ScanSnap and a mobile device via a wireless LAN and then scan a document, you do not have to turn on the computer. a The computer starts up and the ScanSnap Manager icon appears in the Dock. - Page 90 Turning the ScanSnap On or Off Example: iX500 a The [Scan] button flashes in blue. The button returns to being lit normally when document scanning is enabled. iX100/S1100i Open the feed guide of the ScanSnap. Example: iX100 a The [Scan/Stop] button flashes in blue. The button returns to being lit normally when document scanning is enabled.
- Page 91 Turning the ScanSnap On or Off ATTENTION For iX1500/iX500/iX100/S1300i/S1100i, with some computers, the initialization of the ScanSnap may be performed several times when the computer is started up depending on some computers. HINT l It may take more time for the ScanSnap Manager icon in the Dock to change to depending on computer performance, operating environment, or loading, for example, when many software programs are running at the same time.
-
Page 92: Turning The Scansnap Off
Turning the ScanSnap On or Off Turning the ScanSnap Off Turn off the ScanSnap. iX1500 Close the ADF paper chute (cover) of the ScanSnap. iX500/S1300i Close the ADF paper chute (cover) of the ScanSnap. Example: iX500 a The [Scan] button turns off. iX100/S1100i Close the feed guide of the ScanSnap. - Page 93 Turning the ScanSnap On or Off a The power LED turns off. The ScanSnap is turned off and the ScanSnap Manager icon in the Dock changes from ATTENTION l For iX1500/iX500/S1300i, close the ADF paper chute (cover) after putting the extension back. l If moving the ScanSnap, first turn the power off and remove all cables.
-
Page 94: Startup Mode (Ix1500)
Turning the ScanSnap On or Off Startup Mode (iX1500) The action that the ScanSnap takes when the ADF paper chute (cover) is opened and the ScanSnap is turned on depends on the start up mode setting of the ScanSnap. The ScanSnap has two startup modes as described below. l Fast You can start scanning immediately. -
Page 95: Sleep Mode
Turning the ScanSnap On or Off Sleep Mode When the ScanSnap is on and has not been used for the following period of time, it enters sleep (power saving) mode. iX1500/SV600 15 minutes iX500 14 minutes iX100/S1300i/S1100i 1 minute... -
Page 96: Automatic Power Off (Ix1500/Ix500/Ix100/Sv600/S1300I)
Turning the ScanSnap On or Off Automatic Power OFF (iX1500/iX500/iX100/SV600/S1300i) When the ScanSnap is turned on and left unused for the specified time, it will turn itself off automatically. HINT l For iX1500/iX500/SV600/S1300i, a notification window notifies you 5 minutes before the ScanSnap turns off automatically. - Page 97 Turning the ScanSnap On or Off HINT To continue using the ScanSnap, reset the time until auto power-off by performing one of the following: l Insert a document in the ScanSnap l Press the [Scan/Stop] button on the ScanSnap l Close the feed guide and open it again SV600 To turn the ScanSnap back on, perform one of the following operations: l Press the [Scan] button on the ScanSnap (this will not start scanning)
- Page 98 Turning the ScanSnap On or Off 2. In the [Power] list, change the settings for [Power setting] based on how it is connected.
-
Page 99: Checking The Remaining Battery Power (Ix100)
Turning the ScanSnap On or Off Checking the Remaining Battery Power (iX100) The ScanSnap has a battery. To check the remaining battery power, click the ScanSnap Manager icon in the Dock while holding down the [control] key on the keyboard, and check [Battery] in the "ScanSnap Manager Menu"... -
Page 100: Screens And Operations On The Touch Panel (Ix1500)
Screens and Operations on the Touch Panel (iX1500) Screens and Operations on the Touch Panel (iX1500) "Screens on the Touch Panel (iX1500)" (page 101) "Entering Characters on the Touch Panel (iX1500)" (page 105) "Checking the Notification Displayed on the Touch Panel (iX1500)" (page 106) -
Page 101: Screens On The Touch Panel (Ix1500)
Screens and Operations on the Touch Panel (iX1500) Screens on the Touch Panel (iX1500) The screens displayed on the touch panel of the ScanSnap are either the home screen to start scanning or the [Settings] screen to check or modify the settings of the ScanSnap. This section explains the following screens: "Home screen"... - Page 102 Screens and Operations on the Touch Panel (iX1500) l When the ScanSnap is being occupied by a computer connected to the ScanSnap via wireless l When the ScanSnap is being occupied by a computer connected to the ScanSnap via the USB cable l When the ScanSnap is being occupied by a mobile device Device name (3)
- Page 103 Screens and Operations on the Touch Panel (iX1500) [Settings] Screen The [Settings] screen is the screen in which you can check the ScanSnap, wireless LAN, and maintenance information, and specify settings. Returns to the home screen. Displays the [Maintenance] screen. The following operations can be performed in the [Maintenance] window.
- Page 104 Screens and Operations on the Touch Panel (iX1500) l Modifying the settings for each connect mode l Checking the information such as the wireless LAN connection status and the signal strength l Resetting the wireless settings that are configured for the ScanSnap When there is a device with the same IP address as that of the ScanSnap on the network, displayed on The [Connecting Devices] screen is displayed.
-
Page 105: Entering Characters On The Touch Panel (Ix1500)
Screens and Operations on the Touch Panel (iX1500) Entering Characters on the Touch Panel (iX1500) When changing the scanner name for the ScanSnap or entering a security key to connect to the wireless LAN, the keyboard screen is used to enter characters. The keyboard screen is displayed when you press in the input field. -
Page 106: Screens And Operations On The Touch Panel (Ix1500)
Screens and Operations on the Touch Panel (iX1500) Checking the Notification Displayed on the Touch Panel (iX1500) When the glass inside the ScanSnap is dirty, replacement for consumables is needed, or the latest firmware is available, a notification is displayed on the touch panel of the ScanSnap. When there is a notification, appears on When a notification is displayed, check the content and take measures accordingly. -
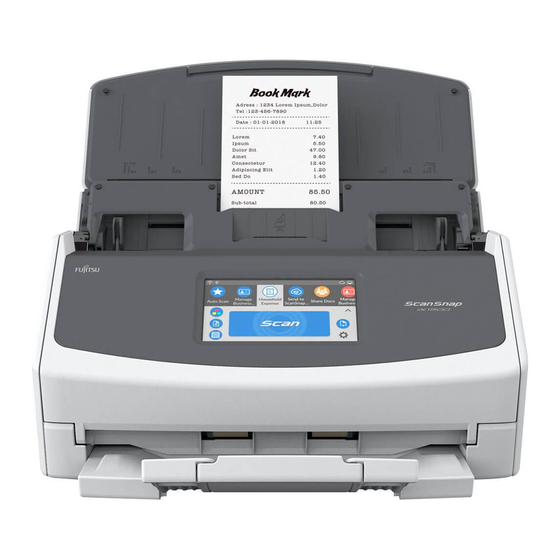
Page 107: Attaching The Receipt Guide (Ix1500)
Attaching the Receipt Guide (iX1500) Attaching the Receipt Guide (iX1500) When you scan business cards or receipts, attaching the Receipt Guide to the ScanSnap makes it easy to scan them. By using the Receipt Guide for business cards and receipts, you can place documents with different widths such as receipts in it to scan them at the same time. - Page 108 Attaching the Receipt Guide (iX1500) ADF Paper Chute (Cover) Slide the side guides all the way out. Fit the protrusions on the Receipt Guide in the slots on the ScanSnap. Slide the Receipt Guide down along the guide.
- Page 109 Attaching the Receipt Guide (iX1500) Press the protrusions on the right and left firmly to fit them in the slots until it clicks. You can remove the Receipt Guide by holding it with one hand and pulling it.
-
Page 110: Connecting The Scansnap Via Wireless Lan (Ix1500)
Connecting the ScanSnap via Wireless LAN (iX1500) Connecting the ScanSnap via Wireless LAN (iX1500) By connecting the ScanSnap to a computer or a mobile device via wireless LAN, you can scan documents. Select one of the following wireless modes to connect the ScanSnap to the computer or mobile device. -
Page 111: Preparations For Connecting The Scansnap Via Wireless Lan (Ix1500)
Preparations for Connecting the ScanSnap via Wireless LAN (iX1500) Preparations for Connecting the ScanSnap via Wireless LAN (iX1500) To connect the ScanSnap via wireless LAN, prepare the following: l An environment in which a wireless LAN is available To connect the ScanSnap and a computer or a mobile device in Access Point Connect mode, prepare the wireless LAN environment. -
Page 112: Connecting The Scansnap To A Wireless Lan (Ix1500)
Connecting the ScanSnap to a Wireless LAN (iX1500) Connecting the ScanSnap to a Wireless LAN (iX1500) To connect the ScanSnap and a computer or a mobile device in Access Point Connect mode, connect the ScanSnap to a wireless access point. HINT When you cannot connect the ScanSnap to a wireless access point, use Direct Connect mode to connect the ScanSnap to a computer or a mobile device directly. -
Page 113: Connecting The Scansnap To A Wireless Access Point By Using The Scansnap Wireless Setup Tool (Ix1500)
Connecting the ScanSnap to a Wireless LAN (iX1500) Connecting the ScanSnap to a Wireless Access Point by Using the ScanSnap Wireless Setup Tool (iX1500) The ScanSnap Wireless Setup Tool is an application to configure the wireless settings required for connecting your ScanSnap via wireless LAN in a wizard format. The ScanSnap Wireless Setup Tool can be used to configure and check the following wireless LAN settings and connection. -
Page 114: Connecting The Scansnap To A Wireless Access Point From The Touch Panel (Ix1500)
Connecting the ScanSnap to a Wireless LAN (iX1500) Connecting the ScanSnap to a Wireless Access Point from the Touch Panel (iX1500) To use the ScanSnap over a wireless LAN, connect the ScanSnap to a wireless access point which the computer is connected to. The ScanSnap can be connected to a wireless access point from the touch panel. - Page 115 Connecting the ScanSnap to a Wireless LAN (iX1500) 5. Enter the information of the wireless access point to be used and press the [Next] button. The items which are displayed in the screen differ depending on the security protocol of the wireless access point.
- Page 116 Connecting the ScanSnap to a Wireless LAN (iX1500) 4. Go back to the touch panel of the ScanSnap, and press the [Next] button in the [WPS (button)] screen within two minutes. 5. Press the [Complete] button in the [Check Connection Results] screen. 6.
-
Page 117: Connecting The Scansnap To A Computer Or Mobile Device Via Wireless Lan (Ix1500)
Connecting the ScanSnap to a computer or mobile device via Wireless LAN (iX1500) Connecting the ScanSnap to a computer or mobile device via Wireless LAN (iX1500) "Connecting the ScanSnap to a Computer in Access Point Connect Mode (iX1500)" (page 118) "Connecting the ScanSnap to a Mobile Device in Access Point Connect Mode (iX1500)"... -
Page 118: Connecting The Scansnap To A Computer In Access Point Connect Mode (Ix1500)
Connecting the ScanSnap to a computer or mobile device via Wireless LAN (iX1500) Connecting the ScanSnap to a Computer in Access Point Connect Mode (iX1500) Configure the wireless settings for the ScanSnap in the ScanSnap Wireless Setup Tool Wizard or on the touch panel to complete the preparation for connecting the ScanSnap to a computer. - Page 119 Connecting the ScanSnap to a computer or mobile device via Wireless LAN (iX1500) HINT When the ScanSnap and a computer are connected via wireless LAN, a notification window notifies you of the communication status.
-
Page 120: Connecting The Scansnap To A Mobile Device In Access Point Connect Mode (Ix1500)
Connecting the ScanSnap to a computer or mobile device via Wireless LAN (iX1500) Connecting the ScanSnap to a Mobile Device in Access Point Connect Mode (iX1500) Configure the wireless settings for the ScanSnap in the ScanSnap Wireless Setup Tool Wizard or on the touch panel to complete the preparation for connecting the ScanSnap to a mobile device. -
Page 121: Connecting The Scansnap To A Computer Directly In Direct Connect Mode (Ix1500)
Connecting the ScanSnap to a computer or mobile device via Wireless LAN (iX1500) Connecting the ScanSnap to a Computer Directly in Direct Connect Mode (iX1500) When a wireless LAN environment has not been configured or the ScanSnap cannot establish a connection to a wireless access point, and if you want to connect the ScanSnap to a computer via wireless LAN, use Direct Connect mode to connect the scanner to the computer directly. - Page 122 Connecting the ScanSnap to a computer or mobile device via Wireless LAN (iX1500) ATTENTION If the ScanSnap Manager icon is , exit ScanSnap Connect Application on the mobile device. HINT l If the [Connect automatically to previous ScanSnap by Wi-Fi] checkbox is selected and the previously connected ScanSnap is available for the connection, the computer is connected to the ScanSnap automatically.
-
Page 123: Connecting The Scansnap To A Mobile Device In Direct Connect Mode (Ix1500)
Connecting the ScanSnap to a computer or mobile device via Wireless LAN (iX1500) Connecting the ScanSnap to a Mobile Device in Direct Connect Mode (iX1500) If a wireless LAN environment has not been configured or the ScanSnap cannot establish a connection with a wireless access point, connect the ScanSnap to a mobile device directly in Direct Connect mode. - Page 124 Connecting the ScanSnap to a computer or mobile device via Wireless LAN (iX1500) 6. Start up ScanSnap Connect Application on the mobile device, and connect the ScanSnap and the mobile device directly. For details about how to connect the ScanSnap to a mobile device, refer to the Basic Operation Guide (Mobile Connection).
-
Page 125: Connecting The Scansnap Via Wireless Lan (Ix500/Ix100)
Connecting the ScanSnap via Wireless LAN (iX500/iX100) Connecting the ScanSnap via Wireless LAN (iX500/iX100) By connecting the ScanSnap to a computer or a mobile device via wireless LAN, you can scan documents. iX100 Select one of the following wireless modes to connect the ScanSnap to the computer or mobile device. -
Page 126: Preparations For Connecting The Scansnap Via Wireless Lan (Ix500/Ix100)
Preparations for Connecting the ScanSnap via Wireless LAN (iX500/iX100) Preparations for Connecting the ScanSnap via Wireless LAN (iX500/iX100) To connect the ScanSnap via wireless LAN, prepare the following: l An environment in which a wireless LAN is available To connect the ScanSnap and a computer or a mobile device in Access Point Connect mode, prepare the wireless LAN environment. -
Page 127: Connecting The Scansnap To A Wireless Lan (Ix500/Ix100)
Connecting the ScanSnap to a Wireless LAN (iX500/iX100) Connecting the ScanSnap to a Wireless LAN (iX500/ iX100) The ScanSnap Wireless Setup Tool is an application to configure the wireless settings required for connecting your ScanSnap via wireless LAN in a wizard format. The ScanSnap Wireless Setup Tool can be used to configure and check the following wireless LAN settings and connection. -
Page 128: Connecting The Scansnap To A Computer Or Mobile Device Via Wireless Lan (Ix500)
Connecting the ScanSnap to a Computer or Mobile Device via Wireless LAN (iX500) Connecting the ScanSnap to a Computer or Mobile Device via Wireless LAN (iX500) "Connecting the ScanSnap and a Computer (iX500)" (page 129) "Connecting the ScanSnap and a Mobile Device (iX500)" (page 131) -
Page 129: Connecting The Scansnap And A Computer (Ix500)
Connecting the ScanSnap to a Computer or Mobile Device via Wireless LAN (iX500) Connecting the ScanSnap and a Computer (iX500) You can use the ScanSnap Wireless Setup Tool Wizard to complete the preparation for connecting the ScanSnap to a computer. For details, refer to "Connecting the ScanSnap to a Wireless LAN (iX500/iX100)"... - Page 130 Connecting the ScanSnap to a Computer or Mobile Device via Wireless LAN (iX500) a The ScanSnap is connected to a computer via wireless LAN and the ScanSnap Manager icon changes to HINT When the ScanSnap and a computer are connected via wireless LAN, a notification window notifies you of the communication status.
-
Page 131: Connecting The Scansnap And A Mobile Device (Ix500)
Connecting the ScanSnap to a Computer or Mobile Device via Wireless LAN (iX500) Connecting the ScanSnap and a Mobile Device (iX500) You can use the ScanSnap Wireless Setup Tool Wizard to complete the preparation for connecting the ScanSnap to a mobile device. For details, refer to "Connecting the ScanSnap to a Wireless LAN (iX500/iX100)"... -
Page 132: Connecting The Scansnap To A Computer Or Mobile Device Via Wireless Lan (Ix100)
Connecting the ScanSnap to a computer or mobile device via Wireless LAN (iX100) Connecting the ScanSnap to a computer or mobile device via Wireless LAN (iX100) "Connecting the ScanSnap to a Computer in Access Point Connect Mode (iX100)" (page 133) "Connecting the ScanSnap to a Mobile Device in Access Point Connect Mode (iX100)"... -
Page 133: Connecting The Scansnap To A Computer In Access Point Connect Mode (Ix100)
Connecting the ScanSnap to a computer or mobile device via Wireless LAN (iX100) Connecting the ScanSnap to a Computer in Access Point Connect Mode (iX100) You can use the ScanSnap Wireless Setup Tool Wizard to complete the preparation for connecting the ScanSnap to a computer. - Page 134 Connecting the ScanSnap to a computer or mobile device via Wireless LAN (iX100) l If the intended ScanSnap for connection does not appear in the list of the ScanSnap units to be connected, refer to the ScanSnap Manager Help. a The ScanSnap is connected to a computer via wireless LAN and the ScanSnap Manager icon changes to HINT When the ScanSnap and a computer are connected via wireless LAN, a notification window...
-
Page 135: Connecting The Scansnap To A Mobile Device In Access Point Connect Mode (Ix100)
Connecting the ScanSnap to a computer or mobile device via Wireless LAN (iX100) Connecting the ScanSnap to a Mobile Device in Access Point Connect Mode (iX100) You can use the ScanSnap Wireless Setup Tool Wizard to complete the preparation for connecting the ScanSnap to a mobile device. -
Page 136: Connecting The Scansnap To A Computer Directly In Direct Connect Mode (Ix100)
Connecting the ScanSnap to a computer or mobile device via Wireless LAN (iX100) Connecting the ScanSnap to a Computer Directly in Direct Connect Mode (iX100) You can use the ScanSnap Wireless Setup Tool Wizard to complete the preparation for connecting the ScanSnap to a computer. - Page 137 Connecting the ScanSnap to a computer or mobile device via Wireless LAN (iX100) From the list of the ScanSnap units to be connected, select the ScanSnap that you want to connect, and click the [Connect] button. ATTENTION l If the [ScanSnap Manager - Enter Destination Password] window appears, enter the password to connect.
-
Page 138: Connecting The Scansnap To A Mobile Device In Direct Connect Mode (Ix100)
Connecting the ScanSnap to a computer or mobile device via Wireless LAN (iX100) Connecting the ScanSnap to a Mobile Device in Direct Connect Mode (iX100) When you connect a mobile device to the ScanSnap in Direct Connect mode, you do not need to configure settings in the ScanSnap Wireless Setup Tool. -
Page 139: Reconnecting To A Wireless Access Point Using The Scansnap Wps Button (Ix500/Ix100)
Reconnecting to a Wireless Access Point Using the ScanSnap WPS Button (iX500/iX100) Reconnecting to a Wireless Access Point Using the ScanSnap WPS Button (iX500/iX100) If the Wi-Fi indicator lights up or flashes in orange, reconnect the ScanSnap to a WPS compatible wireless access point. - Page 140 Reconnecting to a Wireless Access Point Using the ScanSnap WPS Button (iX500/iX100) Turns on the ScanSnap. For details, refer to "Turning the ScanSnap On" (page 89). a After blinking blue, the Wi-Fi indicator lights up in blue or orange. Press the WPS button of the wireless access point. Press and hold (3 seconds or longer) the WPS button on the back of the ScanSnap within 2 minutes after pressing the WPS button of the wireless access point.
- Page 141 Reconnecting to a Wireless Access Point Using the ScanSnap WPS Button (iX500/iX100) l iX100 "Parts and Functions of iX100" (page 70)
-
Page 142: Wireless Settings For The Scansnap (Ix1500)
Wireless Settings for the ScanSnap (iX1500) Wireless Settings for the ScanSnap (iX1500) The following explains the procedure to configure the wireless settings for the ScanSnap, such as how to check the wireless LAN which the scanner is connected to or check network information, how to change a wireless access point which you want to connect the scanner to, and how to switch the wireless mode. -
Page 143: Registering A Certificate/ Checking The Wireless Lan Settings (Ix1500)
Registering a Certificate/ Checking the Wireless LAN Settings (iX1500) Registering a Certificate/ Checking the Wireless LAN Settings (iX1500) "Registering a Client Certificate or CA Certificate (iX1500)" (page 144) "Checking the Wireless LAN Settings (iX1500)" (page 145) "Checking the IP address of the ScanSnap (iX1500)" (page 146) "Checking the DNS Server of the ScanSnap (iX1500)"... -
Page 144: Registering A Client Certificate Or Ca Certificate (Ix1500)
Registering a Certificate/ Checking the Wireless LAN Settings (iX1500) Registering a Client Certificate or CA Certificate (iX1500) To connect the ScanSnap to a wireless access point, use a client certificate or CA certificate that has been registered on the ScanSnap to authenticate a connection to the wireless access point. One certificate for each certificate type (client certificates and CA certificates) can be registered on the ScanSnap. -
Page 145: Checking The Wireless Lan Settings (Ix1500)
Registering a Certificate/ Checking the Wireless LAN Settings (iX1500) Checking the Wireless LAN Settings (iX1500) Check the connection status of the wireless LAN and its access point. Click the ScanSnap Manager icon in the Dock while holding down the [control] key on the keyboard, and select [Quit] from the "ScanSnap Manager Menu"... -
Page 146: Checking The Ip Address Of The Scansnap (Ix1500)
Registering a Certificate/ Checking the Wireless LAN Settings (iX1500) Checking the IP address of the ScanSnap (iX1500) Check the IP address of the ScanSnap on the touch panel. Click the ScanSnap Manager icon in the Dock while holding down the [control] key on the keyboard, and select [Quit] from the "ScanSnap Manager Menu"... -
Page 147: Checking The Dns Server Of The Scansnap (Ix1500)
Registering a Certificate/ Checking the Wireless LAN Settings (iX1500) Checking the DNS Server of the ScanSnap (iX1500) Check the DNS server of the ScanSnap on the touch panel. Click the ScanSnap Manager icon in the Dock while holding down the [control] key on the keyboard, and select [Quit] from the "ScanSnap Manager Menu"... -
Page 148: Checking The Mac Address Of The Scansnap (Ix1500)
Registering a Certificate/ Checking the Wireless LAN Settings (iX1500) Checking the MAC address of the ScanSnap (iX1500) Check the MAC address of the ScanSnap on the touch panel. Click the ScanSnap Manager icon in the Dock while holding down the [control] key on the keyboard, and select [Quit] from the "ScanSnap Manager Menu"... -
Page 149: Changing The Wireless Lan Connection Method (Ix1500)
Changing the Wireless LAN Connection Method (iX1500) Changing the Wireless LAN Connection Method (iX1500) "Reconnecting the ScanSnap to Another Wireless Access Point (iX1500)" (page 150) "Changing the Connection Method from Access Point Connection to Direct Connection (iX1500)" (page 152) "Changing the Connection Method from Direct Connection to Access Point Connection (iX1500)" (page 154) "Changing the Frequency for Connecting the ScanSnap (iX1500)"... -
Page 150: Reconnecting The Scansnap To Another Wireless Access Point (Ix1500)
Changing the Wireless LAN Connection Method (iX1500) Reconnecting the ScanSnap to Another Wireless Access Point (iX1500) Change the wireless access point, to which the ScanSnap is connected, to another one. HINT Using the ScanSnap Wireless Setup Tool enables you to obtain the Wi-Fi settings configured on your computer and easily connect the ScanSnap to the same wireless access point as your computer. - Page 151 Changing the Wireless LAN Connection Method (iX1500) Press [Client certificate] and select the certificate to be used. HINT To check the details about the certificate, press the [Certificate] button. l To perform the authentication with a user ID and a password Press the input field and enter a value for [User ID] and [Password] respectively, and then press [OK].
-
Page 152: Changing The Connection Method From Access Point Connection To Direct Connection (Ix1500)
Changing the Wireless LAN Connection Method (iX1500) Changing the Connection Method from Access Point Connection to Direct Connection (iX1500) When a computer or mobile device is connected to the ScanSnap by using an access point, change the connection method for the computer or mobile device to a direct connection and connect the computer or the mobile device to the ScanSnap directly rather than via a wireless access point. - Page 153 Changing the Wireless LAN Connection Method (iX1500) Go back to the touch panel of the ScanSnap, and tap the [Complete] button in the [Direct Connection Guide] screen. Press to return to the home screen.
-
Page 154: Changing The Connection Method From Direct Connection To Access Point Connection (Ix1500)
Changing the Wireless LAN Connection Method (iX1500) Changing the Connection Method from Direct Connection to Access Point Connection (iX1500) When a computer or mobile device is connected to the ScanSnap directly, change the connection method for the computer or mobile device to an access point connection and connect the computer or the mobile device to the ScanSnap via a wireless access point. - Page 155 Changing the Wireless LAN Connection Method (iX1500) l To perform the authentication with a security key Press the input field for [Security key] and enter the user name, and then press [OK]. l To perform the authentication with a client certificate Press [Client certificate] and select the certificate to be used.
-
Page 156: Changing The Frequency For Connecting The Scansnap (Ix1500)
Changing the Wireless LAN Connection Method (iX1500) Changing the Frequency for Connecting the ScanSnap (iX1500) Change the setting of the frequency for connecting the ScanSnap which is used when the scanner is connected to a wireless access point. HINT In some regions, a 5 GHz wireless LAN cannot be used. If you are using the ScanSnap in the region where a 5 GHz wireless LAN cannot be used, you cannot change the frequency for the connection. -
Page 157: Turning Off The Wireless Lan Connection (Ix1500)
Changing the Wireless LAN Connection Method (iX1500) Turning Off the Wireless LAN Connection (iX1500) Disable the wireless LAN function on the ScanSnap to turn off the wireless LAN connection temporarily. Click the ScanSnap Manager icon in the Dock while holding down the [control] key on the keyboard, and select [Quit] from the "ScanSnap Manager Menu"... -
Page 158: Resetting The Wireless Lan Settings (Ix1500)
Changing the Wireless LAN Connection Method (iX1500) Resetting the Wireless LAN Settings (iX1500) Reset the wireless LAN settings that are configured for the ScanSnap. Click the ScanSnap Manager icon in the Dock while holding down the [control] key on the keyboard, and select [Quit] from the "ScanSnap Manager Menu"... -
Page 159: Access Point Connect Settings (Ix1500)
Access Point Connect Settings (iX1500) Access Point Connect Settings (iX1500) "Authenticating a Wireless Access Point with a Client Certificate (iX1500)" (page 160) "Authenticating a Wireless Access Point with a User ID and Password (iX1500)" (page 161) "Authenticating a Wireless Access Point with an External ID (iX1500)" (page 162) "Setting an IP Address for the ScanSnap (iX1500)"... -
Page 160: Authenticating A Wireless Access Point With A Client Certificate (Ix1500)
Access Point Connect Settings (iX1500) Authenticating a Wireless Access Point with a Client Certificate (iX1500) To connect the ScanSnap to a wireless access point, use a client certificate or CA certificate that has been registered on the ScanSnap to authenticate a connection to the wireless access point. On the touch panel of the ScanSnap, display the [Enter connection information] screen. -
Page 161: Authenticating A Wireless Access Point With A User Id And Password (Ix1500)
Access Point Connect Settings (iX1500) Authenticating a Wireless Access Point with a User ID and Password (iX1500) To connect the ScanSnap to a wireless access point, authenticate a connection to the wireless access point by entering a user ID and password. On the touch panel of the ScanSnap, display the [Enter connection information] screen. -
Page 162: Authenticating A Wireless Access Point With An External Id (Ix1500)
Access Point Connect Settings (iX1500) Authenticating a Wireless Access Point with an External ID (iX1500) To connect the ScanSnap to a wireless access point, authenticate a connection to the wireless access point by entering an external ID. On the touch panel of the ScanSnap, display the [Enter connection information] screen. -
Page 163: Setting An Ip Address For The Scansnap (Ix1500)
Access Point Connect Settings (iX1500) Setting an IP Address for the ScanSnap (iX1500) To identify your ScanSnap on a network, set an IP address for the ScanSnap. When setting an IP address, [Access point connection] needs to be selected for [Wi-Fi connect mode] temporarily. - Page 164 Access Point Connect Settings (iX1500) ATTENTION If there is a device with the same IP address as the ScanSnap on the network, is displayed on in the [Settings] screen. Change the IP address which has been set for the ScanSnap to avoid an IP address conflict on the network.
-
Page 165: Using A Dns Server For The Internet Connection (Ix1500)
Access Point Connect Settings (iX1500) Using a DNS Server for the Internet Connection (iX1500) When an IP address is set for the ScanSnap, the setting for using a DNS server can be configured on the ScanSnap. Click the ScanSnap Manager icon in the Dock while holding down the [control] key on the keyboard, and select [Quit] from the "ScanSnap Manager... -
Page 166: Using A Proxy Server For The Internet Connection (Ix1500)
Access Point Connect Settings (iX1500) Using a Proxy Server for the Internet Connection (iX1500) Configure the Internet connection via a proxy server. The setting for using a proxy server can be configured when [Access point connection] is selected for [Wi-Fi connect mode]. Click the ScanSnap Manager icon in the Dock while holding down the [control] key on the keyboard, and select [Quit] from the... -
Page 167: Scanning Documents
Scanning Documents Scanning Documents "Scanning Documents with iX1500" (page 168) "Scanning Documents with iX500" (page 197) "Scanning Documents with iX100" (page 224) "Scanning Documents with SV600" (page 253) "Scanning Documents with S1300i" (page 281) "Scanning Documents with S1100i" (page 297) -
Page 168: Scanning Documents With Ix1500
Scanning Documents with iX1500 Scanning Documents with iX1500 "Documents to Scan (iX1500)" (page 169) "Scanning Documents (iX1500)" (page 173) "Scanning Long Pages (iX1500)" (page 178) "Scanning Documents of Different Widths or Lengths in One Batch (iX1500)" (page 182) "Scanning Small Size Documents such as Receipts in One Go (iX1500)" (page 187) "Scanning Documents Larger Than A4 or Letter Size (iX1500)"... -
Page 169: Documents To Scan (Ix1500)
Scanning Documents with iX1500 Documents to Scan (iX1500) This section explains about the conditions for documents that can be loaded directly into the ScanSnap and the conditions for documents that can be scanned using the Carrier Sheet. Documents That Can Be Loaded Directly into the ScanSnap Conditions for documents that can be loaded directly into the ScanSnap are as follows: Document type Office paper, postcards, business cards... - Page 170 Scanning Documents with iX1500 Example: gold colored credit card When you scan embossed cards, put the embossed side down, and load the card in landscape orientation. If the embossed characters are not coated in gold or silver and the background color of the card and the color of the embossed characters are similar, it may be difficult for the ScanSnap to recognize embossed characters.
- Page 171 Scanning Documents with iX1500 Because there may be black traces left on the documents, it is recommended that you use the Carrier Sheet to scan such documents. When you scan such documents directly without using a Carrier Sheet, dirt will accumulate on the rollers, which may cause feeding errors.
- Page 172 Scanning Documents with iX1500 Do not leave the Carrier Sheet in high temperature places such as under direct sunlight or near a heating apparatus for a long time. Also, do not use the Carrier Sheet in high temperature places. The Carrier Sheet may be deformed. To avoid deformation, store the Carrier Sheet on a flat surface without any weight on it.
-
Page 173: Scanning Documents (Ix1500)
Scanning Documents with iX1500 Scanning Documents (iX1500) You can load documents such as handouts for meetings or business cards directly in the ScanSnap for scanning. For details about documents that can be scanned, refer to "Documents to Scan (iX1500)" (page 169). - Page 174 Scanning Documents with iX1500 Open the ADF paper chute (cover) of the ScanSnap. ADF Paper Chute (Cover) a The touch panel is activated. In addition, the ScanSnap Manager icon in the Dock changes from Pull out the extension and the stacker on the ADF paper chute (cover). Extension Stacker Load the documents in the ADF paper chute (cover).
- Page 175 Scanning Documents with iX1500 Side Guide ATTENTION Do not accumulate more than 50 sheets (with paper weight of 80 g/m [20 lb]) in the stacker. Adjust the side guides to the width of the documents. Hold each side guide in the middle to adjust them. Otherwise, the documents may be fed skewed.
- Page 176 Scanning Documents with iX1500 a The Quick Menu appears when the scanning is completed. In the Quick Menu, click the icon of the application to link with ScanSnap Manager. For details about linking the following applications with ScanSnap Manager, refer to "Useful Usages"...
- Page 177 Scanning Documents with iX1500 ATTENTION l You cannot start scanning when the Quick Menu is displayed. Either select an icon from the Quick Menu and finish the process, or close the Quick Menu before you perform the next scan. l Do not move, delete, or rename scanned images using other applications while the Quick Menu is displayed.
-
Page 178: Scanning Long Pages (Ix1500)
Scanning Documents with iX1500 Scanning Long Pages (iX1500) Documents up to 863 mm (34 in.) in length can be scanned. For details about documents that can be scanned, refer to "Documents to Scan (iX1500)" (page 169). HINT For details about how to load documents that are 360 mm (14.17 in.) or less in length, refer to "Scanning Documents (iX1500)"... - Page 179 Scanning Documents with iX1500 Hold the document with your hand so that it does not fall out of the ADF paper chute (cover). Press the [Scan] button in the home screen on the touch panel for 3 seconds or longer until the button changes color to start scanning the documents. ATTENTION l Secure enough space where the scanned documents are ejected from the ScanSnap, and pick up the documents with your hands to prevent them from falling off the unit where the...
- Page 180 Scanning Documents with iX1500 The [ScanSnap Manager - Image scanning and file saving] window appears. a The Quick Menu appears when the scanning is completed. In the Quick Menu, click the icon of the application to link with ScanSnap Manager. When you select [Save Documents], you can manage scanned images by folder with ScanSnap Home.
- Page 181 Scanning Documents with iX1500 ATTENTION l You cannot start scanning when the Quick Menu is displayed. Either select an icon from the Quick Menu and finish the process, or close the Quick Menu before you perform the next scan. l Do not move, delete, or rename scanned images using other applications while the Quick Menu is displayed.
-
Page 182: Scanning Documents Of Different Widths Or Lengths In One Batch (Ix1500)
Scanning Documents with iX1500 Scanning Documents of Different Widths or Lengths in One Batch (iX1500) Documents of different widths or lengths can be scanned in one batch. For details about documents that can be scanned, refer to "Documents to Scan (iX1500)" (page 169). - Page 183 Scanning Documents with iX1500 Click the ScanSnap Manager icon in the Dock while holding down the [control] key on the keyboard, and then select [Settings] from the "ScanSnap Manager Menu" (page 84). a The ScanSnap setup window appears. In the [Paper] tab, select [Automatic detection] in [Paper size]. Select [None] in [Multifeed Detection].
- Page 184 Scanning Documents with iX1500 Click the [ ] button in the upper left of the window to close the ScanSnap setup window. Load documents in the ScanSnap. 1. Align the edges of the documents. 2. Load the documents at the center of the ADF paper chute (cover). ATTENTION l Load all documents over one another above the pick roller (center).
- Page 185 Scanning Documents with iX1500 Slant lines appear in the scanned image The documents are scanned in a wrong paper size If the documents are not scanned straight, it is recommended that you select the [Continue scanning after last page] checkbox in the [Scanning] tab of the "ScanSnap Setup Window"...
- Page 186 Scanning Documents with iX1500 a The selected application starts up. For details, refer to the Advanced Operation Guide. ATTENTION l You cannot start scanning when the Quick Menu is displayed. Either select an icon from the Quick Menu and finish the process, or close the Quick Menu before you perform the next scan.
-
Page 187: Scanning Small Size Documents Such As Receipts In One Go (Ix1500)
Scanning Documents with iX1500 Scanning Small Size Documents such as Receipts in One Go (iX1500) If the Receipt Guide is attached to the ScanSnap, a batch of small size documents such as receipts can be loaded in the ScanSnap at the same time. In addition, the Receipt Guide gives you the option to load different-sized documents according to the size of each document by using three kinds of guides at the same time. - Page 188 Scanning Documents with iX1500 Load documents in the ADF paper chute (cover). Load documents in the guides on the Receipt Guide according to the width of each guide. Load the documents face-down and top-first with their back facing you. Press the [Scan] button in the home screen on the touch panel to start scanning the documents.
- Page 189 Scanning Documents with iX1500 In the Quick Menu, click the icon of the application to link with ScanSnap Manager. For details about linking the following applications with ScanSnap Manager, refer to "Useful Usages" (page 328). l Save Business Cards l Save Receipts a The selected application starts up.
-
Page 190: Scanning Documents Larger Than A4 Or Letter Size (Ix1500)
Scanning Documents with iX1500 Scanning Documents Larger Than A4 or Letter Size (iX1500) Documents larger than A4/Letter size (such as A3, 11 × 17 in. and B4) can be scanned with the Carrier Sheet. By folding the document in half and scanning in duplex mode, the two sides are merged into a single image. - Page 191 Scanning Documents with iX1500 For details, refer to the ScanSnap Manager Help. In [Scanning side] in the [Scanning] tab, select [Duplex Scan (Double-sided)] and click the [Apply] button. ATTENTION If [Simplex Scan (Single-sided)] is selected, the ScanSnap outputs the same result as performing a simplex scan in [two separate images (front and back)] mode.
- Page 192 Scanning Documents with iX1500 Click the [ ] button in the upper left of the window to close the ScanSnap setup window. Place the document inside the Carrier Sheet. 1. Fold the document in half with the sides to be scanned facing out. Fold it tightly and smooth out any creases.
- Page 193 Scanning Documents with iX1500 Press the [Scan] button in the home screen on the touch panel to start scanning the documents. a Both sides of the document are scanned and saved as one double-page spread image. ATTENTION l There may be a line or a gap appearing between the front and back side images. Also when you scan a thick document in the Carrier Sheet, the scanned image on the left and the scanned image on the right of a double-page spread image may skew towards each other from the top.
-
Page 194: Scanning Documents Such As Photographs And Clippings (Ix1500)
Scanning Documents with iX1500 Scanning Documents Such as Photographs and Clippings (iX1500) Using the Carrier Sheet allows you to scan documents that can be damaged quite easily such as photographs, or non-standard size documents that are difficult to load directly such as clippings. For details about documents that can be loaded, refer to "Documents to Scan (iX1500)"... - Page 195 Scanning Documents with iX1500 Click the [Apply] button in the ScanSnap setup window. Click the [ ] button in the upper left of the window to close the ScanSnap setup window. Place the document inside the Carrier Sheet. Open the Carrier Sheet and place the top of the document against the top center of the Carrier Sheet.
- Page 196 Scanning Documents with iX1500 Back Press the [Scan] button in the home screen on the touch panel to start scanning the documents. a When scanning is completed, the scanned image is saved. ATTENTION l The scanned image is output at the center of the page in the size specified for [Paper size] in the [Carrier Sheet Settings] window.
-
Page 197: Scanning Documents With Ix500
Scanning Documents with iX500 Scanning Documents with iX500 "Documents to Scan (iX500)" (page 198) "Scanning Documents (iX500)" (page 202) "Scanning Long Pages (iX500)" (page 207) "Scanning Documents of Different Widths or Lengths in One Batch (iX500)" (page 211) "Scanning Documents Larger Than A4 or Letter Size (iX500)" (page 217) "Scanning Documents Such as Photographs and Clippings (iX500)"... -
Page 198: Documents To Scan (Ix500)
Scanning Documents with iX500 Documents to Scan (iX500) This section explains about the conditions for documents that can be loaded directly into the ScanSnap and the conditions for documents that can be scanned using the Carrier Sheet. Documents That Can Be Loaded Directly into the ScanSnap Conditions for documents that can be loaded directly into the ScanSnap are as follows: Document type Office paper, postcards, business cards... - Page 199 Scanning Documents with iX500 ATTENTION l The following types of documents must not be scanned: Documents attached with the metals such as paper clips or staples that can damage the inside of the ScanSnap Remove the metals for scanning. Documents on which the ink is still wet Wait until the ink dries completely to scan these documents.
- Page 200 Scanning Documents with iX500 Paper size Carrier Sheet size (216 × 297 mm) A3 (297 × 420 mm) (*1) A4 (210 × 297 mm) A5 (148 × 210 mm) A6 (105 × 148 mm) B4 (257 × 364 mm) (*1) B5 (182 ×...
- Page 201 Scanning Documents with iX500 Carbon paper or thermal paper Documents with memo papers or sticky notes attached ATTENTION l Using the Carrier Sheet Be careful of the following when you use the Carrier Sheet: Do not stain, or cut the black and white patterned end of the Carrier Sheet. Otherwise, the Carrier Sheet will not be recognized properly.
-
Page 202: Scanning Documents (Ix500)
Scanning Documents with iX500 Scanning Documents (iX500) You can load documents such as handouts for meetings or business cards directly in the ScanSnap for scanning. For details about documents that can be scanned, refer to "Documents to Scan (iX500)" (page 198). - Page 203 Scanning Documents with iX500 Open the ADF paper chute (cover) of the ScanSnap. ADF Paper Chute (Cover) a The [Scan] button flashes in blue. The button returns to being lit normally when document scanning is enabled. In addition, the ScanSnap Manager icon in the Dock changes from Pull the stacker towards you.
- Page 204 Scanning Documents with iX500 Extension Stacker Load the documents in the ADF paper chute (cover). Load the document face-down and head-first with the back facing you (when loading multiple documents, the last page is on the top). Adjust the number of documents so that they do not go beyond the reference marks and are kept within the side guides when they are loaded.
- Page 205 Scanning Documents with iX500 Documents Press the [Scan] button on the ScanSnap to start a scan. ATTENTION Do not perform the following operations during scanning. Doing so will stop scanning. l Connect or disconnect the ScanSnap and other USB devices. l Close the ADF paper chute (cover).
- Page 206 Scanning Documents with iX500 l Save Receipts l Save Photos a The selected application starts up. For details, refer to the Advanced Operation Guide. ATTENTION l You cannot start scanning when the Quick Menu is displayed. Either select an icon from the Quick Menu and finish the process, or close the Quick Menu before you perform the next scan.
-
Page 207: Scanning Long Pages (Ix500)
Scanning Documents with iX500 Scanning Long Pages (iX500) Documents up to 863 mm (34 in.) in length can be scanned. For details about documents that can be scanned, refer to "Documents to Scan (iX500)" (page 198). HINT For details about how to load documents that are 360 mm (14.17 in.) or less in length, refer to "Scanning Documents (iX500)"... - Page 208 Scanning Documents with iX500 Extension Stacker Load only one document in the ADF paper chute (cover). Hold the document with your hand so that it does not fall out of the ADF paper chute (cover). Press the [Scan] button on the ScanSnap (for three seconds or longer) until the button flashes in blue to start a scan.
- Page 209 Scanning Documents with iX500 l Do not perform the following operations during scanning. Doing so will stop scanning. Connect or disconnect the ScanSnap and other USB devices. Close the ADF paper chute (cover). Switch users. Allow the computer to enter sleep mode. HINT When you scan the first page as a long page and continue scanning, the subsequent documents are also scanned as long pages.
- Page 210 Scanning Documents with iX500 When you select [Save Documents], you can manage scanned images by folder with ScanSnap Home. For details, refer to "Managing Paper Documents by Folder on a Computer" (page 329). a The selected application starts up. For details, refer to the Advanced Operation Guide. ATTENTION l You cannot start scanning when the Quick Menu is displayed.
-
Page 211: Scanning Documents Of Different Widths Or Lengths In One Batch (Ix500)
Scanning Documents with iX500 Scanning Documents of Different Widths or Lengths in One Batch (iX500) Documents of different widths or lengths can be scanned in one batch. For details about documents that can be scanned, refer to "Documents to Scan (iX500)" (page 198). - Page 212 Scanning Documents with iX500 Extension Stacker Click the ScanSnap Manager icon in the Dock while holding down the [control] key on the keyboard, and then select [Settings] from the "ScanSnap Manager Menu" (page 84). a The ScanSnap setup window appears. In the [Paper] tab, select [Automatic detection] in [Paper size].
- Page 213 Scanning Documents with iX500 Click the [Apply] button in the ScanSnap setup window. Click the [ ] button in the upper left of the window to close the ScanSnap setup window. Load documents in the ScanSnap. 1. Align the edges of the documents. 2.
- Page 214 Scanning Documents with iX500 ATTENTION l Load all documents over one another above the pick roller (center). Documents that are not loaded above the pick roller cannot be fed. Pick Roller's Width Incorrect l Adjust the side guides to the widest document. If the side guides are not adjusted properly, a paper jam may occur.
- Page 215 Scanning Documents with iX500 a The Quick Menu appears when the scanning is completed. In the Quick Menu, click the icon of the application to link with ScanSnap Manager. When you select [Save Documents], you can manage scanned images by folder with ScanSnap Home.
- Page 216 Scanning Documents with iX500 ATTENTION l You cannot start scanning when the Quick Menu is displayed. Either select an icon from the Quick Menu and finish the process, or close the Quick Menu before you perform the next scan. l Do not move, delete, or rename scanned images using other applications while the Quick Menu is displayed.
-
Page 217: Scanning Documents Larger Than A4 Or Letter Size (Ix500)
Scanning Documents with iX500 Scanning Documents Larger Than A4 or Letter Size (iX500) Documents larger than A4/Letter size (such as A3, 11 × 17 in. and B4) can be scanned with the Carrier Sheet. By folding the document in half and scanning in duplex mode, the two sides are merged into a single image. - Page 218 Scanning Documents with iX500 For details, refer to the ScanSnap Manager Help. In [Scanning side] in the [Scanning] tab, select [Duplex Scan (Double-sided)] and click the [Apply] button. ATTENTION If [Simplex Scan (Single-sided)] is selected, the ScanSnap outputs the same result as performing a simplex scan in [two separate images (front and back)] mode.
- Page 219 Scanning Documents with iX500 Click the [ ] button in the upper left of the window to close the ScanSnap setup window. Place the document inside the Carrier Sheet. 1. Fold the document in half with the sides to be scanned facing out. Fold it tightly and smooth out any creases.
- Page 220 Scanning Documents with iX500 Press the [Scan] button on the ScanSnap to start a scan. a Both sides of the document are scanned and saved as one double-page spread image. ATTENTION l There may be a line or a gap appearing between the front and back side images. Also when you scan a thick document in the Carrier Sheet, the scanned image on the left and the scanned image on the right of a double-page spread image may skew towards each other from the top.
-
Page 221: Scanning Documents Such As Photographs And Clippings (Ix500)
Scanning Documents with iX500 Scanning Documents Such as Photographs and Clippings (iX500) Using the Carrier Sheet allows you to scan documents that can be damaged quite easily such as photographs, or non-standard size documents that are difficult to load directly such as clippings. For details about documents that can be loaded, refer to "Documents to Scan (iX500)"... - Page 222 Scanning Documents with iX500 Click the [Apply] button in the ScanSnap setup window. Click the [ ] button in the upper left of the window to close the ScanSnap setup window. Place the document inside the Carrier Sheet. Open the Carrier Sheet and place the top of the document against the top center of the Carrier Sheet.
- Page 223 Scanning Documents with iX500 Back Press the [Scan] button on the ScanSnap to start a scan. a When scanning is completed, the scanned image is saved. ATTENTION l The scanned image is output at the center of the page in the size specified for [Paper size] in the [Carrier Sheet Settings] window.
-
Page 224: Scanning Documents With Ix100
Scanning Documents with iX100 Scanning Documents with iX100 "Documents to Scan (iX100)" (page 225) "Scanning Documents (iX100)" (page 229) "Scanning Documents by Inserting Two Documents at a Time or by Inserting the Next Document While the Current Document Is Being Scanned (iX100)" (page 234) "Scanning Documents Larger Than A4 or Letter Size by Directly Inserting Them in the ScanSnap (iX100)"... -
Page 225: Documents To Scan (Ix100)
Scanning Documents with iX100 Documents to Scan (iX100) This section explains about the conditions for documents that can be loaded directly into the ScanSnap and the conditions for documents that can be scanned using the Carrier Sheet. Documents That Can Be Loaded Directly into the ScanSnap Conditions for documents that can be loaded directly into the ScanSnap are as follows: Eject method With the output guide closed... - Page 226 Scanning Documents with iX100 Documents other than paper such as fabric, metal foil and OHP film l When you scan picture postcards, be aware that the picture side may get damaged. It is the responsibility of the customer to scan picture postcards. l Be careful of the following when you scan plastic cards: Cards that are bent may not be fed properly.
- Page 227 Scanning Documents with iX100 Paper size Carrier Sheet size (216 × 297 mm) A3 (297 × 420 mm) (*1) A4 (210 × 297 mm) A5 (148 × 210 mm) A6 (105 × 148 mm) B4 (257 × 364 mm) (*1) B5 (182 ×...
- Page 228 Scanning Documents with iX100 Carbon paper or thermal paper Documents with memo papers or sticky notes attached ATTENTION l Using the Carrier Sheet Be careful of the following when you use the Carrier Sheet: Do not stain, or cut the black and white patterned end of the Carrier Sheet. Otherwise, the Carrier Sheet will not be recognized properly.
-
Page 229: Scanning Documents (Ix100)
Scanning Documents with iX100 Scanning Documents (iX100) The procedure for scanning documents by inserting one document at a time is as follows. For details about documents that can be scanned, refer to "Documents to Scan (iX100)" (page 225). Open the feed guide of the ScanSnap. Feed Guide HINT l If you want the document to be ejected from the front of the ScanSnap or when there is not... - Page 230 Scanning Documents with iX100 In addition, the ScanSnap Manager icon in the Dock changes from Insert the document straight into the feeding section of the ScanSnap, with the scanning side facing up. a The document is pulled in until it is set inside the ScanSnap. ATTENTION l If you specify a standard size instead of selecting [Automatic detection] (default), insert the document by aligning it with the left edge of the feeding section.
- Page 231 Scanning Documents with iX100 Thick paper (80 g/m [20 lb] or heavier) Postcards Business cards Plastic cards Carrier Sheets Output Guide Press the [Scan/Stop] button on the ScanSnap to start scanning. ATTENTION Do not perform the following operations during scanning. Doing so will stop scanning. l Connect or disconnect the ScanSnap and other USB devices.
- Page 232 Scanning Documents with iX100 HINT To continue scanning, insert the next document to be scanned. When the document is inserted, scanning starts automatically. Press the [Scan/Stop] button on the ScanSnap to finish scanning. a The Quick Menu appears. In the Quick Menu, click the icon of the application to link with ScanSnap Manager.
- Page 233 Scanning Documents with iX100 a The selected application starts up. For details, refer to the Advanced Operation Guide. ATTENTION l You cannot start scanning when the Quick Menu is displayed. Either select an icon from the Quick Menu and finish the process, or close the Quick Menu before you perform the next scan.
-
Page 234: Scanning Documents By Inserting Two Documents At A Time Or By Inserting The Next Document While The Current Document Is Being Scanned (Ix100)
Scanning Documents with iX100 Scanning Documents by Inserting Two Documents at a Time or by Inserting the Next Document While the Current Document Is Being Scanned (iX100) When scanning small size documents such as business cards and postcards with the ScanSnap, you can insert two documents at a time or you can insert the next document while the current document is being scanned. - Page 235 Scanning Documents with iX100 Open the feed guide of the ScanSnap. Feed Guide HINT l If you want the document to be ejected from the front of the ScanSnap or when there is not enough space where the document exits the ScanSnap, open the output guide. For details about documents that can be scanned with the output guide open, refer to "Documents to Scan (iX100)"...
- Page 236 Scanning Documents with iX100 ATTENTION When inserting the documents, insert them at least 10 mm (0.39 in.) apart from each other. If the space between the documents is less than 10 mm (0.39 in.), the scanned images may not be cropped correctly.
- Page 237 Scanning Documents with iX100 l Switch users. l Allow the computer to enter sleep mode. a The [Scan/Stop] button on the ScanSnap flashes in blue while the documents are being scanned. The [ScanSnap Manager - Image scanning and file saving] window appears. HINT When the [ScanSnap Manager - Image scanning and file saving] window is maximized, multiple scanned images are displayed in the preview area.
- Page 238 Scanning Documents with iX100 HINT To continue scanning, insert the next document to be scanned. When the document is inserted, scanning starts automatically. Press the [Scan/Stop] button on the ScanSnap to finish scanning. a The Quick Menu appears. In the Quick Menu, click the icon of the application to link with ScanSnap Manager.
- Page 239 Scanning Documents with iX100 a The selected application starts up. For details, refer to the Advanced Operation Guide. ATTENTION l You cannot start scanning when the Quick Menu is displayed. Either select an icon from the Quick Menu and finish the process, or close the Quick Menu before you perform the next scan.
- Page 240 Scanning Documents with iX100 Scanning Documents Larger Than A4 or Letter Size by Directly Inserting Them in the ScanSnap (iX100) By folding an A3, B4, or Double Letter size document in half and scanning each side continuously, the scanned images of both sides are automatically merged and saved as a single image. For details about documents that can be scanned, refer to "Documents to Scan (iX100)"...
- Page 241 Scanning Documents with iX100 Feed Guide a The [Scan/Stop] button flashes in blue. The button returns to being lit normally when document scanning is enabled. In addition, the ScanSnap Manager icon in the Dock changes from Fold the document in half so that the sides to be scanned are facing out. ATTENTION Fold the long side of the document in half.
- Page 242 Scanning Documents with iX100 HINT If you scan a document folded in half with the output guide open, a paper jam may occur. Make sure to close the output guide when you scan a document folded in half. Output Guide Press the [Scan/Stop] button on the ScanSnap to start scanning.
- Page 243 Scanning Documents with iX100 In the Quick Menu, click the icon of the application to link with ScanSnap Manager. When you select [Save Documents], you can manage scanned images by folder with ScanSnap Home. For details, refer to "Managing Paper Documents by Folder on a Computer" (page 329).
-
Page 244: Scanning Documents Larger Than A4 Or Letter Size With The Carrier Sheet (Ix100)
Scanning Documents with iX100 Scanning Documents Larger than A4 or Letter Size with the Carrier Sheet (iX100) Documents larger than A4/Letter size (such as A3, 11 × 17 in. and B4) can be scanned with the optional Carrier Sheet. By folding the document in half and scanning both sides, one at a time, the two sides are merged into a single image. - Page 245 Scanning Documents with iX100 Select [one double-page spread image] in [Save as] and click the [OK] button. For details, refer to the ScanSnap Manager Help. Click the [Apply] button in the ScanSnap setup window. Click the [ ] button in the upper left of the window to close the ScanSnap setup window.
- Page 246 Scanning Documents with iX100 HINT Note that the front side of the Carrier Sheet has a black and white pattern at the top and a thick vertical line in the upper right-hand corner. Insert the part with the black and white pattern straight into the feeding section of the ScanSnap, with the front side of the Carrier Sheet facing up.
- Page 247 Scanning Documents with iX100 Turn over the Carrier Sheet and insert it as described in step 7. ATTENTION Make sure to scan the front and back side of the Carrier Sheet consecutively. a Scanning starts automatically and the [ScanSnap Manager - Image scanning and file saving] window appears.
- Page 248 Scanning Documents with iX100 Press the [Scan/Stop] button on the ScanSnap to finish scanning. a The scanned images of the front and back sides of the document are saved as a double- page spread image. ATTENTION l There may be a line or a gap appearing between the front and back side images. Also when you scan a thick document in the Carrier Sheet, the scanned image on the left and the scanned image on the right of a double-page spread image may skew towards each other from the top.
-
Page 249: Scanning Documents Such As Photographs And Clippings (Ix100)
Scanning Documents with iX100 Scanning Documents Such as Photographs and Clippings (iX100) Using the optional Carrier Sheet allows you to scan documents that can be damaged quite easily such as photographs, or non-standard size documents that are difficult to load directly such as clippings. - Page 250 Scanning Documents with iX100 Click the [Apply] button in the ScanSnap setup window. Click the [ ] button in the upper left of the window to close the ScanSnap setup window. Place the document inside the Carrier Sheet. Open the Carrier Sheet and place the top of the document against the top center of the Carrier Sheet.
- Page 251 Scanning Documents with iX100 a The Carrier Sheet is pulled in until it is set inside the ScanSnap. ATTENTION If you perform a scan using the Carrier Sheet with the output guide open, a paper jam may occur and damage the documents. Make sure to close the output guide when you perform a scan using the Carrier Sheet.
- Page 252 Scanning Documents with iX100 For details about how to perform a scan, refer to "Scanning Documents (iX100)" (page 229). Press the [Scan/Stop] button on the ScanSnap to finish scanning. a The scanned image is saved. ATTENTION l The scanned image is output at the center of the page in the size specified for [Paper size] in the [Carrier Sheet Settings] window.
-
Page 253: Scanning Documents With Sv600
Scanning Documents with SV600 Scanning Documents with SV600 "Documents to Scan (SV600)" (page 254) "How to Place Documents (SV600)" (page 255) "Scanning Documents (SV600)" (page 258) "Scanning Books (SV600)" (page 263) "Scanning Multiple Documents at Once (SV600)" (page 268) "Scanning Books Using Page Turning Detection (SV600)" (page 273) "Scanning Documents Using Timed Mode (SV600)"... -
Page 254: Documents To Scan (Sv600)
Scanning Documents with SV600 Documents to Scan (SV600) The following documents can be scanned because the scanning unit does not touch the documents. l Thick documents, such as books l Documents that you want to keep intact, such as photographs and handwritten illustrations Conditions for Documents to Scan Document type Flat documents, such as office paper,... -
Page 255: How To Place Documents (Sv600)
Scanning Documents with SV600 How to Place Documents (SV600) When you place down documents, use the Background Pad. If you scan documents without using the Background Pad, the document edges may not be detected correctly and the created scanned image may be different from the document. For details about documents that can be scanned with the ScanSnap, refer to "Documents to Scan (SV600)"... - Page 256 Scanning Documents with SV600 When Placing a Standard Size Document When you select an option other than [Automatic detection] for [Paper size] on the [Paper] tab in the "ScanSnap Setup Window" (page 86), align the center of the document with the centering mark on the ScanSnap.
- Page 257 Scanning Documents with SV600 l The number of documents placed must not exceed 10. SV600 15 mm (0.59 in.) or More 15 mm (0.59 in.) or More...
-
Page 258: Scanning Documents (Sv600)
Scanning Documents with SV600 Scanning Documents (SV600) Press the [Scan] or [Stop] button on the ScanSnap to turn the power on. [Stop] Button [Scan] Button a The power LED lights up in blue. In addition, the ScanSnap Manager icon in the Dock changes from Place the Background Pad on the front side of the ScanSnap. - Page 259 Scanning Documents with SV600 White Sheets a Scanning starts. ATTENTION l Do not perform the following operations during scanning. Doing so will stop scanning. Connect or disconnect the ScanSnap and other USB devices. Switch users. Allow the computer to enter sleep mode. l Do not cover the white sheet with an object or hand during scanning.
- Page 260 Scanning Documents with SV600 a When scanning is complete, the [ScanSnap Manager - Image scanning and file saving] window displays a scanning standby status. HINT To continue scanning, place down the next document to be scanned, and then perform one of the following operations.
- Page 261 Scanning Documents with SV600 Select [Flat document], and then click the [Save this image] button. HINT Click the [Check/Correct] button in the [ScanSnap Manager - Image scanning and file saving] window to correct the scanned image. The following functions are available: "Filling in Fingers Captured in a Scanned Image (When a Document Is Scanned)(SV600)"...
- Page 262 Scanning Documents with SV600 a The selected application starts up. For details, refer to the Advanced Operation Guide. ATTENTION l You cannot start scanning when the Quick Menu is displayed. Either select an icon from the Quick Menu and finish the process, or close the Quick Menu before you perform the next scan.
-
Page 263: Scanning Books (Sv600)
Scanning Documents with SV600 Scanning Books (SV600) Press the [Scan] or [Stop] button on the ScanSnap to turn the power on. [Stop] Button [Scan] Button a The power LED lights up in blue. In addition, the ScanSnap Manager icon in the Dock changes from Place the Background Pad on the front side of the ScanSnap. - Page 264 Scanning Documents with SV600 White Sheets a Scanning of the book starts. ATTENTION l Do not perform the following operations during scanning. Doing so will stop scanning. Connect or disconnect the ScanSnap and other USB devices. Switch users. Allow the computer to enter sleep mode. l Do not cover the white sheet with an object or hand during scanning.
- Page 265 Scanning Documents with SV600 a When scanning the book is complete, the [ScanSnap Manager - Image scanning and file saving] window displays a scanning standby status. HINT To continue scanning the book, open the next page to be scanned, and then perform one of the following operations: Continuous scanning of the book starts.
- Page 266 Scanning Documents with SV600 Select [Double-page spread (Book/Magazine)], and then click the [Save this image] button. HINT Click the [Check/Correct] button in the [ScanSnap Manager - Image scanning and file saving] window to correct the scanned image. The following functions are available: "Correcting Distorted Book Images (SV600)"...
- Page 267 Scanning Documents with SV600 a The selected application starts up. For details, refer to the Advanced Operation Guide. ATTENTION l You cannot start scanning when the Quick Menu is displayed. Either select an icon from the Quick Menu and finish the process, or close the Quick Menu before you perform the next scan.
-
Page 268: Scanning Multiple Documents At Once (Sv600)
Scanning Documents with SV600 Scanning Multiple Documents at Once (SV600) Press the [Scan] or [Stop] button on the ScanSnap to turn the power on. [Stop] Button [Scan] Button a The power LED lights up in blue. In addition, the ScanSnap Manager icon in the Dock changes from Place the Background Pad on the front side of the ScanSnap. - Page 269 Scanning Documents with SV600 White Sheets a Scanning starts. ATTENTION l Do not perform the following operations during scanning. Doing so will stop scanning. Connect or disconnect the ScanSnap and other USB devices. Switch users. Allow the computer to enter sleep mode. l Do not cover the white sheet with an object or hand during scanning.
- Page 270 Scanning Documents with SV600 a When scanning is complete, the [ScanSnap Manager - Image scanning and file saving] window displays a scanning standby status. HINT To continue scanning, place down the next document to be scanned, and then perform one of the following operations.
- Page 271 Scanning Documents with SV600 In the preview area, the scanned images are cropped and each scanned image is displayed as a separate document. Select [Flat document], and then click the [Save this image] button. HINT Click the [Check/Correct] button in the [ScanSnap Manager - Image scanning and file saving] window to correct the scanned image.
- Page 272 Scanning Documents with SV600 a The selected application starts up. For details, refer to the Advanced Operation Guide. ATTENTION l You cannot start scanning when the Quick Menu is displayed. Either select an icon from the Quick Menu and finish the process, or close the Quick Menu before you perform the next scan.
-
Page 273: Scanning Books Using Page Turning Detection (Sv600)
Scanning Documents with SV600 Scanning Books Using Page Turning Detection (SV600) This section explains how to detect page turning to start scanning automatically. ATTENTION When the installation environment of the ScanSnap or the specification of the book to be scanned encounters any of the following, use timed mode to scan a document. - Page 274 Scanning Documents with SV600 a The [Scanning mode option] window appears. Select the [Configure settings for starting the next scan] checkbox and then [Page turning detection mode]. Click the [OK] button to close the [Scanning mode option] window. Click the [Apply] button in the ScanSnap setup window. Click the [ ] button in the upper left of the window to close the ScanSnap setup window.
- Page 275 Scanning Documents with SV600 Open the page of a book you want to scan and place the book in the scan area of the ScanSnap. For details, refer to"How to Place Documents (SV600)" (page 255). Press the [Scan] button on the ScanSnap to start scanning the book. a The [ScanSnap Manager - Image scanning and file saving] window appears.
- Page 276 Scanning Documents with SV600 a The page turning is detected and continuous scanning starts. ATTENTION l While the [Turn the page.] message appears on the [ScanSnap Manager - Image scanning and file saving] window, if you hold or move your hand over the Background Pad, such motion may be incorrectly detected as page turning.
-
Page 277: Scanning Documents Using Timed Mode (Sv600)
Scanning Documents with SV600 Scanning Documents Using Timed Mode (SV600) This section explains how to automatically start scanning by setting the time period for the document scanning to start. Click the ScanSnap Manager icon in the Dock while holding down the [control] key on the keyboard, and select [Settings] from the "ScanSnap Manager Menu"... - Page 278 Scanning Documents with SV600 l To set the time period for the ScanSnap to start the next scan when a document is scanned continuously: 1. Select the [Configure settings for starting the next scan] checkbox, and then select [Timed interval (Timed mode)]. 2.
- Page 279 Scanning Documents with SV600 Click the [ ] button in the upper left of the window to close the ScanSnap setup window. Place a document with the scanned side face-up in the scan area of the ScanSnap. For details, refer to "How to Place Documents (SV600)"...
-
Page 280: Scanning Documents With Two Scansnaps Connected To A Computer (Sv600)
Scanning Documents with SV600 Scanning Documents with Two ScanSnaps Connected to a Computer (SV600) You can use SV600 and another ScanSnap connected to a computer. When both of the ScanSnap models are connected and turned on, you can use one of them at a time. Note that you cannot scan documents with two ScanSnap models simultaneously. -
Page 281: Scanning Documents With S1300I
Scanning Documents with S1300i Scanning Documents with S1300i "Documents to Scan (S1300i)" (page 282) "Scanning Documents (S1300i)" (page 284) "Scanning Long Pages (S1300i)" (page 288) "Scanning Documents of Different Widths or Lengths in One Batch (S1300i)" (page 292) -
Page 282: Documents To Scan (S1300I)
Scanning Documents with S1300i Documents to Scan (S1300i) Conditions for documents that can be loaded into the ScanSnap are as follows: Office Paper, Postcards, Business Cards Document type Office paper, postcards, business cards Paper weight 64 to 104.7 g/m (17 to 20 lb) Paper size Width: 50.8 to 216 mm (2 to 8.5 in.) Length: 50.8 to 360 mm (2 to 14.17 in.) - Page 283 Scanning Documents with S1300i Folded or torn documents Tracing paper Coated paper Photographs (photographic paper) Perforated or punched documents Documents that are not rectangular or square Carbon paper or thermal paper Documents with memo papers or sticky notes attached Picture Postcards Picture postcards can be scanned when a power cable connection is used.
-
Page 284: Scanning Documents (S1300I)
Scanning Documents with S1300i Scanning Documents (S1300i) You can scan documents such as handouts for meetings or business cards. For details about documents that can be scanned, refer to "Documents to Scan (S1300i)" (page 282). If you are loading multiple sheets, check the number of sheets. The maximum number of sheets in the ScanSnap is as follows: For A4 or smaller sizes: Up to 10 sheets can be loaded (with paper weight of 80 g/m [20 lb]... - Page 285 Scanning Documents with S1300i Open the ADF paper chute (cover) of the ScanSnap. ADF Paper Chute (Cover) a The [Scan] button flashes in blue. The button returns to being lit normally when document scanning is enabled. In addition, the ScanSnap Manager icon in the Dock changes from Pull out the extension.
- Page 286 Scanning Documents with S1300i Adjust the side guides to the width of the documents. Hold each side guide in the middle to adjust them. Otherwise, the documents may be fed skewed. Documents Press the [Scan] button on the ScanSnap to start a scan. ATTENTION Do not perform the following operations during scanning.
- Page 287 Scanning Documents with S1300i In the Quick Menu, click the icon of the application to link with ScanSnap Manager. For details about linking the following applications with ScanSnap Manager, refer to "Useful Usages" (page 328). l Save Documents l Save Business Cards l Save Receipts l Save Photos a The selected application starts up.
-
Page 288: Scanning Long Pages (S1300I)
Scanning Documents with S1300i Scanning Long Pages (S1300i) Documents up to 863 mm (34 in.) in length can be scanned. For details about documents that can be scanned, refer to "Documents to Scan (S1300i)" (page 282). HINT For details about how to load documents that are 360 mm (14.17 in.) or less in length, refer to "Scanning Documents (S1300i)"... - Page 289 Scanning Documents with S1300i Press the [Scan] button on the ScanSnap (for three seconds or longer) until the button flashes in blue to start a scan. ATTENTION l Secure enough space where the scanned documents are ejected from the ScanSnap, and pick up the documents with your hands to prevent them from falling off the unit where the ScanSnap is placed on.
- Page 290 Scanning Documents with S1300i a The Quick Menu appears when the scanning is completed. In the Quick Menu, click the icon of the application to link with ScanSnap Manager. When you select [Save Documents], you can manage scanned images by folder with ScanSnap Home.
- Page 291 Scanning Documents with S1300i ATTENTION l You cannot start scanning when the Quick Menu is displayed. Either select an icon from the Quick Menu and finish the process, or close the Quick Menu before you perform the next scan. l Do not move, delete, or rename scanned images using other applications while the Quick Menu is displayed.
-
Page 292: Scanning Documents Of Different Widths Or Lengths In One Batch (S1300I)
Scanning Documents with S1300i Scanning Documents of Different Widths or Lengths in One Batch (S1300i) Documents of different widths or lengths can be scanned in one batch. For details about documents that can be scanned, refer to "Documents to Scan (S1300i)" (page 282). - Page 293 Scanning Documents with S1300i In the [Paper] tab, select [Automatic detection] in [Paper size]. Select [None] in [Multifeed Detection]. Click the [Apply] button in the ScanSnap setup window. Click the [ ] button in the upper left of the window to close the ScanSnap setup window.
- Page 294 Scanning Documents with S1300i 2. Load the documents at the center of the ADF paper chute (cover). ATTENTION l Load all documents over one another above the pick roller (center). Documents that are not loaded above the pick roller cannot be fed. Pick Roller Assembly's Width Incorrect l Adjust the side guides to the widest document.
- Page 295 Scanning Documents with S1300i The documents are scanned in a wrong paper size If the documents are not scanned straight, it is recommended that you select the [Continue scanning after last page] checkbox in the [Scanning] tab of the "ScanSnap Setup Window" (page 86), separate the documents by their widths, and scan them in different batches.
- Page 296 Scanning Documents with S1300i a The selected application starts up. For details, refer to the Advanced Operation Guide. ATTENTION l You cannot start scanning when the Quick Menu is displayed. Either select an icon from the Quick Menu and finish the process, or close the Quick Menu before you perform the next scan.
-
Page 297: Scanning Documents With S1100I
Scanning Documents with S1100i Scanning Documents with S1100i "Documents to Scan (S1100i)" (page 298) "Scanning Documents (S1100i)" (page 302) "Scanning Documents by Inserting Two Documents at a Time or by Inserting the Next Document While the Current Document Is Being Scanned (S1100i)" (page 307) "Scanning Documents Larger Than A4 or Letter Size by Directly Inserting It in the ScanSnap (S1100i)"... -
Page 298: Documents To Scan (S1100I)
Scanning Documents with S1100i Documents to Scan (S1100i) This section explains about the conditions for documents that can be loaded directly into the ScanSnap and the conditions for documents that can be scanned using the Carrier Sheet. Documents That Can Be Loaded Directly into the ScanSnap Conditions for documents that can be loaded directly into the ScanSnap are as follows: Eject method With the output guide closed... - Page 299 Scanning Documents with S1100i Documents other than paper such as fabric, metal foil and OHP film l When you scan picture postcards, be aware that the picture side may get damaged. It is the responsibility of the customer to scan picture postcards. l Be careful of the following when you scan plastic cards: Cards that are bent may not be fed properly.
- Page 300 Scanning Documents with S1100i Paper size Carrier Sheet size (216 × 297 mm) A3 (297 × 420 mm) (*1) A4 (210 × 297 mm) A5 (148 × 210 mm) A6 (105 × 148 mm) B4 (257 × 364 mm) (*1) B5 (182 ×...
- Page 301 Scanning Documents with S1100i Carbon paper or thermal paper Documents with memo papers or sticky notes attached ATTENTION l Using the Carrier Sheet Be careful of the following when you use the Carrier Sheet: Do not stain, or cut the black and white patterned end of the Carrier Sheet. Otherwise, the Carrier Sheet will not be recognized properly.
-
Page 302: Scanning Documents (S1100I)
Scanning Documents with S1100i Scanning Documents (S1100i) The procedure for scanning documents by inserting one document at a time is as follows. For details about documents that can be scanned, refer to "Documents to Scan (S1100i)" (page 298). Open the feed guide of the ScanSnap. Feed Guide HINT l If you want the document to be ejected from the front of the ScanSnap or when there is not... - Page 303 Scanning Documents with S1100i Insert the document straight into the feeding section of the ScanSnap, with the scanning side facing up. a The document is pulled in until it is set inside the ScanSnap. ATTENTION l If you specify a standard size instead of selecting [Automatic detection] (default), insert the document by aligning it with the left edge of the feeding section.
- Page 304 Scanning Documents with S1100i Business cards Plastic cards Carrier Sheets Output Guide Press the [Scan/Stop] button on the ScanSnap to start scanning. ATTENTION Do not perform the following operations during scanning. Doing so will stop scanning. l Connect or disconnect the ScanSnap and other USB devices. l Close the feed guide.
- Page 305 Scanning Documents with S1100i HINT To continue scanning, insert the next document to be scanned. When the document is inserted, scanning starts automatically. Press the [Scan/Stop] button on the ScanSnap to finish scanning. a The Quick Menu appears. In the Quick Menu, click the icon of the application to link with ScanSnap Manager.
- Page 306 Scanning Documents with S1100i a The selected application starts up. For details, refer to the Advanced Operation Guide. ATTENTION l You cannot start scanning when the Quick Menu is displayed. Either select an icon from the Quick Menu and finish the process, or close the Quick Menu before you perform the next scan.
-
Page 307: Scanning Documents By Inserting Two Documents At A Time Or By Inserting The Next Document While The Current Document Is Being Scanned (S1100I)
Scanning Documents with S1100i Scanning Documents by Inserting Two Documents at a Time or by Inserting the Next Document While the Current Document Is Being Scanned (S1100i) When scanning small size documents such as business cards and postcards with the ScanSnap, you can insert two documents at a time or you can insert the next document while the current document is being scanned. - Page 308 Scanning Documents with S1100i Open the feed guide of the ScanSnap. Feed Guide HINT l If you want the document to be ejected from the front of the ScanSnap or when there is not enough space where the document exits the ScanSnap, open the output guide. For details about documents that can be scanned with the output guide open, refer to "Documents to Scan (S1100i)"...
- Page 309 Scanning Documents with S1100i ATTENTION When inserting the documents, insert them at least 10 mm (0.39 in.) apart from each other. If the space between the documents is less than 10 mm (0.39 in.), the scanned images may not be cropped correctly.
- Page 310 Scanning Documents with S1100i l Close the feed guide. l Switch users. l Allow the computer to enter sleep mode. a The [Scan/Stop] button on the ScanSnap flashes in blue while the documents are being scanned. The [ScanSnap Manager - Image scanning and file saving] window appears. HINT When the [ScanSnap Manager - Image scanning and file saving] window is maximized, multiple scanned images are displayed in the preview area.
- Page 311 Scanning Documents with S1100i HINT To continue scanning, insert the next document to be scanned. When the document is inserted, scanning starts automatically. Press the [Scan/Stop] button on the ScanSnap to finish scanning. a The Quick Menu appears. In the Quick Menu, click the icon of the application to link with ScanSnap Manager.
- Page 312 Scanning Documents with S1100i a The selected application starts up. For details, refer to the Advanced Operation Guide. ATTENTION l You cannot start scanning when the Quick Menu is displayed. Either select an icon from the Quick Menu and finish the process, or close the Quick Menu before you perform the next scan.
-
Page 313: Scanning Documents Larger Than A4 Or Letter Size By Directly Inserting It In The Scansnap (S1100I)
Scanning Documents with S1100i Scanning Documents Larger Than A4 or Letter Size by Directly Inserting It in the ScanSnap (S1100i) By folding an A3, B4, or Double Letter size document in half and scanning each side continuously, the scanned images of both sides are automatically merged and saved as a single image. For details about documents that can be scanned, refer to "Documents to Scan (S1100i)"... - Page 314 Scanning Documents with S1100i Open the feed guide of the ScanSnap. Feed Guide a The [Scan/Stop] button flashes in blue. The button returns to being lit normally when document scanning is enabled. In addition, the ScanSnap Manager icon in the Dock changes from Fold the document in half so that the sides to be scanned are facing out.
- Page 315 Scanning Documents with S1100i HINT If you scan a document folded in half with the output guide open, a paper jam may occur. Make sure to close the output guide when you scan a document folded in half. Output Guide Press the [Scan/Stop] button on the ScanSnap to start scanning.
- Page 316 Scanning Documents with S1100i In the Quick Menu, click the icon of the application to link with ScanSnap Manager. When you select [Save Documents], you can manage scanned images by folder with ScanSnap Home. For details, refer to "Managing Paper Documents by Folder on a Computer" (page 329).
-
Page 317: Scanning Documents Larger Than A4 Or Letter Size With The Carrier Sheet (S1100I)
Scanning Documents with S1100i Scanning Documents Larger than A4 or Letter Size with the Carrier Sheet (S1100i) Documents larger than A4/Letter size (such as A3, 11 × 17 in. and B4) can be scanned with the optional Carrier Sheet. By folding the document in half and scanning both sides, one at a time, the two sides are merged into a single image. - Page 318 Scanning Documents with S1100i Select [one double-page spread image] in [Save as] and click the [OK] button. For details, refer to the ScanSnap Manager Help. Click the [Apply] button in the ScanSnap setup window. Click the [ ] button in the upper left of the window to close the ScanSnap setup window.
- Page 319 Scanning Documents with S1100i HINT Note that the front side of the Carrier Sheet has a black and white pattern at the top and a thick vertical line in the upper right-hand corner. Insert the part with the black and white pattern straight into the feeding section of the ScanSnap, with the front side of the Carrier Sheet facing up.
- Page 320 Scanning Documents with S1100i Turn over the Carrier Sheet and insert it as described in step 7. ATTENTION Make sure to scan the front and back side of the Carrier Sheet consecutively. a Scanning starts automatically and the [ScanSnap Manager - Image scanning and file saving] window appears.
- Page 321 Scanning Documents with S1100i Press the [Scan/Stop] button on the ScanSnap to finish scanning. a The scanned images of the front and back sides of the document are saved as a double- page spread image. ATTENTION l There may be a line or a gap appearing between the front and back side images. Also when you scan a thick document in the Carrier Sheet, the scanned image on the left and the scanned image on the right of a double-page spread image may skew towards each other from the top.
-
Page 322: Scanning Documents Such As Photographs And Clippings (S1100I)
Scanning Documents with S1100i Scanning Documents Such as Photographs and Clippings (S1100i) Using the optional Carrier Sheet allows you to scan documents that can be damaged quite easily such as photographs, or non-standard size documents that are difficult to load directly such as clippings. - Page 323 Scanning Documents with S1100i Click the [Apply] button in the ScanSnap setup window. Click the [ ] button in the upper left of the window to close the ScanSnap setup window. Place the document inside the Carrier Sheet. Open the Carrier Sheet and place the top of the document against the top center of the Carrier Sheet.
- Page 324 Scanning Documents with S1100i a The Carrier Sheet is pulled in until it is set inside the ScanSnap. ATTENTION If you perform a scan using the Carrier Sheet with the output guide open, a paper jam may occur and damage the documents. Make sure to close the output guide when you perform a scan using the Carrier Sheet.
- Page 325 Scanning Documents with S1100i For details about how to perform a scan, refer to "Scanning Documents (S1100i)" (page 302). Press the [Scan/Stop] button on the ScanSnap to finish scanning. a The scanned image is saved. ATTENTION l The scanned image is output at the center of the page in the size specified for [Paper size] in the [Carrier Sheet Settings] window.
-
Page 326: What You Can Do With Related Software
What You Can Do with Related Software What You Can Do with Related Software This section explains the basic operation procedure of software related to the ScanSnap and gives an overview of its functions. "What You Can Do with ScanSnap Home" (page 327) -
Page 327: What You Can Do With Scansnap Home
What You Can Do with ScanSnap Home What You Can Do with ScanSnap Home ScanSnap Home is a desktop application used for managing images created from documents that you scanned with the ScanSnap and for managing the meta information of those images (such as the date and time you scanned the documents and the result of the text recognition for the character string of a document) for all document types ("Documents", "Business Cards", "Receipts"... -
Page 328: Useful Usages
Useful Usages Useful Usages This section explains how to use related software for the scanned image that is created after a document is scanned with the ScanSnap. "Managing Paper Documents by Folder on a Computer" (page 329) "Saving Business Card Data to a Computer" (page 332) "Saving Receipt Data to a Computer"... -
Page 329: Managing Paper Documents By Folder On A Computer
Managing Paper Documents by Folder on a Computer Managing Paper Documents by Folder on a Computer This section explains how to digitize paper documents and manage the data by folder in ScanSnap Home. Scan a paper document with the ScanSnap. For details about how to perform a scan, refer to "Scanning Documents"... - Page 330 Managing Paper Documents by Folder on a Computer Select [Create new folder] in the menu that appears when you click the folder while holding down the [control] key on the keyboard. a A new folder is created. Rename the created folder. HINT To create multiple folders, repeat steps 3 to 5.
- Page 331 Managing Paper Documents by Folder on a Computer a The content data record is moved to the folder. HINT ScanSnap Home has various functions for using saved content data records. For details, refer to the ScanSnap Home Help.
-
Page 332: Saving Business Card Data To A Computer
Saving Business Card Data to a Computer Saving Business Card Data to a Computer This section explains how to digitize business cards and save the card data in ScanSnap Home. Scan business cards with the ScanSnap. For details about how to perform a scan, refer to "Scanning Documents"... - Page 333 Saving Business Card Data to a Computer Check the card data. Check whether characters in the image that is displayed in [View] are entered in [Business card information] correctly. If the card information must be corrected, click the text to be corrected and then directly edit it.
- Page 334 Saving Business Card Data to a Computer HINT For details about ScanSnap Home operations, refer to the ScanSnap Home Help.
-
Page 335: Saving Receipt Data To A Computer
Saving Receipt Data to a Computer Saving Receipt Data to a Computer This section explains how to digitize receipts and save the receipt data in ScanSnap Home. Scan receipts with the ScanSnap. For details about how to perform a scan, refer to "Scanning Documents"... - Page 336 Saving Receipt Data to a Computer Check the receipt data. Check whether characters in the image that is displayed in [View] are entered in [Receipt information] correctly. If the receipt information must be corrected, click the text to be corrected and then directly edit...
- Page 337 Saving Receipt Data to a Computer HINT For details about ScanSnap Home operations, refer to the ScanSnap Home Help.
-
Page 338: Creating A Photo Album And Saving It To A Computer
Creating a Photo Album and Saving it to a Computer Creating a Photo Album and Saving it to a Computer This section explains how to digitize photos and tag each digitized photo by name or by place in order to create an album in ScanSnap Home. Scan photos with the ScanSnap. - Page 339 Creating a Photo Album and Saving it to a Computer a The input field appears. Enter a name in the input field to categorize the photo and press the [Return] key. a A content data record created from the photo that you scanned is tagged with the specified name used to categorize the photo.
- Page 340 Creating a Photo Album and Saving it to a Computer a The tagged content data record created from the photo is displayed. HINT For details about ScanSnap Home operations, refer to the ScanSnap Home Help.
-
Page 341: Correcting Scanned Images (Sv600)
Correcting Scanned Images (SV600) Correcting Scanned Images (SV600) The scanned images can be corrected before ScanSnap Manager is linked with an application. The scanned images can be corrected in the following cases: "When a Document Is Scanned (SV600)" (page 342) "When a Book Is Scanned (SV600)"... -
Page 342: When A Document Is Scanned (Sv600)
When a Document Is Scanned (SV600) When a Document Is Scanned (SV600) When a document is scanned with the ScanSnap, the following correction can be made on the scanned image: "Filling in Fingers Captured in a Scanned Image (When a Document Is Scanned)(SV600)" (page 343) -
Page 343: Filling In Fingers Captured In A Scanned Image (When A Document Is Scanned)(Sv600)
When a Document Is Scanned (SV600) Filling in Fingers Captured in a Scanned Image (When a Document Is Scanned)(SV600) Fingers that are captured when a document is scanned can be filled in. ATTENTION l Do not hold the corners of the document when you scan. If you do so, the shape of the image may not be recognized correctly. - Page 344 When a Document Is Scanned (SV600) For details about how to perform a scan, refer to "Scanning Documents (SV600)" (page 258). a The [ScanSnap Manager - View cropped images] window is displayed. Select a scanned image to fill in fingers captured in the image. Select the [Continue with Point Retouch] checkbox and click the [Next] button.
- Page 345 When a Document Is Scanned (SV600) a The [ScanSnap Manager - Book Image Viewer] window appears in the point retouch mode. Click on a finger captured in a scanned image with the mouse. a When a finger is detected, it is indicated with a red dashed outline. To change a range of the outline, drag the white dot on the outline.
- Page 346 When a Document Is Scanned (SV600) HINT When a finger captured in a scanned image is not detected, a default outline is displayed around the finger. In that case, drag the white dot on the outline to align the outline with the shape of the finger. Click the [Apply] button.
-
Page 347: When A Book Is Scanned (Sv600)
When a Book Is Scanned (SV600) When a Book Is Scanned (SV600) The book image correction allows you to correct scanned images. The book image correction refers to making the following corrections to the images scanned from books with the ScanSnap: "Correcting Distorted Book Images (SV600)"... -
Page 348: Correcting Distorted Book Images (Sv600)
When a Book Is Scanned (SV600) Correcting Distorted Book Images (SV600) To correct the distortion of a scanned image from a book, follow the procedure below. ATTENTION l To correct the distortion of a scanned image, the shape of the book needs to be detected. If a book is scanned as follows, the shape of the book may not be detected correctly. - Page 349 When a Book Is Scanned (SV600) 2. Edit in point retouch mode ( Filling in the captured fingers in image If you edit in the book image correction mode after editing in the point retouch mode, the edited results in point retouch mode are overridden. On the window that appears after a book is scanned, select [Double-page spread (Book/Magazine)] and click the [Check/Correct] button.
- Page 350 When a Book Is Scanned (SV600) On the front and back cover of the book, make the middle outline for the gutter parallel to the right and left outlines. If the outline of the book is not aligned with the shape of the book in the scanned image, drag the upper part and lower part of the outline to correct each position.
- Page 351 When a Book Is Scanned (SV600) Follow the procedure below to modify the corner points and the outline. 1. Modify the corner points. The corner points can be modified by either of the following: l Double-click the position where you want to move the corner points. a The corner points automatically move to the double-clicked position.
- Page 352 When a Book Is Scanned (SV600) When there are curved/slanted lines or graphics with curved/slanted lines on the document, the scanned image of the document may not be corrected properly and the layout may not look right.
-
Page 353: Splitting A Double-Page Spread Image Into Two Page Images (Sv600)
When a Book Is Scanned (SV600) Splitting a Double-Page Spread Image into Two Page Images (SV600) The double-page spread image can be split into the right and left pages. When a JPEG file is split, the file is divided into two files. ATTENTION Follow the procedure below to perform multiple book image correction for one page. - Page 354 When a Book Is Scanned (SV600) a The [ScanSnap Manager - Book Image Viewer] window appears. Select the page to be split. Click , and then click a The split line is indicated with a green dashed line. If the split line is not aligned with the gutter of the book, drag the corner points to correct the position.
- Page 355 When a Book Is Scanned (SV600) a A message for confirming the split target appears. Click the [Selected Pages] button. a The page is split. When you have completed splitting the page, click the [Save and Quit] button.
-
Page 356: Filling In Fingers Captured In A Scanned Image (When A Book Is Scanned)(Sv600)
When a Book Is Scanned (SV600) Filling in Fingers Captured in a Scanned Image (When a Book Is Scanned)(SV600) Fingers that are captured when a book is scanned can be filled in. ATTENTION l To fill in fingers captured in the scanned image, the fingers need to be detected. If a book is scanned in the following ways, captured fingers may not be detected correctly. - Page 357 When a Book Is Scanned (SV600) If you edit in the book image correction mode after editing in the point retouch mode, the edited results in point retouch mode are overridden. HINT l Up to five fingers on each side (right/left) can be filled in. l To prevent image deterioration, select and fill in as many fingers as possible in one go.
- Page 358 When a Book Is Scanned (SV600) HINT When a finger captured in a scanned image is not detected, a default outline is displayed around the finger. In that case, drag the white dot on the outline to align the outline with the shape of the finger. Click the [Apply] button.
- Page 359 When a Book Is Scanned (SV600) a The finger captured in a scanned image is filled in. When you have completed filling in the captured finger, click the [Save and Quit] button.
-
Page 360: When Multiple Documents Are Scanned At Once (Sv600)
When Multiple Documents Are Scanned at Once (SV600) When Multiple Documents Are Scanned at Once (SV600) When multiple documents are scanned at once with the ScanSnap, the following corrections can be made on the scanned images: "Correcting the Scanned Image Orientation (SV600)" (page 361) "Modifying the Crop Area (SV600)"... -
Page 361: Correcting The Scanned Image Orientation (Sv600)
When Multiple Documents Are Scanned at Once (SV600) Correcting the Scanned Image Orientation (SV600) The orientation of scanned images that are skewed or upside-down can be corrected. On the window that appears after multiple documents are scanned at once, select [Flat document] and click the [Check/Correct] button. For details about how to perform a scan, refer to "Scanning Multiple Documents at Once (SV600)"... - Page 362 When Multiple Documents Are Scanned at Once (SV600) Click a The scanned image is rotated by 90 degrees. When you have completed correcting the orientation, click the [Save and Quit] button.
- Page 363 When Multiple Documents Are Scanned at Once (SV600) HINT l To fine-tune the orientation of the crop frame, select which scanned image you want to rotate and then perform one of the following operations: Drag the green operating point that appears at the top of the crop frame by as little or as much as you want.
-
Page 364: Modifying The Crop Area (Sv600)
When Multiple Documents Are Scanned at Once (SV600) Modifying the Crop Area (SV600) The size of the crop frame that is used to crop the scanned image can be modified. On the window that appears after multiple documents are scanned at once, select [Flat document] and click the [Check/Correct] button. - Page 365 When Multiple Documents Are Scanned at Once (SV600) Click any position on the window. a The crop area is fixed. When you have completed changing the crop area, click the [Save and Quit] button. HINT l To move a crop frame, place the mouse inside the crop frame and drag it when all the operating points have turned red.
-
Page 366: Adding The Necessary Scanned Images (Sv600)
When Multiple Documents Are Scanned at Once (SV600) Adding the Necessary Scanned Images (SV600) If the necessary scanned images do not become the targets to be cropped, you can manually add them to the targets. Up to 20 crop frames can be added for one scanned image. On the window that appears after multiple documents are scanned at once, select [Flat document] and click the [Check/Correct] button. - Page 367 When Multiple Documents Are Scanned at Once (SV600) a A crop frame is added to the scanned image that is automatically recognized, and the scanned image that was cropped by dragging the mouse is added to the end of [Cropped image].
-
Page 368: Deleting Unnecessary Scanned Images (Sv600)
When Multiple Documents Are Scanned at Once (SV600) Deleting Unnecessary Scanned Images (SV600) When there are multiple scanned images, unnecessary crop frames can be deleted. Scanned images without crop frames are not output and cannot be linked with an application. On the window that appears after multiple documents are scanned at once, select [Flat document] and click the [Check/Correct] button. - Page 369 When Multiple Documents Are Scanned at Once (SV600) Click a A confirmation message appears. Click the [Yes] button. a The crop frame is removed from the selected scanned image, and the scanned image disappears from [Cropped image].
- Page 370 When Multiple Documents Are Scanned at Once (SV600) After you have removed the crop frame from the unnecessary scanned image, click the [Save and Quit] button. HINT If the [Next] button is displayed, clear the [Continue with Point Retouch] checkbox. The [Next] button changes to the [Save and Quit] button.
-
Page 371: Uninstalling Software/Troubleshooting During Uninstallation
Manager Menu" (page 84). l ScanSnap Support Site (https://scansnap.fujitsu.com/g-support/en/) If you cannot solve the problem after referring to the above section, contact your FUJITSU scanner dealer or an authorized FUJITSU scanner service provider. "If You Have Installed the Software Before" (page 372) "When the ScanSnap Manager Icon Does Not Appear"... -
Page 372: If You Have Installed The Software Before
If You Have Installed the Software Before If You Have Installed the Software Before If your attempt to reinstall the software related to the ScanSnap failed, uninstall the software and then reinstall it. For details, refer to the following: "Uninstalling the Software" (page 443) "Reinstalling the Software"... -
Page 373: Reinstalling The Software
If you cannot disable the anti-virus software, check if the software is set to lock the application. Access the download web pages of the software programs. ScanSnap Software Downloads https://scansnap.fujitsu.com/global/dl/ Select your model and operating system and click [Display software list] to display the list of software programs to be installed. -
Page 374: When The Scansnap Manager Icon Does Not Appear
When the ScanSnap Manager Icon Does Not Appear When the ScanSnap Manager Icon Does Not Appear This section explains how to troubleshoot when the ScanSnap Manager icon does not appear in the Dock even though the software is installed and the ScanSnap is connected to the computer. "Displaying the ScanSnap Manager Icon"... -
Page 375: Displaying The Scansnap Manager Icon
When the ScanSnap Manager Icon Does Not Appear Displaying the ScanSnap Manager Icon From the sidebar in Finder, select [Applications] → [ScanSnap], and then double-click [ScanSnap Manager] to start ScanSnap Manager. HINT If the problem is solved, you can change the setting so that ScanSnap Manager will start up automatically from the next time you log in to the computer. -
Page 376: When Scansnap Manager Does Not Operate Normally
When ScanSnap Manager Does Not Operate Normally When ScanSnap Manager Does Not Operate Normally If the ScanSnap Manager icon in the Dock is displayed as even though the software is installed and the ScanSnap is connected to the computer, perform the following procedures. "Checking the Connection between the ScanSnap and the Computer"... -
Page 377: Checking The Connection Between The Scansnap And The Computer
When ScanSnap Manager Does Not Operate Normally Checking the Connection between the ScanSnap and the Computer Unplug the USB cable from the computer and the ScanSnap, then plug it back in. Make sure to leave at least 5 seconds between unplugging and plugging the cable. If you are using a USB hub, connect the USB cable to the computer directly. -
Page 378: Checking If Scansnap Manager Is Operating Normally
When ScanSnap Manager Does Not Operate Normally Checking If ScanSnap Manager Is Operating Normally Turn off the ScanSnap and then turn it on again. Make sure to leave at least 5 seconds between turning off and on the ScanSnap. If the problem persists, proceed to step 2. If you are using a USB hub, connect the ScanSnap to the computer directly with a USB cable. -
Page 379: Cleaning The Scansnap
Cleaning the ScanSnap Cleaning the ScanSnap "Cleaning Materials" (page 380) "Cleaning iX1500" (page 381) "Cleaning iX500" (page 388) "Cleaning iX100" (page 394) "Cleaning SV600" (page 399) "Cleaning S1300i" (page 400) "Cleaning S1100i" (page 406) "Cleaning the Carrier Sheet (iX1500/iX500/iX100/S1100i)" (page 411) "Cleaning the Background Pad (SV600)"... -
Page 380: Cleaning Materials
Cleaning Materials Cleaning Materials Cleaning materials and their part numbers are as below. Product Name Part No. Unit Note Cleaner F1 PA03950-0352 1 bottle Size: 100 ml Cleaning Paper (*1) CA99501-0012 1 pack 10 sheets Cleaning Wipe (*2) PA03950-0419 1 pack 24 packets Lint-free dry cloth (*3) Commercially... -
Page 381: Cleaning Ix1500
Cleaning iX1500 Cleaning iX1500 This section explains about the cleaning materials and how to clean the ScanSnap. ATTENTION The bottom part of the ScanSnap may become hot when the ScanSnap is being used but this does not affect ScanSnap operation or cause any physical harm. Be careful not to drop the ScanSnap when carrying it. -
Page 382: Cleaning The Outside Of Ix1500
Cleaning iX1500 Cleaning the Outside of iX1500 ScanSnap Clean the outside of the ScanSnap, the ADF paper chute (cover), the ADF top section, and the stacker in the following procedure. Disconnect the cables from the ScanSnap and then clean the outside of the ScanSnap with a dry cloth, or a cloth moistened with Cleaner F1/mild detergent. -
Page 383: Cleaning The Inside Of Ix1500
Cleaning iX1500 Cleaning the Inside of iX1500 Scanning repeatedly may cause dust and paper dust to accumulate inside the ScanSnap resulting in a scanning error. As a guideline, the inside of the ScanSnap should be cleaned every 1,000 sheets scanned. Note that this guideline varies depending on the types of documents you scan. - Page 384 Cleaning iX1500 Pull the ADF release tab towards you to open the ADF top section. Clean the following locations with a cloth moistened with Cleaner F1. Ultrasonic Sensor (x2) Pick Roller (x1) Plastic Idler Roller (x2) Rubber Idler Roller (x2) Brake Roller (x1)
- Page 385 Cleaning iX1500 When cleaning, be careful not to damage the document sensor with a cloth. l Brake roller (× 1) Remove the brake roller from the ScanSnap to clean them. For details about how to remove the brake roller, refer to "Replacing Consumables for iX1500"...
- Page 386 Cleaning iX1500 l Ultrasonic sensor (× 2) Gently wipe the dirt and dust off the surface of the ultrasonic sensors. If it is difficult to clean the ultrasonic sensors, use cotton swabs. Clean the feed rollers and the eject rollers with the ScanSnap turned on. 1.
- Page 387 Cleaning iX1500 Feed Roller (x2) Eject Roller (x2) l Feed roller (× 2)/eject roller (× 2) Gently wipe the dirt and dust off while taking care not to damage the surface of the roller. Make sure that they are cleaned properly because residue on the rollers will affect the feeding performance.
-
Page 388: Cleaning Ix500
Cleaning iX500 Cleaning iX500 This section explains about the cleaning materials and how to clean the ScanSnap. ATTENTION The bottom part of the ScanSnap may become hot when the ScanSnap is being used but this does not affect ScanSnap operation or cause any physical harm. Be careful not to drop the ScanSnap when carrying it. -
Page 389: Cleaning The Outside Of Ix500
Cleaning iX500 Cleaning the Outside of iX500 Clean the outside of the ScanSnap, the ADF paper chute (cover), the ADF top section, and the stacker in the following procedure. Unplug the cables from the ScanSnap. Clean the outside of the ScanSnap with a dry cloth, or a cloth moistened with Cleaner F1/mild detergent. -
Page 390: Cleaning The Inside Of Ix500
Cleaning iX500 Cleaning the Inside of iX500 Scanning repeatedly may cause dust and paper dust to accumulate inside the ScanSnap resulting in a scanning error. As a guideline, the inside of the ScanSnap should be cleaned every 1,000 sheets scanned. Note that this guideline varies depending on the types of documents you scan. - Page 391 Cleaning iX500 1. Unplug the power cable from the AC outlet. 2. Pull the ADF release tab towards you to open the ADF top section. ADF Paper Chute (Cover) ADF Release Tab ADF Top Section 3. Clean the following locations with a cloth moistened with Cleaner F1. ATTENTION When cleaning, be careful not to damage the document sensor with a cloth.
- Page 392 Cleaning iX500 For details about how to remove the brake rollers, refer to "Replacing Consumables for iX500" (page 424). Gently wipe off the dirt and dust along the grooves on the roller surface. Be careful not to damage the surface of the rollers. l Idler roller (×...
- Page 393 Cleaning iX500 Eject Roller (x2) Feed Roller (x2) l Feed roller (× 2)/eject roller (× 2) Press the [Scan] button to rotate the rollers. Gently wipe the dirt and dust off while taking care not to damage the surface of the roller. Make sure that they are cleaned properly because residue on the rollers will affect the feeding performance.
-
Page 394: Cleaning Ix100
Cleaning iX100 Cleaning iX100 This section explains about the cleaning materials and how to clean the ScanSnap. "Cleaning the Outside of iX100" (page 395) "Cleaning the Inside of iX100" (page 396) -
Page 395: Cleaning The Outside Of Ix100
Cleaning iX100 Cleaning the Outside of iX100 Clean the outside of the ScanSnap in the following procedure. Unplug the cables from the ScanSnap. Clean the outside of the ScanSnap with a dry cloth, or a cloth moistened with Cleaner F1/mild detergent. ATTENTION l Never use paint thinner or any other organic solvents. -
Page 396: Cleaning The Inside Of Ix100
Cleaning iX100 Cleaning the Inside of iX100 Scanning repeatedly may cause dust and paper dust to accumulate inside the ScanSnap resulting in a scanning error. As a guideline, the inside of the ScanSnap should be cleaned every 100 sheets scanned. Note that this guideline varies depending on the types of documents you scan. - Page 397 Cleaning iX100 Top Cover Output Guide Feed Guide 3. Clean the following locations with a cloth moistened with Cleaner F1. Glass (x 2) Idler Roller (x 12) l Glass (× 2, one on the top cover and one on the opposite side) Gently wipe the dirt and dust off the surface of the glass sections.
- Page 398 Cleaning iX100 Eject Roller (x 1) Feed Roller (x 1) l Feed roller (× 1, located on the scanner side) Press the [Scan/Stop] button to rotate the roller. Gently wipe the dirt and dust off while taking care not to damage the surface of the roller. Make sure that they are cleaned properly because residue on the roller will affect the feeding performance.
-
Page 399: Cleaning Sv600
Cleaning SV600 Cleaning SV600 This section explains how to clean the outside of the ScanSnap. If the white sheet, glass, camera, lamp, or infrared LED is dirty, errors may appear in the scanned images. Whenever an error appears in a scanned image, clean the ScanSnap. Unplug the cables from the ScanSnap. -
Page 400: Cleaning S1300I
Cleaning S1300i Cleaning S1300i This section explains about the cleaning materials and how to clean the ScanSnap. "Cleaning the Outside of S1300i" (page 401) "Cleaning the Inside of S1300i" (page 402) -
Page 401: Cleaning The Outside Of S1300I
Cleaning S1300i Cleaning the Outside of S1300i Clean the outside of the ScanSnap, the ADF paper chute (cover), and the ADF top section in the following procedure. Unplug the cables from the ScanSnap. Clean the outside of the ScanSnap with a dry cloth, or a cloth moistened with Cleaner F1/mild detergent. -
Page 402: Cleaning The Inside Of S1300I
Cleaning S1300i Cleaning the Inside of S1300i Scanning repeatedly may cause dust and paper dust to accumulate inside the ScanSnap resulting in a scanning error. As a guideline, the inside of the ScanSnap should be cleaned every 200 sheets scanned. Note that this guideline varies depending on the types of documents you scan. - Page 403 Cleaning S1300i Clean the following items: l Pad assy l Idler roller l Glass l Pick roller l White backing strip 1. Unplug the power connection cable (power cable or USB bus power cable) from the power supply source (AC outlet or computer). 2.
- Page 404 Cleaning S1300i l Pick roller assembly (× 1, located on the scanner side) Gently wipe the dirt and dust off the rollers as you manually rotate them downward. Be careful not to damage the surface of the rollers. Make sure that they are cleaned properly because residue on the rollers will affect the feeding performance.
- Page 405 Cleaning S1300i ADF Paper Chute (Cover) ADF Top Section a It clicks when it returns to its original position. ATTENTION Make sure that the ADF top section is completely closed. Otherwise, paper jams or other feeding errors, or image faults may occur.
-
Page 406: Cleaning S1100I
Cleaning S1100i Cleaning S1100i This section explains about the cleaning materials and how to clean the ScanSnap. "Cleaning the Outside of S1100i" (page 407) "Cleaning the Inside of S1100i" (page 408) -
Page 407: Cleaning The Outside Of S1100I
Cleaning S1100i Cleaning the Outside of S1100i Clean the outside of the ScanSnap in the following procedure. Unplug the cables from the ScanSnap. Clean the outside of the ScanSnap with a dry cloth, or a cloth moistened with Cleaner F1/mild detergent. ATTENTION l Never use paint thinner or any other organic solvents. -
Page 408: Cleaning The Inside Of S1100I
Cleaning S1100i Cleaning the Inside of S1100i Scanning repeatedly may cause dust and paper dust to accumulate inside the ScanSnap resulting in a scanning error. As a guideline, the inside of the ScanSnap should be cleaned every 100 sheets scanned. Note that this guideline varies depending on the types of documents you scan. - Page 409 Cleaning S1100i Top Cover Output Guide Feed Guide 3. Clean the following locations with a cloth moistened with Cleaner F1. Glass (x 2) Idler Roller (x 12) l Glass (× 2, one on the top cover and one on the opposite side) Gently wipe the dirt and dust off the surface of the glass sections.
- Page 410 Cleaning S1100i Press the [Scan/Stop] button to rotate the roller. Gently wipe the dirt and dust off while taking care not to damage the surface of the roller. Make sure that they are cleaned properly because residue on the roller will affect the feeding performance. l Eject roller (×...
-
Page 411: Cleaning The Carrier Sheet (Ix1500/Ix500/Ix100/S1100I)
Cleaning the Carrier Sheet (iX1500/iX500/iX100/S1100i) Cleaning the Carrier Sheet (iX1500/iX500/iX100/ S1100i) As you keep using the Carrier Sheet, dirt and dust will accumulate on the surface and the inside. Clean the Carrier Sheet regularly because it may result in scanning errors. The procedure for cleaning the Carrier Sheet is as follows. -
Page 412: Cleaning The Background Pad (Sv600)
Cleaning the Background Pad (SV600) Cleaning the Background Pad (SV600) As you keep using the Background Pad, dirt and dust will accumulate on the surface. Clean the Background Pad in the following procedure. Cleaning Clean the Background Pad with a dry or damp cloth. ATTENTION l Do not use any detergent. -
Page 413: Consumables For The Scansnap (Ix1500/Ix500/S1300I)
Consumables for the ScanSnap (iX1500/iX500/S1300i) Consumables for the ScanSnap (iX1500/iX500/ S1300i) "Part Numbers and Replacement Cycle of Consumables (iX1500/iX500/S1300i)" (page 414) "Checking the Status of Consumables (iX500/S1300i)" (page 416) "Replacing Consumables for iX1500" (page 417) "Replacing Consumables for iX500" (page 424) "Replacing Consumables for S1300i"... -
Page 414: Part Numbers And Replacement Cycle Of Consumables (Ix1500/Ix500/S1300I)
Part Numbers and Replacement Cycle of Consumables (iX1500/iX500/S1300i) Part Numbers and Replacement Cycle of Consumables (iX1500/iX500/S1300i) The following table shows the part number of the consumables and the suggested replacement cycles. Note that the suggested replacement cycles are guidelines for using A4 (80 g/m [20 lb]) wood-free paper, as these cycles vary depending on the type of documents scanned. - Page 415 Part Numbers and Replacement Cycle of Consumables (iX1500/iX500/S1300i) Product Name Part No. Suggested replacement cycle PICK ROLLER PA03541-0001 100,000 sheets or one year...
-
Page 416: Checking The Status Of Consumables (Ix500/S1300I)
Checking the Status of Consumables (iX500/S1300i) Checking the Status of Consumables (iX500/S1300i) You can check the status of each consumable in the following procedure. Click the ScanSnap Manager icon in the Dock while holding down the [control] key on the keyboard, and then select [Check consumable status] from the "ScanSnap Manager Menu"... -
Page 417: Replacing Consumables For Ix1500
Replacing Consumables for iX1500 Replacing Consumables for iX1500 The Roller Set consists of the brake roller and pick roller. Replace the consumable (Roller Set) of the ScanSnap when the replacement cycle is reached. The following shows the suggested replacement cycles. l Every 200,000 sheets scanned Note that a notification ( ) appears on the touch panel of the ScanSnap when the number of... - Page 418 Replacing Consumables for iX1500 Replace the brake roller. 1. Open the brake roller cover. Hold both ends of the cover, and open it in the direction of the arrow. 2. Remove the shaft of the brake roller from the ScanSnap. Lift the brake roller to remove the right side of the shaft, and then pull out the shaft from the hole on the left.
- Page 419 Replacing Consumables for iX1500 3. Remove the brake roller from the shaft. 4. Attach the new brake roller to the shaft. Insert the shaft to the brake roller by aligning the protrusion on the shaft with the slot on the brake roller.
- Page 420 Replacing Consumables for iX1500 6. Close the brake roller cover. ATTENTION Make sure that the shaft is attached firmly. Otherwise, paper jams or other feeding errors may occur. Replace the pick roller. 1. Open the sheet guide. Slide the side guides all the way. Open the sheet guide by hooking your finger in the dip of the sheet guide.
- Page 421 Replacing Consumables for iX1500 3. Remove the pick roller. Lift the right side of the bushing slightly (about 5 mm), move it toward the right, and then lift it upward to pull out the pick roller. ATTENTION Be careful not to touch the grease on the gear near the bushing. 4.
- Page 422 Replacing Consumables for iX1500 5. Rotate the bushing in the direction of the arrow. ATTENTION Make sure that the pick roller is attached firmly. Otherwise, paper jams or other feeding errors may occur. 6. Close the sheet guide. Make sure that both sides of the sheet guide are locked firmly. Close the ADF top section.
- Page 423 Replacing Consumables for iX1500 a It clicks when it returns to its original position. Connect the power cable to the AC outlet, and turn on the ScanSnap. Reset the Roller Set counter. 1. Press on the touch panel to display the [Settings] screen. 2.
-
Page 424: Replacing Consumables For Ix500
Replacing Consumables for iX500 Replacing Consumables for iX500 The Roller Set consists of the brake roller and pick roller. Replace each roller in the following procedure: l Before replacing consumables, you must turn off the ScanSnap and unplug the power cable from the AC outlet. Not doing so may cause fire or electrical shock. - Page 425 Replacing Consumables for iX500 Cover 2. Remove the shaft of the brake roller from the ScanSnap. Lift the brake roller to remove the right side of the shaft, and then pull out the shaft from the hole on the left. Brake Roller Shaft 3.
- Page 426 Replacing Consumables for iX500 Shaft Protrusion Slot Brake Roller 5. Attach the shaft to the ScanSnap. Insert the left end of the shaft in the hole properly, and then attach the right side of the shaft into place. Brake Roller Shaft 6.
- Page 427 Replacing Consumables for iX500 Side Guides Sheet Guide 2. Rotate the bushing in the direction of the arrow. Bushing 3. Remove the pick roller. Lift the right side of the bushing slightly (about 5 mm), move it toward the right, and then lift it upward to pull out the pick roller.
- Page 428 Replacing Consumables for iX500 Bushing ATTENTION Be careful not to touch the grease on the gear near the bushing. 4. Attach a new pick roller to the ScanSnap. Insert the left end of the shaft into the left-side hole, and then slowly attach the right end of the shaft into place.
- Page 429 Replacing Consumables for iX500 Bushing ATTENTION Make sure that the pick roller is attached firmly. Otherwise, paper jams or other feeding errors may occur. 6. Close the sheet guide. Make sure that both sides of the sheet guide are locked firmly. Close the ADF top section.
- Page 430 Replacing Consumables for iX500 2. Click the [Reset] button for [Roller Set Count]. a A confirmation window appears. 3. Click the [Yes] button. a [Roller Set Count] is reset to 0.
-
Page 431: Replacing Consumables For S1300I
Replacing Consumables for S1300i Replacing Consumables for S1300i This section explains how to replace the pad assy and the pick roller assembly. l Before replacing consumables, you must turn off the ScanSnap and unplug the power connection cable (power cable or USB bus power cable) from the power supply source (AC outlet or computer). -
Page 432: Replacing The Pad Assy (S1300I)
Replacing Consumables for S1300i Replacing the Pad Assy (S1300i) Replace the pad assy in the following procedure: Unplug the power connection cable (power cable or USB bus power cable) from the power supply source (AC outlet or computer). Remove any documents from the ADF paper chute (cover). Pull the ADF release tab towards you to open the ADF top section. - Page 433 Replacing Consumables for S1300i Pad Assy ADF Top Section Pad Plate ATTENTION Attach the pad assy with the front side up. If the pad assy is attached upside down, paper jams or other feeding errors may occur. Correct Incorrect Front Back Make sure that the pad assy is attached to the retaining hook firmly.
- Page 434 Replacing Consumables for S1300i 1. Click the ScanSnap Manager icon in the Dock while holding down the [control] key on the keyboard, and then select [Check consumable status] from the "ScanSnap Manager Menu" (page 84). → The [ScanSnap Manager - Check consumable status] window appears. 2.
-
Page 435: Replacing The Pick Roller Assembly (S1300I)
Replacing Consumables for S1300i Replacing the Pick Roller Assembly (S1300i) Replace the pick roller assembly in the following procedure: Unplug the power connection cable (power cable or USB bus power cable) from the power supply source (AC outlet or computer). Remove any documents from the ADF paper chute (cover). - Page 436 Replacing Consumables for S1300i Bushing Shaft Pick Roller Assembly Remove the shaft of the pick roller from the ScanSnap. Lift the left side of the shaft slightly (about 5 mm), move it toward the left, and then lift it upward to pull it out.
- Page 437 Replacing Consumables for S1300i ATTENTION Lifting the retaining clip with your fingernail may hurt or damage your fingernail. Use a paper clip or something alike if you have trouble lifting it up. Attach the new pick roller assembly to the shaft. Insert the drive pin of the shaft into the slot of the pick roller assembly.
- Page 438 Replacing Consumables for S1300i Bushing Shaft Pick Roller Assembly ATTENTION Make sure that the shaft is attached firmly. Otherwise, paper jams or other feeding errors may occur. Attach the sheet guide. While holding the squeeze clip on the right end, attach the sheet guide to its original position. Sheet Guide Squeeze Clip...
- Page 439 Replacing Consumables for S1300i Connect the power connection cable (power cable or USB bus power cable) to the power supply source (AC outlet or computer), and turn on the ScanSnap. Reset the pick roller count. 1. Click the ScanSnap Manager icon in the Dock while holding down the [control] key on the keyboard, and then select [Check consumable status] from the "ScanSnap Manager...
-
Page 440: Appendix
Appendix Appendix "Updating the Software" (page 441) "Updating the Firmware" (page 442) "Uninstalling the Software" (page 443) "Part Number of the Background Pad (SV600)" (page 449) "Part Number of the Carrier Sheet (iX1500/iX500/iX100/S1100i)" (page 450) "Specifications of the ScanSnap" (page 451) -
Page 441: Updating The Software
It is recommended that you apply latest updates to enhance security, operability and functions. For the software programs that can be updated, refer to the following: https://scansnap.fujitsu.com/jp/downloads/online-setup-help-ww.html ScanSnap Online Update checks the download server periodically. When the latest version of ScanSnap is available, the update list window appears. -
Page 442: Updating The Firmware
Updating the Firmware Updating the Firmware Update the ScanSnap firmware to add new features or improve features and operational performance. If the ScanSnap is connected to the Internet, the firmware can be updated on the touch panel of the ScanSnap. "To check the latest information on the firmware"... -
Page 443: Uninstalling The Software
Uninstalling the Software Uninstalling the Software This section explains how to uninstall the following software programs: "Uninstalling ScanSnap Manager" (page 444) "Uninstalling ScanSnap Home" (page 446) "Uninstalling ABBYY FineReader for ScanSnap" (page 447) "Uninstalling ScanSnap Online Update" (page 448) -
Page 444: Uninstalling Scansnap Manager
Uninstalling the Software Uninstalling ScanSnap Manager Uninstall ScanSnap Manager. The procedure is as follows. Turn on the computer and log in as a user with Administrator privileges. From the sidebar in Finder, select [Applications] → [ScanSnap] → [Sub], and then double-click [ScanSnap Uninstaller]. a The [ScanSnap Uninstaller] window (the [Welcome to ScanSnap Uninstaller] screen) appears. - Page 445 Uninstalling the Software 8. Close the [Users & Groups] window.
-
Page 446: Uninstalling Scansnap Home
Uninstalling the Software Uninstalling ScanSnap Home For details about how to uninstall ScanSnap Home, refer to the ScanSnap Home Help. -
Page 447: Uninstalling Abbyy Finereader For Scansnap
Uninstalling the Software Uninstalling ABBYY FineReader for ScanSnap Uninstall ABBYY FineReader for ScanSnap. The procedure is as follows. Turn on the computer and log in as a user with Administrator privileges. Exit ABBYY FineReader for ScanSnap if it is running. From the sidebar in Finder, select [Applications] →... -
Page 448: Uninstalling Scansnap Online Update
Uninstalling the Software Uninstalling ScanSnap Online Update Uninstall ScanSnap Online Update. HINT Before uninstalling ScanSnap Online Update, make sure that none of the following software is installed. l ScanSnap Manager l ScanSnap Organizer l CardMinder The procedure is as follows. Turn on the computer and log in as a user with Administrator privileges. -
Page 449: Part Number Of The Background Pad (Sv600)
Part Number of the Background Pad (SV600) Part Number of the Background Pad (SV600) The product name and part number of the Background Pad are as follows. Product Name Qty. Part No. Background Pad 1 sheet PA03641-0052 For details about purchasing the Background Pad, refer to "Suppliers of Consumables/Optional Parts"... -
Page 450: Part Number Of The Carrier Sheet (Ix1500/Ix500/Ix100/S1100I)
Part Number of the Carrier Sheet (iX1500/iX500/iX100/S1100i) Part Number of the Carrier Sheet (iX1500/iX500/ iX100/S1100i) The product name and part number of the Carrier Sheet are as follows. Product Name Qty. Part No. Carrier Sheets 5 sheets PA03360-0013 The Carrier Sheet should be replaced approximately every 500 scans. However, replace it if damage or dirt is noticeable. -
Page 451: Specifications Of The Scansnap
Specifications of the ScanSnap Specifications of the ScanSnap "Specifications of iX1500" (page 452) "Specifications for iX500" (page 454) "Specifications of iX100" (page 456) "Specifications of SV600" (page 458) "Specifications of S1300i" (page 459) "Specifications for S1100i" (page 461) -
Page 452: Specifications Of Ix1500
Specifications of iX1500 The following table summarizes the specifications of the ScanSnap. Item Specification Product name ScanSnap iX1500 Scanning method Automatic Document Feeder (ADF), simultaneous duplex scanning Scanning color mode Simplex/duplex, color/gray/black and white/auto (automatic color, gray, and B&W detection) Optical system/image sensor Equal-magnification optics/color CIS ×... - Page 453 Specifications of the ScanSnap Item Specification Related software Scanner driver ScanSnap Manager File management ScanSnap Home Text recognition ABBYY FineReader for ScanSnap Update management ScanSnap Online Update and application PDF editing Kofax Power PDF Standard for Mac, Nuance Power PDF Standard for Mac, or Nuance PDF Converter for Mac *1: When the ScanSnap is connected to a USB 3.1 Gen1 port or a USB 3.0 port, the ScanSnap may not be recognized by some computers.
-
Page 454: Specifications For Ix500
Specifications of the ScanSnap Specifications for iX500 The following table summarizes the specifications of the ScanSnap. Item Specification Product name ScanSnap iX500 Scanning method Automatic Document Feeder (ADF), simultaneous duplex scanning Scanning color mode Simplex/duplex, color/gray/black and white/auto (automatic color, gray, and B&W detection) Optical system/image sensor Equal-magnification optics/color CIS ×... - Page 455 Specifications of the ScanSnap Item Specification Related software Scanner driver ScanSnap Manager File management ScanSnap Home Text recognition ABBYY FineReader for ScanSnap Update management ScanSnap Online Update and application PDF editing Nuance PDF Converter for Mac *1: When the ScanSnap is connected to a USB 3.0 port, the ScanSnap may not be recognized by some computers.
-
Page 456: Specifications Of Ix100
Specifications of the ScanSnap Specifications of iX100 The following table summarizes the specifications of the ScanSnap. Item Specification Product name ScanSnap iX100 Scanning method Manual feed (Continuous Document Feeding (CDF) function supported), simplex scanning, two selectable paper paths (U-turn path (*1), straight path (*2)) Scanning color mode Simplex, color/gray/black and white/auto (automatic color, gray, and B&W detection) - Page 457 Specifications of the ScanSnap *2: When the output guide is closed. *3: When the ScanSnap is connected to a USB 3.0 port, the port operates as a USB 2.0 port. *4: IPv6 is not supported.
-
Page 458: Specifications Of Sv600
Specifications of the ScanSnap Specifications of SV600 The following table summarizes the specifications of the ScanSnap. Item Specification Product name ScanSnap SV600 Scanning method Overhead scanning Scanning color mode Color/gray/black and white/auto (automatic color, gray, and B&W detection) Optical system/image sensor Lens reduction optics/color CCD ×... -
Page 459: Specifications Of S1300I
Specifications of the ScanSnap Specifications of S1300i The following table summarizes the specifications of the ScanSnap. Item Specification Product name ScanSnap S1300i Scanning method Automatic Document Feeder (ADF), simultaneous duplex scanning Scanning color mode Simplex/duplex, color/gray/black and white/auto (automatic color, gray, and B&W detection) Optical system/image sensor Equal-magnification optics/color CIS ×... - Page 460 Specifications of the ScanSnap Item Specification Environmental specification Compliant with the International Energy Star Program, and RoHS Directive Related software Scanner driver ScanSnap Manager File management ScanSnap Home Text recognition ABBYY FineReader for ScanSnap Update management ScanSnap Online Update and application *1: When the ScanSnap is connected to a USB 3.0 port, the port operates as a USB 2.0 port.
-
Page 461: Specifications For S1100I
Specifications of the ScanSnap Specifications for S1100i The following table summarizes the specifications of the ScanSnap. Item Specification Product name ScanSnap S1100i Scanning method Manual feed (Continuous Document Feeding (CDF) function supported), simplex scanning, two selectable paper paths (U-turn path (*1), straight path (*2)) Scanning color mode Simplex, color/gray/black and white/auto (automatic color, gray, and B&W detection) - Page 462 Specifications of the ScanSnap *3: When the ScanSnap is connected to a USB 3.0 port, the port operates as a USB 2.0 port.
-
Page 463: About Customer Support And Maintenance
If your problem cannot be solved after referring to the above web pages, visit the following web page to check the contact information of a suitable Fujitsu office and contact the Fujitsu office. https://www.fujitsu.com/global/about/resources/shop/computing/peripheral/scanners/index.html l ABBYY FineReader for ScanSnap From the sidebar in Finder, select [Applications] →...