
Related Manuals for Dimplex Edel EDL200UK-630


Summary of Contents for Dimplex Edel EDL200UK-630
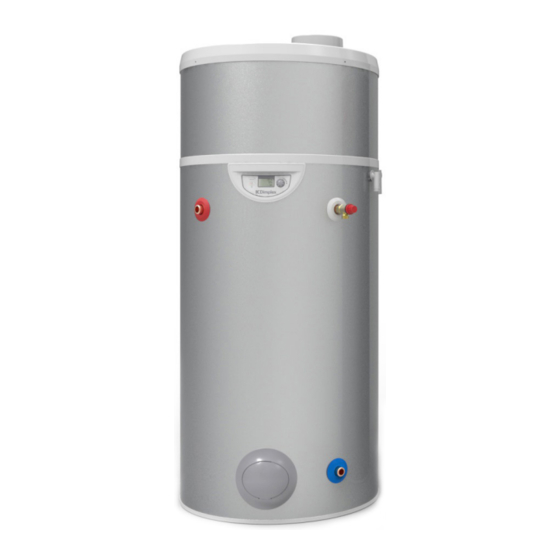
- Page 1 Air Source Heat Pump Water Heater Installation and User Instructions RD00662-5 Important - This manual must be left with user after Installation!
- Page 2 GDC Group Ltd is a licensed member of the Benchmark Scheme which aims to improve the standards of installation and commissioning of do- mestic heating and hot water systems in the UK and to encourage regu- lar servicing to optimise safety, efficiency and performance. Benchmark places responsibilities on both manufacturers and installers.
-
Page 3: Table Of Contents
Contents Manual Warnings Set-Up and Use Commissioning Safety Information Using your Hot Water Heat Pump Control Box Introduction Setting the Language Setting the Time Scope of Delivery Setting the Water Temperature Standby Mode Pre-Installation Boost Function Handling Electric Mode Unpacking 7.10 Programming Pipework... -
Page 4: Manual Warnings
1 Manual Warnings Before removing the cover from Electrical Warnings the immersion heater isolate the Indicates any hazard of an appliance using isolating switch! electrical nature Danger of electrical shock! Only use suitable electrically Information insulated equipment when work- ing inside immersion housing. Indicates tips and advice for the smooth operation of the system. -
Page 5: Introduction
Section G3 of Building Regulations. Permitted transport positions: No other transport position is authorised Dimplex cannot take responsibility for ensuring safe operation of the appli- ance outside of the scope of intended All other transport positions are use. -
Page 6: Pipework
- In rooms which are exposed to frost - In humid rooms which have a lot of steam or vapour Dimplex recommend an annual maintenance (for example, a bathroom) inspection is carried out on the water heater. In hard... -
Page 7: Discharge Pipe D2
7m from the tundish to the point of discharge. Dimplex strongly recommends the use of metal pipework only and Dimplex does not take responsibility for any damage caused from discharges. From Table 2, the maximum resistance allowed for a... -
Page 8: Termination Of Discharge Pipe
6.2.2 Expansion Vessel 5.8.3 Termination of discharge pipe The expansion vessel is mandatory on the Dimplex - “The discharge pipe (D2) from the tundish should water heater and can be connected directly to the cold terminate in a safe place where there is no risk to water inlet group, utilising the flexible hose supplied persons in the vicinity of the discharge.”... -
Page 9: Balanced Cold Water Supply
Note: The T&P valve is pre-sealed and if moved the Expansion Vessel seal will be broken, should this occur, it will need to Connection be resealed with an appropriate sealant (Dimplex part number R00836-1). Expansion Relief 6.4.2 Discharge Pipe D2... -
Page 10: Worked Example
2m straight 24.0 pliance and/or building fabric. 90°bend 12.5 37.5 External terminal 51.0 51.0 Dimplex does not take any responsibil- ity for issues caused by poor ducting design or installation. Air Exhaust 2m straight 19.2 90°bend 12.5 25.0 Figure 7 provides an example of how the ducting inlet and outlet connections should be installed. -
Page 11: Accessing Electrical Connections
Condensates Draining Only a voltage-free, external connection may be used, or the electronics board may be destroyed. The condensates tube should not be directly connected to a drain. It must terminate into open air through a U-bend which has been added and contains 6.9.1.1 Electricity Provider Contact water. -
Page 12: Connecting The Pv Function
Before turning on the mains supply to the 6.9.1.2 Connecting the PV Function water heater a hot water tap should be opened, This function enables the appliance to operate in preferably on the same floor or the floor below auto-production mode, which means that it will use the where the water heater is located. -
Page 13: Using Your Hot Water Heat Pump
7.2 Using your Hot Water Heat Pump Setting the Language The language must be selected when the appliance is The hot water heat pump mainly operates with the heat turned on for the first time. Turn the dial to the left, pump, as long as the air intake temperature remains in select ‘English’... -
Page 14: Setting The Water Temperature
BOOST Function Setting the Water Temperature (for occasional use) The water temperature can be adjusted between 30°C The ‘BOOST’ function temporarily uses both the and 65°C. The heat pump alone heats the water up immersion heater and the heat pump to increase the until 60°C. -
Page 15: Programming
7.10 Programming Programming enables you to define the periods of time the appliance runs in ‘Economy’, ‘Comfort’ or ‘Off’ mode (freeze protection mode). Electrical backup is not allowed while the appliance is in ‘Economy’ mode. To access the program menu: - Press the ‘Clock’. -
Page 16: Installer Menu
7.11 Installer Menu 3. Select ‘Yes’. It may be necessary to adjust certain settings to 4. Press the dial to confirm. optimise the performance of the heat pump water heater, depending on how the appliance is installed. 5. Press the ‘Menu’ key. Accessing the Installer Menu: 6. -
Page 17: Anti-Bacteria
7.11.2.1 Anti-Bacteria (Anti-Bact) 7.11.2.3 Minimum Temperature It is possible to allow the operation of the immersion heater along with the heat pump to prevent the Example: Anti-Bact 8 = the legionella water temperature falling below a minimum comfort ANTI-BACT ANTI-BACT cycle every 8 days Example: temperature of 38°C. -
Page 18: Maximum Heating Time
7.11.2.5 Maximum Time Manual Locking from the Main Screen Without gaining access through the ‘installer’ menu and A period of time can be chosen where the electrical provided that locking settings are not already in place. back-up will run at the same time as the heat pump to speed up the heating of the water in the tank. -
Page 19: Reading Display
7.11.5 Reading Display When draining the tank, ensure that there is a large enough air inlet at the top to avoid any depression in The ‘Read Data’ menu shows you, in real time, the the tank. information given by sensors. To access hold the dial for 3 seconds until ‘Display’... -
Page 20: Troubleshooting
Troubleshooting Issue Check The Heat Pump is not - That the desired water temperature is higher than working temperature of the water in the tank. - There is power supply to the appliance. - The the green light is on. - That the appliance is not in holiday mode (see Section 7.6) -
Page 21: Spare Parts
Spare Parts Description Part No 22mm x 3bar Inlet control group R00041-1 Inlet control group PRV cartridge R00009-1 18 litre expansion vessel R00045-2 Expansion vessel fixing kit R00094-2 DN16 3/4” BSP x 1000 flex pipe R00095-1 1/2” BSP T&P valve R00020-1 15 x 22 straight PE tundish R00047-1... -
Page 22: Error Message Codes
Error Message Codes: Errors, Solutions and Operating in case of Error Errors can be dismissed by briefly pressing the dial (manual reset). Temporary operation measures while Display Error Probable causes Solutions waiting for problem to be solved • Voltage too high on electrical network. - Page 23 Temporary operation measures while Display Error Probable causes Solutions waiting for problem to be solved • Domestic hot water • Defective water sensor • Check that sensor is in • Heat pump is OVER- overheat (water • Water sensor removed the right position in the non-functional HEAT...
-
Page 24: Warranty
9 Warranty This product should be serviced annually to optimise its safety, efficiency and performance. The tank is guaranteed against breakage for a The service engineer should complete the relevant period of five years, starting from the date the Service Record on the Benchmark Checklist after appliance was activated, if the warranty voucher each service. - Page 25 9.1.2 Exclusion from Warranty 9.1.2.5 Hydraulic Connections 9.1.2.1 Use Cases (unlimited) where warranty is void: - Inverting the hot/cold water connections. Cases where warranty (unlimited) is void : - Water pressure being higher than 6 bars. - Water supply being other than cold domestic water, - Absence of, incorrect fitting of, or obstruction of (such as rainwater or water from a well), or which has pressure relief valve.
-
Page 26: Technical Data
Technical Data and Product Fiche Air Discharge Air Intake Edel Air Source Water Heater Dimensions (for reference only) Figure 11: Technical Data and Product Fiche... - Page 27 Edel Air Source Water Heater - Dimensions Reference EDL200UK-630 EDL270UK-630 Capacity [l] 197.5 Hot Water Capacity [l]* 164.12 228.65 Weight - Empty [kg] 56.5 Weight - Full [kg] Heat Up Time [hh:mm]* 06:21 09:28 Heat Loss [kWh/24h] 1.61 1.77 Height [mm] 1460 1780 Outer Diameter [mm]...
- Page 28 Edel Air Source Water Heater - Product Features Materials Inner cylinder Stainless steel Outer cylinder Plastic Inlet/outlet Stainless steel Insulation 50mm PU foam (GWP=1, ODP=0) Maximum Operating Conditions Potable water temperature 65°C Operating pressure 3 bar Maximum design pressure 6 bar Heat Pump max.
- Page 29 Power Supply Green/Yellow Black Blue Brown Fan B1244454 Blue Blue Black Black Sensors Black Black Blue Black Black Black Brown Blue Brown Black Communication Bus Display...
- Page 30 lack Brown lack Black Black Sensors Black Black Black Blue Black Blue Black Brown Blue Green/Yellow Blue Black Blue Blue Brown Black HPS - High Pressure Switch C25 - Compressor Start Capacitor C2 - Fan Capacitor C4 - Valve - Fan DV - Defrost Valve - Immersion Heater LTS - Immersion Heater Safety Cut-out...
- Page 31 Notes...
- Page 32 Notes...
- Page 33 Notes...
- Page 34 MAINS PRESSURE HOT WATER STORAGE SYSTEM COMMISSIONING CHECKLIST This Commissioning Checklist is to be completed in full by the competent person who commissioned the storage system as a means of demonstrating compliance with the appropriate Building Regulations and then handed to the customer to keep for future reference. Failure to install and commission this equipment to the manufacturer’s instructions may invalidate the warranty but does not affect statutory rights.
- Page 35 SERVICE RECORD It is recommended that your hot water system is serviced regularly and that the appropriate Service Record is completed. Service Provider Before completing the appropriate Service Record below, please ensure you have carried out the service as described in the manufacturer’s instructions.
- Page 36 Disregarding the instructions given in this manual in its entirety and any relevant regulations, standards and codes of practice will void the guarantee of this product. Glen Dimplex reserve the right to revise products, literature and guarantee terms without prior notice due to a policy of continuous improvement.