Table of Contents
Advertisement
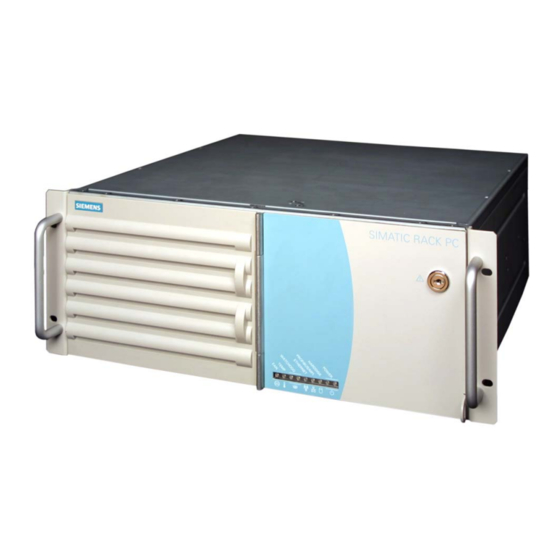
SIMATIC
SIMATIC Rack PC 840
Manual
Edition 04/2002
A5E00104826-03
Preface, Contents
Welcome to the SIMATIC Rack PC 840
Setting-up and Operating
Appendix
Guidelines for ESD
Technical Specifications
Retrofit Notes
Glossary, Index
1
2
3
4
5
6
7
8
9
A
B
C
Advertisement
Chapters
Table of Contents

Related Manuals for Siemens SIMATIC Rack PC 840


Summary of Contents for Siemens SIMATIC Rack PC 840
-
Page 1: Table Of Contents
Preface, Contents Important Information SIMATIC Welcome to the SIMATIC Rack PC 840 Setting-up and Operating SIMATIC Rack PC 840 the SIMATIC Rack PC 840 SIMATIC Rack PC 840 Expansions Manual Configuring the SIMATIC Rack PC 840 Error Diagnosis Hardware Information... - Page 2 Trademarks SIMATIC, SIMATIC HMI and SIMATIC NET are registered trademarks of SIEMENS AG. Third parties using for their own purposes any other names in this document which refer to trademarks might infringe upon the rights of the trademark owners.
-
Page 3: Preface
Where is this Manual Valid? This manual is valid for all supplied variations of the SIMATIC Rack PC 840 and describes the state of delivery as of April 2002. Certifications, Standards and Approvals... -
Page 4: Important Information
Structure of the Manual In Chapters 1 to 4 the manual contains the most important instructions for starting up and using the SIMATIC Rack PC 840. Chapters 5 to 9 are reference sections you will only require in special cases. - Page 5 Siemens representative in your local agency. http://www.ad.siemens.de/partner Training Center Siemens offers a number of training courses to familiarize you with the SIMATIC S7 automation system. Please contact your regional training center or our central training center in D 90327 Nuremberg, Germany for details:...
- Page 6 E-mail: simatic.hotline@ E-mail: simatic.hotline@ nbgm.siemens.de sae.siemens.com.sg sea.siemens.com GMT: +1:00 GMT: +8:00 GMT: –5:00 German and English are spoken on all the SIMATIC hotlines, French, Italian and Spanish are also spoken on the authorization hotline. SIMATIC Rack PC 840 Manual A5E00104826-03...
- Page 7 S Users and specialists from all over the world share information in the forum. S Your local customer service representative for Automation & Drives in our customer service representative data bank. S Information on field service, repairs, spare parts and more under ”Services”. SIMATIC Rack PC 840 Manual A5E00104826-03...
- Page 8 Preface SIMATIC Rack PC 840 Manual viii A5E00104826-03...
- Page 9 ........Connecting the SIMATIC Rack PC 840 to Other SIMATIC S5 Devices...
- Page 10 ......Self-Test of the SIMATIC Rack PC 840 before Booting ....
- Page 11 ........9-12 SIMATIC Rack PC 840 Manual A5E00104826-03...
- Page 12 ..............Index-1 SIMATIC Rack PC 840 Manual A5E00104826-03...
-
Page 13: Important Information
Be sure the fan ventilation slots are open so that a sufficient amount of air can be drawn in to cool the housing interior. SIMATIC Rack PC 840 Manual A5E00104826-03... - Page 14 DC power supply unit so that the cable does not cause damages in the event of a short circuit. Cables with a cross section of a maximum of up to 5 mm can be connected. SIMATIC Rack PC 840 Manual A5E00104826-03...
- Page 15 If you install or exchange system expansions and damage your Rack PC, the warranty becomes void. The power supply may only be dismantled or exchanged by authorized technical personnel. SIMATIC Rack PC 840 Manual A5E00104826-03...
- Page 16 S Always pull the power plug and disconnect the battery before connecting or disconnecting modules (containing ESDs). S Touch modules fitted with ESDs by their edges only. S Never touch wiring posts or printed conductors on modules containg ESDs. SIMATIC Rack PC 840 Manual A5E00104826-03...
-
Page 17: Certificates, Directives And Declarations
Postfach 1963 D-92209 Amberg Tel.: +49 (9621) 80-3283 Fax: +49 (9621) 80-3278 Observing the Setup Guidelines The setup guidelines and safety instructions given in this electronic manual must be observed on startup and during operation. SIMATIC Rack PC 840 Manual A5E00104826-03... -
Page 18: Certification For The Usa, Canada And Autralia
Canadian Standard Association (CSA) to standard C22.2. No. 950 (LR 81690) or to C22.2 No. 142 (LR 63533) Canadian Standard Association (CSA) to the American Standard UL 1950 (LR 81690) or to the UL 508 (LR 63533) NRTL SIMATIC Rack PC 840 Manual A5E00104826-03... -
Page 19: The Simatic Rack Pc
Avis Canadien Cet appareil numérique de la classe B est conforme à la norme NMB-003 du Canada. Australia (for devices with AC power supply) AS/NZS 3548 This product meets the requirements of the Norm. SIMATIC Rack PC 840 Manual A5E00104826-03... -
Page 20: Transport
PC. The PC must be allowed to reach room temperature slowly before you switch it on. If condensation has formed, you should wait approximately 12 hours before switching on the PC. SIMATIC Rack PC 840 Manual A5E00104826-03... -
Page 21: Welcome To The Simatic Rack Pc 840
Welcome to the SIMATIC Rack PC 840 Chapter Overview Section Description Page Front View with Closed Front Door Front View with Opened Front Door Side View Rear View Drives Backup Battery 2-10 SIMATIC Rack PC 840 Manual A5E00104826-03... -
Page 22: Front View With Closed Front Door
Welcome to the SIMATIC Rack PC 840 Front View with Closed Front Door Figure 2-1 Front View with Closed Front Door Front Panel The front panel has openings for device ventilation. A filter mat and the fans are located behind this front panel. It can only be removed when the front door is open. - Page 23 Welcome to the SIMATIC Rack PC 840 Front Door The Front ports and the screw to unlock the housing cover are protected against dirt and unauthorized access by means of a door. Please keep the front door closed during normal operation. The Microsoft Windows Product Key is located on the inside of the front door.
-
Page 24: Front View With Opened Front Door
Welcome to the SIMATIC Rack PC 840 Front View with Opened Front Door Figure 2-2 Front View with Opened Front Door Universal Serial Bus connector. You can use the USB port to connect external devices, for example, CD drives, printers, modems as well as mouse and keyboard. -
Page 25: Side View
Welcome to the SIMATIC Rack PC 840 Housing Screw Screw for fastening the housing cover. Caution Only qualified personnel is authorized to open the Rack PC or carry out repairs or maintenance work. Side View Figure 2-3 Side View Fastening Points for Telescopic Rails The Rack PC can be mounted on telescopic rails or on cabinet brackets. -
Page 26: Rear View
Welcome to the SIMATIC Rack PC 840 Rear View 9 10 11 12 Figure 2-4 Rear View Power Supply Fan Here are openings for power supply ventilation. Caution The air venting slots for outgoing air must not be obstructed. Otherwise, there is a risk of overheating. - Page 27 Welcome to the SIMATIC Rack PC 840 PROFIBUS/MPI (opcional) You can connect the Rack PC to an S7 automation system or to a PROFIBUS network via the PROFIBUS/MPI port with galvanic isolation . See Section 3.6 in the electronic manual. This port is an optional product feature.
-
Page 28: Drives
Welcome to the SIMATIC Rack PC 840 Drives As the Rack PC can be configured freely, the following drives are available - depending on your order. 2.5.1 Disk Drive You can store programs and data on diskettes with the disk drive and load them from diskettes into the Rack PC. -
Page 29: Cd Rom Drive
Welcome to the SIMATIC Rack PC 840 Caution Drives are sensitive to vibrations and shock. Any vibrations occurring during operation can lead to loss of data or damage to the drive. If you intend transporting the unit, switch it off, and wait until the drive has come to rest (about 20 seconds) before you move it. -
Page 30: Cd Rw Drive
Do not recharge the battery, do not open the battery by force. The correct lithium battery is available from Siemens (order no.: A5E00047601). Return used batteries to the manufacturer/recycler or dispose of them according to local regulations. -
Page 31: Setting Up And Operating The Simatic Rack Pc
Preparing for Operation Connecting Peripheral Units Connecting the SIMATIC Rack PC 840 to Other SIMATIC S5 3-13 Devices Connecting the SIMATIC Rack PC 840 to a SIMATIC S7 Network 3-16 (MPI/DP) Networking the SIMATIC Rack PC 840 with Other Stations on 3-18... -
Page 32: Unpacking And Checking The Scope Of Delivery
Setting Up and Operating the SIMATIC Rack PC 840 Unpacking and Checking the Scope of Delivery Unpacking the Rack PC Unpack your Rack PC programming device as follows: 1. Remove the packing. 2. Do not throw the original packing away. Keep it in case you have to transport the unit again sometime in the future. -
Page 33: Installing The Simatic Rack Pc
Setting Up and Operating the SIMATIC Rack PC 840 Installing the SIMATIC Rack PC 840 The Rack PC is particularly suitable for horizontal fitting in consoles, switch boards and 19” rack systems. The Rack PC with AC power supply meets the requirements for a fire enclosure to EN60950. - Page 34 Setting Up and Operating the SIMATIC Rack PC 840 483.4 19.031 18.307 430.4 16.944 Dimensions: Inch Figure 3-1 Dimension Drawings for Installation SIMATIC Rack PC 840 Manual A5E00104826-03...
- Page 35 Setting Up and Operating the SIMATIC Rack PC 840 Dimensions for telescopic 33±T3 rails by the company Rittal 100±T1 100±T1 100±T1 1.299±T3 type 3659 3.937±T1 3.937±T1 3.937±T1 72.6±T2 2.858±T2 88.5±T2 3.484±T2 127±T1 35±T3 5±T1 1.377±T3 209.6±T1 Dimensions for telescopic 8.251±T1 355.6±T1...
-
Page 36: Preparing For Operation
Setting Up and Operating the SIMATIC Rack PC 840 Preparing for Operation Connection to the Power Supply Unit Power Supply Unit Figure 3-3 Connection to the Power Supply Unit Warning The Rack PC with AC power supply is equipped with a safety-tested mains cable and may only be connected to a grounded grounding outlet. - Page 37 Setting Up and Operating the SIMATIC Rack PC 840 Equipotential Measures Low-impedance ground connections ensure that faults arising from external power supply cables, signalling cables or cables to peripheral units are diverted. Therefore connect the equipotential grounding connection on the system housing to the central earth terminal of the cabinet or the unit, into which the computer is fitted, in such a way that it has low impedance (large surface area, large contacts).
-
Page 38: Connecting Peripheral Units
Setting Up and Operating the SIMATIC Rack PC 840 Connecting Peripheral Units Notice When connecting peripheral units, ensure that the components have industrial capability according to EN 50082-2. Connecting the Printer to the Parallel Port Proceed as follows to connect your printer: 1. - Page 39 Setting Up and Operating the SIMATIC Rack PC 840 Connecting the Printer to a USB Port You can find out how to connect a USB printer in Connecting USB devices. Connecting Monitors You connect external multisynchronous monitors using the standard VGA connector on the right-hand panel side of the unit.
- Page 40 Setting Up and Operating the SIMATIC Rack PC 840 Connecting a PS/2 Mouse You can connect an external PS/2 mouse or another external pointing device to an additional PS/2-compatible mouse connector. USB connection for COM 2 Port Port for PS/2 mouse...
- Page 41 Setting Up and Operating the SIMATIC Rack PC 840 Connecting a PS/2 Keyboard A PS/2 keyboard of your choice can be connected to the Rack PC. PS/2 keyboard connection Figure 3-7 Connecting a PS/2 Keyboard To connect the keyboard, proceed as follows: 1.
- Page 42 Setting Up and Operating the SIMATIC Rack PC 840 Connecting USB Devices Single as well as several USB devices (mouse, keyboard or printer) can be connected to a USB port. S Insert the USB device connector into the USB port.
-
Page 43: Connecting The Simatic Rack Pc 840 To Other Simatic S5 Devices
Setting Up and Operating the SIMATIC Rack PC 840 Connecting the SIMATIC Rack PC 840 to Other SIMATIC S5 Devices Point-to-Point Connection In this section, you will learn how to connect your Rack PC to a programming device or S5 programmable logic controller using a point-to-point connection. - Page 44 Setting Up and Operating the SIMATIC Rack PC 840 Caution Risk of damage to the Rack PC! The interface port may be damaged if you confuse the connections or use the wrong connecting cables. Make sure the TTY cable of the Rack PC is plugged into the COM 1 / TTY port and not into the LPT 1 port.
- Page 45 Setting Up and Operating the SIMATIC Rack PC 840 Rack PC to PG Connection (V.24, TTY) If you want to connect your Rack PC to a programming device, you can plug the appropriate connecting cable into the V.24 or TTY interface port...
-
Page 46: Connecting The Simatic Rack Pc 840 To A Simatic S7 Network
Setting Up and Operating the SIMATIC Rack PC 840 Connecting the SIMATIC Rack PC 840 to a SIMATIC S7 Network (PROFIBUS/MPI) Connecting an S7 Programmable Controller via PROFIBUS/MPI Port You can connect the Rack PC to a SIMATIC S7 automation system or to a PROFIBUS network via the potentially isolated*) PROFIBUS/MPI port**). - Page 47 Setting Up and Operating the SIMATIC Rack PC 840 Connecting Via the MPI/DP port, you can connect your PC to S MPI networks (S7-200, S7-300, and S7-400) or S PROFIBUS DP networks (DP components). PROFIBUS/MPI Network Up to 32 devices (PC, programming device, or programmable controller) can be connected to the PROFIBUS/MPI port to form a network segment.
-
Page 48: Networking The Simatic Rack Pc 840 With Other Stations On
Setting Up and Operating the SIMATIC Rack PC 840 Networking the SIMATIC Rack PC 840 with Other Stations on PROFIBUS Networking the Rack PC on PROFIBUS PROFIBUS is an open and robust bus system for industrial use. It can be used to configure networks with up to 32 stations per segment. -
Page 49: Simatic Rack Pc 840 Expansions
SIMATIC Rack PC 840 Expansions What Does This Chapter Contain? You can enhance the performance of your Rack PC by adding an additional main memory, drives and expansion modules. This chapter describes how to expand your Rack PC. Please observe the relevant safety guidelines. -
Page 50: Opening The Unit
SIMATIC Rack PC 840 Expansions Opening the Unit 4.1.1 Prerequisites The device is designed for easy maintenance so that any work that is necessary can be done quickly and at low cost. Caution The electronic components on the printed circuit boards are extremely sensitive to electrostatic discharge. -
Page 51: Opening The Simatic Rack Pc 840
You can carry out all necessary installation work on the Rack PC with screwdrivers of the TORX T10 and TORX T8 types. 4.1.2 Opening the SIMATIC Rack PC 840 To open the Rack PC, proceed as follows: 1. Pull out the power supply connector.This is only necessary for devices with AC power supply. -
Page 52: Components Visible After Opening The Unit
SIMATIC Rack PC 840 Expansions 4.1.3 Components Visible after Opening the Unit Components Once you have removed the housing cover of your unit, the components are visible: Motherboard Memory expansion Processor Front drive holder Backup battery Power supply Rear drive holder... -
Page 53: The Motherboard
SIMATIC Rack PC 840 Expansions 4.1.4 The Motherboard The motherboard is the heart of the Rack PC. Here, data is processed and stored, and interfaces and device I/Os are controlled and managed. TTY–Modul Figure 4-3 Motherboard SIMATIC Rack PC 840 Manual... - Page 54 SIMATIC Rack PC 840 Expansions Components on the Motherboard The following components are located on the motherboard of the Rack PC: Slot Interface/Port Processor socket with heat sink X3, X4, X5 DIMM slots for memory expansion 2.54 mm primary IDE 2.54 mm secondary EIDE...
-
Page 55: Installing Memory Expansion Submodules
SIMATIC Rack PC 840 Expansions Installing Memory Expansion Submodules The motherboard has 3 slots for 144 pin SDRAM memory submodules. This allows you to expand the memory capacity of your Rack PC to a maximum of 512 Mbytes. Either one, two or three modules can be installed. - Page 56 SIMATIC Rack PC 840 Expansions Caution The electronic components of the printed circuit boards are extremely sensitive to electrostatic discharge. Certain precautionary measures are therefore necessary when handling such components. These measures are explained in the guidelines for handling electrostatically sensitive devices (ESD) in Appendix A.
-
Page 57: Replacing The Backup Battery
SIMATIC Rack PC 840 Expansions Replacing the Backup Battery Battery Power Supply for Real-Time Clock and Configuration A backup battery (3.6 V-lithium battery) powers the the real-time clock even after the Rack PC is switched off. In addition to the time of day, all the information about the Rack PC (device configuration) is stored in RAM. - Page 58 SIMATIC Rack PC 840 Expansions Backup Battery Figure 4-5 Position of the Backup Battery Caution Risk of damage! Only replace the lithium battery with an identical battery or with a type recommended by the manufacturer (Order No.: A5E00047601). Dispose of used batteries in keeping with local regulations.
-
Page 59: Installation Of Expansion Cards
SIMATIC Rack PC 840 Expansions Installation of Expansion Cards Notes about the Cards The Rack PC is designed for the use with cards as per the AT/PCI specification. The dimensions of the cards may not exceed the stated dimensions. If the height is exceeded, contact problems, malfunctions and difficulties with the assembly cannot be excluded. -
Page 60: Removal And Installation Of The Device For Holding Down The Modules
SIMATIC Rack PC 840 Expansions 4.4.1 Removal and Installation of the Device for Holding Down the Modules The device for holding down the modules is inserted in two holders. Eleven down holders are fitted on the device for holding down the modules. These down holders are fully adjustable to the modules. -
Page 61: Removal And Installation Of An Expansion Module
SIMATIC Rack PC 840 Expansions 4.4.2 Removal and Installation of an Expansion Module Proceed as follows: 1. Open the housing as described in Section 4.1. 2. Remove all connectors from the expansion module and note the assignment. 3. Remove the device for holding down the modules as described in Section 4.4.1. -
Page 62: Removal And Installation Of Drives
SIMATIC Rack PC 840 Expansions Removal and Installation of Drives 4.5.1 Removal and Installation of the Front Drive Holder Depending on your order, a CD-ROM, a CD-RW, a hard disk and a disk drive can be installed in the front drive holder. -
Page 63: Removal And Installation Of The Rear Drive Holder
SIMATIC Rack PC 840 Expansions 4.5.2 Removal and Installation of the Rear Drive Holder The rear drive holder is fixed with four screws on the outside and one screw in the device. 1. Open the device as described in Section 4.1. -
Page 64: Removal And Installation Of The Floppy/Cd Rom Drive
SIMATIC Rack PC 840 Expansions 4.5.4 Removal and Installation of the Floppy/CD ROM Drive 1. Open the housing as described in Section 4.1. 2. Remove the drive holder as described in Section 4.5.1. 3. Remove the data and power supply cables on the drive. -
Page 65: Removal And Installation Of The Power Supply Unit
SIMATIC Rack PC 840 Expansions Removal and Installation of the Power Supply Unit Warning Only qualified personnel is authorized to exchange the power supply unit. 1. Open the system housing as described in Section 4.1. 2. Remove the data and power supply cables of the drives, the motherboard and the bus board and note down their assignment. -
Page 66: Removal And Installation Of The Bus Board
SIMATIC Rack PC 840 Expansions Removal and Installation of the Bus Board 1. Open the housing as described in Section 4.1. 2. Remove all the modules from the slots (proceed as described in Section 4.4.2.). 3. Remove all the connectors from the bus board. -
Page 67: Removal And Installation Of The Motherboard
SIMATIC Rack PC 840 Expansions Removal and Installation of the Motherboard 1. Open the housing as described in Section 4.1. 2. Remove all the modules from the slots (proceed as described in Section 4.4.2). 3. Remove the bus board as described in Section 4.7. -
Page 68: Removal And Installation Of The Device Fan
SIMATIC Rack PC 840 Expansions Removal and Installation of the Device Fan The Rack PC is ventilated by fans which blow fresh air into the housing (pressurization). 1. Switch off the device. 2. Open the front door at a right angle (90_). This enables you to access the front panel and pull it off towards the front. -
Page 69: Processor Change
SIMATIC Rack PC 840 Expansions 4.10 Processor Change Proceed as follows to exchange the processor: 1. Open the housing as described in Section 4.1. 2. Pull out the fan cable plug. 3. Remove the cooling unit which is fixed using a lifting lever. -
Page 70: Reset Button
SIMATIC Rack PC 840 Expansions 4.11 Reset Button A hardware reset is initiated by means of the reset button on your device. The PC is restarted. The Rack PC reset button is located behind the front door. The reset button can be only actuated with a thin pen (for example, an opened-up paper clip). -
Page 71: Configuring The Simatic Rack Pc 840
Configuring the SIMATIC Rack PC 840 What Does This Chapter Contain? In this chapter, you will learn how to configure your programming device. You need to do this if you change your system by adding, removing, or exchanging expansion modules and memory expansions, or by replacing a system module. -
Page 72: Changing The Device Configuration With Bios Setup
Configuring the SIMATIC Rack PC 840 Changing the Device Configuration with BIOS SETUP Changing the Device Configuration Your Rack PC device configuration is set for working with the software supplied with the unit. You should only change the preset values if you have modified your Rack PC in any way or if a fault occurs when the unit is powered up. - Page 73 Configuring the SIMATIC Rack PC 840 Screen Display Following Power On With the default setting of your PC, the display shown below appears following power-on: Phoenix BIOS 4.0 A5E000xxxxx–ES0x Copyright 1985-2000 Phoenix Technologies Ltd. All Rights Reserved. SIMATIC Rack PC 840 V10.01.02 CPU = Intel...
- Page 74 Configuring the SIMATIC Rack PC 840 Menu Structure The screen is divided into four sections. In the top section, you can select the menu screens [Main], [Advanced], [Security], [Power], [Boot Sequence], [Version], [Exit]. In the left of the center section you can select various settings or submenus.
-
Page 75: The Main Menu
Configuring the SIMATIC Rack PC 840 The Main Menu PhoenixBIOS Setup Utility Main Advanced Security Power Boot Sequence Version Exit Item Specific Help System Time: [ 15:35:32 ] [ 01/08/2001 ] System Date: <Tab>, <Shift-Tab>, Diskette A: [Disabled] <Enter> selects field. - Page 76 Configuring the SIMATIC Rack PC 840 System Time und System Date Time and Date System Time and System Date indicate the current values. Once you have selected the appropriate option, you can use the [+] and [–] keys to modify the time...
- Page 77 Configuring the SIMATIC Rack PC 840 “Type” Field The parameters you can select here are usually stored on the IDE drive. The ’Auto’ setting in the ’Type’ field means that these values are automatically read from the drive and written into memory (Autodetect).
- Page 78 Configuring the SIMATIC Rack PC 840 ”Boot Options” Field The following submenu appears when you select the “Boot Options” field in the main menu: PhoenixBIOS Setup Utility Main Boot Options Item Specific Help QuickBoot Mode: [Enabled] Allows the system to skip certain tests while booting.
- Page 79 Configuring the SIMATIC Rack PC 840 Example of a summary screen: PhoenixBIOS Setup Utility BIOS Version : Vxx.xx.xx SIMATIC Rack : PC 840I System ROM : Fxx – FFFF CPU Type : Pentium(R) III BIOS Date : 01/08/01 CPU Speed...
- Page 80 Configuring the SIMATIC Rack PC 840 Numlock Switches Numlock on or off following power on. If “Auto” is set, this will be remembered the next time the device is switched on. Key Click A keystroke can be heard Keyboard auto-repeat...
- Page 81 Configuring the SIMATIC Rack PC 840 Entry Meaning LAN Remote Booting using a connected LAN is possible. The [Enabled] Boot respective boot source is displayed as Intel Boot-Agent in the boot sequence menu. Booting using LAN is not possible. [Disabled] SafeCard On board monitoring functions are enabled.
-
Page 82: The Advanced Menu
Configuring the SIMATIC Rack PC 840 The Advanced Menu Menu Structure PhoenixBIOS Setup Utility Main Advanced Security Power Boot Sequence Version Exit Item Specific Help Setup Warning Setting items on this menu to incorrect values may cause your system to malfunction... - Page 83 Configuring the SIMATIC Rack PC 840 Local Bus IDE [Primary] One IDE interface for max. two drives. adapter [Secondary] [Primary & Secondary] Two IDE interfaces for max. four drives. [Disabled] No local IDE interface. Large Disk [DOS] The drive tables are adapted for DOS access operations Access Mode in accordance with Enhanced IDE.
- Page 84 Configuring the SIMATIC Rack PC 840 Printer Port Internal LPT1 Mode: Use this setting to set the operating mode of the printer interface. Refer to the table below to ensure that the setting matches the printer connected to the printer port.
- Page 85 Configuring the SIMATIC Rack PC 840 ”PCI Devices” Field If the PCI devices field is selected, the following submenu appears: PhoenixBIOS Setup Utility Advanced Item Specific Help PCI Devices, Slot #1 Option Rom Scan [Enabled] Initialize device expansion Enable Master:...
- Page 86 Configuring the SIMATIC Rack PC 840 “PCI/PNP ISA IRQ Resource Exclusion” Submenu Available means that the Plug and Play mechanism in BIOS can allocate the IRQ to Plug and Play submodules or motherboard functions. Use the ’Reserved’ setting only if the interrupt has to be assigned specifically to submodules with no Plug and Play capability.
- Page 87 Configuring the SIMATIC Rack PC 840 “PCI IRQ line” Field PhoenixBIOS Setup Utility Advanced PCI Configuration Item Specific Help Reserves the specified PCI/PNP ISA IRQ Resource Exclusion IRQ for use by legacy ISA devices PCI IRQ line 1: Disabled PCI IRQ line 2:...
-
Page 88: The Security Menu
Configuring the SIMATIC Rack PC 840 The Security Menu You can only edit the fields enclosed in square brackets. Two passwords are assigned to protect your PC from unauthorized use. You can use the supervisor password to prevent use of diskettes for the normal user and to limit use of the hard disk. - Page 89 Configuring the SIMATIC Rack PC 840 Diskette This mode of protection is not active unless ”Password on boot ” is set to access [enabled]. [Supervisor] Diskette access is not possible unless the supervisor password was entered during system boot. [User] Diskette access is not possible unless the user password was entered during system boot.
-
Page 90: The Power Menu
Configuring the SIMATIC Rack PC 840 The Power Menu This menu has the following structure. PhoenixBIOS Setup Utility Security Main Advanced Power Boot Sequence Version Exit Item Specific Help APM: [Enabled] [Disabled Power Savings: APM (Advanced Power Management) allows APM... - Page 91 Configuring the SIMATIC Rack PC 840 After Power [Stay Off] After power failure the device is not switched Failure on automatically. [Last State] Provided it was switched on prior to a power failure, the device is switched on again [Power On] Restores the previous power state before loss occured.
-
Page 92: The Boot Sequence Menu
Configuring the SIMATIC Rack PC 840 The Boot Sequence Menu This menu allows you to prioritize the boot devices. PhoenixBIOS Setup Utility Main Advanced Security Power Boot Sequence Version Exit Item Specific Help +Removable Devices Keys used to view or... - Page 93 Configuring the SIMATIC Rack PC 840 Groups marked + can contain more than one device. When you select a group marked in this way, hit Enter to view the list of devices in the group. See the figure below for an illustration:...
-
Page 94: The Version Menu
Configuring the SIMATIC Rack PC 840 The Version Menu This menu contains the information you will have to quote when you send us technical questions about your system. PhoenixBIOS Setup Utility Main Advanced Security Power Boot Sequence Version Exit Item Specific Help... -
Page 95: The Exit Menu
Configuring the SIMATIC Rack PC 840 The Exit Menu The setup program is always terminated using this menu. PhoenixBIOS Setup Utility Main Advanced Security Power Boot Sequence Version Exit Item Specific Help Save Changes & Exit Exit Without Saving Changes... -
Page 96: Default Setup Settings
Configuring the SIMATIC Rack PC 840 Default Setup Settings Documenting Your Device Configuration If you have made any modifications to the default Setup settings, you can enter them in the following table. You can then refer to these entries if you need to make any hardware modifications later. - Page 97 Configuring the SIMATIC Rack PC 840 System Parameter Default Settings Your Entries Advanced Installed O/S Other Reset Configuration Data COM/LPT Configuration Internal COM1 Auto Internal COM2 Auto Internal LPT1 Auto Mode PCI-Configuration PCI Device Slot 1 Option ROM Scan Enabled...
- Page 98 Configuring the SIMATIC Rack PC 840 System Parameter Default Settings Your Entries PCI IRQ Line 1 Auto Select PCI IRQ Line 2 Auto Select PCI IRQ Line 3 Auto Select PCI IRQ Line 4 Auto Select Floppy disk controller Enabled...
-
Page 99: Error Diagnosis
No Mouse Pointer Appears on the Screen The Clock Time and/or the Date in your PC Is Incorrect USB-Device does not Function An Error Message Appears on the Screen Self-Test of the SIMATIC Rack PC 840 before Booting SIMATIC Rack PC 840 Manual A5E00104826-03... -
Page 100: Problems When Using Modules From Other Manufacturers
– If the error no longer occurs, the module you used from another manufacturer was the cause of the fault. Replace this module with a Siemens module, or contact the module supplier. S Force ”Reset Configuration” via BIOS Setup (see Chapter 5.3). -
Page 101: The Monitor Remains Dark
S Switch on your PC. Note If the mouse pointer still does not appear on the screen after you have performed these checks and measures, please contact your technical support team. SIMATIC Rack PC 840 Manual A5E00104826-03... -
Page 102: The Clock Time And/Or The Date In Your Pc Is Incorrect
The USB port is not recognized by the operating system. It is only supported by Windows Me and Windows 2000 at the present time. In addition, the BIOS setup can be controlled by a USB keyboard. SIMATIC Rack PC 840 Manual A5E00104826-03... -
Page 103: An Error Message Appears On The Screen
Contact your technical support team. Shadow RAM Failed at offset: Memory error Contact your technical support team Extended RAM Failed at offset: Memory error Contact your technical support team Failing Bits: Memory error Contact your technical support team SIMATIC Rack PC 840 Manual A5E00104826-03... - Page 104 Run SETUP System timer error Hardware error Contact your technical support team. Real time clock error Clock chip error Contact your technical support team. Keyboard controller error Keyboard error Contact your technical support team. SIMATIC Rack PC 840 Manual A5E00104826-03...
-
Page 105: Self-Test Of The Simatic Rack Pc 840 Before Booting
Error Diagnosis Self-Test of the SIMATIC Rack PC 840 before Booting When the PC is powered up, it runs a self-test (POST = Power On Self Test). If the POST detects a fault, it outputs the sequence of beeps (beep code) assigned for the fault or the FAN LED lights red. - Page 106 Reset the interrupt controller TP_COMPUTE_SPEED Determine the clock pulse speed TP_740_INIT Initialize the PG 740 I/Os TP_CMOS_TEST Test the CMOS RAM TP_ADV_CS_CONFIG Configure the advanced chip set TP_VECTOR_INIT Initialize the interrupt vectors TP_COPYRIGHT Test the copyright SIMATIC Rack PC 840 Manual A5E00104826-03...
- Page 107 Determine the serial ports TP_LPT Determine the parallel port TP_IO_AFTER Reenable the IO blocks TP_FDISK_CFG_IDE_CTRLR Configure the IDE controller TP_ENABLE_NMI Enable the NMI TP_FLOPPY Initialize the floppy controller TP_FDISK Initialize the hard disk controller SIMATIC Rack PC 840 Manual A5E00104826-03...
- Page 108 This signal means that the initialization of the special PC hardware has been skipped. If your SIMATIC Rack PC 840 does not power up properly, you can advise the hotline of the hex code of the POST. SIMATIC Rack PC 840 Manual...
-
Page 109: Hardware Information
Page Current Requirement of the Components (Maximum Values) Overview of the Components and Ports System Resources Monitoring Functions Ports Bus Board 7-26 Power Supply (AC) 7-34 Power Supply (DC) 7-35 7.10 Connecting Cables 7-36 SIMATIC Rack PC 840 Manual A5E00104826-03... -
Page 110: Current Requirement Of The Components (Maximum Values)
180 W permissible Power efficency of the AC and DC approximately 65% power supply Depending on the selected device configuration The total power comsumption of the +5V and +3.3V voltages may not exceed 160 W. SIMATIC Rack PC 840 Manual A5E00104826-03... -
Page 111: Controller
(500mA) USB ports Ethernet 10BaseT/100Base-TX (Intel 82559) 10/100 Mbps, potentially isolated * Electrically isolated in a safety extra-low voltage circuit (SELV) Optional product feature Depending on the CPU type Depending on the selected device configuration SIMATIC Rack PC 840 Manual A5E00104826-03... -
Page 112: System Resources
Start > Programs > Accessories > System Tools > System Information Windows 2000 Start > Settings > Control Panel > Administrative Tools > Computer Management > System Information Windows NT 4.0 Start > Programs > Administrative Tools (Common) > Windows NT Diagnostics SIMATIC Rack PC 840 Manual A5E00104826-03... -
Page 113: Monitoring Functions
Inside temperature out- normal side the permissible ran- CPU starts, fan speed is CPU does not start or fan normal speed is too low. The fan status is only displayed when SOM or SOL is enabled. SIMATIC Rack PC 840 Manual A5E00104826-03... -
Page 114: Temperature Monitoring/Indication
The temperature error remains saved until the temperatures have fallen below the thresholds and are reset by one of the following measures: S Acknowledge the error message via the SOM program S Restarting the device. SIMATIC Rack PC 840 Manual A5E00104826-03... -
Page 115: Watchdog (Wd)
The monitoring times are adjustable in increments of one second in a range from 3 to 255 seconds. Note If the watchdog time is changed after the watchdog was activated (i.e., while the watchdog is running), the watchdog is retriggered! SIMATIC Rack PC 840 Manual A5E00104826-03... -
Page 116: Fan Monitoring
S Device restart. Flashing of the Temp LED indicates that the device is being operated in the limit range. Please check if the permissible ambient temperature has been exceeded or if the filter is soiled. SIMATIC Rack PC 840 Manual A5E00104826-03... -
Page 117: Ports
6 pin, mini DIN socket external First and second USB channel, additional internal third USB channel for front interface PROFIBUS/MPI external X400 9 pin, standard socket, potentially isolated port Ethernet external X700 RJ45 external X303 15 pin, socket SIMATIC Rack PC 840 Manual A5E00104826-03... - Page 118 TTY send Output +20mA Isolated current source DTR (S1) Data terminal ready Output -TTY TxD TTY send Output RI (M3) Incoming call Input 23-25 Unassigned The line current (TTY) is an optional product feature. SIMATIC Rack PC 840 Manual 7-10 A5E00104826-03...
- Page 119 Terminal ready Output GND (E2) Functional ground (reference potential) DSR (M1) Readiness for operation Input RTS (S2) Switch on transmitter Output CTS (M2) Ready to transmit status Input RI (M3) Incoming call Input SIMATIC Rack PC 840 Manual 7-11 A5E00104826-03...
- Page 120 Automatic new line Output (open collector) / ERROR Device error Input (4,7 kW pull up) / INIT Reset / Initialization Output (open collector) / SELECT IN Printer selection Output (open collector) 18 - 25 Ground SIMATIC Rack PC 840 Manual 7-12 A5E00104826-03...
- Page 121 View onto the socket Figure 7-5 Connector Pinout for an External Keyboard Connecting Cable Pin-No. Designation Description Input / Output Data line, keyboard Input/output Unassigned Ground P5VFK +5V ( fused) Output Clock line, keyboard Input/output Unassigned SIMATIC Rack PC 840 Manual 7-13 A5E00104826-03...
- Page 122 +5V (fused) Output - Data Data line Input / Output + Data Data line Input / Output Ground The connectors are of type A. The ports are rated as high current USB (500mA). SIMATIC Rack PC 840 Manual 7-14 A5E00104826-03...
- Page 123 Signal line A of the MPI module Input/output RTS_PG RTS output signal of the MPI module. The Output control signal is “1” when the programming device is sending. Screen on connector casing Optional product feature SIMATIC Rack PC 840 Manual 7-15 A5E00104826-03...
- Page 124 4, 5 * SYMR Internal 75 Ω output Received data Input 7, 8 * SYMT Internal 75 Ω output Shield LED yellow Connection LED green Activity * is not necessary for data transfer SIMATIC Rack PC 840 Manual 7-16 A5E00104826-03...
- Page 125 Ground 5 V (fused) Output Ground Unassigned DDC_DAT Display Data Channel Data Input / Output EXT_H Horizontal synchronizing Output pulse EXT_V Vertical synchronizing pulse Output DDC_CLK Display Data Channel Clock Input / Output SIMATIC Rack PC 840 Manual 7-17 A5E00104826-03...
-
Page 126: Assignment Of The Front Port On The Motherboard
LED temperature error, anode with Output 330Ω in series on motherboard RUN_R LED watchDog error, anode with Output 330Ω in series on motherboard RUN_G LED watchdog o.k., anode with 330Ω Output in series on motherboard SIMATIC Rack PC 840 Manual 7-18 A5E00104826-03... -
Page 127: Assignment Of The Internal Ports On The Motherboard
The connection to the motherboard is effected by a gold-plated direct connector of the type ‘PCI, 64 bit’. All the necessary bus signals (ISA and PCI) are applied to this connector. The following table shows the connector assignment. SIMATIC Rack PC 840 Manual 7-19 A5E00104826-03... - Page 128 SBO# Ground PCI_GNT_N4 SERR# Ground PCI5_PCLK +3.3V +3.3V +3.3V PCI_GNT_N5 C/BE[1]# AD[15] PCI_REQ_N5 +3.3V AD[14] +3.3V Ground ISA_OSL Ground AD[13] +12V +12V AD[12] AD[11] +12V +12V AD[10] Ground –12V –5V # low active SIMATIC Rack PC 840 Manual 7-20 A5E00104826-03...
- Page 129 12V power supply Input 3.3V 3.3V power supply Input –12V –12V power supply Input Ground PSOFF Output Ground Ground Ground –5V –5V power supply Input 5V power supply Input 5V power supply Input SIMATIC Rack PC 840 Manual 7-21 A5E00104826-03...
- Page 130 TRACK_N0 Track 0 signal Input Ground WR_PRT_N Write protection signal Input Ground RD_DAT_N Read Data signal Input Ground SIDE_1_N Page selection Output MED_ID1 High Density Disk recognition Input DCHG_N Disk change display Input SIMATIC Rack PC 840 Manual 7-22 A5E00104826-03...
- Page 131 Interrupt signal Input – Unassigned AD_1 Adress 1 Output Reserved Reserved AD_0 Adress 0 Output AD_2 Adress 2 Output CS1_N Chip Select 1 Output CS3_N Chip Select 3 Output HDACT_N HD active Input Ground SIMATIC Rack PC 840 Manual 7-23 A5E00104826-03...
- Page 132 Adress 0 Output AD_2 Adress 2 Output CS1_N Chip Select 1 Output CS3_N Chip Select 3 Output HDACT_N Disk drive activity Input Ground +5V power supply Output +5V power supply Output Ground Reserved Reserved SIMATIC Rack PC 840 Manual 7-24 A5E00104826-03...
- Page 133 Power supply Output – – Assignment for SCSI Activity Connector, X39 Type JST B2B-PH-SM3-TB Pin No. Designation Description Input / Output – SCSI HD_N 0V levell means that SCSI Input port is active SIMATIC Rack PC 840 Manual 7-25 A5E00104826-03...
-
Page 134: Bus Board
Figure 7-10 Connector Assignment on the Bus Board Connector Assignment Auxillary ATX Pin No. Designation Description Input / Output 1, 2, 3 Masse 4, 5 +3.3 V +3.3 V +5 V +5 V SIMATIC Rack PC 840 Manual 7-26 A5E00104826-03... -
Page 135: Port For Motherboard
The connection to the motherboard is established by a gold-plated PCI 64 bit direct connector. All the required bus signals (ISA and PCI) are present on this connector. The following table shows the pin assignments. SIMATIC Rack PC 840 Manual 7-27 A5E00104826-03... - Page 136 SBO# Ground PCI_GNT_N4 SERR# Ground PCI5_PCLK +3.3V +3.3V +3.3V PCI_GNT_N5 C/BE[1]# AD[15] PCI_REQ_N5 +3.3V AD[14] +3.3V Ground ISA_OSL Ground AD[13] +12V +12V AD[12] AD[11] +12V +12V AD[10] Ground –12V –5V # low active SIMATIC Rack PC 840 Manual 7-28 A5E00104826-03...
- Page 137 SA 06 IRQ 3 SA 05 DACK2# SA 04 SA 03 BALE SA 02 + 5V SA 01 SA 00 I/O determines the direction of the signals for the CPU board. low active SIMATIC Rack PC 840 Manual 7-29 A5E00104826-03...
- Page 138 CPU for system bus access send and receive these signals. A minus sign “-” in front of the signal name shows that the signal is LOW active. SIMATIC Rack PC 840 Manual 7-30 A5E00104826-03...
- Page 139 +3.3V Ground FRAME# IRDY# Ground +3.3V TRDY# DEVSEL# Ground Ground STOP# LOCK# +3.3V PERR# SDONE +3.3V SBO# SERR# Ground +3.3V C/BE[1]# AD[15] AD[14] +3.3V Ground AD[13] AD[12] AD[11] AD[10] Ground # low active SIMATIC Rack PC 840 Manual 7-31 A5E00104826-03...
-
Page 140: Operator Panel
For pin assignment see page 7-14 LEDs LEDs green, red, yellow Reset Button 1-pin button On/Off Button 1-pin button 26 pin Pin Connector Connection to the motherboard External Reset Connector The device is reset. SIMATIC Rack PC 840 Manual 7-32 A5E00104826-03... - Page 141 External reset, (IO low max. 30 mA) Ground The device is reset when pins 1 and 2 (for example, via button) are short circuited. It remains in this state until the short circuit has been remedied. SIMATIC Rack PC 840 Manual 7-33 A5E00104826-03...
-
Page 142: Ac Power Supply
Input voltage +5 V secondary voltage POWER GOOD preset time 100 ... 500 ms hold-up time 16.6 ms minimum save time 1 ms mimimum Figure 7-12 Time Characteristics of the Power Good Signal SIMATIC Rack PC 840 Manual 7-34 A5E00104826-03... -
Page 143: Dc Power Supply
Power–Good Signal: Input voltage +5 V secondary voltage POWER GOOD preset time 100 ... 500 ms hold-up time Not specified save time 1 ms mimimum Figure 7-13 Time Characteristics of the Power Good Signal SIMATIC Rack PC 840 Manual 7-35 A5E00104826-03... -
Page 144: Connecting Cables
Figure 7-14 SIMATIC S5 Connecting Cable SIMATIC S7 Connecting Cable for PROFIBUS/MPI You can use the 6ES7901-0BF00-0AA0 connecting cable to connect your Rack PC to a SIMATIC S7 programmable controller. Please read the notes in Chapter 3. SIMATIC Rack PC 840 Manual 7-36 A5E00104826-03... -
Page 145: Controller
Controller Chapter Overview Section Description Page SCSI Controller Raid Controller 8-18 SIMATIC Rack PC 840 Manual A5E00104826-03... -
Page 146: Scsi Controller
• Make sure that termination is properly installed. • Connect the devices via the SCSI cable to the SCSI connector on the system module. • The SCSI controller terminator must be disabled when you connect devices with the external SCSI bus. SIMATIC Rack PC 840 Manual A5E00104826-03... - Page 147 If you are operating an 8-bit SCSI device as the final device on the SCSI cable you need an adapter (68-pin to 50-pin) with high-byte termination. Notice Use top-quality SCSI cables only as otherwise you may have problems transferring data. SIMATIC Rack PC 840 Manual A5E00104826-03...
-
Page 148: Scsi Setup
SCSI Setup. to restore default settings to toggle between black+white and color display Note also the status bar at the bottom margin of the screen. SIMATIC Rack PC 840 Manual A5E00104826-03... - Page 149 BIOS Support for Int 13 Extensions** Enabled * The setting is only effective if Multiple LUN Support is active (Enabled). ** The setting is only effective if the BIOS of the SCSI controller is active (Enabled). SIMATIC Rack PC 840 Manual A5E00104826-03...
-
Page 150: Meaning Of The Setup Parameters
If the Ultra Wide SCSI controller is not the final device on the SCSI cable, termination must be disabled. Automatic Host adapter is terminated automatically LowON/HighON Termination is enabled (default setting) LowOFF/HighOFF Termination is disabled. SIMATIC Rack PC 840 Manual A5E00104826-03... - Page 151 SCSI device. However, it can also exchange data with slow SCSI devices. The function is enabled (default setting). The function is disabled. Notice Synchronous data transmission is required for fast and ultra SCSI operations. SIMATIC Rack PC 840 Manual A5E00104826-03...
- Page 152 You may have to change the settings on your SCSI devices so that this function is supported (read your SCSI device documentation). The function is enabled. The function is disabled. SIMATIC Rack PC 840 Manual A5E00104826-03...
- Page 153 Disabled. Reset SCSI Bus at IC If you have enabled this menu option, the SCSI bus is reset. Enabled SCSI bus is reset (default setting). Disabled SCSI bus is not reset. SIMATIC Rack PC 840 Manual A5E00104826-03...
- Page 154 Enabled The SCSI BIOS is activated (default setting). Disabled The SCSI-BIOS is deactivated. Notice Remember that you must install special SCSI drivers for your SCSI devices if you disable the SCSI BIOS. SIMATIC Rack PC 840 Manual 8-10 A5E00104826-03...
- Page 155 1024 cylinders. Enabled is the default setting. Enabled Hard disk drives with more than 1024 cylinders are supported (default setting). Disabled Hard disk drives with more than 1024 cylinders are not supported. SIMATIC Rack PC 840 Manual 8-11 A5E00104826-03...
-
Page 156: Connecting Other Scsi Devices
ID 7 is intended for the SCSI controller The customer is responsible for determining the extent to which the connection of external SCSI devices is compatible with the device. Devices with FCC, UL and CE labeling should be connected. SIMATIC Rack PC 840 Manual 8-12 A5E00104826-03... -
Page 157: Terminating The Aha-2940 Ultra Wide
50-pin internal and 68-pin external connectors Caution Do not connect SCSI devices to all three connectors of an AHA-2940 Ultra Wide host adapter! Cable with Terminator No Termination Terminated by Cable No Termination Figure 8-1 Internal Termination SIMATIC Rack PC 840 Manual 8-13 A5E00104826-03... -
Page 158: Terminating Scsi Devices
SCSI devices may be connected up to this cable. The cable is terminated on the drive-side. You should only use top quality 68-pin external SCSI cables for external extensions. The total external cable length may not exceed 2 meters. SIMATIC Rack PC 840 Manual 8-14 A5E00104826-03... -
Page 159: Connecting External Scsi Devices
SCSI device. 4. To connect other external SCSI devices, daisy-chain each device to the previous device until all external SCSI devices have been connected (see Figure 8-3). Terminating Plug Figure 8-3 External Termination SIMATIC Rack PC 840 Manual 8-15 A5E00104826-03... -
Page 160: Troubleshooting On The Scsi Controller
SCSI cables from the Ultra Wide SCSI controller and restart the system. If the system starts successfully, check the SCSI cable. One of the SCSI devices may also be faulty. Check the SCSI devices. SIMATIC Rack PC 840 Manual 8-16 A5E00104826-03... - Page 161 (This error rarely occurs). – 06h – Unit attention – The removable media may be write-protected. Disable write protection and run the utility again. SIMATIC Rack PC 840 Manual 8-17 A5E00104826-03...
-
Page 162: Raid Controller
To do this, change the start type into restart via System setting > Devices > ATAPI. You have to restart your computer afterwards. Instructions on Windows 2000 When reinstalling Windows 2000 you have to select FASTTRAK 100 TX2/TX4 from the recommended lists SIMATIC Rack PC 840 Manual 8-18 A5E00104826-03... -
Page 163: Reinstallation Of The Software
Chapter Overview Section Description Page Restoring the Hard Disk Installation of the Windows Operating System Installing Drivers and Software 9-11 Installing the Raid Controller Software 9-12 Installing the Burner Software 9-12 SIMATIC Rack PC 840 Manual A5E00104826-03... -
Page 164: Restoring The Hard Disk
DOS partition and do you want this partition to be activated?” select “[N]” for No for a FAT 32 partition and then enter the desired partition size, for example, 6100 MB. SIMATIC Rack PC 840 Manual A5E00104826-03... -
Page 165: Creating Partitions Under Windows 2000
5. Create a primary DOS partition with 4090 MB. Enter [N] for “No” for the question ”Do you want to use the maximum memory size available for the primary DOS partition and do you want to activate this partition?” and set the partition size to 6100 MB. SIMATIC Rack PC 840 Manual A5E00104826-03... -
Page 166: Creating Partitions Under Windows Nt
The hard disk is delivered with the following installed (only for versions delivered with Windows NT): – a partition of with the FAT16 file system with 2045 Mbytes, – a partition of with the NTFS file system. SIMATIC Rack PC 840 Manual A5E00104826-03... - Page 167 Use the Recovery CD to boot as described in steps 1 to 3 above and then format drive C: with the program “Format”. Type: ”A:\>Format C:”. The creation of NTFS partitions is done under the Windows NT setup program. Starting the Windows NT setup is described in Section 9.2.1. SIMATIC Rack PC 840 Manual A5E00104826-03...
-
Page 168: Installing The Windows Operating System
Recovery Microsoft Windows 2000. 9.2.1 Installing the Recovery CD for Microsoft Windows NT This CD contains encoded data which can only be transferred to a SIEMENS SIMATIC PC. Data transfer is carried out with the OEMSETUP.EXE program on the CD ROM or, after booting, from the CD-ROM with the recovery function. -
Page 169: Installing The Microsoft Windows Me Operating System
With the help of the Recovery CD you can reinstall or restore the operating system. This CD contains encoded data which can only be transferred to a SIEMENS SIMATIC PC. Data transfer is carried out using the OEMSETUP.EXE program on the CD ROM or using the recovery function after booting the CD ROM. -
Page 170: Installing The Recovery Cd For Microsoft Windows Me
If the hard disk has not been installed, first select “2. Boot for FDISK, FORMAT or Windows-Setup (Section 9.1). 5. You have to acknowledge the “SIEMENS End User License Agreement” with the F8 function key. Pressing ESC allows you to decline the agreement and cancels the installation. -
Page 171: Installing The Recovery Cd For Microsoft Windows 2000
Reinstallation of the Software 9.2.4 Installing the Recovery CD for Microsoft Windows 2000 This CD contains encoded files which can only be transferred to a SIEMENS SIMATIC PC. Data transfer is made with the OEMSETUP.EXE program on the CD ROM, or after booting from the CD ROM with the recovery function. - Page 172 You can set another language and keyboard via the control panel with the dialog Start >Settings > Control Panel > Regional Options > tab ”General”, box ”Menus and dialogs”> tab ”Input locales”, box ”Input language”. SIMATIC Rack PC 840 Manual 9-10 A5E00104826-03...
-
Page 173: Installing Drivers And Software
When reinstalling Windows 2000, make sure to install the chip set driver prior to the other drivers. When reinstalling Windows NT, the Windows NT ServicePack has to be installed prior to all the other drivers. The ServicePack has to be reinstalled after a driver installation. SIMATIC Rack PC 840 Manual 9-11 A5E00104826-03... -
Page 174: Installing The Raid Controller Software
When reinstalling Windows 2000 you have to select FASTTRAK 100 TX2/TX4 from the recommended lists. Installating the Burner Software You will find instructions on installing and operating the burner software on the supplied CD ROM for the burner software. SIMATIC Rack PC 840 Manual 9-12 A5E00104826-03... - Page 175 Guidelines for Handling Electrostatic Sensitive Devices (ESD) Chapter Overview Section Description Page What Does ESD Mean? Electrostatic Charging Basic Protective Measures against Discharge of Static Electricity SIMATIC Rack PC 840 Manual A5E00104826-03...
- Page 176 The damage which arises in a module as a result of overvoltage cannot usually be detected immediately, but only becomes apparent after a lengthy operating period. SIMATIC Rack PC 840 Manual A5E00104826-03...
- Page 177 3 antistatic material, for example, wood or concrete 5 10 20 30 40 50 60 70 80 90 100 rel. humidity in % Figure A-1 Electrostatic Voltages which an Operator Can Be Charged with SIMATIC Rack PC 840 Manual A5E00104826-03...
- Page 178 If you have to perform measurements on an assembly, discharge your body by touching a grounded metallic object before carrying out the work. Use only grounded measuring instruments. SIMATIC Rack PC 840 Manual A5E00104826-03...
- Page 179 Technical Specifications SIMATIC Rack PC 840 Manual A5E00104826-03...
- Page 180 10 V/m 80-1000 MHz, 80% AM (to IEC 61000-4-3) 10 V/m 900 MHz and 1.89 GHz, 50% ED (to IEC 61000-4-3) 10 V 9KHz- 80MHz (to IEC 61000-4-6) Magnetic field 30 A/m 50Hz (to IEC 61000-4-8) SIMATIC Rack PC 840 Manual A5E00104826-03...
- Page 181 SXGA LCD controller on the AGP bus ATI Rage Mobility 128 Graphics memory 8 MB SDRAM Resolutions/frequencies/colors CRT: up to 1280x1024/16.7 mill. colors/85 Hz LCD: up to 1024x768x18 bits Internal connection for LCD LVDS single chip; single channel SIMATIC Rack PC 840 Manual A5E00104826-03...
- Page 182 When using a CD-RW drive, the device should generally be free of mechanical disturbances while burning. When using a CD-RW drive, the device should generally be free of mechanical disturbances while bur- ning. The line current (TTY) is an optional product feature Optional product feature SIMATIC Rack PC 840 Manual A5E00104826-03...
- Page 183 Retrofit Notes What Does This Chapter Contain? This chapter describes the permissible variants of equipment for Rack PC 840 including drives and processors and the resulting permissible operating conditions. SIMATIC Rack PC 840 Manual A5E00104826-03...
- Page 184 The EIDE drives in front of the drive holder can either be mounted permanently or in a removeable rack. Devices equipped with removable racks are not to be exposed to shock in accordance with DIN IEC 600068-2-29. SIMATIC Rack PC 840 Manual A5E00104826-03...
- Page 185 The EIDE drives in front of the drive holder can either be mounted permanently or in a removeable rack. Devices equipped with removable racks are not to be exposed to shock in accordance with DIN IEC 600068-2-29. SIMATIC Rack PC 840 Manual A5E00104826-03...
- Page 186 Celeron processors with 566 Mhz can be used. The maximum permissible power loss of expansion modules is 30W. CD RW and CD ROM can be installed and can be operated within the temperature limits as described previously. SIMATIC Rack PC 840 Manual A5E00104826-03...
-
Page 187: Glossary
This chapter contains a glossary in which you will find a list of the terminology used in conjunction with the SIMATIC range of personal computers and programming devices and a brief explanation of each of the terms. SIMATIC Rack PC 840 Manual Glossary-1 A5E00104826-03... - Page 188 The authorization can be saved on the aithorization diskette again by the menu command Start > Simatic > AuthorsW. Authorization Diskette The authorization disk contains the authorization required by the re-installation of a software. SIMATIC Rack PC 840 Manual Glossary-2 A5E00104826-03...
- Page 189 Booting Loading operation which transfers the operating system to the main memory. The speed (in bits per second) with which information is transmitted over a data link. SIMATIC Rack PC 840 Manual Glossary-3 A5E00104826-03...
- Page 190 The configuration software updates the device configuration when new modules are installed. This is done either by copying the configuration files supplied with the module or by manual configuration using the configuration utility. SIMATIC Rack PC 840 Manual Glossary-4 A5E00104826-03...
- Page 191 SETUP program. Disk Drive The disk drive (floppy disk drive) is used to store programs and data on diskette (write access) or to load from diskette to the computer (read access). SIMATIC Rack PC 840 Manual Glossary-5 A5E00104826-03...
- Page 192 GB. Digital video discs can be double-sided with a maximum storage of 17 GB per disc. A digital video disc player is needed to read digital video discs; this player is equipped to read older optical storage technologies. SIMATIC Rack PC 840 Manual Glossary-6 A5E00104826-03...
- Page 193 Formatting divides the memory area on a magnetic data medium into tracks and sectors. Formatting deletes all the data on a data medium. Every data medium must be formatted before it is used for the first time. SIMATIC Rack PC 840 Manual Glossary-7 A5E00104826-03...
- Page 194 HTTP Hypertext Transfer Protocol is the protocol used to carry requests from a browser to a Web server and to transport pages from Web servers back to the requesting browser. SIMATIC Rack PC 840 Manual Glossary-8 A5E00104826-03...
- Page 195 This routine processes an instruction set to deal with the particular situation that caused the interrupt. Interrupts can be generated by various hardware devices to request service or report problems. SIMATIC Rack PC 840 Manual Glossary-9 A5E00104826-03...
- Page 196 A keyboard is the collection of keys which are used to input data, text, characters, letters, numbers, special characters, and control commands in a computer. The keyboard forms the input interface between the user and the computer. SIMATIC Rack PC 840 Manual Glossary-10 A5E00104826-03...
- Page 197 Memory Cards in credit card format. memory for user programs and parameters, for example, for programmable modules and CPs. Micro Memory Card New and very compact card for SIMATIC. Memory Expansion See Extended Memory SIMATIC Rack PC 840 Manual Glossary-11 A5E00104826-03...
- Page 198 The single Microsoft-Disk-Operating-System is one of the standard OS for PCs. Multimedia The combination of sound, graphics, animation, and video. In the world of computers, multimedia is a subset of hypermedia, which combines the aforementioned elements with hypertext. SIMATIC Rack PC 840 Manual Glossary-12 A5E00104826-03...
- Page 199 Information is transmitted byte for byte via a parallel interface (port). This means that the transmission rate is very fast. The programming devices have one parallel interface (LPT1). Password Unique sequence of characters that is entered for user identification. See Access Protection. Personal computer SIMATIC Rack PC 840 Manual Glossary-13 A5E00104826-03...
- Page 200 Used to connect a programming device. Some CPUs are optionally equipped with two PG links. Pixel Pix Element (picture point). The pixel represents the smallest element that can be reproduced on-screen or on a printer. SIMATIC S5 programmable logic controller SIMATIC Rack PC 840 Manual Glossary-14 A5E00104826-03...
- Page 201 (for example, S7-200, S7-300, S7-400) consist of one or more CPUs and various I/O modules. Programmable Controller (AS) This programmable controller (PLC) consists of the central unit, a CPU and of diverse I/O modules. Pull-Down Menu See Drop-Down Menu SIMATIC Rack PC 840 Manual Glossary-15 A5E00104826-03...
- Page 202 Small Computer System Interface. Interface for connecting SCSI devices (hard disk drives, CD-ROM drives). Serial Interface Data is transmitted one bit at a time via a serial interface (port); serial interfaces are therefore slower than parallel interfaces. SIMATIC Rack PC 840 Manual Glossary-16 A5E00104826-03...
- Page 203 This is a software package which represents the basis for all other STEP 5 software packages. With the programming device (PG), this package is used to program programmable logic controllers of the SIMATIC S5 family. The language used is known as STEP 5. SIMATIC Rack PC 840 Manual Glossary-17 A5E00104826-03...
- Page 204 The Touchpad is used in many programs (with mouse control) as an input device for cursor control and menu operation. The Touchpad works with touch-sensitive sensors. The cursor can be moved over the screen with the touch of a finger. SIMATIC Rack PC 840 Manual Glossary-18 A5E00104826-03...
- Page 205 It is assigned to a programmable module (for example, CPU, FM) and can be split into smaller blocks (modules). Video Graphics Array. Industrial standard graphics adapter for use with any commonly used software. SIMATIC Rack PC 840 Manual Glossary-19 A5E00104826-03...
- Page 206 HTTP (Hypertext Transfer Protocol). Working Memory The memory in which a program is stored which can be processed. Also known as main memory. SIMATIC Rack PC 840 Manual Glossary-20 A5E00104826-03...
- Page 207 S Write protection for files; this type of write protection is stored in the computer and is allocated by the system manager. S Floppy disk write protection; for 3 1/2 in. diskettes by opening the write protection hole. Another name for Windows 2000. SIMATIC Rack PC 840 Manual Glossary-21 A5E00104826-03...
- Page 208 Glossary SIMATIC Rack PC 840 Manual Glossary-22 A5E00104826-03...
-
Page 209: Index
USB mouse, 3-10 Fan Monitoring, 7-8 via PROFIBUS/MPI interface, 3-16 Floppy Disk Drive, 2-4 Connecting Cables, 7-36 removal and installation, 4-16 Controller, 8-2 Front door, 2-3 Controller Software, 9-12 Front drive holder, 2-9 SIMATIC Rack PC 840 Manual Index-1 A5E00104826-03... - Page 210 RJ45 Ethernet port, 3-18 Memory submodules, 4-7 Monitor, dark, 6-3 Monitoring functions, 7-5 Safety instructions Motherboard, 4-5 battery, 1-4 removal and installation, 4-19 power supply, 1-2 Mouse, 2-7 repairs, 1-3 MPI/PROFIBUS network, 3-17 ventilation, 1-1 SIMATIC Rack PC 840 Manual Index-2 A5E00104826-03...
- Page 211 Variants of equipment, C-1 Switching on the PC, 3-7 Ventilation, safety instructions, 1-1 VGA port, 2-7 VGA socket connector, 7-17 Technical Specifications, B-1 Telescopic rails, 2-5 Temperature Monitoring, 7-6 Watchdog, 7-7 Transport, 1-8 SIMATIC Rack PC 840 Manual Index-3 A5E00104826-03...
- Page 212 Index SIMATIC Rack PC 840 Manual Index-4 A5E00104826-03...