Yaesu FT3DR Operating Manual
C4fm/fm 144/430mhz dual band digital transceiver
Hide thumbs
Also See for FT3DR:
- Instruction manual (63 pages) ,
- Technical supplement (53 pages) ,
- Operating manual (46 pages)
Table of Contents
Advertisement
Quick Links
Advertisement
Table of Contents

Related Manuals for Yaesu FT3DR


Summary of Contents for Yaesu FT3DR
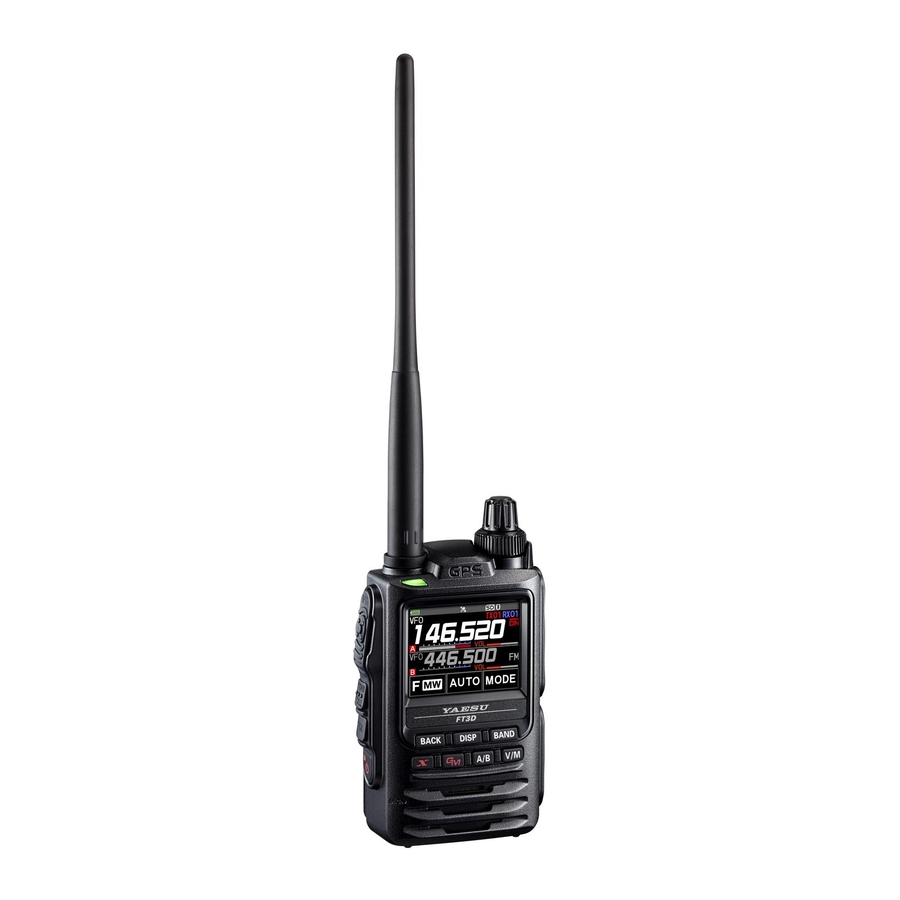
- Page 1 C4FM/FM 144/430MHz DUAL BAND DIGITAL TRANSCEIVER FT3D FT3D Operating Manual...
-
Page 2: Table Of Contents
Contents Introduction ............. 3 Clearing Memories ........34 Quick Guide ............ 4 Restore erased memory ......34 Controls & Connections ........ 5 Recalling the Home Channels ..... 34 Transceiver ............ 5 Changing the Home Channel Frequency ..34 Operation Keys ..........6 Using Memory Tag ........ - Page 3 Using the Voice Recording ......49 Set Mode: MEMORY Menu Operations ..70 About the file ..........49 1 Setting Memory Bank Link ......70 Recording the receive audio ...... 50 2 Assigning Name to Memory Bank ..... 70 Setting the Recording function ....50 3 Assigning Name to Memory Channel ..
- Page 4 Number Input ..........89 Specifications ..........90 Micro Computer Clock Type Function ..78 7 Setting a Time Interval for Saving YAESU LIMITED WARRANTY ...... 92 GPS Position Information ......79 8 Permitting/Prohibiting Transfer of Home Channel Frequency to VFO ... 79 9 Setting the LOCK Function .......
-
Page 5: Introduction
Thank you for purchasing the FT3DR/DE Transceiver. We urge you to read this manual in its entirety, and also the Advance Manual (available for download on the Yaesu web- site), to gain a full understanding of the amazing capability of the exciting new FT3DR/ DE Transceiver. -
Page 6: Quick Guide
Set the Bluetooth function ® 5. Press the PTT switch to conclude input- ting. The FT3DR/DE equipped with the Blue- Normal operation (VFO Mode) screen tooth function. To use a Bluetooth headset, will be displayed. refer to “Bluetooth® Operation” on page... -
Page 7: Controls & Connections
B-band, and blue on A-band and B-band microphone (MH-85A11U) to this terminal. receive. Lights red during transmit. • To use the clone function, connect to an- other FT3DR/DE with an optional clone PTT Switch cable (CT-168). Press and hold the PTT switch to transmit, • When updating the firmware, connect to... -
Page 8: Operation Keys
Operation Keys [ BACK ] key ] key Press to return to the previous screen. • Press to turn the GM function ON/OFF. • Press and hold to enter DG-ID number set- [ DISP ] key ting screen. • Each press switches between the frequency [ A/B ] key display and the backtrack display. -
Page 9: Touch Screen Display
Touch Screen Display Lights when DTMF function is enabled Lights when Auto Power Off is activated Lights when GPS is acquired Lights when AF DUAL function is enabled Lights when GPS Log Function is enabled Lights when the mute function is activated Lights when Voice recording function is activated LOCK Lights when a microSD memory card is inserted... - Page 10 z A-band / B-band display area A-band display modes VFO mode : Memory mode (“M” and channel number) Home Channel : Repeater minus (-) shift : Repeater plus (+) shift : Split operation Specified Memory Channel (Specify that only designated memory channels are scanned during memory scan- ning.) Skip Memory Channel (Permits designating undesired channels to be skipped during scanning.)
- Page 11 Displays the operating mode (Digital mode is indicated by a red icon) : FM (Analog) mode : Normal digital mode (digital mode using C4FM modulation) : Wide digital mode (digital mode using C4FM modulation) : AMS (Automatic Mode Select) FM (Analog) mode : AMS (Automatic Mode Select) DN mode : AMS (Automatic Mode Select) VW mode When AMS (Automatic Mode Select) function is activated, indicator is shown with a...
- Page 12 z Dual Band Screen A-band and B-band are displayed in a top-down fashion. Both bands are received simultaneously. • Touch the frequency of the operation band (white dis- play) to display the numeric keypad screen for frequen- cy input. • Touch the sub-band (gray display) frequency to change the operation band.
- Page 13 z BACKTRACK Screen Either the backtrack screen or the GPS information screen that was displayed last will be displayed. •Real-time navigation function Touch [ ] at the top left of the screen to display the position and direction of the partner station in real time during communication in C4FM digital V/D mode.
- Page 14 z AF DUAL Screen While receiving and listening to a radio broadcast, the A-band and B-band may also si- multaneously be monitored for activity. • When a signal is received on A-band or B-band, the broadcast audio is muted and the A or B band audio is heard.
-
Page 15: Safety Precautions ( Be Sure To Read )
Be sure to read these important precautions, and use this product safely. Yaesu is not liable for any failures or problems caused by the use or misuse of this product by the purchaser or any third party. Also, Yaesu is not liable for damages caused through the use of this product by the purchaser or any third party, except in cases where ordered to pay damages under the laws. - Page 16 Use only the supplied antenna. Do not use tact the dealer from which you purchased this modified or damaged antennas. product or Yaesu Amateur Customer Support. Disconnect the power cord and connection Do not bend, twist, pull, heat and modify...
- Page 17 Install the hand strap and belt clip securely. Do not place the transceiver on an un- Improper installation may cause the FT3DR/ steady or sloping surface, or in a location FT3DE to fall or drop, resulting in an injury or with extreme vibration.
- Page 18 About Waterproofing Feature Conforming to IPX5 When the included antenna and battery pack are installed and the MIC/SP jack, EXT DC IN jack, DATA terminal, and micro SD slot are securely covered with rubber caps, this product is moisture and splash resistant. To ensure continued waterproofing pro- tection, be sure to check the following points before use.
-
Page 19: About This Manual
About this manual To select an item displayed on the screen of the FT3DR/DE, either touch the item direct- ly on the display, or rotate the DIAL knob to select the item, and then press the [DISP] key. In this manual, only the touch screen operation is described when either operation can be performed. -
Page 20: Supplied Accessories And Options
Supplied Accessories and Options Supplied Accessories • Rechargeable Li-Ion Battery Pack (7.2 V, 2,200 mAh) SBR-14LI • Battery Charger SAD-25* • Antenna • Belt Clip • USB Cable • Operating Manual (This Manual) • SBR-14LI Manual • Battery Pack protective cap * Depending on the transceiver version. -
Page 21: Preparation
Preparation Installing the Antenna 1. Turn the antenna clockwise until it is secured. • Do not hold or twist the upper part of the antenna when installing or removing it. To do so may break the Hold the thick base of the antenna conductors inside the antenna. -
Page 22: Charging The Battery Pack
Charging the Battery Pack Charging the Battery Pack using the Battery Charger (SAD-25) Using the supplied battery charger (SAD-25), it takes about 9 hours* to charge the SBR- 14LI battery pack fully. *Depending on the battery status, the charging time might be increased 1. -
Page 23: Using A Microsd Memory Card
• A microSD memory card that was used in another device may not function properly, for example, it may not be recognized by the FT3DR/DE or reading, and writing may take an unusually long time. Use of the SD Memory Card Formatter provided by the SD Association may improve this. -
Page 24: Operation
Press and hold the Power (Lock) switch again to turn the transceiver OFF. If the battery pack is removed or the external power supply is turned OFF, without turning the FT3DR/DE OFF, the display may remain on the screen for a while, this is not a malfunction. -
Page 25: Adjusting The Squelch Setting
Adjusting the squelch setting The squelch level may be adjusted to mute the background noise when no signal is present. 1. Press the SQL switch and then rotate the VOL knob to adjust to a level at which the background noise is muted. appears on the display. -
Page 26: Selecting A Frequency Band
Selecting a Frequency Band 1. Press the [BAND] key to select the desired frequency band. • Press the [F MW] key, then press the [BAND] key to select the frequency bands in reverse order. The frequency bands that can be selected for each of the A and B bands are as follows: z Frequency bands on A-band AM BC Band FM BC Band... -
Page 27: Changing The Frequency Step
In the default setting, of the frequency step is set to “AUTO”, which automatically provides a suitable frequency step according to the frequency band. Selecting the Communication Mode z Using AMS The FT3DR/DE transceiver is equipped with the AMS (Automatic Mode Select) function which automatically selects the communication mode corresponding to the received signal. -
Page 28: Fixing The Communication Mode
Fixing the Communication Mode 1. To fix the transmit operation mode, touch [MODE] to switch the communication mode. Communication Mode Icon Description of Modes V/D Mode This is the standard digital mode. (Voice & Data are transmitted Calls are less prone to interruptions caused by detection simultaneously) and correction of the received digital voice signal. -
Page 29: Changing The Transmit Power Level
Changing the Transmit Power Level 1. Touch [F MW], then touch [TX PWR]. If [TX PWR] is not displayed, touch [BACK ←] to dis- play [TX PWR] and then touch it. 2. Rotate the DIAL knob to select one of the following transmit power levels. -
Page 30: Using The Convenient Digital C4Fm Features
2. When accessing a C4FM digital repeater controlled by a DG-ID number, set the transmit DG-ID number of the FT3DR/DE to that of the repeater input. Even in that case, if the receive DG-ID number of the FT3DR/DE is set to “00”, all the downlink signals from the repeater may be received. -
Page 31: Communicate Only With The Specific Members By Setting The Dg-Id Number Except For "00
• Refer to the separate Operating Manual GM Edition for details on how to use the GM function (download the manual from our YAESU website). 5. Press the [GM] key to turn the GM (Group Monitor) function OFF and return to normal operations. - Page 32 4. Press the [GM] key, then rotate the DIAL knob to set the receive DG-ID (DG-ID RX) to “50”. DG-ID TX : 50 DG-ID RX : 50 5. Press and hold the [GM] key, or press the PTT switch to save the setting and return to normal operations.
-
Page 33: Repeater Operation
If you need to access the repeaters which requires a 1750 Hz burst tone for access by the FT3DR (USA/Asian versions), you can set the switch to serve as a “Tone Call” switch instead. To change the configuration of this switch, use Set Mode... -
Page 34: Using The Memory
Using the Memory The FT3DR/DE transceiver incorporates a Large number of memory channels that can register the operating frequency, communication mode, and other operational informa- tion. z 900 Memory Channels z 99 Skip Search Memory Channels z 11 Home Channels... -
Page 35: Registering To Memory Channels
• The transceiver may be placed into a Memory Channel Only mode, (which restricts the FT3DR/DE to operate only on the memory channels), by pressing the [V/M] key, while pressing the Power (Lock) switch to turn the transceiver ON. To cancel the Memory Channel Only mode, turn the transceiver OFF, then press the [V/M] key again, while pressing Power (Lock) switch to turn the transceiver ON. -
Page 36: Clearing Memories
Clearing Memories 1. Touch and hold [F MW]. 2. Rotate the DIAL knob to select the memory channel from which the data is to be cleared. 3 . Tou c h [ ], then touch [M.DEL]. Confirmation screen “DELETE?” is displayed. 4. -
Page 37: Using Memory Tag
For additional details on the following functions, refer to the Advanced Manual which may be downloaded from the Yaesu website. Memory Channel List All memory channels can be displayed and recalled from the list. -
Page 38: Scanning Function
Memory Bank Scan For additional details on the Programmable Memory Scan (PMS) and Memory Bank Scan, refer to the Advanced Manual which may be downloaded from the Yaesu website. VFO Scan VFO scan function scans the VFO frequencies, and detects signals. -
Page 39: Setting The Receive Operation When Scanning Stops
NOAA Alert Tone while using VFO scan or Memory channel scan. When the Weather Alert Scan feature is engaged, the FT3DR/DE will check the Weath- er Broadcast Channels for activity every five seconds while scanning. If you watch the display carefully, you can observe the scanner periodically shift to the Weather Broad- cast channel and quickly acan the Weather channels in search of the Alert Tone. -
Page 40: Skip Memory Channels, And Specified Memory Channels
For additional details on the following functions, refer to the Advanced Manual which may be downloaded from the Yaesu website. Skip Memory Channels, and Specified Memory Channels Two types of memory channels may be designated, “skip memory channels” and “speci- fied memory channels”... -
Page 41: Convenient Preset Receiver Memory Channels
Convenient Preset Receiver Memory Channels Weather Broadcast (10 channels), International VHF Marine Radio (57 channels) and Shortwave Broadcasts Stations (89 channels) are recorded in the preset receiver mem- ory channels. • Weather Broadcast preset receiver memory channels [WX CH] are listed on: ...................... page 40 The frequencies (10 channel) used for the VHF Weather Broadcast Station are regis- tered to dedicated preset receiver memory channels. -
Page 42: Preset Vhf Weather Broadcast Receiver Memory Channels
Preset VHF Weather Broadcast Receiver Memory Channels The frequencies (10 channels) used for the VHF Weather Broadcast Stations are regis- tered in dedicated preset receiver memory channels. 1. Press the [A/B] key to set the A-band as the operating band. 2. -
Page 43: Preset International Vhf (Marine) Radio Receiver Memory Channels
Preset International VHF (Marine) Radio Receiver Memory Channels The frequencies (57 channels) used for the international VHF Marine Radio are regis- tered in dedicated preset receiver memory channels. 1. Press the [A/B] key to set the A-band as the operating band. 2. -
Page 44: Preset Worldwide Shortwave Broadcast Receiver Memory Channels
Memory channel No. Frequency (MHz) Memory channel No. Frequency (MHz) 157.150 161.750* 157.125 161.725* 157.200 161.800* 157.175 161.775* 157.250 161.850* 157.225 161.825* 157.300 161.900* 157.275 161.875* 157.350 161.950* 157.325 161.925* 157.400 162.000* 157.375 157.425 * indicates the frequency of the VHF marine base station. For example: if the preset receiver memory channel 1 is selected, the base station frequency 160.650 MHz appears and lights up. - Page 45 Frequency Broadcast Station Frequency Broadcast Station Name Name Number (MHz) Name Number (MHz) Name 5.990 ITALY Italy 7.465 ISRAEL Israel 9.575 ITALY Italy 11.585 ISRAEL Israel 9.675 ITALY Italy 15.615 ISRAEL Israel 17.780 ITALY Italy 17.535 ISRAEL Israel 7.170 TURKEY Turkey 6.045 INDIA...
-
Page 46: Convenience Features
8. Press the PTT switch to return to the normal operation. • While connected to a Bluetooth headset, the “ ” icon lights up on the FT3DR/DE screen, and the received audio and operation beep will be heard from the Blue- tooth headset. -
Page 47: Subsequent Bluetooth ® Headset Connection When The Power Is Turned On
(when the VOX function is OFF) When the VOX function is OFF, pressing the “Call button”* on the Bluetooth headset once will keep the FT3DR/DE in transmit and a call can be made using the Bluetooth headset. Press the “Call button”* again to return the FT3DR/DE to receive. -
Page 48: Connect With Another Bluetooth ® Headset
® Connect with another Bluetooth headset 1. Press and hold the [DISP] key, and then touch [OP- TION]. 2. Touch [2 Bluetooth], and then rotate the DIAL knob to select [ON]. 2 Bluetooth 3. If already connected to a Bluetooth headset, touch Connected [DISCON] to disconnect. -
Page 49: Vox Operation
1. Press and hold the [DISP] key, and then touch [OP- TION]. 2. Touch [4 Bluetooth Save], and then rotate the DIAL knob to select [ON]. 4 Bluetooth Save 3. Press the PTT switch to return to normal operation. VOX Operation The VOX system provides automatic transmit/receive switching activated by voice input to the microphone or Bluetooth Headset. -
Page 50: Set The Vox (Voice Operated Transmit) Delay Time
Set the VOX (Voice Operated Transmit) delay time During transmissions using the VOX (Voice Operated Transmit) function, set the time to return to receive when speaking is paused: 1. Press and hold the [DISP] key, and then touch [TX/ RX]. 2. -
Page 51: Cam (Club Channel Activity Monitor) Function
With the voice recording function, the received audio of the other station, and/or the transmit audio of this unit is recorded on the microSD memory card. The recorded file can be played back with FT3DR/DE or the microSD memory card can be taken out and used on a PC. -
Page 52: Recording The Receive Audio
Recording the receive audio 1. Touch [F MW], and then touch [REC]. If [REC] is not displayed, touch [BACK ←] to display [REC] and then touch it. • The display will indicate “RECSTART” and recording will begin. • During recording, “ ”... -
Page 53: Playback The Recorded Audio
4. Press the [BACK] key, and then rotate the DIAL knob 5 RECORDING to select “MIC”. BAND: 5. Press the [DISP] key, and then rotate the DIAL knob to MIC : select “ON” or “OFF”. Record both transmit and receive audio OFF: Record only the receive audio Playback the recorded audio 1. -
Page 54: Taking Picture (Snapshot Function)
In addition, the most recently captured image data can be transmitted to other trans- ceivers* by pressing (Send Image Button) on the camera-mounted speaker micro- phone. * Refer to the Yaesu website or catalog for the compatible transceiver models. Lens Send Image Button Aim this part toward the object to photograph. -
Page 55: Taking Pictures
1. Connect the camera-equipped speaker microphone (MH-85A11U) to the DATA terminal of the transceiver. • When connecting or disconnecting the MH-85A11U, turn off the FT3DR/DE. • When receiving an AM radio broadcast signal with the camera microphone connected, noise may occur, but this is not a malfunction. -
Page 56: Wires-X Function
APRS (Automatic Packet Reporting System) function The FT3DR/DE uses a GPS receiver to acquire and display its position location informa- tion. The APRS feature uses the location information to transmit the position information, data and messages, using the format developed by Bob Bruninga WB4APR. -
Page 57: Gps Function
GPS Function FT3DR/DE is equipped with GPS (Global Positioning System) receiver. When receiving signals from GPS satellites, the current position (latitude, longitude, al- titude) can be calculated and displayed within a tolerance of several meters. In addition, GPS receives the exact time from the satellite atomic clock. -
Page 58: Using Set Mode
Using Set Mode The Set Mode permits configuring the various functions according to individual operating needs and preferences. Set Mode Operation 1. Press and hold the [DISP] key. The SET MODE screen will be displayed. 2. Touch the desired item in Set Mode. The Sub-menu screen will be displayed. -
Page 59: Tables Of Set Mode Operations
Tables of Set Mode Operations Selectable options Set mode no. / item Description (Options in bold are the default settings) DISPLAY COMPASS / NUMERIC 1 TARGET LOCATION Set what to display using the smart navigation function. HEADING UP / NORTH UP 2 COMPASS Set the compass display of the smart navigation function. - Page 60 Selectable options Set mode no. / item Description (Options in bold are the default settings) 4 MEMORY PROTECT Set whether to allow or prohibit ON / OFF memory channel registration. 5 MEMORY SKIP Set for skip memory / specify memory. OFF / SKIP / SELECT 6 MEMORY WRITE Set the automatic channel number NEXT / LOWER...
- Page 61 Selectable options Set mode no. / item Description (Options in bold are the default settings) * For details of the functions, refer to the GM Function Instruction Manual. 1 DP-ID LIST Displays the DP-ID list screen. – 2 RADIO ID CHECK Display the transceiver specific –...
- Page 62 Selectable options Set mode no. / item Description (Options in bold are the default settings) APRS * For details of the functions, refer to the APRS Instruction Manual. 1 APRS AF DUAL Turn the muting function ON or OFF ON / OFF when both the APRS function and AF dual function are active.
- Page 63 Selectable options Set mode no. / item Description (Options in bold are the default settings) 10 APRS RINGER Set the bell ring on/off when a beacon Mic-E: ON / OFF POSITION: ON / OFF or message is received. WEATHER: ON / OFF OBJECT: ON / OFF ITEM: ON / OFF STATUS: ON / OFF...
- Page 64 Set your station symbol. 48 icons including 1(/[Human/Person]) / 2(/b Bicycle) / 3(/> Car) / 4(YY Yaesu Radios) 26 POSITION COMMENT Set up the position comment function. Off Duty / En Route / In Service / Returning / Committed / Special / Priority / Custom 0 to 6...
-
Page 65: Set Mode: Display Menu Operations
Set Mode: DISPLAY Menu Operations 1 Setting What to Display Using the Smart Navigation Function Set what to display on the smart navigation screen. 1. Press and hold the [DISP] key, and then touch [DISPLAY]. 2. Touch [1 TARGET LOCATION]. 3. -
Page 66: Selecting The Display Language
The default setting: LEVEL 6 7 Changing the Opening Message Displayed Immediately after Power-on You can select the message under the “YAESU” logo displayed when turning on the transceiver. 1. Press and hold the [DISP] key, and then touch [DISPLAY]. -
Page 67: Displaying The Battery Voltage
8 Displaying the Battery Voltage Display the battery voltage. When the optional external power supply adapter with a cig- arette plug (SDD-13) is connected, the power supply voltage of this adapter is displayed. 1. Press and hold the [DISP] key, and then touch [DISPLAY]. 2. -
Page 68: Set Mode: Tx/Rx Menu Operations
Set Mode: TX/RX Menu Operations 1 MODE 1 Reducing Receiver Sensitivity Attenuator (ATT) Function If the signal from the remote station is too strong or, a strong signal exists nearby that interferes with reception, use the attenuator (ATT) function to reduce interference. 1. -
Page 69: Digital
2 DIGITAL 1 Setting the Pop-up Time of the Remote Station Information Set the time duration to display the remote station information such as the call sign, on the LCD. 1. Press and hold the [DISP] key, and then touch [TX/RX]. 2. -
Page 70: Turn The Vw Mode Selection On Or Off
4 Turn the VW mode selection ON or OFF. Set the digital voice FR (VW) mode selection. 1. Press and hold the [DISP] key, and then touch [TX/RX]. 2. Touch [2 DIGITAL]. 3. Touch [4 DIGITAL VW]. 4. Rotate the DIAL knob to select the desired setting. The digital voice FR (VW) mode may be selected. -
Page 71: Audio
[3 AUDIO] → [3 RX AF DUAL]. For additional details, refer to the Advanced Manual which may be downloaded from the Yaesu website. 4 Setting the VOX (automatic voice transmission) Function Set the VOX function settings, by selecting [3 AUDIO] → [4 VOX]. -
Page 72: Set Mode: Memory Menu Operations
16 characters. For additional details, refer to the Advanced Manual which may be downloaded from the Yaesu website. 3 Assigning Name to Memory Channel By selecting [3 MEMORY NAME], you can assign a name such as a call sign and broad- cast station name to each memory channel and home channel. -
Page 73: Setting The Memory Channels Used For Registration
6 Setting the Memory Channels Used for Registration Set whether to register to the lowest unused memory channel number following the chan- nel number you most recently used, or to the lowest unused memory channel number. 1. Press and hold the [DISP] key, and then touch [MEMORY]. 2. -
Page 74: Set Mode: Signaling Menu Operations
[1 BELL]. For additional details, refer to the Advanced Manual which may be downloaded from the Yaesu website. 2 Selecting a DCS Code Select the DCS code out of the 104 codes from 023 to 754 by selecting [2 DCS CODE]. -
Page 75: Adjusting The Squelch Level Sql Level Function
11 Setting the Type of Squelch Select [11 SQL TYPE] to open the squelch only when a signal containing the specified tone or code is received. For additional details, refer to the Advanced Manual which may be downloaded from the Yaesu website. -
Page 76: Selecting A Ctcss Tone Frequency
Select [12 TONE SQL FREQ] to select the tone frequency from 50 types between 67.0 Hz and 254.1 Hz. For additional details, refer to the Advanced Manual which may be downloaded from the Yaesu website. 13 Setting the Sound and Speed During Tone Search Tone Search Function The audio may be muted during tone search. -
Page 77: Set Mode: Scan Menu Operations
Set Mode: SCAN Menu Operations 1 Setting the Surveillance Interval Time for Priority Channels DW INTERVAL TIME Function When the dual receive function is active, the interval time at which the priority channel is monitored can be set. 1. Press and hold the [DISP] key, and then touch [SCAN]. 2. -
Page 78: Setting The Priority Memory Channel Transmit Operation
Remark The default setting: OFF Set Mode: GM Menu Operations For details on how to set each item, refer to “FT3DR/DE GM Function Instruction Manu- al” which is available on Yaesu website. Set Mode: WIRES-X Menu Operations For details on how to set each item, refer to “FT3DR/DE WIRES-X Instruction Manual”... -
Page 79: Set Mode: Config Menu Operations
Set Mode: CONFIG Menu Operations 1 Turn Power Off Automatically Auto Power-Off Function Set whether or not to turn the transceiver OFF automatically if there is no operation for a certain period of time. 1. Press and hold the [DISP] key, and then touch [CONFIG]. 2. -
Page 80: Setting The Beep Volume
No confirmation sound is emitted when a band edge/CH1 is encoun- tered. Emits the confirmation sound when a band edge/CH1 is encountered. Remark The default setting: OFF 4 Setting the BEEP volume Set the volume of the beep sound. 1. Press and hold the [DISP] key, and then touch [CONFIG]. 2. -
Page 81: Setting A Time Interval For Saving Gps Position Information
• Data saved onto the microSD memory card is saved in GPSyymmddhhmmss.LOG format. • Saved data may be viewed by using OEM PC applications*. * Yaesu does not provide technical support for PC applications. 8 Permitting/Prohibiting Transfer of Home Channel Frequency to VFO Set whether or not to permit tuning off of the home channel and transfer to the VFO. -
Page 82: Setting The Operation Of The Moni/T-Call Key
10 Setting the Operation of the MONI/T-CALL Key Set how the transceiver functions when the MONI/T-CALL key is pressed. 1. Press and hold the [DISP] key, and then touch [CONFIG]. 2. Touch [10 MONI/T-CALL]. 3. Rotate the DIAL knob to select the desired setting. MONI Monitors frequencies. -
Page 83: Setting The Ptt Delay Time Ptt Delay Function
z Inputting the Password to Use the Transceiver 1. Press and hold the Power (Lock) switch to turn the transceiver ON. The password input screen appears. 2. Use the numeric keypad on the display to input the password. 3. When the valid password is entered, the frequency display screen appears. Remark If an invalid password is entered, the transceiver is turned OFF automati- cally. -
Page 84: Setting The Frequency Offset For Repeater Shift Rpt Shift Freq Function
Yaesu website. 19 Setting Clock Time Set the date and time function of the built-in clock of the FT3DR/DE. In the factory settings, the date and time are automatically set when positioning the GPS signal, so in this case no manual setting is necessary. -
Page 85: Limit The Time Of A Continuous Transmission (Tot Function)
4. The VOL and DIAL knob functions are swapped. Remark The default setting: the upper knob is DIAL. Set Mode: APRS Menu Operations For details on setting each item, refer to “FT3DR/DE APRS Instruction Manual” which is available on Yaesu website. -
Page 86: Set Mode: Sd Card Menu Operations
Set Mode: SD CARD Menu Operations 1 Saving/Loading Data to/from microSD Memory Card Settings information can be saved to a microSD memory card, also the saved informa- tion can be loaded to the transceiver. 1. Press and hold the [DISP] key, and then touch [SD CARD]. 2. -
Page 87: Display Microsd Memory Card Information
3 Display microSD Memory Card Information Display information from SD Memory Card. 1. Press and hold the [DISP] key, and then touch [SD CARD]. 2. Rotate the DIAL, then touch [3 MEMORY INFO]. The bar graph and the following information will be displayed. Used space: x,xxx MB Free space: x,xxx MB Capacity: x,xxx MB... -
Page 88: Set Mode: Option Menu Operations
Set Mode: OPTION Menu Operations 1 Setting the Optional Microphone with Camera for Use Image size and quality can be set for the optional microphone with camera (MH-85A11U). 1. Press and hold the [DISP] key, and then touch [OPTION]. 2. Touch [1 USB CAMERA]. 3. -
Page 89: Set Mode: Callsign Menu Operations
Set Mode: CALLSIGN Menu Operations 1. Press and hold the [DISP] key, and then touch [CALLSIGN]. 2. Enter a call sign using the alphabet input screen and the ten key input screen. • The alphabet input screen can be switched to the number input screen by touching [123]. -
Page 90: Restoring To Defaults (Reset)
Restoring to Defaults (Reset) Caution When the All Reset function is performed, all data registered in the memory will be deleted. Be sure to note the settings on paper or back up the data on a microSD memory card. For details on how to save backup onto a microSD memory card refer to “Set Mode: SD CARD Menu Operations”... -
Page 91: Text Input Screen
Text input screen When the radio is first turned on after restoring defaults, the keyboard screen is dis- played to enter your own station call sign. z Character input method 1. Touch a character on the screen to enter it. 2. -
Page 92: Specifications
Specifications z General Frequency Range : TX 144 - 148 MHz or 144 - 146 MHz 430 - 450 MHz or 430 - 440 MHz : RX: A- Band 0.5 MHz - 999.995 MHz (USA Cellular Blocked) B- Band 108 MHz - 580 MHz Channel Steps : 5/6.25/8.33/9/10/12.5/15/20/25/50/100 kHz (8.33 kHz: only for Air band, 9 kHz: only for AM Radio) - Page 93 z Receiver Circuit Type : Double-conversion super heterodyne (AM /NFM) Direct-conversion (AM / FM Radio) Intermediate Frequency : 1st: A- Band 58.05 MHz 1st: B- Band 57.15 MHz 2nd: A- Band, B- Band 450 kHz Sensitivity : 0.5 - 30 MHz (AM)* 3 μV typ @10 dB SN 30 - 54 MHz (NFM)* 0.35 μV typ @12 dB SINAD...
-
Page 94: Yaesu Limited Warranty
Limited Warranty is valid only in the country/region where this product was originally purchased. On-line Warranty Registration: Thank you for buying YAESU products! We are confident your new radio will serve your needs for many years! Please register your product at www.yaesu.com - Owner’s Corner... - Page 95 YAESU Authorized Service Center, all reasonable efforts will be expended by YAESU MUSEN to cause this product to conform to its original specifications. YAESU MUSEN will return the repaired product (or a replacement product) free of charge to the original purchaser. The decision to repair or replace this product is the sole discretion of YAESU MUSEN.
- Page 96 Changes or modifications to this device that are not expressly approved by YAESU MUSEN could void the user’s authorization to operate this device. This device complies with part 15 of the FCC Rules. Operation is subject to the following two conditions: ( 1 ) This device may not cause harmful interference, and ( 2 ) this device must accept any interference including received, interference that may cause undesired operation.
- Page 97 Telephone: (714) 827-7600 EU Declaration of Conformity We, Yaesu Musen Co. Ltd of Tokyo, Japan, hereby declare that this radio equipment FT3DE is in full compliance with EU Radio Equipment Directive 2014/53/EU. The full text of the Declaration of Conformity for this product is available to view at http://www.yaesu.com/jp/red ATTENTION –...
- Page 98 Copyright 2019 YAESU MUSEN CO., LTD. All rights reserved. No portion of this manual may be reproduced without the permission of YAESU MUSEN CO., LTD. YAESU MUSEN CO., LTD. Tennozu Parkside Building 2-5-8 Higashi-Shinagawa, Shinagawa-ku, Tokyo 140-0002 Japan YAESU USA...