Table of Contents
Advertisement
Quick Links
OPERATION AND FIELD INSTALLATION MANUAL
VMCS Heavy Duty Electric Griddle Top
For additional information on Vulcan or to locate an authorized parts and
service provider in your area, visit our website at www.vulcanequipment.com
©ITW Food Equipment Group, LLC
3600 North Point Blvd.
Baltimore, MD 21222
VMCS-101
MODELS
VMCS-101
VMCS-102
VMCS-201
VMCS-202
RETAIN THIS MANUAL FOR FUTURE USE
FORM F-47658 (10-15)
Advertisement
Table of Contents

Related Manuals for Vulcan-Hart VMCS Series


Summary of Contents for Vulcan-Hart VMCS Series
- Page 1 OPERATION AND FIELD INSTALLATION MANUAL VMCS Heavy Duty Electric Griddle Top MODELS VMCS-101 VMCS-102 VMCS-201 VMCS-202 VMCS-101 For additional information on Vulcan or to locate an authorized parts and service provider in your area, visit our website at www.vulcanequipment.com RETAIN THIS MANUAL FOR FUTURE USE ©ITW Food Equipment Group, LLC 3600 North Point Blvd.
-
Page 2: Table Of Contents
TABLE OF CONTENTS OPERATIONS Installation…………………………………………………………………………………………... Electrical specifications……………………………………………………………………………. Controls……………………………………………………………………………………………... Raising/lowering griddle top………………………………………………………………………. Teflon wrap installation…………………………………………………………………………..Plate gap adjuster………………………………………………………………………………….. Using the griddle…………………………………………………………………………………… Care and cleaning……..…………………………………………………………………………... Shutdown…………………………………………………………………………………………… Maintenance………………………………………………………………………………………... FIELD INSTALLATION ASSEMBLY Tools required……………………………………………………………………………………… Mounting bracket assembly………………………………………………………………………. Mounting bracket installation……………………………………………………………………... Griddle top installation…………………………………………………………………………….. Mounting plate installation………………………………………………………………………… Bumper stop installation...…..…………………………………………………………………….. -
Page 3: Installation
VMCS HEAVY DUTY ELECTRIC GRIDDLE TOP GENERAL VMCS Heavy Duty Electric Griddle Tops are produced with quality workmanship and materials. Proper installation, usage and maintenance of the griddle top will result in many years of satisfactory performance. Thoroughly read this entire manual before beginning and carefully follow all of the instructions provided. -
Page 4: Vmcs
UNPACKING This griddle top was inspected before leaving the factory. The carrier assumes full responsibility for the safe delivery upon acceptance of the shipment. Check for possible shipping damage immediately after receipt. If the griddle top is found to be damaged, complete the following steps: Carrier must be notified within 5 business days of receipt. -
Page 5: Controls
After cleaning your griddle with chemicals, you should repeat the seasoning procedure for proper cooking. CONTROLS The heavy duty electric griddle top section is independently controlled by a power switch , thermostat and high limit cutoff switch. When the power switch (red rocker switch) is turned ON, the left amber light will illuminate and power will be supplied to the thermostat. -
Page 6: Raising/Lowering Griddle Top
To raise the assembly 1. Lift by the handle only 2. Hold handle until assembly holds in place at the approximate 53° position. Fig. B Always hold handle to maintain control of the unit until lifting mechanism holds in the desired raised position or rests in the lowered position. -
Page 7: Plate Gap Adjuster
Teflon Retaining Pin 3. Raise the platen to the 53° raised position. Drape the Teflon sheet from the right side of the platen by hooking the front and back of the Teflon bracket to the Teflon retaining pins. See Fig. E. 4. -
Page 8: Using The Griddle
USING THE VMCS ELECTRIC GRIDDLE TOP To preheat, wipe the griddle top plate with cooking oil and set the thermostats for the desired temperatures 10-12 minutes before cooking. PRODUCT LOADING A uniform and systematic approach to loading the grid dle will produce the most consistent product results. -
Page 9: Shutdown
ONCE PER WEEK Clean the griddle surface thoroughly. A mild detergent solution may be used on the plate surface to help clean it, but be sure the detergent is thoroughly removed by wiping down with clear water. After removal of detergent from the surface of the plate, the griddle should be coated with cooking oil according to the instructions in this manual. -
Page 10: Maintenance
EXTENDED SHUTDOWN 1. Set the power switch to the OFF position. This will shut down the griddle top completely. 2. Leave unit in the raised, 53° position. 3. Apply a light coating of cooking oil on the grooved (steel) plate to inhibit rust. 4. -
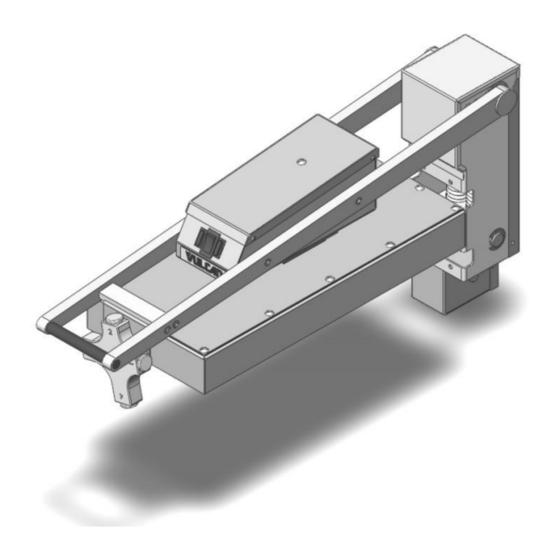
Page 11: Mounting Bracket Assembly
BRACKET ASSEMBLY AND INSTALLATION The griddle and its parts are hot. Use care when operating, cleaning or servicing the griddle. Disconnect power supply and follow lockout / tagout procedures before cleaning and servicing the appliance. Prior assembly, make sure mounting bracket is the correct size. The back bracket should match the width of the griddle. - Page 12 4. Securely tighten the mounting bracket system assembly bolts at the left and right side mounting brackets. Fig. 4. 5. Check that the left and right mounting brackets have not moved from position while assembly bolts were The “F” clamps should still tightened.
- Page 13 8. Drill the remaining holes through the side mounting brackets into the griddle chassis. Insert and tighten screws as shown in Fig. 7. Repeat procedure for the other side of the assembly. 9. Drill holes with 5/32” bits from the rear of the side mounting bracket into the back mounting bracket and install wall spacer with (4) 10-24 x ½”...
-
Page 14: Griddle Top Installation
It may be necessary to angle the griddle and hang one of the four legs off the edge of the table at a time to complete step 11. Ensure that the griddle is safely supported and this step is accomplished with aid of a second person. - Page 15 14. Place cardboard or other protective covering on the gas griddle surface to prevent scratching. Ensure that the unit is safely supported and steps 15 through 20 are accomplished with aid of a second person. 15. Remove top and rear spring armature covers.
- Page 16 Ensure that the unit is safely supported and steps 15 through 20 are accomplished with aid of a second person. Apply a thread locking compound to the mounting bracket screws in steps 18 and 19. 18. Insert and tighten the bottom mounting bracket screws and washers.
-
Page 17: Bumper Stop Installation
21. Install the bumper stop assembly into top of armature. Fig. 19 Bumper Stop Assembly Fig. 19 Raised Position 22. Check range of motion as shown in Fig. 20. The assembly should hold in place at the raised, 53˚ position and rest under its own weight in the lowered Lowered Position position. -
Page 18: Electrical Connections And Specifications
ELECTRICAL CONNECTIONS Electrical grounding connections must comply with applicable portions of the National Electrical Code and/or other local electrical codes. Disconnect the electrical power to the griddle and follow lockout / tagout procedures. Since the griddle top is not fused, you must connect to a fused circuit equipped with a suitable disconnecting means as required by local authorities. -
Page 20: Troubleshooting
TROUBLESHOOTING PROBLEM POSSIBLE CAUSES 1. Thermostat set too low. Turn to higher setting 2. High limit cutoff switch is tripped – depress reset button. Heat does not come on 3. If power switch is not illuminated. Check breaker panel. when power switch is 4.