VeriFone VX690 User Manual
Hide thumbs
Also See for VX690:
- User manual (36 pages) ,
- Quick user manual (1 page) ,
- Installation manual (48 pages)
Table of Contents
Advertisement
Advertisement
Table of Contents

Related Manuals for VeriFone VX690


Summary of Contents for VeriFone VX690
- Page 1 Live eftpos integrated User Guide Live eftpos integrated User Guide...
- Page 2 Live eftpos support For support Email: support@liveeftpos.com.au Website: support.liveeftpos.com.au PC-EFTPOS Support PC-EFTPOS provides the software that allows communication between your terminal and your point of sale software. www.pceftpos.com 02 9998 9800 Monday to Friday: 8:30am – 10:00pm (AEST) Saturday: 10:00am – 5:00pm (AEST) Sunday : 10:00am –...
-
Page 3: Table Of Contents
Contents Introducing the Live eftpos integrated terminal Merchant responsibility for equipment and materials provided Cancellation of facility Damaged, lost or stolen equipment Merchant receipts EFTPOS stationery Setup and configuration Using the Touch Screen Using the Keypad Powering up Loading paper Getting started Terminal setup and configuration Terminal pairing with base (Bluetooth) - Page 4 Fall Back Sales Procedures Electronic Fall Back Glossary Troubleshooting Hardware Faults Response Codes Live eftpos integrated User Guide...
-
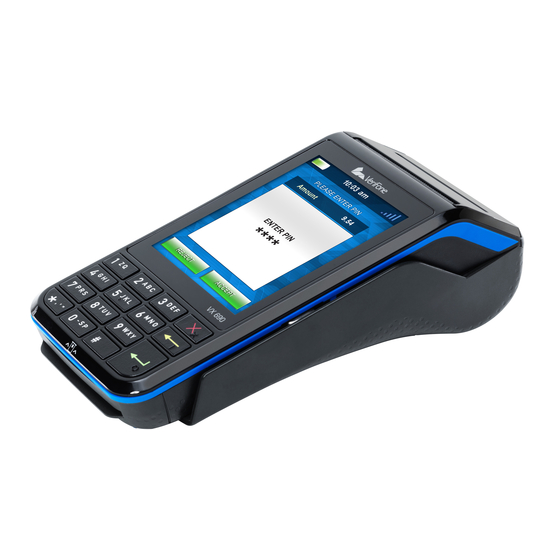
Page 5: Introducing The Live Eftpos Integrated Terminal
Introducing the Live eftpos integrated terminal What this guide will cover This user guide will provide you with the information you need to know about the Live eftpos integrated terminal. As you read this guide you will become familiar with the terminal and feel comfortable operating it. -
Page 6: Damaged, Lost Or Stolen Equipment
Damaged, lost or stolen equipment You are responsible for your equipment. If equipment is damaged, lost or stolen, you will be charged for its replacement. Merchant receipts It’s vital that you retain all merchant receipts printed, in a secure manner for reconciliation and in case of terminal failure. -
Page 7: Setup And Configuration
Setup and configuration Using the Touch Screen The Live eftpos integrated terminal has a colour touch screen. To navigate using the touch screen, follow the prompts and press the option on the screen to make a selection. Using the Keypad Key Title Symbol Key Purpose... -
Page 8: Powering Up
Powering up Connecting base station to power Insert the power cable into the power port on the terminal base. Plug the AC power cord into a wall outlet or a power surge. Place terminal on charger to begin charging the terminal. Manual Start-up Hold the green (Enter) key down for about 10 seconds until terminal displays the start- up screen. -
Page 9: Terminal Setup And Configuration
Communication type The terminal supports PC-EFTPOS IP Gateway via the POS. In the event that your main communication method is down, the terminal will automatically failover to 3G/GPRS backup communications. Terminal setup and configuration To begin setting up your new Live eftpos integrated terminal: Ensure the terminal base is connected to power. -
Page 10: Terminal Configuration
Terminal configuration Connecting base station to power Once the Live eftpos integrated terminal is connected, the Merchant ID and Terminal ID will need to be entered into the PC-EFTPOS EFT Client. This work will be completed by a technician at the time of configuration. You can use the function on the keypad from the terminal idle screen to configure the primary communications method. -
Page 11: Procedures
Procedures Conducting Contactless Transactions The Live eftpos integrated terminal supports contactless transactions. Instructions: Your customer should position the contactless enabled card above the terminal screen. Await the confirmation beeps before removing the card. The screen status LEDs will also indicate the progress of the read. -
Page 12: Ccv Security Codes
CCV Security Codes AUTHORISED SIGNATURE NOT VALID UNLESS SIGNED What is CCV? The CCV is a three or four digit value printed on a payment card (usually on the signature panel), used to verify card-not-present transactions. CCV security codes are a way to lessen the risk of fraud and chargeback when the cardholder is not physically present, or when a card cannot be inserted/swiped successfully. -
Page 13: Everyday Functions
Everyday Functions Purchase/Sale How to process a Purchase transaction Terminal Screen Next Step READY Start by initiating the transaction via the POS interface. 29/09/18 PURCHASE Bring the card into contact with the terminal by swiping, PRESENT CARD inserting or tapping it. ®... - Page 14 Terminal Screen Next Step PURCHASE MASTERCARD Wait for the “Processing” message to complete. Processing Please Wait PURCHASE This final screen will show you whether the transaction has successfully processed. A successful transaction will display APPROVED the word APPROVED on-screen, while a failed transaction will display DECLINED.
- Page 15 How to process a Purchase with Cash-Out transaction If ‘Cash Out’ is enabled on the terminal, customers can be given cash out. To enable ‘Cash Out’ please contact Live eftpos support on 1300 780 788 or email: support@liveeftpos.com.au Cash is available from cheque and savings accounts only. Terminal Screen Next Step READY...
- Page 16 Terminal Screen Next Step PURCHASE MASTERCARD SAV Wait for the “Processing” message to complete. Processing Please Wait REMOVE If prompted, remove the customer’s card from the terminal. CARD PURCHASE MASTERCARD SAV APPROVED This final screen will show you whether the transaction has successfully processed.
-
Page 17: Cash Out
Cash Out If ‘Cash Out’ is enabled on the terminal, customers can be given cash out. Cash is available from cheque and savings accounts only. Terminal Screen Next Step READY Start by initiating the transaction via the POS interface, including entry of the cash-out amount. 29/09/18 Bring the card into contact with the terminal by swiping Swipe or... - Page 18 Terminal Screen Next Step PURCHASE MASTERCARD SAV Wait for the “Processing” message to complete. Processing Please Wait REMOVE If prompted, remove the customer’s card from the terminal. CARD PURCHASE This final screen will show you whether the transaction MASTERCARD SAV has successfully processed.
-
Page 19: Refund
Refund How to process a Refund transaction Refunds may only be processed where there was an initial valid transaction on the same card. If a customer returns a purchase, or if an incorrect amount was charged, process a refund as follows: Terminal Screen Next Step... - Page 20 Terminal Screen Next Step REFUND MASTERCARD SAV Wait for the “Processing” message to complete. Processing Please Wait REMOVE If prompted, remove the customer’s card from the terminal. CARD REFUND MASTERCARD This final screen will show you whether the transaction has REFUND successfully processed.
-
Page 21: Void A Transaction
Void a transaction How to Void a transaction The Void function can be carried out on credit or charge cards to reverse a transaction that has not yet settled (where available). You should also know that debit card and pre- authorisation transactions cannot be voided. -
Page 22: Tip Adjustment
Terminal Screen Next Step VOID Check that the customer’s signature is correct and confirm VERIFY SIGNATURE this via the POS. CORRECT? VOID If the Void is approved then you’ll see this screen will be VOID APPROVED shown for about 5 seconds. Tip Adjustment How to process a Tip Adjustment A Tip Adjustment is performed after the original transaction has been processed. - Page 23 Terminal Screen Next Step READY Start by initiating the transaction via the POS interface, including entry of the Tip amount that is to be added to the original amount. 29/09/18 Now enter the ROC number for completion into the POS. ENTER ROC NO To force ROC entry via the terminal just leave it blank ON POS...
-
Page 24: How To Process A Mail/Telephone Order/E-Commerce Transaction
How to Process a Mail/Telephone Order/e-Commerce Transaction How to process a Tip Adjustment Transactions initiated by mail or telephone are known as MOTO (Mail Order or Telephone Order) transactions. ECOM (Electronic Commerce) transactions are those initiated over the Internet. MOTO and ECOM transactions can be processed on credit and charge cards only, as the cardholder is not present. - Page 25 Terminal Screen Next Step Enter the 3 or 4 digit CCV value (found on the customer card) into the POS. You don’t need to do this if the CCV Enter CCV was already entered at the same time as the card On POS number.
-
Page 26: How To Process A Pre-Authorisation
How to Process a Pre-Authorisation This function is used to reserve funds for a sale to be processed at a later time. Car rentals and hotels/motels most commonly use this function. Note: • Pre-authorisation transactions can only be performed on credit cards and charge cards and only where you have been authorised to do so. - Page 27 Terminal Screen Next Step PRE-AUTH Wait for the POS “Processing” message to complete. Processing Please Wait REMOVE If prompted, remove the customer’s card from the terminal. CARD PRE-AUTH If signature is required, check that the customer signature is correct and confirm via the POS. VERIFY SIGNATURE CORRECT?* PRE-AUTH...
-
Page 28: How To Process A Completion
How to Process a Completion A completion is used to complete an earlier Pre-Authorisation and charges the cardholder. A completion may also be known as a checkout. You can process a completion in one of two ways: Using the ROC number from the pre-authorised transaction. Using the authorisation number of the pre-authorised transaction. - Page 29 Terminal Screen Next Step If the lookup is successful then the pre-authorised details will be shown (last four card number digits, amount, Swipe or authorisation number). Insert Card Confirm via the POS whether the authorisation details shown are correct. PRE-AUTH Wait for the POS “Processing”...
- Page 30 Using the Authorisation number Terminal Screen Next Step READY Start by initiating the transaction via the POS interface, including entry of the ROC which is to be completed. 29/09/18 PRE-AUTH Enter the ROC number for completion into the POS. Enter six zero’s (000000) to force ROC entry via the On POS terminal on the following screen.
- Page 31 Terminal Screen Next Step CHECK OUT Press ENTER on the terminal to proceed. Press ENTER CHECK OUT If signature is required, check that the customer signature is VERIFY SIGNATURE correct and confirm via the POS. CORRECT?* Take note of the response message. A successful response CHECK OUT will display “Approved”, while an unsuccessful response will Approved...
-
Page 32: End Of Day Functions
End of Day Functions Settlement Settlement for the terminal can occur via a programmed terminal settlement (automatic- Settlement) either by Live eftpos or by the PC-EFTPOS software or by a manual settlement. Failure to perform a Settlement may result in split deposits for Settlements. The terminal and POS must be powered on for settlement to occur at the programmed time. -
Page 33: How To Print A Pre-Settlement Report
How to print a Pre-Settlement report This function will print a report of all transactions performed since the last settlement, without resetting the totals. Terminal Screen Next Step Start by initiating the transaction via the POS interface. An “APPROVED” message will display when the pre- PRE-SETTLEMENT settlement report is successful. -
Page 34: Standalone-Lite Mode
Standalone-Lite Mode The Standalone-Lite mode on your terminal allows it to transact on it’s own in the event of a POS outage, without the need for the POS. It’s important to know that the Standalone-Lite mode doesn’t offer the full range of functionality outlined earlier in this document. -
Page 35: Purchase Using Standalone-Lite Mode
Purchase using Standalone-Lite Mode Terminal Screen Next Step PURCHASE Select Purchase transaction on the terminal (press ENTER on terminal if screen is not visible to display menu) CASHOUT REFUND PREV NEXT ENTER AMOUNT Enter the transaction amount into the terminal and press ENTER. - Page 36 Terminal Screen Next Step PURCHASE MASTERCARD CREDIT Have the customer select an account on the terminal screen. SELECT ACCOUNT Note: The terminal will only display the available accounts for the card entered. PURCHASE MASTERCARD Ask the customer to enter their PIN on the terminal and press ENTER, or just press ENTER to sign (if allowed*).
-
Page 37: Standalone-Lite Cash Out Flow
Standalone-Lite Cash Out flow Terminal Screen Next Step PURCHASE Select Cash Out transaction on the terminal. CASHOUT REFUND PREV NEXT CASH OUT ENTER CASH OUT Enter the Cash Out amount into the terminal and press ENTER. CASH OUT TOTAL AMOUNT Press ENTER to confirm the total Cash Out amount. -
Page 38: Standalone-Lite Refund Flow
Terminal Screen Next Step CASH OUT MASTERCARD DEBIT Ask the customer to enter their PIN on the terminal and Key PIN or ENTER press ENTER, or just press ENTER to sign (if allowed). XXXX CASH OUT MASTERCARD DEBIT Wait for the “Processing” message to complete. Processing Please Wait CASH OUT... - Page 39 Terminal Screen Next Step REFUND Enter the Refund amount into the terminal and press ENTER. ENTER REFUND AMT REFUND TOTAL AMOUNT Press ENTER to confirm the total refund amount. REFUND PRESENT CARD Bring the card into contact with the terminal by swiping, inserting or tapping it.
-
Page 40: Standalone-Lite Settlement Flow
Terminal Screen Next Step REFUND MASTERCARD DEBIT Wait for the “Processing” message to complete. Processing Please Wait REFUND Take note of the response message. A successful response will APPROVED display “APPROVED”, while an unsuccessful response will display “DECLINED”. Before completing the refund, check that the transaction was approved before handing the customer their copy of the transaction record and their card. -
Page 41: Standalone-Lite Pre-Settlement Report
Standalone-Lite Pre-Settlement Report Terminal Screen Next Step Select Pre-Settlement on the terminal. This option is on page SETTLEMENT 2 of the idle screen. PRE-SETTLE LAST SETTLE MORE MERCHANT Enter your merchant password or contact Merchant Business PASSWORD Solutions for assistance. Once your password is accepted your Pre-Settlement receipt will be printed. -
Page 42: Standalone-Lite Duplicate/Reprint Receipt Flow
Standalone-Lite Duplicate/Reprint Receipt flow Terminal Screen Next Step LOGON Select Receipt Reprint on the terminal. This option is on page 3 of the idle screen. REPRINT SHIFT TOTALS MORE LOGON The Receipt Reprint will be performed and will then return you to the Standalone-Lite idle screen. -
Page 43: Fall Back Sales Procedures
Fall Back Sales Procedures Electronic Fall Back Electronic Fall Back is the ability to continue performing transactions on the terminal, even when communication with the host system has been lost or the card issuer is unavailable. In EFB mode, transactions are stored within the terminal and manual vouchers are not required. After communication has been restored, the terminal forwards the stored transactions to Live eftpos for processing. - Page 44 EFB Purchase Receipt Mastercard Mastercard ACCT TYPE CREDIT ACCT TYPE CREDIT TRANS TYPE TRANS TYPE PURCHASE PURCHASE TERMINAL ID TERMINAL ID POS REF POS REF BANK REF BANK REF Exp Date AMOUNT AMOUNT TOTAL AUD TOTAL AUD APPROVED APPROVED CARDHOLDER SIGN HERE Remember to always check the receipt to verify if a transaction Live eftpos integrated User Guide...
-
Page 45: Glossary
Glossary Charge Card American Express, Diners Club or JCB card Credit Card Mastercard, Visa card or UnionPay International CCV Number (Card Check Value) An additional security feature used in transactions where the cardholder is not present (MOTO or ECI). Debit Card A card that gives the customer access to a cheque or savings account. -
Page 46: Troubleshooting
Troubleshooting Hardware Faults HARDWARE FAULTS ACTION No response from the terminal Ensure that the power cable is securely connected to the terminal. Power off the terminal for 10 seconds. Power on the terminal. Retry the transaction. Call Live eftpos if the problem persists. Terminal not reading cards Re-insert/swipe the card as per instructions in Section 4.0. If there is still no response from the card reader power off the terminal for 10 seconds. Power on the terminal. Retry the transaction. -
Page 47: Response Codes
Response Codes Code Display Cause/Action APPROVED The transaction has been approved APPROVED The transaction has been approved if the signature is correct With signature APPROVED The transaction has been approved APPROVED The transaction has been approved CALL FOR AUTH Unable to obtain electronic authorisation CALL FOR AUTH Unable to obtain electronic authorisation INVALID PPID... - Page 48 Code Display Cause/Action CANNOT PAY Obtain another form of payment Advise cardholder to contact card issuer WRONG ACCOUNT Retry the transaction, selecting a different account If the transaction is declined again, obtain another form of payment Advise cardholder to contact card issuer WRONG ACCOUNT Retry the transaction, selecting a different account If the transaction is declined again, obtain another...
- Page 49 Code Display Cause/Action CANNOT PAY Obtain another form of payment Advise cardholder to contact card issuer SETTLE NOT AVAILABLE A settlement has been processed in the last 24 hours, or the settlement is being attempted between 9.30pm and 11.00pm (AEST) Retry during settlement hours, making sure 24 hours have elapsed since the previous settlement SYSTEM ERROR...
- Page 50 Below is a copy of a receipt which indicates the location of the Response Codes. Mastercard ACCT TYPE CHEQUE TRANS TYPE PURCHASE TERMINAL ID POS REF BANK REF AMOUNT TOTAL AUD AUTH Response Code APPROVED Location Remember to always check the receipt to verify if a transaction Where your terminal displays a response code not listed in this guide, and you use an electronic terminal supplied by us, you should phone Live eftpos on 100 780 788 for...
- Page 51 Live eftpos support For support Email: support@liveeftpos.com.au Website: support.liveeftpos.com.au PC-EFTPOS Support PC-EFTPOS provides the software that allows communication between your terminal and your point of sale software. www.pceftpos.com 02 9998 9800 Monday to Friday: 8:30am – 10:00pm (AEST) Saturday: 10:00am – 5:00pm (AEST) Sunday : 10:00am –...