Brady BradyPrinter S3100 User Manual
Sign & label printer
Hide thumbs
Also See for BradyPrinter S3100:
- Quick start manual (2 pages) ,
- Quick start manual (2 pages) ,
- Quick start manual (2 pages)
Table of Contents
Advertisement
Advertisement
Table of Contents

Related Manuals for Brady BradyPrinter S3100


Summary of Contents for Brady BradyPrinter S3100
- Page 1 User’s Manual...
-
Page 2: Copyright And Trademarks
This manual is copyrighted with all rights reserved. No portion of this manual may be copied or reproduced by any means without the prior written consent of Brady. While every precaution has been taken in the preparation of this document, Brady... - Page 3 End User License Agreement for Microsoft Windows CE © You have acquired a device that includes software licensed by Brady Worldwide, Inc. from Microsoft Licensing or its affiliates (“MS”). Those installed software products of Microsoft origin, as well as associated media, printed materials, and “online”...
- Page 4 Brady warrants to the buyer that its products are free from defects in material and workmanship, but limits its obligation under this warranty to replacement of the product shown to Brady’s satisfaction to have been defective at the time Brady...
- Page 5 (1) es posible que este equipo o dispositivo no cause interferencia perjudicial y (2) este equipo o dispositivo debe aceptar cualquier interferencia, incluyendo la que pueda causar su operación no deseada. BradyPrinter S3100 Sign & Label Printer User’s Manual...
- Page 6 Dispose of in accordance with local regulations. Turkey Turkish Ministry of Environment and Forestry (Directive on the Restriction of the use of certain hazardous substances in electrical and electronic equipment). Türkiye Cumhuriyeti: EEE Yönetmeliğine Uygundur BradyPrinter S3100 Sign & Label Printer User’s Manual...
- Page 7 表示该说包含在所有均质材料中的有害物质这部分低于 GB/ T26572 的限量要求。 X: Indicates that said hazardous substance contained in at least one of the homogeneous materials used for this part is above the limit requirement of GB/T 26572. 表示所述包含在用于该部分的均质材料中的至少一种有害物质是上述 GB / T26572 的限制要求。 BradyPrinter S3100 Sign & Label Printer User’s Manual...
- Page 8 - Motor 馬達 Cutter 切刀 - Print Head 列印頭 備考 1.〝超出 0.1 wt %〞及〝超出 0.01 wt %〞係指限用物質之百分比含量超出百分比含量基準值。 Note 1:“Exceeding 0.1 wt %” and “exceeding 0.01 wt %” indicate that the percentage content of the restricted substance exceeds the reference percentage value of presence condition. 備考 2. 〝○〞係指該項限用物質之百分比含量未超出百分比含量基準值 。 Note 2:“ ○ ” indicates that the percentage content of the restricted substance does not exceed the percentage of reference value of presence. 備考 3. 〝-〞係指該項限用物質為排除項目。 Note 3:The “−” indicates that the restricted substance corresponds to the exemption viii BradyPrinter S3100 Sign & Label Printer User’s Manual...
- Page 9 Antenna Type \ Antenna Gain PCB trace antenna \ -3.06 dBi Environmental Operation -40 to 85° C (-40° to 185° F) Note: Be mindful of Brady host printer user guide for maximum operating temperatures Environmental Storage -55 to 125° C (-67° to 257° F)
- Page 10 IC établies pour un environnement non contrôlé. Cet équipement doit être installé et utilisé avec un minimum de 20cm de distance entre la source de rayonnement et votre corps. BradyPrinter S3100 Sign & Label Printer User’s Manual...
- Page 11 < +20dBm EIRP (100mW) International The WiFi radio module used in Brady host printers comply with internationally recognized standards covering human exposure to electromagnetic fields, i.e. EN 62311 "Assessment of electronic and electrical equipment related to human exposure restrictions for electromagnetic fields (0 Hz - 300 GHz)".
- Page 12 Safety and Environment Please read and understand this manual before using the BradyPrinter S3100 Sign & Label Printer for the first time. This manual describes all of the main functions of the BradyPrinter S3100 printer. Precautions Before using the BradyPrinter S3100 printer, please note the following precautions: •...
-
Page 13: Contact Information
China: www.brady.com.cn/membercenter/register_product.aspx Repair and Return If for any reason you need to return the BradyPrinter S3100 printer for repair, please contact Brady Technical Support for repair and replacement information. Document Conventions When using this document, it is important that you understand the conventions used throughout the manual. -
Page 14: Table Of Contents
Creating a Label from a Template ...............28 Creating a Custom Label ..................30 Set Label Attributes ....................31 Creating Fixed-Length Label ................31 Creating Auto-Sized Label ..................31 Orientation ......................32 Label Width ......................33 Framing a Label ....................35 BradyPrinter S3100 Sign & Label Printer User’s Manual... - Page 15 Printing Labels ....................68 Canceling a Print Job ..................69 Resuming an Interrupted Print Job ..............69 Feeding and Cutting Label Stock ................69 Adjusting Print Energy ..................70 Adjusting Print Offset ..................71 Printing from a PC ....................72 BradyPrinter S3100 Sign & Label Printer User’s Manual...
- Page 16 Chinese Traditional ...................105 Korean .......................106 C • Specialty Label Types Pipe Markers......................108 Set Up Pipe Marker Options ................108 Create Pipe Marker Labels ................109 Save, Open or Delete a Pipe Marker Label ............116 BradyPrinter S3100 Sign & Label Printer User’s Manual...
- Page 17 Right to Know (RTK)....................133 Setting RTK Preferences ..................133 Create RTK Labels ....................137 Open, Save or Delete an RTK Label ..............138 GHS (CLP)....................... 140 D • Material / Ribbon Cross Reference BradyPrinter S3100 Sign & Label Printer User’s Manual xvii...
-
Page 18: Introduction
Introduction Thank you for purchasing the BradyPrinter S3100 Sign & Label Printer, which you can use to create and print professional-looking industrial labels and signs. All you have to do is: • Drop in a ribbon cartridge. You can choose from a wide range of single-color ribbons. -
Page 19: Compatible Applications
Compatible Applications Compatible Applications ® The BradyPrinter S3100 Sign & Label Printer is compatible with Brady Workstation desktop software. When used with Brady Workstation software, the printer will automatically recognize all enabled and compatible materials up to 4 in. (101.6 mm) wide. For operation of the printer with other software, refer to the documentation for your application. -
Page 20: About Menus, Dialog Boxes And Screens
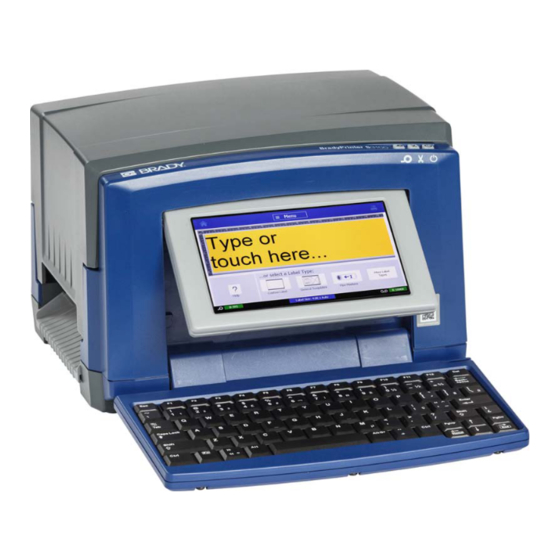
About Menus, Dialog Boxes and Screens The following information describes the menus, dialog boxes and screens used in the BradyPrinter S3100 Sign & Label Printer system. Home Page The Home page automatically displays when you first start the printer. The main... -
Page 21: Tools Panel
Zoom In: Lets you increase the view of the object(s) on the label. Scroll arrows appear if the objects are zoomed larger than the available display area. Zoom Out: Lets you decrease the view of the object(s) on the label. BradyPrinter S3100 Sign & Label Printer User’s Manual... -
Page 22: Button Actions
There are two types of scroll arrows: • Up or Down : Use to move through a list of items in a menu. • Navigation : Use to view all parts of a label. BradyPrinter S3100 Sign & Label Printer User’s Manual... -
Page 23: Setting Up Your Printer
• Power Cord • USB Type B Cable • Printed “Quick Start Guide” • Cleaning Kit Note: Please keep the original packaging, including the box, in case the printer must be returned. BradyPrinter S3100 Sign & Label Printer User’s Manual... -
Page 24: System Components
Note: The printer is equipped with a universal power supply and can be operated with a supply voltage of 100 to 240 V~, 50- to 60 Hz. The printer senses the voltage type and automatically adjusts for the power source. BradyPrinter S3100 Sign & Label Printer User’s Manual... -
Page 25: Setting Up The Printer
The size and color of the currently installed media and other status indicators are shown. Note: If there is no ribbon or media installed, the system defaults to black ribbon and 4 in. [101.6 mm] wide continuous white media. Power Cord Connector Power Switch BradyPrinter S3100 Sign & Label Printer User’s Manual... - Page 26 1. To remove ribbon, open the enclosure cover (opens from left). 2. Release the latch on the ribbon cover [2] and swing open. 3. Release the ribbon cartridge latch [3] and lift the ribbon cartridge up and out. BradyPrinter S3100 Sign & Label Printer User’s Manual...
- Page 27 6. Close the enclosure cover. 7. If printer was asleep, press . The system detects the installed supplies, sets media and ribbon colors, indicates the label dimensions and the amount of remaining supplies. BradyPrinter S3100 Sign & Label Printer User’s Manual...
- Page 28 Unpacking and Setting up Printer Setting up the Printer To install or change media: 1. Open the enclosure cover (opens from left). 2. Release the latch on the ribbon-cover [2] and swing open. BradyPrinter S3100 Sign & Label Printer User’s Manual...
- Page 29 10. Close and latch ribbon cover, then close enclosure cover. 11. If printer was asleep, press . The system detects the installed supplies, sets background and foreground colors, indicates the label dimensions and the amount of remaining supplies. BradyPrinter S3100 Sign & Label Printer User’s Manual...
-
Page 30: System Power
If you choose the option to make the data fit, the system will move and/or resize the objects so they fit on the new media size. BradyPrinter S3100 Sign & Label Printer User’s Manual... -
Page 31: Putting The Printer Into Sleep Mode
Any data in the Editor at the time of the reset will be lost. 2. When the Home page displays, you can continue with your label activities. BradyPrinter S3100 Sign & Label Printer User’s Manual... -
Page 32: Using Your Printer With A Pc
Configuring the Printer for Network Communication Using Your Printer with a PC If you use computer software such as Brady Workstation to create labels, you will need to connect the printer to your computer. (For information on creating labels directly on the printer, see “Creating Labels” on page 27.) Note: You must have labeling software installed on your computer to create, edit or print labels from the PC. - Page 33 Enter the type of security used for the network. For example, WEP64 or WPA TKIP. • Authentication Type: This field is only visible for enterprise networks. Touch Select. A list opens. Touch the type of authentication and then touch the OK button. BradyPrinter S3100 Sign & Label Printer User’s Manual...
- Page 34 Default Gateway: Enter the IP address of the default gateway. • DNS Server (Primary): Enter the IP address of the primary DNS server. • DNS Server (Secondary): Enter the IP address of the secondary DNS server. BradyPrinter S3100 Sign & Label Printer User’s Manual...
- Page 35 6. Scroll to the bottom of the list of available networks and select Others. 7. On the Other Network window, choose Personal or Enterprise network and fill in the necessary details. 8. Touch the Connect button. BradyPrinter S3100 Sign & Label Printer User’s Manual...
-
Page 36: Configuring A Direct Usb Connection
When printing from the PC, the printer must be attached to the PC via the USB cable. Be sure to select the BradyPrinter S3100 printer in the print dialog box of the PC labeling program you are using. -
Page 37: Setting Up The System Defaults
Time: Touch to highlight the Hour, Minute or Second, then touch the or • arrows to change the time. Touch AM/PM to toggle between AM and PM. 5. When done, touch the OK button. BradyPrinter S3100 Sign & Label Printer User’s Manual... -
Page 38: Localization And Unit Of Measure
3. From the Setup menu, touch the Localization button. 4. In the Language list, choose the language you want the system to display. 5. Select a Unit of measure (Inches vs. Millimeters). 6. When done, touch the OK button. BradyPrinter S3100 Sign & Label Printer User’s Manual... -
Page 39: Set Text Defaults
4. In the Text Defaults menu, change any of the following options: Note: Text/object options take effect with the next text object created. Existing text objects are not affected. • Font • Text units • Justification 5. When done, press the OK button. BradyPrinter S3100 Sign & Label Printer User’s Manual... -
Page 40: Set Barcode Defaults
4. In the Barcode Defaults menu, change any of the following options: • Symbology • Check Characters • Ratio • Density • Human readable text 5. When done, touch the OK button. BradyPrinter S3100 Sign & Label Printer User’s Manual... -
Page 41: Set Printing
4. In the Printing dialog, change the Auto cut settings to your desired option and choose whether or not to print a boundary around the label. 5. When done, touch the OK button. BradyPrinter S3100 Sign & Label Printer User’s Manual... -
Page 42: Customizing Home Page Defaults
4. From the Available list, select a label type to include and then touch the Include button. 5. If desired, change the display order by pressing one of the Order buttons. 6. When done, touch the OK button. BradyPrinter S3100 Sign & Label Printer User’s Manual... -
Page 43: Displaying System Information
1. From the Editor, touch the Menu button. 2. In the menu options list, touch the Info button. The System Information dialog box displays. 3. Touch the Cancel button when you are done viewing the system information. BradyPrinter S3100 Sign & Label Printer User’s Manual... -
Page 44: Working With Labels
Working with Labels Creating Labels Creating your first label on the BradyPrinter S3100 Sign & Label Printer is as easy as starting to type! You don’t need special software and you don’t have to be connected to a PC to create or print labels. -
Page 45: Creating A Label From A Template
Use this procedure to create a label using a general template or specialty template. To create a label from a general template: 1. From the Home page, touch the General Templates button. 2. On the Select Template dialog box, touch a Category. BradyPrinter S3100 Sign & Label Printer User’s Manual... - Page 46 Note: You can only add more objects to the label if all template objects have been defined. 10. Continue selecting objects and entering data until all objects are defined. BradyPrinter S3100 Sign & Label Printer User’s Manual...
-
Page 47: Creating A Custom Label
Note: If the label is full and there is no place to add a new object, the object will be placed at the right-most edge of the label and you will have to move and/or resize it. Note: See “Specialty Label Types” on page 107 for creating other label types. BradyPrinter S3100 Sign & Label Printer User’s Manual... -
Page 48: Set Label Attributes
2. In the menu list, touch the Size & Orientation button. 3. Select the Autosize to Fit Data check box. When entering data, the label size will automatically be adjusted to fit the data. 4. Touch the OK button. BradyPrinter S3100 Sign & Label Printer User’s Manual... -
Page 49: Orientation
If you choose to make the data fit, the objects will be moved and/or resized so they fit on the label; however, the objects will not be rearranged into a new orientation. 4. Touch the OK button. BradyPrinter S3100 Sign & Label Printer User’s Manual... -
Page 50: Label Width
Figure: Stacking labels using 2-, 3-, or 4-Up label width To adjust the width: 1. Touch the Menu button. 2. Under Label, touch the Size & Orientation button. 3. Under Label Width, touch the Set Label Width button. BradyPrinter S3100 Sign & Label Printer User’s Manual... - Page 51 4-Up function. To set a custom width: a. Touch Set Custom Width. b. In the Set Custom Width data field, enter the desired width. c. When finished, touch the OK button. BradyPrinter S3100 Sign & Label Printer User’s Manual...
-
Page 52: Framing A Label
Note: Line width options are available only when the rectangle or rounded rectangle frame shape is selected. 4. When your changes are complete, touch the OK button . The changes are applied. BradyPrinter S3100 Sign & Label Printer User’s Manual... -
Page 53: Tools
2. Touch the scroll arrow again to continue scrolling in the direction you want. If you hold the scroll arrow down, the system will continue scrolling. 3. To return to normal viewing mode, touch until you can see the entire label content. BradyPrinter S3100 Sign & Label Printer User’s Manual... -
Page 54: Working With Objects
The system automatically reduces the object size to fit on the label and will move or resize the object so it stays within the printable area of the label (text will not be truncated). BradyPrinter S3100 Sign & Label Printer User’s Manual... -
Page 55: Adding Objects
Note: As soon as a text object is selected, the system goes to the text editing panel and you can type and/or edit the text. 2. To edit the text, see “Working with Text” on page 46. BradyPrinter S3100 Sign & Label Printer User’s Manual... -
Page 56: Graphic Objects
See “Import Graphics” on page 76. Shapes Use a graphics object to add a shape, such as a circle or rectangle to your label. To add a shape to your label: BradyPrinter S3100 Sign & Label Printer User’s Manual... - Page 57 The following image shows an outlined shape on the left and a filled in shape on the right. • To fill in the shape touch the Fill button. • To outline the shape, touch the Outline button. BradyPrinter S3100 Sign & Label Printer User’s Manual...
-
Page 58: Barcode Objects
Options for entering barcode data and selecting symbology will remain displayed until valid characters are entered or you cancel the operation. 4. Touch the OK button. BradyPrinter S3100 Sign & Label Printer User’s Manual... -
Page 59: Serial Objects
Total number: Number of labels that will be printed (not used if Ending Value is entered). • Before serial: Prefix (text or spaces) before the serial value. • After serial: Suffix (text or spaces) after the serial value. BradyPrinter S3100 Sign & Label Printer User’s Manual... - Page 60 Adding Objects Serial Objects 5. When done, touch the OK button . The system displays the initial (first) value of the serialization on the label. BradyPrinter S3100 Sign & Label Printer User’s Manual...
-
Page 61: Date/Time Objects
Include time: Toggles the time on or off. • Date Format: Format for date printed on label(s). • Time Format: Format for time printed on label(s). • Hour Format: 12-hour (AM or PM) or 24-hour time format BradyPrinter S3100 Sign & Label Printer User’s Manual... - Page 62 Note: If the system clock has not been set, the system displays a message requesting that you set the system clock. Selecting OK takes you to Clock Settings. Selecting Cancel returns you to the Editor. BradyPrinter S3100 Sign & Label Printer User’s Manual...
-
Page 63: Working With Text
To select all characters in a text box: 1. In the Editor, touch a text object. 2. Touch the Select All Chars button . The system selects all characters in the text object. BradyPrinter S3100 Sign & Label Printer User’s Manual... -
Page 64: Increase Or Decrease Text Size
4. To delete all text and remove the text box, touch the Delete button the Tools section. All text in the selected text box is deleted and the text box is removed. BradyPrinter S3100 Sign & Label Printer User’s Manual... -
Page 65: Changing Character Font, Size Or Style
Left-justified text grows to the right, center-justified text grows both directions and right-justified text grows to the left. To set text horizontal justification: 1. In the Editor, select the text object you want to change. BradyPrinter S3100 Sign & Label Printer User’s Manual... -
Page 66: Vertical Text
To expand or condense text: 1. In the Editor, select the text object you want to expand or condense. 2. In the Control Panel, touch the More Options button to navigate to the Expand/Condense controls. BradyPrinter S3100 Sign & Label Printer User’s Manual... -
Page 67: Reversing Text
For example, when an accented character is typed, it will not display until the letter to be modified is also typed. The accented character will then be displayed with the letter. BradyPrinter S3100 Sign & Label Printer User’s Manual... - Page 68 The "+" sign indicates that two or more keys should be pressed simultaneously. • A comma separating a keystroke combination indicates that the first set of keys should be released before typing the next keystroke combination. Figure: Keystroke Combinations BradyPrinter S3100 Sign & Label Printer User’s Manual...
-
Page 69: Typing Accented Characters
Lower Case: Shift + Key, Letter Diaeresis (umlaut) Upper Case: Shift + Key, Shift + Letter å Ring Lower Case: Alt + Key, Letter Upper Case: Alt + Key, Shift + Letter BradyPrinter S3100 Sign & Label Printer User’s Manual... -
Page 70: Entering Special Characters
3. To delete characters from the area, press Backspace or highlight the characters and press Delete. 4. When you are done choosing special character(s), touch the OK button The special characters are inserted in the active text object at the current cursor position. BradyPrinter S3100 Sign & Label Printer User’s Manual... -
Page 71: Working With Barcodes
3. In the Barcode dialog box, change the desired options: • Data value • Symbology • Set Data Source (optional). See “Converting Text or Barcode to Variable Data” on page 64 for details. 4. When done, touch the OK button. BradyPrinter S3100 Sign & Label Printer User’s Manual... -
Page 72: Changing Barcode Options
You can also decide whether you want the text to include a check character or a start/stop character. To add human-readable text: 1. In the Editor, select a barcode object. 2. Touch the More Options button to go to the Human Readable Text control panel. BradyPrinter S3100 Sign & Label Printer User’s Manual... - Page 73 6. When done, touch the OK button . The barcode reflects the changes. 7. Select the check character options you want for your barcode. The changes are immediately reflected in the Editor. BradyPrinter S3100 Sign & Label Printer User’s Manual...
-
Page 74: Handling Objects
To exit text editing mode, touch More Options, then use the arrow keys to move your object. 3. Repeat Step 2 until the object is positioned where you want it. BradyPrinter S3100 Sign & Label Printer User’s Manual... - Page 75 . The object is displayed at the specified position. Note: If the values entered result in the object being positioned outside the printable area, the system resizes and repositions the object to fit on the label. BradyPrinter S3100 Sign & Label Printer User’s Manual...
-
Page 76: Aligning Objects
Note: If an option is unavailable, or if the object already reflects the change, the option button(s) are greyed out. Example: To move an object to the upper left corner: a. Touch (top). b. Touch (left). BradyPrinter S3100 Sign & Label Printer User’s Manual... -
Page 77: Sizing Objects
Note: If an object is rotated, the non-proportional sizing handles are hidden. To size non-proportionally, return the object to an unrotated state (0 degrees). BradyPrinter S3100 Sign & Label Printer User’s Manual... - Page 78 . The object is displayed at the specified size. Note: If the values entered result in the object being positioned outside the printable area, the system resizes and repositions the object to fit on the label. BradyPrinter S3100 Sign & Label Printer User’s Manual...
-
Page 79: Deleting An Object
2. Touch the More Options button to go to the Object Frame panel. 3. Select the Shape you want around the object (none, rectangle, rounded). 4. Select a Line Width for the frame (narrow, medium, wide). BradyPrinter S3100 Sign & Label Printer User’s Manual... -
Page 80: Rotating An Object
The font size will stay reduced even if the object is rotated back to its original position (a full 360°). 4. Repeat Step 3 to rotate the object further (selecting Rotate 4 times returns the object to the original unrotated state). BradyPrinter S3100 Sign & Label Printer User’s Manual... -
Page 81: Converting Text Or Barcode To Variable Data
(the Sample area will immediately display an example of the selections): 7. When you touch the OK button , The text or barcode object is converted to a serial object on the label. BradyPrinter S3100 Sign & Label Printer User’s Manual... - Page 82 See “Serial Objects” on page 42 for instructions. 3. In the Serial & Date/Time dialog box, choose either Date/Time Text or Date/Time Barcode. 4. In the Date/Time dialog box, choose the settings you want for the object. BradyPrinter S3100 Sign & Label Printer User’s Manual...
- Page 83 2. Touch the More Options button to go to the Set Data Source option. 3. Touch the Set Data Source button. 4. Touch the Constant button. The date/time is converted to editable data. BradyPrinter S3100 Sign & Label Printer User’s Manual...
-
Page 84: Printing Your Labels
3. (Serial data only.) If you used serial data, multiple labels are generated. Touch the Next Label or Previous Label button to view the labels generated from the serial object. 4. Touch the Start Print or Cancel button BradyPrinter S3100 Sign & Label Printer User’s Manual... -
Page 85: Printing Labels
• Preview • Print energy (accessed from the Advanced Settings button) • Adjust Offset (accessed from the Advanced Settings button) 3. Touch the Start Print button to start printing the label. BradyPrinter S3100 Sign & Label Printer User’s Manual... -
Page 86: Canceling A Print Job
Note: For die-cut media, the media advances to the cut position which is the next die-cut label. For continuous media, the media advances two inches each time you press the Feed button. 2. If desired, press Cut . The printer will cut off the media. BradyPrinter S3100 Sign & Label Printer User’s Manual... -
Page 87: Adjusting Print Energy
Note: By default, the print energy is at the nominal setting for the best overall performance. 4. Touch the OK button . The print energy level is changed and the Print dialog box is displayed. BradyPrinter S3100 Sign & Label Printer User’s Manual... -
Page 88: Adjusting Print Offset
3. In the Adjust Offset area, enter a value in the horizontal and/or vertical offset boxes: • Horizontal Offset: shifts the image (printed portion of the label) to the right or left. • Vertical Offset: shifts the image (printed portion of the label) up or down. BradyPrinter S3100 Sign & Label Printer User’s Manual... -
Page 89: Printing From A Pc
Note: To use this procedure, the printer must be physically connected to PC, the appropriate drivers (i.e., printer driver, USB driver) must be installed on the PC (see “Using Your Printer with a PC” on page 15) and the BradyPrinter S3100 printer must be powered on. -
Page 90: Working With Label Files
Note: The system will support only one USB flash drive at a time. 4. Choose a Category or touch the New Category button and type a category name. BradyPrinter S3100 Sign & Label Printer User’s Manual... -
Page 91: Open A Label File
• External USB (label files saved on a USB flash drive) 4. Choose the Category where the label is saved. The system will display the label files available in the selected location. BradyPrinter S3100 Sign & Label Printer User’s Manual... - Page 92 Touch No if you want to return to the previous screen without deleting the file. Note: If you delete all labels in a category, the system will automatically delete the category (except My Labels). BradyPrinter S3100 Sign & Label Printer User’s Manual...
-
Page 93: Using System Tools
2. Connect the USB flash drive that contains the graphic(s) to any available USB port on the printer. Note: The system will only support one USB flash drive at a time. 3. Touch the Menu button. BradyPrinter S3100 Sign & Label Printer User’s Manual... - Page 94 (“Delete a Label File” on page 74) or deleting previously imported files (“Delete Imported Graphics” on page 78) before you can import any new graphics. There is approximately 56MB of storage space available. BradyPrinter S3100 Sign & Label Printer User’s Manual...
-
Page 95: Delete Imported Graphics
6. Touch Yes to confirm the deletion. The graphic will be deleted from the Installed list. 7. Repeat Steps 3-6 to delete additional graphics. 8. Touch the OK button to exit the dialog. BradyPrinter S3100 Sign & Label Printer User’s Manual... -
Page 96: Import Fonts
You can clear space by deleting saved files. There is approximately 56MB of storage space available. BradyPrinter S3100 Sign & Label Printer User’s Manual... -
Page 97: Installing Firmware Upgrades
2. Point to Technical Support and then, under the Downloads heading, click Firmware. 3. Find the most recent BradyPrinter S3100 firmware upgrade in the list and click it. You can sort the list alphabetically to make it easier to find the printer model. -
Page 98: Maintenance
To remove printer power and media: 1. Remove the power plug [1] from the printer. 2. Open the enclosure cover (opens from left). BradyPrinter S3100 Sign & Label Printer User’s Manual... - Page 99 4. Release the ribbon cartridge latch [3] and lift the ribbon cartridge up and out. 5. Move yellow media wiper [4] to far right (when facing display). 6. Move yellow media guides [5] to full-open. 7. Remove media cartridge from the slots of media holder [6]. BradyPrinter S3100 Sign & Label Printer User’s Manual...
-
Page 100: Cleaning The Printer
1. Lightly moisten a lint-free cloth with isopropyl alcohol, or use a pre-moistened cloth suitable for cleaning a PC screen. 2. Gently rub the damp cloth across the screen until all of the residue is removed. BradyPrinter S3100 Sign & Label Printer User’s Manual... -
Page 101: Cleaning The Cutter Blade
2. Squeeze the two yellow cutter tabs [7] to release the cutter. The cutter mechanism and exit chute [8] will slide down behind the ribbon cover. 3. Fill the plastic bottle from the cleaning kit with isopropyl alcohol. BradyPrinter S3100 Sign & Label Printer User’s Manual... - Page 102 Note: You may need to hold ribbon cover up slightly to access the exit chute. 6. Replace the ribbon and tape. 7. Close all covers and plug in the power cord. BradyPrinter S3100 Sign & Label Printer User’s Manual...
-
Page 103: Cleaning The Sensors
3. With a pre-moistened foam swab, gently wipe the surface of the media sensor [10] and cutter sensor [11] at the locations shown in the figure. Do not allow the alcohol to drip from the swab. BradyPrinter S3100 Sign & Label Printer User’s Manual... -
Page 104: Cleaning The Cutter Blade Exit Area
Note: To reach all areas of the exit chute, you can close the enclosure cover and tilt the printer up on its side. 4. Replace the ribbon and tape. 5. Close all covers, plug in the power cord, and turn on the power switch. BradyPrinter S3100 Sign & Label Printer User’s Manual... -
Page 105: Dust Cleaning
3. Moisten one of the foam swabs from the cleaning kit with the alcohol and gently rub across the green and black area of the printhead [14]. CAUTION! Use only the materials supplied in the cleaning kit. Using other materials may permanently damage the printhead. BradyPrinter S3100 Sign & Label Printer User’s Manual... -
Page 106: Replacing The Media Wiper
3. Pull the tab slightly forward and then slide the wiper insert out of the wiper arm. 4. To replace the wiper, insert the lip of the wiper insert into the slot [16] of the wiper arm and slide in until the tab snaps into place. BradyPrinter S3100 Sign & Label Printer User’s Manual... -
Page 107: Clearing Jams
2. Check that there is no damage to the print head, cutter blades, sensors, etc. 3. Check whether any cleaning is needed. If cleaning is required, see “Cleaning the Printer” on page 83 for details. 4. Reload ribbon and media and clear all error messages. BradyPrinter S3100 Sign & Label Printer User’s Manual... -
Page 108: Clearing A Cutter Jam
Clearing a Cutter Jam Clearing a Cutter Jam To clear a jam from the cutter: 1. Cut the media as shown below. 2. Squeeze the tabs to release and tilt the cutter module. BradyPrinter S3100 Sign & Label Printer User’s Manual... - Page 109 3. Rotate the cutter gear counter-clockwise to lower the blade. 4. Remove the media. 5. Rotate the gear clock-wise to raise the blade. 6. Push the cutter mechanism back into place so that the pins snap into place. BradyPrinter S3100 Sign & Label Printer User’s Manual...
-
Page 110: Troubleshooting
(see “Adjusting Print Energy” on page 70). • Reinstall the ribbon cartridge. No print on the label. The label or ribbon is not loaded correctly or out of ribbon. • Load a new ribbon. BradyPrinter S3100 Sign & Label Printer User’s Manual... - Page 111 “Adjusting Print Offset” on page 5- Print Queue Full Other jobs are printing or waiting to Wait for a job to complete printing print and no additional jobs can fit in and try again. the queue. BradyPrinter S3100 Sign & Label Printer User’s Manual...
-
Page 112: A Glossary Of Terms
Readable Check Character: Displays the check character on the label if Include Check Character is also selected. Does not apply to all symbologies. Readable Start/stop: Displays the start/stop character (*) on the label (does not apply to all symbologies). BradyPrinter S3100 Sign & Label Printer User’s Manual... - Page 113 Internal Memory page 6-73: Memory built into the device used for permanent storage of files, graphics, fonts, templates, etc. • Key: Physical component, typically on keyboard. Used for data entry and navigation. BradyPrinter S3100 Sign & Label Printer User’s Manual...
- Page 114 Proportional Sizing page 4-60: Uniform scaling of an object or text. Object maintains its size in both the horizontal and vertical direction. • Non-proportional Sizing page 4-60: Non-uniform scaling of an object or text. Object size is distorted in the direction being sized. BradyPrinter S3100 Sign & Label Printer User’s Manual...
- Page 115 USB Device (Universal Serial Bus) [pages 19, 80]: A plug-and-play interface between a computer and other devices. A USB device can be a Type B cable that connects from the PC to a device (e.g., BradyPrinter S3100 printer), or a small, portable storage device (e.g., flash drive).
-
Page 116: B Character Mapping And Ime For Asian Text
A, a, E, e, I, i, O, o, U, u ˜ N, n, O, o ¨ A, a, E, e, O, o, U, u ¸ C, c, K, k, G, g, N, n, L, l, R, r, S, s, T, t BradyPrinter S3100 Sign & Label Printer User’s Manual... -
Page 117: European Azerty
S, s, Z, z, C, c, T, t, N, n, E, e, R, r ˘ A, a, G, g ˝ U, u, O, o ˚ A, a, U, u ¯ A, a, E, e, I, i, U, u ˙ E, e, Z, z, C, c BradyPrinter S3100 Sign & Label Printer User’s Manual... -
Page 118: European Qwertz
S, s, Z, z, C, c, T, t, N, n, E, e, R, r ˘ A, a, G, g ˝ U, u, O, o ˚ A, a, U, u ¯ A, a, E, e, I, i, U, u ˙ E, e, Z, z, C, c BradyPrinter S3100 Sign & Label Printer User’s Manual... -
Page 119: European Qwerty
A, a, U, u ¯ A, a, E, e, I, i, U, u ˙ E, e, Z, z, C, c European Cyrillic Accent Characters Affected A, a, E, e, I, i, O, o, U, u BradyPrinter S3100 Sign & Label Printer User’s Manual... -
Page 120: Using The Input Method Editor (Ime)
Note: For each letter typed, the IME predicts a set of characters based on the entered text. For frequently selected characters, the printer "learns" the characters and moves them up the list of character options. BradyPrinter S3100 Sign & Label Printer User’s Manual... - Page 121 Choose a corresponding character: On keyboard, type 1, 2, 3, etc. to choose the character 4. To close the text editor, press Esc or touch anywhere outside the text editor window. 5. Touch the language button to toggle back to the original language. BradyPrinter S3100 Sign & Label Printer User’s Manual...
-
Page 122: Chinese Traditional
The character is immediately added to the text box and the candidate dialog closes. - or - Press the arrow to select the correct candidate, then press Enter. 4. Repeat Steps 2 and 3 until all of your text is entered. BradyPrinter S3100 Sign & Label Printer User’s Manual... -
Page 123: Korean
5. Delete the initial symbol so that only the selected candidate displays. 6. Repeat Steps 2 through 5 until all of your text is entered. BradyPrinter S3100 Sign & Label Printer User’s Manual... -
Page 124: C Specialty Label Types
HSID: (Hazardous Substances Identification). Compliant chemical warning labels for use in Europe. These templates are installed for European regions only. Customize Customize: Lets you determine which three (default) label types will display on the Home page. BradyPrinter S3100 Sign & Label Printer User’s Manual... -
Page 125: Pipe Markers
Australia & New Zealand standard for hazardous AS1345-1995 substances. Previous American pipe marker standard. ANSI/ASME 1996 5. When done, touch the OK button. Until changed, these settings will remain for all future labels. BradyPrinter S3100 Sign & Label Printer User’s Manual... -
Page 126: Create Pipe Marker Labels
4. Perform the steps appropriate for your pipe marker style (see “Creating a Standard Pipe Marker” on page 110, “Creating a Rollform Pipe Marker” on page 113 or “Creating a Symbol or Arrow Tape Pipe Marker” on page 115). BradyPrinter S3100 Sign & Label Printer User’s Manual... - Page 127 See “Entering Special Characters” on page 53 for more detail. If too many characters per line are used, a message will display prompting you to edit the text or lengthen the pipe marker. BradyPrinter S3100 Sign & Label Printer User’s Manual...
- Page 128 Note: To deselect a graphic, touch the graphic again. b. If necessary, touch the Change Category button to choose from a different set of graphics. You can select graphics from more than one category. 6. Touch the Next button. BradyPrinter S3100 Sign & Label Printer User’s Manual...
- Page 129 Note: If the length of all elements together exceeds the recommended length, you will be prompted to edit the data or lengthen the pipe marker. 10. Install the correct ribbon and tape as necessary, and print the label. BradyPrinter S3100 Sign & Label Printer User’s Manual...
- Page 130 Instead, the font will reduce to fit the whole word on the line. 5. To enter special characters, click the Special Characters button , then enter the characters. See “Entering Special Characters” on page 53 for more detail. BradyPrinter S3100 Sign & Label Printer User’s Manual...
- Page 131 8. If desired, edit the data by touching the Edit Pipe Marker Data button in the Pipe Marker control panel. Not all fields are editable. 9. Install the correct ribbon and tape as necessary, and print the label. BradyPrinter S3100 Sign & Label Printer User’s Manual...
- Page 132 Touch the Symbol button, then choose a category and graphic. As soon as you select a graphic, the label will be created and displayed in the Editor. 6. Install the correct ribbon and tape as necessary, and print the label. BradyPrinter S3100 Sign & Label Printer User’s Manual...
-
Page 133: Save, Open Or Delete A Pipe Marker Label
3. In the Delete File dialog, select the category where the label is located. 4. Select the label you want to delete. 5. When prompted to delete the file, touch Yes. Selecting No will cancel the operation. BradyPrinter S3100 Sign & Label Printer User’s Manual... -
Page 134: Premade Labels - North America
1. From the Home page, touch the PreMade Labels button. - or - Touch the More Label Types button, then touch the PreMade Labels button. 2. From the Select Label dialog, enter the Label ID, then touch OK. - or - BradyPrinter S3100 Sign & Label Printer User’s Manual... -
Page 135: Premade Labels Reference Images - Europe
For information about the available labels for Europe, contact your local Sales Representative. Note: PreMade Labels for Europe are available only in French, German, Italian and Dutch. PreMade Labels Reference Images - North America Reference the following labels when creating PreMade Labels. BradyPrinter S3100 Sign & Label Printer User’s Manual... - Page 136 PreMade Labels - North America PreMade Labels Reference Images - North America Admittance, Exit, Confined Spaces BradyPrinter S3100 Sign & Label Printer User’s Manual...
- Page 137 PreMade Labels - North America PreMade Labels Reference Images - North America Alerts and First Aid Chemical - Hazardous Materials BradyPrinter S3100 Sign & Label Printer User’s Manual...
- Page 138 PreMade Labels - North America PreMade Labels Reference Images - North America Conduit - Voltage Electrical Hazard - Lockout BradyPrinter S3100 Sign & Label Printer User’s Manual...
- Page 139 PreMade Labels - North America PreMade Labels Reference Images - North America Fire Funny Signs BradyPrinter S3100 Sign & Label Printer User’s Manual...
- Page 140 PreMade Labels - North America PreMade Labels Reference Images - North America Graphics - Mandatory BradyPrinter S3100 Sign & Label Printer User’s Manual...
- Page 141 PreMade Labels - North America PreMade Labels Reference Images - North America Graphics - Packaging Graphics - PPE BradyPrinter S3100 Sign & Label Printer User’s Manual...
- Page 142 PreMade Labels - North America PreMade Labels Reference Images - North America Graphics - Prohibition BradyPrinter S3100 Sign & Label Printer User’s Manual...
- Page 143 PreMade Labels - North America PreMade Labels Reference Images - North America Graphics - Signal Words BradyPrinter S3100 Sign & Label Printer User’s Manual...
- Page 144 PreMade Labels - North America PreMade Labels Reference Images - North America Graphics - Warning BradyPrinter S3100 Sign & Label Printer User’s Manual...
- Page 145 PreMade Labels - North America PreMade Labels Reference Images - North America Inspection Machine - Operational No Smoking BradyPrinter S3100 Sign & Label Printer User’s Manual...
- Page 146 PreMade Labels - North America PreMade Labels Reference Images - North America Pipe Marker Arrows BradyPrinter S3100 Sign & Label Printer User’s Manual...
- Page 147 PreMade Labels - North America PreMade Labels Reference Images - North America Pipe Markers BradyPrinter S3100 Sign & Label Printer User’s Manual...
- Page 148 PreMade Labels - North America PreMade Labels Reference Images - North America BradyPrinter S3100 Sign & Label Printer User’s Manual...
- Page 149 PreMade Labels - North America PreMade Labels Reference Images - North America Protective Warning Stakes BradyPrinter S3100 Sign & Label Printer User’s Manual...
-
Page 150: Right To Know (Rtk)
3. Touch the Setup button . Choose from any of the available options, then follow the instructions in “Set Label Defaults” on page 134 or “Add or Delete Hazards or Organs” on page 135. BradyPrinter S3100 Sign & Label Printer User’s Manual... - Page 151 Note: The available label sizes are determined by the format type you have selected. 3. Click the OK button. 4. Click the OK button again to close the dialog and return to the main page. BradyPrinter S3100 Sign & Label Printer User’s Manual...
- Page 152 To delete a hazard type: 1. In the Right-to-Know Preferences dialog, touch the Hazards button. 2. In the Add or delete hazards drop-down list, choose the hazard you want to delete, then touch the Delete button. BradyPrinter S3100 Sign & Label Printer User’s Manual...
- Page 153 To delete an organ type: 1. In the Right-to-Know Preferences dialog, touch the Organs button. 2. In the Add or delete hazards drop-down list, choose the organ you want to delete, then touch the Delete button. BradyPrinter S3100 Sign & Label Printer User’s Manual...
-
Page 154: Create Rtk Labels
5. To edit or change the objects, touch the Edit RTK Data button. 6. In the dialog(s) that display, select or enter the new data, then click the Next or Finish button. Note: The format cannot be edited after a label has been created. BradyPrinter S3100 Sign & Label Printer User’s Manual... -
Page 155: Open, Save Or Delete An Rtk Label
3. In the Delete File dialog, choose the category where the label is located. 4. Touch the label you want to delete. 5. When prompted to delete the file, touch the Yes button. Selecting No will cancel the operation. BradyPrinter S3100 Sign & Label Printer User’s Manual... - Page 156 Color Bar and NFPA labels. Manufacturer Enter manufacturer of chemical, if known. Temperature Enter temperature that you want printed on the label. Date Enter the date. *Available options depend on the RTK format selected. BradyPrinter S3100 Sign & Label Printer User’s Manual...
-
Page 157: Ghs (Clp)
5. On the Select Label Size and Type dialog box, touch the Next button again. You cannot change the label type because monochrome is the only option with this printer. 6. Touch anywhere on the displayed label to bring up the CLP (GHS) Data dialog box. BradyPrinter S3100 Sign & Label Printer User’s Manual... - Page 158 12. On the Select Hazardous Statements screen, touch the up and down arrows in the scroll bar to view more statements and select the check box for each statement that you want to use. BradyPrinter S3100 Sign & Label Printer User’s Manual...
- Page 159 15. To remove a previously added statement, touch the Clear button for each statement that you want to remove. 16. When complete, touch the Finish button. The label displays the added statements. BradyPrinter S3100 Sign & Label Printer User’s Manual...
- Page 160 Note: If the Finish button is not available, make sure that the product name is entered, that at least one hazard or precaution statement is selected, and that the graphics have been specified. BradyPrinter S3100 Sign & Label Printer User’s Manual...
- Page 161 Material / Ribbon Cross Reference BradyPrinter S3100 Material / Ribbon Cross Reference Guide Material Ribbon ● = Recommended ∆ = Acceptable Brady B30-R10000 B30-R6000 B30-R6200 B30-R4300 B30-R4400 Material Description Material # (Black, Colors) (Black) (Black) (Black) (White) B-423 Polyester ●...
- Page 162 BradyPrinter S3100 Material / Ribbon Cross Reference Guide Material Ribbon ● = Recommended ∆ = Acceptable Brady B30-R10000 B30-R6000 B30-R6200 B30-R4300 B30-R4400 Material Description Material # (Black, Colors) (Black) (Black) (Black) (White) B-727 Polyimide ● ● ∆ B-7563 Metallized Polyester...
- Page 164 © 2018 Brady Worldwide, Inc. All Rights Reserved.