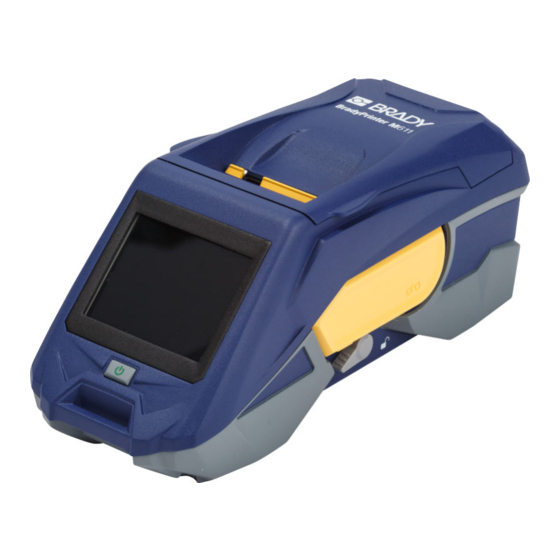
Brady BradyPrinter M611 User Manual
Mobile label printer
Hide thumbs
Also See for BradyPrinter M611:
- Quick start manual (251 pages) ,
- User manual (59 pages) ,
- Quick start manual (2 pages)
Table of Contents
Advertisement
Quick Links
Advertisement
Table of Contents

Related Manuals for Brady BradyPrinter M611


Summary of Contents for Brady BradyPrinter M611
- Page 1 User’s Manual...
- Page 2 Copyright and Trademarks Disclaimer This manual is proprietary to Brady Worldwide, Inc. (hereafter "Brady"), and may be revised from time to time without notice. Brady disclaims any understanding to provide you with such revisions, if any. This manual is copyrighted with all rights reserved. No portion of this manual may be copied or reproduced by any means without the prior written consent of Brady.
- Page 3 Brady’s satisfaction to have been defective at the time Brady sold it. This warranty does not extend to any persons obtaining the product from the buyer. THIS WARRANTY IS IN LIEU OF ANY OTHER WARRANTY, EXPRESS OR IMPLIED, INCLUDING, BUT NOT LIMITED TO, ANY IMPLIED WARRANTY OF MERCHANTABILITY OR FITNESS FOR A PARTICULAR PURPOSE, AND OF ANY OTHER OBLIGATIONS OR LIABILITY ON BRADY’S PART.
- Page 4 Registration Information To register your printer go to: www.bradycorp.com/register. Repair and Return If for any reason you need to return the product for repair, please contact Brady Technical Support for repair and replacement information. Document Conventions When using this document, it is important that you understand the conventions used throughout the manual.
-
Page 5: Table Of Contents
Contents 1 • Introduction System Specifications....................1 Physical and Environmental Characteristics ............2 Proximity Range for Wi-Fi and Bluetooth ..............2 2 • Setup Unpacking the Printer ....................3 What’s in the Box ....................3 Save the Packaging ..................3 Registration ......................3 Printer Components ....................4 Power and Battery ..................... - Page 6 Dismantling the Cartridge ...................21 Recycling Components ..................22 Accessories......................23 Magnet ........................23 Attaching the Strap .....................24 3 • Getting Started Touch Screen ......................26 Navigation and Status Bar .................27 Material Details ....................27 Creating Labels......................27 Cutting and Feeding ....................28 Printing ........................28 4 •...
- Page 7 Wireless Regulatory Information ................42 United States ......................42 Federal Communication Commission (FCC) ..........42 Canada .......................43 Innovation, Science and Economic Development (ISED) ......43 Mexico .........................43 Brazil ........................44 European Union ....................44 International ......................44 Japan ........................44 B • Licensing End User License Agreement for Microsoft Windows CE© ........ 45 Made for Apple Badge.....................
-
Page 8: Introduction
It includes the following features: • Rugged and durable — withstands a 4 ft. (1.2 m) drop. • Quickly and easily create labels using either Brady Express Labels mobile app or Brady Workstation desktop software. • Bluetooth® and Wi-Fi® enabled for easy wireless connectivity. -
Page 9: Physical And Environmental Characteristics
Introduction System Specifications Physical and Environmental Characteristics The BradyPrinter™ M611 printer has the following physical and environmental characteristics: Physical U.S. Units Metric Units Dimensions 11.0” L x 4.5” W x 4.6” H 279 x 113 x 116 mm Weight (with label supply and ribbon) 3.52 lbs 1.60 kg Note: The table below refers to the BradyPrinter™... -
Page 10: Setup
What’s in the Box The following items are included in the standard BradyPrinter™ M611 package: • BradyPrinter™ M611 printer with internal battery. (Battery is not accessible. Contact Brady Technical Support for service.) • AC adapter and power cord • USB cable (BMP41-USB) •... -
Page 11: Printer Components
Setup Printer Components Printer Components Supply door (label supply well) Supply door open tabs AC adapter port Bulk or external label feed path USB port (computer connection) Magnet attachment screw hole USB host port (phone charging and Ribbon firmware upgrades) Power button Lock lever Strap attachment loop... -
Page 12: Power And Battery
The printer can be powered through an AC/DC power adapter. When the adapter is plugged in, it is also charging the battery. CAUTION! Use only the 18 V DC, Brady AC/DC adapters shown below, for supplying power to the BradyPrinter™ M611. -
Page 13: Charging The Battery Before Initial Use
Setup Power and Battery Charging the Battery Before Initial Use Fully charge the internal lithium ion battery before running the printer on battery. 1. Plug the printer into a power outlet. 2. Charge for 4.5 hours. 3. Check for full charge. a. -
Page 14: Usb Host Port
Setup Printer Settings USB Host Port The USB host port serves two purposes. • Upgrading firmware and materials database (Y and B) files. See “Upgrading Firmware” on page 29 and “Updating Y and B Values” on page 30. • Charging a mobile device, only when the printer is plugged in to an AC power source. Printer Settings Use the touch screen on the printer to configure standard settings, such as the language. -
Page 15: Date And Time
Setup Printer Settings Date and Time Set the printer’s clock to the current date and time. To set the date and time: 1. With the printer turned on, tap Settings. 2. Tap System Configuration, then Date and Time. The left side of the screen displays the current settings. -
Page 16: Brightness And Rotation
In the Brady Express Labels app, go to settings and add the printer again. When using the Brady Express Labels app, this name is shown when selecting a printer, unless the connection to the printer was set up manually with an IP address. See “Software for Creating Labels”... -
Page 17: Software For Creating Labels
Install labeling software on your computer or mobile device, set up the connection to the printer, then use the software to design labels and send them to the printer. (Refer to your local Brady website for other Brady software. Be aware that older Brady labeling software may not automatically detect the printer and that the information in this manual is based on the software listed below.) -
Page 18: Connecting The Printer
Select the printer on the mobile device. Note: If you change the name of the printer after it has been paired with the Brady Express Labels mobile app, you must pair it again. (See “Printer Name” on page 9.) In the Brady Express Labels app, go to settings and add the printer again. -
Page 19: Usb
Connecting the Printer To connect to a computer via USB 2.0, plug the provided USB cable into the printer and the computer. Brady Workstation software automatically detects the printer when connected via USB cable. Wi-Fi Connect to a Wi-Fi network either by searching for and selecting a network, or by manually entering the network settings. -
Page 20: Manually Enter Settings
Setup Loading Supplies • If the network you need is not in the list, it may not be discoverable. Tap Other. Choose either Personal Network or Enterprise Network. The system displays settings appropriate to your selection. You may need information from your IT department to complete the settings. Manually Enter Settings Use this method if you need to identify the network by static IP or DHCP. -
Page 21: Loading Ribbon
Setup Loading Supplies Loading Ribbon Product numbers for ribbons begin with M61. For example, M61-R4310. Note: It is best to remove the label supply before installing ribbon. Loading the ribbon with label supply in the printer can damage the ribbon. To install ribbon: 1. -
Page 22: Loading Labels
Brady labels come equipped with smart-cell technology that enables the printer and Brady labeling software to recognize the type of label and automatically set many label formatting details. For optimum performance, use genuine Brady BMP61 labels. Labels can be loaded with the power on or off. - Page 23 Setup Loading Supplies b. Grasp the label roll smart cell guide and gently pull up out of the label well. 3. Remove the protective tape covering the leading end of the labels on the new label roll. 4. With labels coming off the top of the smart cell spool toward the front of the printer, grasp the smart cell handle and...
-
Page 24: Loading Bulk Labels
Setup Loading Supplies 9. Close the label supply door by pushing down on it until it snaps into place. Loading Bulk Labels To load bulk labels: 1. Remove the label spool and the label feed ramp from the box. 2. On the bulk label box, push tabs A and C in, then pull the perforated flap down and tear off. -
Page 25: Loading Fanfold (Raised Panel) Labels
Setup Loading Supplies 5. Insert the label spool into the printer so that the smart cell aligns with the reader in the label well. Adjust the label guide as needed. 6. Pull the loose end of the bulk labels out of the box and thread over the tray and into the bulk label feed path on the printer. -
Page 26: Recycling The Label And Ribbon Cartridge
Setup Recycling the Label and Ribbon Cartridge 2. Place the open label box behind the printer and feed the labels through the external label slot, over the label spool, and through the guide slots until it stops. 3. Tap Feed on the touch screen to advance the label supply. -
Page 27: Dismantling The Ribbon
Setup Recycling the Label and Ribbon Cartridge Dismantling the Ribbon To dismantle the ribbon: 1. Using your thumbnail, press the clear plastic locking tab down. While holding the tab down, insert the blade of the screwdriver above the smart cell and slide downward. The smart cell easily slides out for removal. -
Page 28: Dismantling The Cartridge
Setup Recycling the Label and Ribbon Cartridge Dismantling the Cartridge To open the cartridge: 1. Unwind any remaining label supply from the spool, then gently peel the end of the supply off of the spool to separate. 2. Grip the spool just behind the black end cap (containing the smart cell). 3. -
Page 29: Recycling Components
Setup Recycling the Label and Ribbon Cartridge Recycling Components These components should be removed from the cartridge and recycled according to the following guidelines. Component Material Recycle Bin Ribbon Spools (White) #9 ABS Ribbon Smart Cell Electronic Electronic Waste Label Supply Smart Cell Ribbon Cartridge (Clear) Polycarbonate (PC) #7 Other... -
Page 30: Accessories
Setup Accessories Accessories The following accessories are available for the BradyPrinter™ M611 printer and can be purchased separately from your distributor: • Magnet (BMP-MAGNET-2) • Hard-sided carrying case (BMP-HC-2) • Sling pack (BMP-PACK-2) • Cleaning Kit (PCK-5) • Strap (BMP-Strap-1). Included with printer and available for purchase separately. Magnet Use the magnet accessory, purchased separately, to attach the printer to magnet-receptive metal surfaces such as panels and I-beams. -
Page 31: Attaching The Strap
Attaching the Strap Use the included strap to hang the printer. To attach the strap: 1. With the Brady logo on the strap facing up, thread the strap through the loop on the front of the printer. - Page 32 Setup Accessories 2. Thread the strap through the two D-rings. 3. Separate the two D-rings so there is enough space for the strap to pass between them, and thread the end of the strap back between the two rings. 4. Pull the loose end of the strap until it feels tight, then press the strap together with the hook and loop fastener so it lays flat.
-
Page 33: Getting Started
3 Getting Started Touch Screen Use the printer’s touch screen to configure settings, check status, and feed and cut labels, among other functions. Touch the screen with your finger to make a selection. Note: Do not use a writing pen or other sharp object. Doing so may mar the touch screen surface. 10 11 Home Ribbon remaining... -
Page 34: Navigation And Status Bar
To close the Material Details screen, click the x in the upper right corner. Creating Labels Create label files using Brady Workstation software or the Brady Express Labels app. When you first create a label file, you specify the printer. This allows the software to provide features specific to your printer. Also, software automatically detects the ribbon and labels installed in the printer. -
Page 35: Cutting And Feeding
Getting Started Printing Cutting and Feeding Use the cutting settings in the software to determine if and when the printer should cut labels. The software also automatically feeds labels. If you need to cut manually, from the home screen on the printer, tap Cut or Feed. CAUTION! Do not insert fingers near cutter. -
Page 36: Maintenance
The About page displays version numbers for various components of the system. Check the Firmware driver version when considering a firmware upgrade. Use the remaining information on the About page if instructed by Brady Support. To view system information: 1. From the home page, tap Settings. -
Page 37: Updating Y And B Values
Update Y and B values periodically to make sure the printer has data for any new label supplies. Also, update if you have ordered a custom label supply from Brady and it came with new Y and B values. You do not need to know your current database version. The printer displays a confirmation message showing the version numbers during the import process. - Page 38 Maintenance Cleaning the Printer 2. With the printer turned on, tap Settings. 3. Tap Maintenance, and then tap Clean Print Head. 4. With the ribbon removed, close the lock lever. 5. Set the label supply guide to the widest position. 6.
-
Page 39: Replacing The Cutter Blade Cover
Maintenance Replacing the Cutter Blade Cover Replacing the Cutter Blade Cover CAUTION! When removing jammed material from the cutter, do not use sharp objects such as a screwdriver because they may damage the print head. Use tweezers to grasp the material. Do not insert fingers near cutter. -
Page 40: Replacing The Cutter Assembly
Maintenance Replacing the Cutter Assembly To remove the cutter blade cover: 1. From inside the supply well, slip your finger under the right side of the blade cover and gently pull up to unhook the blade cover. The blade cover releases easily. To re-insert the cutter blade cover: 1. - Page 41 Maintenance Replacing the Cutter Assembly 3. Tap Maintenance, and then tap Replace Cutter. This moves the cutter into position for service, uncovering the mounting screw. mounting screw 4. Loosen the mounting screw. 5. Remove the cutter assembly. lever bearing BradyPrinter™ M611...
- Page 42 Maintenance Replacing the Cutter Assembly 6. Install the new cutter assembly making sure the two tabs are located as indicated in the picture below, and the lever is between the bearing and pin on the actuator as shown in the picture above.
-
Page 43: Replacing The Label Supply Door
Maintenance Replacing the Label Supply Door Replacing the Label Supply Door If the printer is accidentally dropped, the printer supply door may come off. If the supply door is not damaged, it can easily be re-attached to the printer. The supply door must be on the printer and closed for printing and cutting. -
Page 44: Troubleshooting
5 Troubleshooting The following sections provide information to help troubleshoot issues with the printer. • The “Troubleshooting Scenarios” section below contains a list of possible issues you may encounter with information about the cause and solutions. • “Error Messages” on page 38 provides a list of error messages with cross references to related information in this manual. -
Page 45: Printer Does Not Turn On
Troubleshooting Error Messages Solutions: • Adhesive may have built up on the blades. Clean the cutter blades with a moistened swab from the cleaning kit. See “Cleaning the Printer” on page 30. • Make sure the software is set to cut as desired (between labels or at the end of the job). Printer does not turn on Problem: Nothing happens when I press the power button. - Page 46 Troubleshooting Error Messages Error Title Related Information Supply Empty “Loading Labels” on page 15 Invalid Supply “Loading Labels” on page 15 Cannot Connect to Wireless Network “Bluetooth” on page 11 “Wi-Fi” on page 12 Maintenance Required “Cleaning the Printer” on page 30 Failure Loading Supply “Loading Labels”...
-
Page 47: A Regulatory Compliance
A Regulatory Compliance Agency Compliance and Approvals United States FCC Notice Note: This equipment has been tested and found to comply with the limits for a Class A digital device, pursuant to part 15 of the FCC Rules. These limits are designed to provide reasonable protection against harmful interference when the equipment is operated in a commercial environment. -
Page 48: Taiwan Statement
Regulatory Compliance Agency Compliance and Approvals Taiwan Statement Class A Statement 警告使用者 這是甲類的資訊產品,在居住的環境中使用時,可能會造成射頻干擾,在這種情況下,使用者會被要求 採取某些適當的對策。 Taiwan Restricted Substances Containment Status (RoHS Declaration) related to this product is available at www.BradyID.com/M611compliance. Europe WARNING! This is a Class A product. In a domestic environment, this product may cause radio interference in which case the user may be required to take adequate measures. -
Page 49: Turkey
PCB trace antenna \ 1.00 dBi Environmental Operation and -40 to 85° C (-40° to 185° F) Storage (Radio Modules) Note: Be mindful of Brady host printer user guide for maximum operating temperatures United States Federal Communication Commission (FCC) Note: This equipment has been tested and found to comply with the limits for a Class A digital device, pursuant to part 15 of the FCC Rules. -
Page 50: Canada
Regulatory Compliance Wireless Regulatory Information Changes or modifications not expressly approved by the party responsible for compliance could void the user's authority to operate the equipment. This device complies with Part 15 of the FCC Rules. Operation is subject to the following two conditions: (1) This device may not cause harmful interference and, (2) this device must accept any interference received, including interference that may cause undesired operation. -
Page 51: Brazil
< +20dBm EIRP (100mW) International The WiFi radio module used in Brady host printers comply with internationally recognized standards covering human exposure to electromagnetic fields, i.e. EN 62311 "Assessment of electronic and electrical equipment related to human exposure restrictions for electromagnetic fields (0 Hz - 300 GHz)". -
Page 52: B Licensing
End User License Agreement for Microsoft Windows CE © You have acquired a device that includes software licensed by Brady Worldwide, Inc. from Microsoft Licensing or its affiliates (“MS”). Those installed software products of Microsoft origin, as well as associated supply, printed materials, and “online” or electronic documentation (“SOFTWARE”) are protected by international intellectual property laws and treaties. -
Page 53: Made For Apple Badge
Licensing Made for Apple Badge NO EVENT SHALL MS BE LIABLE FOR ANY AMOUNT IN EXCESS OF U.S. TWO HUNDRED FIFTY DOLLARS (U.S.$250.00). Limitations on Reverse Engineering, Decompilation, and Disassembly. You may not reverse engineer, decompile, or disassemble the SOFTWARE, except and only to the extent that such activity is expressly permitted by applicable law not withstanding this limitation.