Table of Contents
Advertisement
Quick Links
Advertisement
Table of Contents

Related Manuals for Ricoh IS450


Summary of Contents for Ricoh IS450
- Page 1 Image Scanner OPERATING INSTRUCTIONS Printed in Japan EE GB G407-6657...
-
Page 2: Power Supply
Introduction This manual contains detailed instructions on the operation and maintenance of this machine. To get maximum versatility from this machine all operators should carefully read and follow the in- structions in this manual. Please keep this manual in a handy place near the machine. Please read the Safety Information before using this machine. - Page 3 (and/or peripheral) in order to meet EMC Directive 89/336/EEC emission limits. In accordance with IEC417, this machine uses the following symbols for the main switch: • means Push ON Push OFF Declaration of Conformity RICOH IMAGE SCANNER IS450S/IS450D/IS450SE/IS450DE Copyright © 1998...
-
Page 4: Declaration Of Conformity
• Consult the dealer or an experienced radio /TV technician for help. Declaration of Conformity Product Name: Scanner Model Number: RICOH IMAGE SCANNER IS450S/IS450D/IS450SE/IS450DE Responsible party: Ricoh Corporation Address: 5 Dedrick Place, West Caldwell, NJ 07006 Telephone number: 973-882-2000 This device complies with part 15 of FCC Rules. -
Page 5: Examples Of Indications
Safety Information When using your machine, the following safety precautions should be always be followed Safety During Operation In this manual, the following important symbols are used: WARNING: Ignoring this warning could cause serious injury or even death. CAUTION: Ignoring this caution could cause injury or damage to property. Examples of Indications Symbol Do NOT carry out the operation represented by this symbol... - Page 6 Safety Information Warnings Only connect the machine to the power source described on the inside front cover of this manual. Avoid multi-wiring. Do not damage, break or make any modifications to the power cord. Do not place heavy objects on it, pull it hard or bend it more than necessary.
- Page 7 Safety Information CAUTION Keep the machine away from humidity and dust. A fire or an electric shock might occur. Do not place the machine on an unstable or tilted surface. If it topples over, it could cause injury. When you move the machine, unplug the power cord from the wall outlet to avoid fire or electric shock.
-
Page 8: Important Information
Important Information Important Information 1. Read all of these instructions and keep them for later reference. 2. Follow all warnings and instructions marked on the machine. 3. Unplug this machine from the wall outlet before cleaning. Do not use liquid cleaners or aerosol cleaners. - Page 9 13. Unplug this machine from the wall outlet and refer servicing to qualified service personal under the following conditions; A. When the power cord or plug is damaged or frayed. B. If liquid has been spilled into the machine. C. If the machine has been exposed to rain or water. D.
-
Page 10: How To Read This Manual
How to Read This Manual How to Read This Manual In this manual, the following symbols are used: Warning This symbol indicates a potentially hazardous situation that might result in death or serious injury when you misuse the machine without following the instructions under this symbol. Be sure to read the instructions, all of which are described in the Safety Information section. -
Page 11: Table Of Contents
Table of Contents Safety Information ---------------------------------------------------------------------- i Safety During Operation ----------------------------------------------------------- i Examples of Indications ------------------------------------------------------------ i Important Information ---------------------------------------------------------------- iv How to Read This Manual ----------------------------------------------------------- vi 1. Introduction Features ----------------------------------------------------------------------------------- 1 Ultra-fast scanning ---------------------------------------------------------------- 1 Simultaneous scanning of both sides of a document --------------------------- (Duplex Model only) ----------------------------------------------------------- 1 Direct operation using the buttons on the scanner ------------------------------ (Manual Scanning function) ------------------------------------------------------ 1... - Page 12 Table of Contents 3. Setting Originals Originals ---------------------------------------------------------------------------------- 17 Recommended Sizes and Weights of Originals -------------------------- 17 Difficult to Detect Sizes ----------------------------------------------------------- 18 Original Sizes and Scanning Area -------------------------------------------- 19 Setting Originals ----------------------------------------------------------------------- 20 Setting the Original on the Contact Glass ----------------------------------- 20 Setting the Original in the Auto Document Feeder (ADF) -------------- 21 4.
- Page 13 6. Appendices Maintenance ---------------------------------------------------------------------------- 33 Cleaning the Scanner ------------------------------------------------------------ 33 Cleaning the Contact Glass, Slit Glass, White Sheet, and Platen ---------- 34 Cleaning the Feed Roller and Drum ------------------------------------------- 34 Cleaning the White Roller (Duplex Model Only) ---------------------------- 36 Moving the Scanner -------------------------------------------------------------- 38 Carrying the Scanner a Short Distance ---------------------------------------- 39 Shipping the Scanner ------------------------------------------------------------ 39 Disposing of the Scanner ------------------------------------------------------- 39...
-
Page 15: Introduction
Features This section describes the features of this scanner. Ultra-fast scanning When scanning A4 (8½” 11” images/minute. When scanning A4 scan 31 (32) images/minute. During double-sided scanning, when scanning A4 11” ), monochrome at 200dpi, this scanner can scan 86 (88) images/minute. When using the Auto Document Feeder (ADF) in binary scanning, these speeds apply to the second and subsequent sheets. -
Page 16: Space-Saving Design
1. Introduction Space-saving design This scanner is designed in a “wingless” style, in which there are no protruding elements, such as a document tray. This design allows the scanner to be set up next to a wall, and permits office space to be used more effectively. -
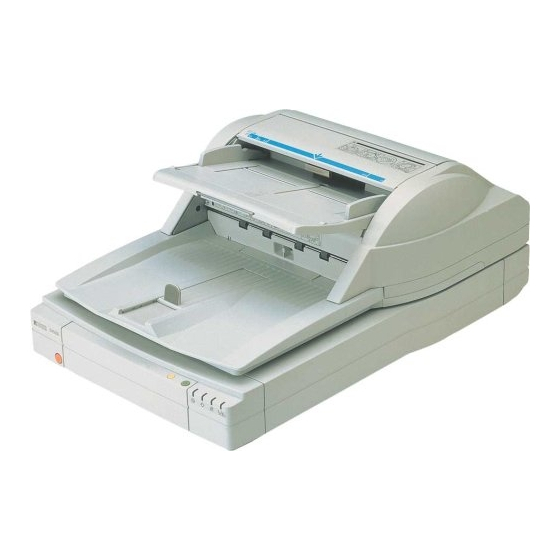
Page 17: Guide To The Scanner
Guide to the Scanner 1. Auto Document Feeder (ADF) This is used to automatically feed and scan documents. 2. Document Table Documents that are to be scanned by the Auto Document Feeder (ADF) are placed here. 3. Auxiliary Table This table can be extended outwards when placing large documents in the Auto Docu- ment Feeder (ADF). - Page 18 1. Introduction 1. White Sheet This presses the document down on the contact glass. 2. Contact Glass This is where the document is placed. 3. ADF Cover Open this cover to clear paper jams, etc. 4. Power Connector Connect the power cable here. 5.
-
Page 19: Understanding The Indicators
Understanding the Indicators The scanner has the following indicators: 1: Power On 2: Machine Busy 3: Document in Place 4: Error When the scanner is in a normal operating state, the indicators will light in one of the combina- tions shown below. If the indicators light in any other pattern, an error has occurred. Refer to p. 28, “Error Indicators and Solutions.”... - Page 20 1. Introduction...
-
Page 21: Setting Up The Scanner
2. Setting up the Scanner This chapter explains the preparations that are necessary in order to use the scanner. Preparing for Installation Checking the Scanner Location Set up the scanner in a location that satisfies the following conditions: Setup location Warning: Make sure the wall outlet is near the machine and easily accessible so that in event of an emergency it can be... - Page 22 2. Setting up the Scanner Installation space Set up the scanner in a location where there is enough space to provide the clearance shown in the figure below. Installation environment Important Do not set up the scanner in any of the types of locations listed below. Doing so could cause the scanner to malfunction.
- Page 23 Set up the scanner in a location where the temperature and humidity will fall within the ranges shown below. Usable range 50 F 80% F 15% Usable range Important Save the box and cushioning material in which the scanner was packed so that they can be used if it is necessary to transport the scanner in the future.
-
Page 24: Connecting To The Host Computer
2. Setting up the Scanner Connecting to the Host Computer This scanner connects to a host personal com- puter through a SCSI interface. This section provides an overview of SCSI, and explains how to connect the scanner to a host com- puter. -
Page 25: Setting The Scsi Id
Important The total length of the SCSI cables, in- cluding the length of the cable inside the personal computer, should be no more than 3m (9.8 ft.) when using Fast SCSI, and no more than 6m (19.7 ft.) when using non-Fast SCSI. Some combinations of SCSI boards and peripheral devices that are connected simultaneously may not work together... -
Page 26: Connecting The Scsi Cable (Connection To Other Port)
2. Setting up the Scanner Connecting the SCSI Cable (Connection to Other Port) A A A A A Turn off the host computer and all pe- ripheral devices that will be connected through the SCSI interface. B B B B B Use SCSI cables to connect the per- sonal computer and the peripheral de- vices in daisy chain fashion, with this... -
Page 27: Connecting The Power Cable
Connecting the Power Cable This section explains how to connect the power cable to the scanner. Warning Only connect the machine to the power source described on the inside front cover of this manual. Avoid multi-wiring. Do not damage, break or make any modifications to the power cord. - Page 28 2. Setting up the Scanner B B B B B Push the power cable plug all of the way into the power connector on the scanner. Note Use the power cable that was provided with this scanner. C C C C C Plug the other end of the power cable into the power outlet.
-
Page 29: Turning On/Off The Scanner Power
Turning On/Off the Scanner Power Turning On the Scanner Power When turning on the power, turn on each device in the daisy chain one by one, starting from the device that is at the opposite end of the daisy chain away from the host computer and working towards the host computer. -
Page 30: Initializing The Scanner
2. Setting up the Scanner Initializing the Scanner If the SCSI ID rotary switch or DIP switch settings have been changed while the power is on, it is necessary to initialize the scanner in order to put the new settings into effect. To initialize the scanner, either turn the power off and then back on again, or else perform the procedure described below: A A A A A... -
Page 31: Setting Originals
This section explains how to set originals that are to be scanned in the scanner. Originals can be set either on the contact glass or in the Auto Document Feeder (ADF). The Auto Document Feeder (ADF) is useful when you want to scan multiple originals consecutively. Originals Recommended Sizes and Weights of Originals Where original is set... -
Page 32: Difficult To Detect Sizes
3. Setting Originals An original that is highly transparent, such as transparencies or tracing paper An original that has markedly curled edges, such as shown below Difficult to Detect Sizes When the optional Image Processing Unit Type A is installed, the scanner can automatically detect the size of an original. -
Page 33: Original Sizes And Scanning Area
Original sizes that can be detected automatically Original size Paper sizes used in Japan A 3 B 4 A 4 A 4 B 5 B 5 A 5 A 5 B 6 B 6 A 6 Where original is placed Contact glass Auto Document Feeder (ADF) -
Page 34: Setting Originals
3. Setting Originals Setting Originals Setting the Original on the Contact Glass Caution: Be careful not to pinch your fingers when closing the Auto Document Feeder (ADF). A A A A A Open the Auto Document Feeder (ADF). B B B B B With the side to be scanned facing down, place the original on the contact glass, and align it with the home position and scale. -
Page 35: Setting The Original In The Auto Document Feeder (Adf)
Setting the Original in the Auto Document Feeder (ADF) Note Do not set originals in the Auto Document Feeder (ADF) in excess of the upper limit mark. (Stacked height: Not more than 15mm (0.6")) The number of sheets that can be set in the Auto Document Feeder (ADF) at one time depends on the size and weight (thickness) of the originals. - Page 36 3. Setting Originals Note When scanning an original that is A5 (HLT ) size or smaller, pull the stopper out of the output table, turn it around, slide it back into the table, and adjust the position. (Refer to the diagram below.) Important When the stopper is extended, do not grasp the stopper when opening or closing the Auto...
- Page 37 C C C C C Fan the sheets, and then line up their edges. D D D D D With the first page facing up on top, place the originals in the Auto Document Feeder (ADF), and adjust the positions of the guides so that they touch the edges of the original.
- Page 38 3. Setting Originals...
-
Page 39: Scanning Originals
4. Scanning Originals General Scanning Method Scanning of an original is initiated by software that is TWAIN or ISIS compatible. The method of operation depends on the software. For details, refer to the manual that was supplied with your software. Limitation When using double-sided scanning, if the leading edge of the reverse side of the document is dark, the scanned image may appear whitish. -
Page 40: Manual Scanning
4. Scanning Originals Manual Scanning By setting up a scanner driver that supports the manual scanning function, scanning can be initiated by pressing the Start button. If the manual scanning function is used, then communications between the scanner and the personal computer are no longer needed in cases where it is necessary to set the original in the scanner one sheet at a time, for example. -
Page 41: Troubleshooting
When Scanning Does not Start If scanning does not start, check the following: Item to check Is the power on? Is the SCSI ID set properly? Are the DIP switches set properly? Are the SCSI cables connected securey? If any cables are disconnected, connect Are the indicators on or flashing? Is the scanner driver selected properly? Are the software settings correct? -
Page 42: Error Indicators And Solutions
5. Troubleshooting Error Indicators and Solutions When the indicators are on or flashing in any of the following combinations, an error has occurred. After confirming the nature of the error, take the appropriate action. : On : Flashing : Off Description of error The Auto Document Feeder (ADF) or the ADF cover is... -
Page 43: Procedures To Correct Errors In The Adf
Procedures to Correct Errors in the ADF When an Original is Jammed in the Auto Document Feeder (ADF) A A A A A Open the ADF cover. B B B B B Turn the drum knob in the direction indicated by the arrow. 1: Knob 2: Feed roller C C C C C... -
Page 44: When Characters Printed By The Endorser Are Too Light Or The Original Gets Dirty
5. Troubleshooting When Characters Printed by the Endorser are Too Light or the Original Gets Dirty Replacing the Ink Ribbon Caution: When you pull out the plug from the socket, grip the plug to avoid damaging the cord and causing fire or electric shock. Replace the ink ribbon if the Endorser’s printing becomes too light. - Page 45 When Characters Printed by the Endorser are Too Light D D D D D Raise the rear portion of the Endorser, and then pull the Endorser out. Important Do not pull on the Endorser’s cord. E E E E E Place the Endorser down with the printing section facing up.
-
Page 46: Cleaning The Endorser
5. Troubleshooting I I I I I Push the Endorser in until it clicks, and tuck the Endorser’s power cord into the appropriate hook. J J J J J Slide the protrusion on the bottom of the cover into the output table, and then push the cover closed. -
Page 47: Appendices
Maintenance Cleaning the Scanner Warning: Do not remove any covers or screws other than those specified in this manual. Some parts of the machine are at a high voltage and could give you an electric shock. When the machine needs to be checked, adjusted, or repaired, contact your service representatives. -
Page 48: Cleaning The Contact Glass, Slit Glass, White Sheet, And Platen
6. Appendices Cleaning the Contact Glass, Slit Glass, White Sheet, and Platen Caution: Be careful not to pinch your fingers when closing the Auto Document Feeder (ADF). A A A A A Turn off scanner power, and unplug the power cable from the power outlet. B B B B B Wipe these components with a soft, dry cloth. - Page 49 Maintenance Note Always clean the feed roller after scanning an original that was written in pencil or with some other material that is not solidly fixed on the paper. If you do not clean the feed roller, it may dirty the next original that is scanned.
-
Page 50: Cleaning The White Roller (Duplex Model Only)
6. Appendices Cleaning the White Roller (Duplex Model Only) If white stripes (in the normal paper direction) appear in the image from the reverse side of the original when a double-sided document is scanned, clean the white roller according to the procedure described below. - Page 51 E E E E E Align the arrow on the reverse side of the white sheet with the document home position. Note Make sure that the white sheet does not lie on the scales. 1: Home position 2: Scales F F F F F Gently close the Auto Document Feeder (ADF), and press it down on it firmly.
-
Page 52: Moving The Scanner
6. Appendices Moving the Scanner Caution: The scanner weighs a maximum 29kg. When moving the scanner, always hold it with the Auto Document Feeder (ADF) against yourself, and lift it up slowly so as not to strain yourself. Trying to lift the scanner even though it is too heavy for you, or handling the scanner carelessly and dropping it can result in injury. -
Page 53: Carrying The Scanner A Short Distance
Carrying the Scanner a Short Distance A A A A A Turn off scanner power, and unplug the power cable from the power outlet. B B B B B Disconnect the SCSI cables. C C C C C Grasping the scanner on the sides, above the bottom, and with the Auto Document Feeder (ADF) closest to yourself, carry the scanner to its new location. -
Page 54: Options
6. Appendices Options This section describes options that are sold separately. Image Processing Unit Type A Note The Image Processing Unit Type A is an option. If this option is used, the following image processing features become possible: Dynamic Threshold This function automatically determines a suitable threshold value on the basis of the brightness of the original, and converts the scanned image to binary data. -
Page 55: Endorser Unit Type A(Printing Function)
Endorser Unit Type A (Printing Function) Note The Endorser Unit Type A (Printing Function) is an option for some models, and is standard equipment on other models. The Endorser Unit Type A (printing function) can print a symbol or number on originals that have been scanned by the Auto Document Feeder (ADF). -
Page 56: Specifications
6. Appendices Specifications Scanner Electrical and Hardware Specifications Type Scanning methods Scanning area Resolution Gray scale Scanning time Scanning speed Warm-up time Interface Power consumption Size Weight Desktop flatbed scanner Fixed original scanning and moving original scanning Main-direction: 298mm (11.7”) max. Sub-direction: 432mm (17”) max. -
Page 57: Dip Switches
DIP Switches Only the settings of DIP switches 1 through 3 can be changed. Do not change the settings of the other switches. Important If multiple scanners with the SCAM function enabled are connected on the same daisy chain, the host will not be able to recognize the IDs. In this case, set DIP switch 1 to “ON”(SCAM function disabled), and set the SCSI ID with the rotary switch. -
Page 58: Functions
6. Appendices Functions The scanner driver can be used to perform the following image processing functions: Preview Scan Scanning Composition Binary Scanning/Threshold Halftone Scanning Gray Scale Scanning Area Extraction Section Area (Multi-area Settings) Auto Photo/Letter Resolution Brightness Contrast Gamma Correction Binary Filters Parameter Download Document Size Detection... -
Page 59: Scan
Scan This function scans an original once the scanning area, scanning composition, resolution, and other values have been set. When setting these values, consideration should be given to the original that is to be scanned and to the output device (display, printer, etc.). For example, it is meaningless to scan an original at high resolution if the resolution of the output device is lower than the scanning resolution, especially because high-resolution scanning uses a great deal of memory and requires more processing time. -
Page 60: Binary Scanning/Threshold
6. Appendices Binary Scanning/Threshold The binary scanning function converts the original into black and white image data. If the original contains any intermediate colors, they are compared with the threshold value and determined to be either black or white accordingly. The threshold value can be set to any of 255 gradations; any intermediate colors that are brighter than the threshold value are scanned as “white,”... -
Page 61: Halftone Scanning
Halftone Scanning Halftone scanning converts the original into an image consisting of pseudo-halftones produced by dot shading (in which shading is achieved through combinations of black and white dots, as in newspaper photographs). This function is used to output an original that has intermediate tones, such as a photo, on an output device that can only produce monochrome output, such as a laser printer. -
Page 62: Gray Scale Scanning
6. Appendices 70 LPI Gray Scale Scanning Glay Scale scanning converts an original into image data consisting of 4-bit or 8-bit gradations. Four bits can express 16 gradations, and eight bits can express 256 gradations. This function is used to output an original that contains intermediate tones on an output device that can express intermediate tones for a single pixel, such as a display or a Dye Sublimation printer. -
Page 63: Area Extraction
Functions Area Extraction This function extracts and scans a specified rectangular area within a scanning area. For example, to scan just the photograph portion of the original shown below, specify the area where the photograph is located. The rectangular area is specified by specifying the coordinates of the upper left corner of the rectangle, and the vertical and horizontal lengths. -
Page 64: Section Area (Multi-Area Settings)
6. Appendices Section Area (Multi-area Settings) This function permits the specification of up to four rectangular areas of any size within the scanning area, each of which can be set as the scanning area. When overlapping areas are set, the area that was set last takes priority. -
Page 65: Auto Photo/Letter
Auto Photo/Letter This function automatically determines whether the image being scanned is text (binary image) or photo (intermediate tone image), and scans the text areas in binary scanning mode and the photos in halftone scanning mode. This function is used in order to automatically scan text in binary scanning mode and photos in halftone scanning mode. -
Page 66: Resolution
6. Appendices Resolution This function permits setting separate resolutions for the main-scanning and the sub-scanning, over a range of 100dpi to 800dpi (in 1dpi increments) for each. A high resolution setting requires more free space in memory and requires more processing time. Basically, when outputting a scanned image that is the same size as the original image, set the same resolution as that of the output device. -
Page 67: Brightness
Brightness The brightness can be adjusted to 255 levels. If a high value is set for the brightness, the image will become brighter overall. If a low value is set, the image will become darker overall. When scanning a dark original, set a high value for the brightness; when scanning a bright original, set a low value for the brightness. -
Page 68: Gamma Correction
6. Appendices Gamma Correction The following types of gamma correction are possible. However, different models of output devices have different characteristics. Select a suitable gamma curve for the original that is to be scanned and the output device. Normal Emphasizes the contrast slightly, resulting in a somewhat sharp scanned image. Sharp Emphasizes the contrast, resulting in a sharp scanned image. -
Page 69: Binary Filters
Binary Filters The following two filters can be used for binary scanning. Noise removal This filter used to eliminate the unnecessary small dots that appear when scanning an original that is the result of several generations of photocopying. When filter is not used Smoothing This filter is used to smooth out small bumps within an image. -
Page 70: Document Size Detection
6. Appendices Document Size Detection This function automatically detects the width of the original, and sends the information to the personal computer. Document Size Detection on the Contact Glass Document Size Detection in the Auto Document Feeder (ADF) Note If there is any coloring on the leading edge (5mm, 0.2”) of the original, the size of the original might not be detected properly. -
Page 71: Erase Background
Erase Background This function permits selection of the white side dynamic range for scanning. When Erase Background is disabled The dynamic range is set so that a white original (D value: 0.07) reaches maximum output. When Erase Background is enabled During scanning, the portion of the original that is closest to white is deemed to be white, and the dynamic range is set so that the portion in question reaches maximum output. -
Page 72: Index
6. Appendices Index ADF Cover ----------------------- 4, 29, 34 Area Extraction --------------------------- 49 Auto Document Feeder (ADF) --- 1, 3, 5, 17, 19, 21, 22, 23, 28, 29, 36, 37, 39 Auto Photo/Letter ------------------ 40, 51 Auxiliary Table ----------------------- 3, 21 Binary Filters ------------------------------ 55 Binary Scanning ---------------------- 45, 46 Brightness ---------------------------------- 53... - Page 73 Parameter Download --------------------- 55 Platen --------------------------------------- 34 Power Cable -------------------------------- 13 Power Connector ----------------------- 4, 14 Power On ------------------------------------- 5 Power Switch ---------------------- 3, 13, 15 Preview ------------------------------------- 44 Red Lamp Unit ---------------------------- 40 Reset Switch ---------------------------- 4, 16 Resolution ---------------------------------- 52 Rotary Switch --------------------------- 4, 11 Scale ----------------------------------------- 20 SCAM --------------------------------- 10, 43...
- Page 74 6. Appendices...