CompuLab fitlet2 Owner's Manual
Hide thumbs
Also See for fitlet2:
- Installation instructions (5 pages) ,
- Installation manual (2 pages) ,
- Installation instructions (4 pages)
Table of Contents
Advertisement
Advertisement
Table of Contents

Related Manuals for CompuLab fitlet2


Summary of Contents for CompuLab fitlet2
- Page 1 Owner’s Manual Revision 1.1 Dec-2017...
-
Page 2: Safety Instructions
Damage due to servicing that is not authorized by Compulab is not covered by your warranty. Read and follow the safety instructions that came with the product. -
Page 3: Table Of Contents
Package contents..................4 Hardware specifications................. 5 Connectors layout..................6 Quick start guide ................7 Minimum requirements ................7 Identifying fitlet2 configuration ............7 Opening fitlet2 ....................7 Installing RAM ....................9 M.2 cooling plate and SSD..............10 RTC battery ....................12 Re-assembling fitlet2 ................ -
Page 4: Introduction
Tel: +972-48-290-168 | Fax: +972-48-325-251 | www.fit-iot.com Introduction Thank you for purchasing fitlet2. It is a miniature PC designed to be tough, capable, versatile and user-friendly. With proper installation we expect fitlet2 to serve you for many years. The unique fanless design of fitlet2 eliminates the need for any maintenance after installation. -
Page 5: Hardware Specifications
112 mm X 84 mm X 34 mm Weight 350g Warranty 5 years Warranty notes Storage device warranty in accordance with device manufacturer’s warranty. Excludes battery. For the latest specifications please visit: www.fit-iot.com/web/products/fitlet2/fitlet2-specifications/ www.fit-iot.com Page 5 of 17 fitlet2 owner’s manual... -
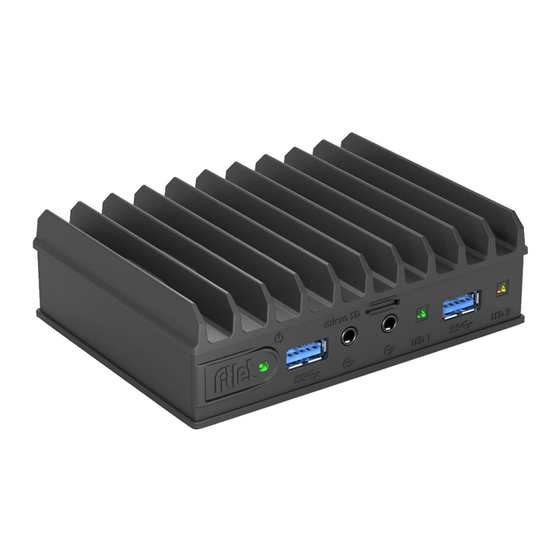
Page 6: Connectors Layout
Hayetsira St. 17, Yokneam, Israel Tel: +972-48-290-168 | Fax: +972-48-325-251 | www.fit-iot.com Connectors layout www.fit-iot.com Page 6 of 17 fitlet2 owner’s manual... -
Page 7: Quick Start Guide
Identifying fitlet2 configuration fitlet2 configuration is detailed on the label attached to the bottom side of the computer. Note Pay attention to RAM and storage. If not installed fitlet2 will not boot. You will have to first install these devices. Opening fitlet2 You will need to open fitlet2 in order to install RAM, storage and RTC battery. - Page 8 Tel: +972-48-290-168 | Fax: +972-48-325-251 | www.fit-iot.com To open fitlet2 please follow these steps: 1. Place fitlet2 on a flat surface bottom-up. 2. Open the four screws using the Phillips screwdriver (counter clock-wise). 3. Lift the bottom cover to remove it. Side panels should fall-off.
-
Page 9: Installing Ram
Tel: +972-48-290-168 | Fax: +972-48-325-251 | www.fit-iot.com Installing RAM RAM socket is positioned on the top side of the motherboard. fitlet2 accepts a single SODIMM DDR3L (1.35V). Insert DDR3L SODIMM module and press it down until it is latched firmly on both sides. www.fit-iot.com Page 9 of 17 fitlet2 owner’s manual... -
Page 10: M.2 Cooling Plate And Ssd
• Assist in battery placement • Provide proper cable management inside fitlet2 fitlet2 accepts M.2 M-key 2242 | 2260 SATA SSD. The SSD has to be fastened to the M.2 cooling plate. Then the M.2 cooling plate is placed at the underside of the motherboard and fastened to the front and back panel. - Page 11 6. Turn over the M.2 cooling plate and push the M.2 SSD into its socket at the underside of the motherboard. 7. Push down the M.2 cooling plate and tighten the 3 panel screws www.fit-iot.com Page 11 of 17 fitlet2 owner’s manual...
-
Page 12: Rtc Battery
Tel: +972-48-290-168 | Fax: +972-48-325-251 | www.fit-iot.com RTC battery The RTC battery is used for keeping time and date while fitlet2 is disconnected from power. BIOS settings and power-up policy is independent of battery. fitlet2 normally ships with the battery unplugged to ensure that the battery is not discharged during warehousing. -
Page 13: Re-Assembling Fitlet2
Hayetsira St. 17, Yokneam, Israel Tel: +972-48-290-168 | Fax: +972-48-325-251 | www.fit-iot.com Re-assembling fitlet2 Place the fitlet2 onto the top cover. Note: The top cover is symmetric – direction does not matter. Place the bottom cover onto the fitlet2. Important note: The tall U-shaped boss has to be near the M.2 sockets. Otherwise the... -
Page 14: Connecting Fitlet2
Insert the DC plug into the fitlet2 DC-in jack. Rotate clockwise 90° to secure. Slide into the power-supply the AC blade correct to your country and plug the power- supply into an AC-outlet. The power button on fitlet2 should turn green, in a few seconds an image should appear on the display. -
Page 15: Entering Bios Setup
Hayetsira St. 17, Yokneam, Israel Tel: +972-48-290-168 | Fax: +972-48-325-251 | www.fit-iot.com Entering BIOS Setup Turn off the fitlet2. Turn on while holding down the Del key, until access into AMI Inc. BIOS utility. See http://www.fit-pc.com/wiki/index.php/Main_Page. Installing and booting operating system Please consult https://www.fit-iot.com/web/products/fitlet2/os... -
Page 16: Service
Compulab guarantees products against defects in workmanship and material for a period of 60 months from the date of shipment. • Your sole remedy and Compulab’s sole liability shall be for Compulab, at its sole discretion, to either repair or replace the defective product at no charge. •... - Page 17 -Reorient or relocate the receiving antenna. by the party responsible for -Increase the separation between the equipment compliance (Compulab Ltd.) could and receiver. void the user’s authority to -Connect the equipment into an outlet on a circuit operate the equipment.