
Related Manuals for Tecsun S-8800


Summary of Contents for Tecsun S-8800
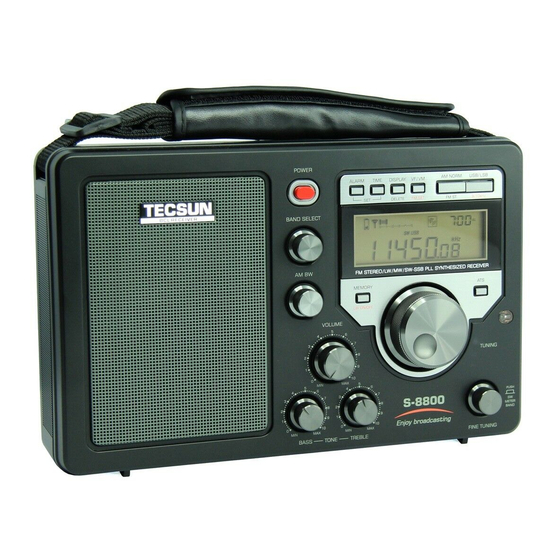
- Page 1 TECSUN FM Stereo/LW/MW/SW SSB PLL Synthesized Receiver S-8800 OPERATION MANUAL TECSUN ELECTRONIC IND. LTD.
-
Page 3: Table Of Contents
CONTENTS 1. LCD SYMBOL DESCRIPTION ..................1 2. LOCATION OF CONTROLS (FRONT OF THE RADIO) ..........2 LOCATION OF CONTROLS (SIDE AND BACK OF THE RADIO) ....... 3 3. REMOTE CONTROL OPERATION ................4 4. INSTALLING BATTERIES ..................... 5 5. HOW TO TURN ON/OFF THE RADIO ................6 6. -
Page 4: Lcd Symbol Description
LCD SYMBOL DESCRIPTION Clock time, Alarm time (AL), SW meter band (mb), Frequency memory storage location (PRESET), Charging time (Charge) indication Alarm on indication Sleep timer on indication Battery display Full battery power: Depleted battery power: Signal strength indication Weak signal: Strong signal: Radio ON display: Frequency, bandwidth, volume and clock time display... -
Page 5: Location Of Controls (Front Of The Radio)
LOCATION OF CONTROLS ( FRONT OF THE RADIO ) Time setting Display/Delete Alarm setting (by radio only) In radio ON mode: - Press to switch between “Clock time” and “Alarm time” in the top right corner of the LCD; in View Memory Power/Sleep: (VM) mode the LCD also displays the “Station memory location”. -
Page 6: Location Of Controls (Side And Back Of The Radio)
LOCATION OF CONTROLS ( SIDE AND BACK OF THE RADIO ) INT ANT./EXT ANT. switch Telescopic antenna (for short wave and FM) DC (5V) USB Charging socket - “INT ANT.” position: When using the telescopic antenna. - “EXT ANT.” position: When using an external antenna. DX / LOCAL switch DX position: For long-distance reception, and when the received signal is weak. -
Page 7: Remote Control Operation
In VM mode, press bandwidth filter. - AM mode: 2.3kHz / 3kHz / 4kHz / 6kHz and hold to scan all available stored TECSUN - SSB mode: 0.5kHz / 1.2kHz / 2.3kHz / 3kHz stations in the selected frequency band. RM-007 / 4kHz AM NORM. -
Page 8: Installing Batteries
INSTALLING BATTERIES (RADIO) 1. Open the battery compartment located at the back of the unit. 2. Correctly install two 18650 lithium batteries by following the polarity diagram. Note: This device has battery detection circuits, supplied with detection buttons and LEDs located at both ends of the battery compartment. -
Page 9: How To Turn On/Off The Radio
INSTALLING BATTERIES (REMOTE CONTROL) The operating voltage of the remote control is 3V and requires two pieces AAA (R03) size batteries. 1. Open the battery door. 2. Insert two AAA-size batteries Close the battery door. following the indicated polarity. HOW TO TURN ON/OFF THE RADIO After installing the batteries, press the [POWER] button... -
Page 10: Volume & Tone Control
VOLUME & TONE CONTROL Volume control Radio: Rotate the [VOLUME] knob to adjust to your desired volume level. Volume indicator (level 0-30) Remote control: Press the [VOL+ / VOL-] button Volume display while using Remote Control the remote control for your desired volume level. -
Page 11: Mw Tuning Step & Fm Frequency Range Setting
MW TUNING STEP & FM FREQUENCY RANGE SETTING To meet the broadcasting conditions in different countries, you can preset the MW tuning step and FM frequency range following the below steps: MW tuning step (9kHz / 10kHz) setting In radio OFF mode, press and hold the [9/10kHz] button on either the radio remote control . -
Page 12: Antenna Selection And Connection
4. Do not use a gas pipeline or AC power outlet for grounding purposes. 1. Long Wave and Medium Wave antenna: The S-8800 radio uses a built-in magnetic rod (ferrite) antenna to receive long wave and medium wave signals. Since this ferrite antenna is directional, minimizing interference and achieving the best reception for long wave and medium wave signals requires repositioning of the radio. - Page 13 AN-05 external antenna ” (can be purchased separately) to the telescopic antenna of the S-8800. Fix the opposite end at a high location outside the building, then push the [INT ANT. / EXT ANT.] antenna switch to “INT ANT.” position.
- Page 14 Connecting a low-impedance short wave antenna Example: symmetrical horizontal antenna: Connecting a high-impedance short wave antenna Example: inverted L-shaped antenna Warning: Do not use the water pipe as the ground wire for anti-lightning protection!
- Page 15 3. Antenna for FM For receiving FM signals, you can either use the telescopic antenna or an external antenna. When using the telescopic antenna, push the [INT ANT. / EXT ANT.] switch “INT ANT.” position. Changing the length and angle of the telescopic antenna can improve the reception.
-
Page 16: Broadcasting Knowledge: How To Achieve Long-Distance Fm Radio Reception (Fm-Dx)
Broadcasting knowledge: How to achieve long-distance FM radio reception (FM-DX)? To enhance reception, use an outdoor VHF antenna or suitable FM antenna (low attenuation coaxial cable), fix it as high as possible (take into account the antenna usage safety alerts) and point it in the direction of the desired FM broadcast. If the signal is weak, you may require installing a low-noise antenna amplifier. -
Page 17: Vf (View Frequency) & Vm (View Memory) Mode
VF (View Frequency) & VM (View Memory) MODE VF (View Frequency): Press the [VF/VM] button on the radio or remote control . When the clock or alarm time is shown in the upper right corner of the display, the VF mode is activated. -
Page 18: Am Bw (Bandwidth) Selection
Note: The frequency scanning direction is based on the last used tuning direction. When the last used tuning direction was up frequency/down frequency, then the scanning direction is also up frequency/ Auto Scan Tuning display down frequency. DIRECT KEYPAD ENTRY In VF mode, you can press the numeric keys [0-9] on the remote control to directly... -
Page 19: Ssb (Single Side Band) Selection
Choosing a wider band (local stations / strong signals): It has better audio fidelity when receiving strong signals or local stations. Choosing a narrower band (long distance stations / weak stations): 1. Suitable for receiving weak and long AM Bandwidth display distance stations. -
Page 20: Fm Stereo
The figure shows an AM signal that has two sidebands with information, each a copy of the other, and the carrier wave. To enhance the efficiency of the signal, the carrier wave and either one of the sidebands can be eliminated. What remains is a single side band (SSB). -
Page 21: How To Reduce Interference When Listening To Fm Radio
2. How to reduce interference when listening to FM radio? - Change the length of the telescopic antenna: In general, when listening to lower frequencies (such as 89.3 MHz), fully extend the telescopic antenna. When listening to higher frequencies (such as 105.2 MHz), reduce the length of the antenna;... - Page 22 When using the remote control, in VF mode, you can directly key in the station frequency. Press the [M] button, then key in a memory location. Press the [M] button again to confirm. METHOD 2: Semi-auto storage Radio operation: [VF/VM] and [MEMORY] buttons Remote control operation: [SCAN] and [M] buttons...
- Page 23 MW ATS i) Turn on the radio, select VF mode and rotate the [BAND SELECT] knob press the [MW] button on the remote control to choose MW band. ii) Press the [ATS] button on the radio or press and hold the [MW] button on the remote control to activate the auto tuning storage function.
-
Page 24: Broadcasting Knowledge: Why Are More Mw Stations Received At Night Than During The Day
4. For MW, due to the characteristics of radio waves, more radio stations can be received during nighttime than daytime. 5. It is advised to repeat the ATS function for SW from time to time, since SW reception is affected by a variety of factors. SW radio waves are affected by the condition of the ionosphere, which varies according to the time of day, seasons and the state of the sun. -
Page 25: Listening To Stored Stations
LISTENING TO STORED STATIONS Turn on the radio, select your desired FM/LW/MW/SW band and press the [VF/VM] button to enter the View Memory [VM] mode. When in VM mode, the memory location “PXXX” is displayed in the upper right corner of the LCD. Browse all stored stations through any of the below methods. -
Page 26: Deleting Stored Stations
DELETING STORED STATIONS Choose the frequency band from which to delete stored stations, and then enter the View Memory (VM) mode. Rotate the [TUNING] knob to select a station, then use any of the below methods to delete: METHOD 1: Delete a single station Press and hold the [DELETE] button on the radio, or press and hold the [ONE] button... -
Page 27: Broadcasting Knowledge: Why Is The Sw Broadcasting Sound So Unstable, Continuously Changing Between Large And Small Sound
Broadcasting knowledge: Why is the SW broadcast sound so unstable, continuously changing between large and small sound? The cause can be found in the unstable nature of the ionosphere, which reflects SW signals back to earth. The height, thickness and density of the ionosphere influence how well SW signals are reflected, but these conditions change constantly, especially during daytime. -
Page 28: Alarm Setting (By Radio Only)
ALARM SETTING (by radio only) 1. Press and hold the [ALARM] button Alarm ON symbol hours minutes on the radio until the hours indicator starts blinking in the upper right corner of the LCD. Rotate the [TUNING] knob to adjust the hours. Then press the [ALARM] button to confirm the hours setting. -
Page 29: Sleep Timer Setting
SLEEP TIMER SETTING It is possible to set a timer (1-120 minutes) “Sleep Timer” symbol after which the device automatically turns off. In power OFF mode, press and hold the [POWER] button on the radio, then use the [TUNING] knob to adjust the setting. -
Page 30: Display & Backlight Features
DISPLAY & BACKLIGHT FEATURES DISPLAY While listening to the radio: i) Press the [DISPLAY] button on the radio to display the clock time “00:00”, alarm time “00:00 AL” or memory location “PXXX” (only in VM mode) in the top right corner of the LCD. -
Page 31: Built-In Charging Function
BUILT-IN CHARGING FUNCTION To utilize the built-in charging function, insert 2 pieces 18650 lithium battery, then connect a 5V / 1A DC adaptor with a USB mini-B plug to the device. The battery level indicator on the LCD advances from down to up while charging, with the symbol “... -
Page 32: Trouble Shooting
TROUBLE SHOOTING QUESTIONS ANSWERS SOLUTIONS - Batteries have no power. - Replace or charge the batteries. Cannot turn on the radio - Batteries are installed - Take note of the correct polarity incorrectly. direction, then reinstall the batteries. - Firmware glitch. - See section 28 on Firmware Reset. -
Page 33: Firmware Reset Function
FIRMWARE RESET FUNCTION This device works on advanced and stable firmware to enhance users’ enjoyment. In the event that a sudden firmware glitch does occur, press the [RESET] button to return to normal operation; stored stations will not be lost when resetting the firmware. - Page 34 S/N SENSITIVTY (S / N = 26dB) better than 3mV / m MW: (S / N = 26dB) better than 1mV / m SW: (S / N = 26dB) better than 20μV SSB: (S / N = 10dB) better than 1μV (S / N = 30dB) better than 3μV SELECTIVITY LW / MW: >...
-
Page 35: Radio Maintenance
SPEAKER Impedance: 8Ω Power: 2W STEREO EARPHONES JACK: 32Ω, Ф3.5mm POWER SUPPLY Rechargeable battery: 2 x 18650 lithium battery (7.4V) Battery for remote control: 2 x AAA size battery (3V) External charger: DC 5V / 1A UNIT DIMENSIONS: 272 x 173 x 88 mm RADIO MAINTENANCE 1. -
Page 36: Memorandum
MEMORANDUM... - Page 37 MEMORANDUM...
- Page 38 MEMORANDUM...
- Page 40 TECSUN TECSUN ELECTRONIC IND. LTD. Address: Rm 11, 13/F, Block A, Hoi Luen Ind. Ctr., 55 Hoi Yuen Road, Kwun Tong, Kowloon, Hong Kong. E-mail: tecsun@on-nets.com Website: www.tecsun.com.cn V120117...