Table of Contents
Advertisement
Advertisement
Table of Contents

Related Manuals for Kodak 8810


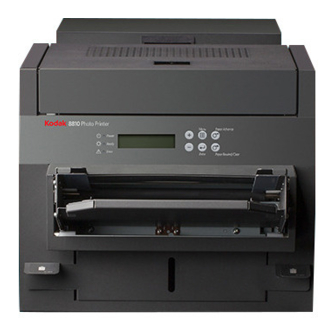
Summary of Contents for Kodak 8810
- Page 1 KODAK 8810 Photo Printer 8810 Photo Printer User’s Guide June 2009...
- Page 2 Eastman Kodak Company Rochester, New York 14650 © Eastman Kodak Company, 2009 Kodak is a trademark of Eastman Kodak Company. P/N 4J7045...
-
Page 3: Table Of Contents
Table of Contents 1 Setting Up the Printer Package Contents............................1-1 Preparing the Printer for Use ........................1-2 Connecting the Power Cable........................1-3 Connecting the USB Cable........................1-3 Turning On the Printer ...........................1-3 Handling and Storing the Paper and Ribbon.................... 1-4 Loading the Ribbon............................1-4 Loading the Paper............................ - Page 4 Table of Contents Appendix B: Safety and Regulatory Information Important Safety Information ........................B-1 Safety Labels ..............................B-2 Regulatory and Safety Compliance ......................B-3 Safety ................................B-3 Electromagnetic Compatibility (EMC) ....................B-3 Noise Emission ............................B-5 Disposal...............................B-5 China RoHS ............................... B-6...
-
Page 5: Setting Up The Printer
Setting Up the Printer Package Contents The KODAK 8810 Photo Printer is packaged with the following items: 1. Printer 2. Exit tray (not installed) 3. Trim tray (not installed) 4. Paper flange with gear (blue) 5. Paper flange without gear (red) NOTE: A power cord and USB cable are included with some configurations. -
Page 6: Preparing The Printer For Use
Setting Up the Printer Preparing the Printer for Use CAUTION: The printer weighs approximately 60 lbs (27 kg) and is heavier at the front than at the back. Always use two people when lifting or moving the printer. NOTE: Keep the carton and packaging in case you ever need to transport the printer. -
Page 7: Connecting The Power Cable
Setting Up the Printer Connecting the Power If you received more than one power cable with your printer, make sure to use the correct power cable for your country. Cable 1. Check that the power switch is turned off ( ). CAUTION: The power outlet must be grounded. -
Page 8: Handling And Storing The Paper And Ribbon
• Store the paper and ribbons away from direct sunlight. Loading the Ribbon Make sure you have a KODAK Photo Print Kit 8800/8810S or KODAK Photo Print Kit 8800/8810L available. These kits contain the correct ribbon for your printer (see “Printer Supplies”... - Page 9 Setting Up the Printer 4. Insert your fingers into the holes in the plastic wrapper on the end of the ribbon. Remove the plastic wrapper from the ribbon. Do not remove the label from the ribbon at this time. IMPORTANT: Label Plastic wrapper 5.
-
Page 10: Loading The Paper
Slack in the ribbon can cause a paper jam. IMPORTANT: 13. Close the top cover. Loading the Paper Make sure you have a KODAK Photo Print Kit 8800/8810S or KODAK Photo Print Kit 8800/8810L available. These kits contain the correct ribbon for your printer (see “Printer Supplies” on page A-2). - Page 11 Setting Up the Printer 4. Align the lugs on the blue flange with the notches in the paper roll, then insert into the new paper roll. Insert the red flange into the other end of the roll. Lugs Notches (blue flange) NOTE: If the paper flanges are improperly attached to the roll, the paper roll will not fit into the printer.
- Page 12 Setting Up the Printer 7. Gently close the paper door. NOTE: The ribbon must be loaded in the printer (see page 1-4) before the paper automatically loads and advances. The printer loads the paper. It then prints a blank sheet—the portion of the roll that may have fingerprints as a result of handling.
-
Page 13: Making A Test Print
Setting Up the Printer Making a Test Print Make a test print to check that the printer is installed and set up correctly. 1. Press Menu twice until Test Print Mode appears. 2. Press Enter to start printing the test print. For more information on using the operator panel in Setup mode, “Printer Settings”... -
Page 15: Operating The Printer
Operating the Printer Making Prints You make prints using photo printing software applications. For application-specific printing information, see the user’s guide or online Help for the software application. Handling and Storing Prints For best results: • Make sure hands are clean and free of food, oil, and grease. •... -
Page 16: Operator Panel Buttons
Operating the Printer Operator Panel Buttons Button Menu To enter Setup Mode. Menu scroll To scroll through printer settings. Setting To scroll forward or backward through options scroll setting options. Enter To initiate an action or accept a change. Paper To advance paper. -
Page 17: Printer Settings
Operating the Printer Printer Settings Use the operator panel buttons to review and change printer settings. Printer settings are displayed here 8810 Photo Printer Menu Paper Advance Power Ready Error Enter Paper Rewind/Clear 1. Press Menu to enter Setup Mode. -
Page 19: Maintaining The Printer
Maintaining the Printer To ensure good printer performance and high-quality prints, make sure the KODAK 8810 Photo Printer and its environment are clean and dust free. Performing Routine Maintenance To maintain good print quality, clean the exterior of the printer and... -
Page 20: Cleaning The Exterior
Fire or electric shock could result. If any foreign object enters the printer, turn off the printer power immediately, remove the power cord, and contact KODAK Service and Support. 1. Wipe the exterior of the printer and trim tray with a damp, lint-free cloth. -
Page 21: Cleaning The Platen Roller
Maintaining the Printer 4. Use another clean alcohol pad to wipe the peel roller. Rotate Peel roller the peel roller while wiping to clean all of the roller surface. 5. Allow the alcohol to dry completely (about five minutes) before you resume printing. 6. -
Page 22: Cleaning The Cleaning Rollers
Maintaining the Printer Cleaning the Cleaning It is essential to keep the cleaning rollers clean to prevent dirt from transferring back onto the prints and to keep the printer Rollers operating correctly. 1. Make sure the power switch is turned off ( ). 2. - Page 23 Maintaining the Printer 6. Repeat steps 1-3 to remove, clean and reinstall the front cleaning roller. CAUTION: The thermal head becomes extremely hot during normal operation. Do not touch it. There are sharp cutter blades inside the printer. Follow instructions carefully to avoid touching any areas that may be hazardous.
-
Page 25: Troubleshooting
Troubleshooting Problem Description or Cause Possible Solution Paper jam; error light is on, Paper is jammed in the Clear the paper jam (see page 4-3). printer does not operate printer Prints have vertical streaks Thermal print head is dirty. Clean the thermal print head (see page 3-2). -
Page 26: Resolving Operator Panel Error Messages
Power Ready Error Enter Paper Rewind/Clear Refer to the following table to resolve errors reported on the operator panel. If the error persists, contact KODAK Service and Support. Message Description or Cause Possible Solution Paper Empty The paper is empty or is not installed... -
Page 27: Clearing A Paper Jam
Troubleshooting Clearing a Paper Jam 1. Press the Paper Rewind button twice. 2. Open the paper door. Menu Paper Advance Enter Paper Rewind/Clear 3. If the paper is not fully rewound, manually rewind the paper onto the roll. CAUTION: To prevent damage to the printer, do not pull abruptly on the paper. -
Page 28: Recovering From A Power Interruption
6. Close the top cover. 7. Turn on the printer. If the Paper Jam message is still displayed on the operator panel, contact KODAK Service and Support. Recovering from a Power Interruption CAUTION: If the printer loses power while printing, the printer stops with the thermal print head positioned against the platen roller. -
Page 29: Appendix A: Additional Information
Appendix A: Additional Information System Requirements • Computer with MICROSOFT WINDOWS XP, WINDOWS 2003 Server, WINDOWS VISTA Operating System • Minimum 1.0 GHz Celeron Microprocessor • Minimum memory requirement is determined by your operating system • Minimum 2 GB of available hard disk space •... -
Page 30: Printer Supplies
* Paper and ribbon rolls contain material to make the stated print quantity. The paper roll contains a small amount of additional paper for lead edge and trailing edge waste. Thermal Printer Cleaning Use the KODAK Thermal Printer Cleaning Kit when performing routine maintenance on the printer (see page 3-1). -
Page 31: Packing And Transporting The Printer
3. Repack the printer in the original packing box. See the packing/unpacking instructions included with the box. Getting Help Help with your printer is available from the following sources: • “Chapter 4 Troubleshooting” in this user’s guide. • KODAK Service and Support. -
Page 33: Appendix B: Safety And Regulatory Information
Do not touch it. • Alcohol pads are used to clean the thermal print head and other internal printer components. In the United States, for health, safety, and environment information, call 585-722-5151. Customers outside the U.S. can contact KODAK Service and Support. -
Page 34: Safety Labels
Safety and Regulatory Information Safety Labels Please observe the important safety warnings that are posted on the printer. CAUTION HOT SURFACE To prevent burns, avoid touching the thermal print head. CAUTION SHARP OBJECTS The metal edges of the printer may be sharp. CAUTION SHARP CUTTER BLADE There are sharp cutter blades inside the printer. -
Page 35: Regulatory And Safety Compliance
Safety and Regulatory Information Regulatory and Safety Compliance Safety Complies with UL 60950-1 CAN/CSA C22.2 No. 60950-1-03 EN 60950-1 IEC 60950-1 Tested for Norwegian IT Power systems 240V phase to phase Electromagnetic NOTE: This equipment has been tested and found to comply with the limits for a Class A digital device, pursuant to part 15 Compatibility (EMC) of the FCC rules. - Page 36 Safety and Regulatory Information CAUTION: This is a class A product. In a domestic environment this product may cause radio interference in which case the user may be required to take adequate measures. “Changes or modifications not expressly approved by the party responsible for compliance could void the user’s authority to operate the equipment.”...
-
Page 37: Noise Emission
In the European Union, this symbol indicates that when the last user wishes to discard this product, it must be sent to appropriate facilities for recovery and recycling. Contact KODAK Service and Support or refer to www.kodak.com/go/recycle additional information on the collection and... -
Page 38: China Rohs
This value is assigned based on normal use of the product as described in the operating instructions. Table of hazardous substance's name and concentration Model Name: KODAK 8810 Photo Printer...