Table of Contents
Advertisement
Extended User Guide
KODAK
VERITÉ 64 series
WIRELESS ALL-IN-ONE INKJET PRINTER
We're glad you chose this KODAK VERITÉ Wireless All-In-One Inkjet
Printer.
Need help fast?
Read your Quick Start Guide and/or Extended User Guide first for quick tips that make using your KODAK
VERITÉ Wireless All-In-One Inkjet Printer more enjoyable. If you have read your instructions and still need
assistance, you may access our online help at
www.kodakverite.com/support
or call 1-844-995-6325 (1-844-99KODAK)
Details, explanations, and expressions displayed on your smartphone/tablet/PC display may differ from those
shown in this Extended User Guide. The displayed items and specifications are subject to change without
notice.
Advertisement
Table of Contents

Related Manuals for Kodak VERITE 64 series


Summary of Contents for Kodak VERITE 64 series
- Page 1 Printer. Need help fast? Read your Quick Start Guide and/or Extended User Guide first for quick tips that make using your KODAK VERITÉ Wireless All-In-One Inkjet Printer more enjoyable. If you have read your instructions and still need assistance, you may access our online help at www.kodakverite.com/support...
-
Page 2: Table Of Contents
Contents Introduction ........... 3 Settings ............40 Notice and Safety ..................3 Wi-Fi Setup ....................40 Dear Customer ..................3 Google Cloud Print™ ................42 About this Extended User Guide ............3 AirPrint ....................... 43 Software update ..................43 Printer Utility .................... 43 General safety information ...... -
Page 3: Introduction
» Refer to “Scanner” on page 37. operation of your device. Your Kodak Product and supplies have been designed and tested to meet strict safety requirements, including safety agency evaluation About this Extended User Guide and certification, compliance with electromagnetic regulations and established environmental standards. -
Page 4: General Safety Information
General safety information Never use a gas duster on this device. This gas trapped inside of ● this device may cause ignition and explosion. In the event that the device becomes too hot, or if you see smoke Funai reserves the right to change products at any time without ●... -
Page 5: Trademark Information
Windows logo are trademarks of the Declaration of conformity Microsoft group of companies in the United States and/or other Trade Name : KODAK countries. Responsible party : FUNAI CORPORATION, Inc. Google™, Google Chrome™, Chrome OS™, Google Drive™, ●... - Page 6 Punishment of Crimes Related to Stamps, Act on Control of Imitation of Stamps. © 2017 Funai Electric Co., Ltd. All rights reserved. The Kodak trademark, logo and trade dress are used under license from Kodak. Funai is a registered trademark of Funai Electric Co., Ltd. and may not be used in any way without the express written consent of Funai.
-
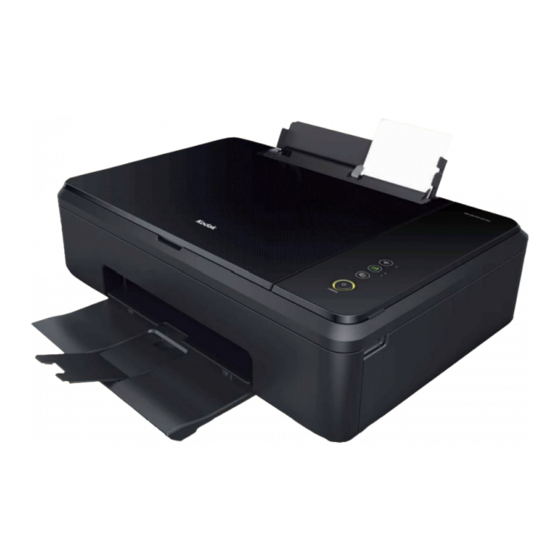
Page 7: Overview
When opening the lid/door Overview Scanner glass Front view Ink door Paper support Ink cartridge holder Paper guide Front cover Photo Tray Scanner lid Paper exit tray Exit tray extender Control panel and LED indicators Rear view Rear Cover (Duplex Unit) Printer USB port —... -
Page 8: Control Panel
Control panel Indicates a paper jam has occurred. — (Paper Jam) Indicates the connection status of — (Wireless) (Black ink) LED the Wireless Network and Easy Simple Print. Indicates ECO mode — (ECO) (Color ink) LED Indicates the present unit's status. —... -
Page 9: Meaning Of Led Behavior And Lights
Meaning of LED behavior and lights Black ink LED — — indicated by indicated by — — Color ink LED indicated by — — — — Paper jam LED Wireless LED — — — — indicated by — — — ECO LED indicated by indicated by... - Page 10 ECO mode status LED(s) Behavior Meaning / Possible cause(s) No light Indicates that ECO mode0 (ECO Off). Lights up Indicates that ECO mode1 is ON (Save 20% ink). Lights up Indicates that ECO mode2 is ON (Save 20% ink, page reduced 12%). Network status LED(s) Behavior...
-
Page 11: Initial Operation
Note(s) Missing package contents If any of the parts are missing or damaged, please contact ● an Authorized Service Center or Kodak Support. Note(s) Unpack How to Remove / Re-Install the Rear Cover (Duplex Unit) Place your fingers in the bottom concave area, then... -
Page 12: Install Ink Cartridges
Slide the color ink cartridge all the way into the right slot Install ink cartridges using the green rail. Color(Right) Install ink cartridges to ink cartridge holder Remove the black and color ink cartridges from packaging. Black Color Black(Left) Remove the plastic tape on the black and color ink cartridges using the red pull tab. -
Page 13: Load Paper
Set the plain paper (Letter or A4 size 20 lb. or 75 g/m2) onto Load paper the paper support. You can load up to 60 plain paper sheets. Slide the paper guide firmly against the edge of the paper. Set paper onto the paper support Reach your hand to the back of the unit, just above the Rear Cover (Duplex Unit), and lift up the center of the Paper Support. -
Page 14: Initial Setup
How to download the printer driver Initial setup From your PC go to www.kodakverite.com/support confirm that the “DOWNLOADS” is selected. Before you download the printer driver to your PC Select the model number of your unit from [SELECT PRINTER]. Requirements Select “PC drivers and software”... -
Page 15: Install The Printer Driver To Your Pc
Double-click on [KODAK-VERITE 64 Installer.mpkg]. Note(s) If the installer does not start when you double-click ● [KODAK-VERITE 64 Installer.mpkg], please try the Click [Agree]. following steps: Select [System Preferences] in the Apple Menu. The Apple Menu is located on the top left of the screen. Click the Apple Icon to display the pull-down menu. - Page 16 If your PC cannot find the unit, the pop-up menu will appear The unit will start scanning the alignment pattern to set an for 5 seconds. Click the instruction for the connection appropriate alignment on this unit. method you have chosen, then read the help text for more details.
- Page 17 Using USB Printer cable Open the scanner lid and place the alignment pattern paper facing down on the scanner glass, then click [Confirm] after Double-click the printer driver installer and select “USB ● closing the scanner lid. Connect”. If you accept the License Agreement, the installation of the driver will begin.
-
Page 18: Wi-Fi Setup
WPS Search Wi-Fi Setup Click [WPS Search]. Select Wi-Fi Setup type and follow the Menu display instructions. Press and hold the WPS button on your Router for a few - Click Manual Wi-Fi Settings. seconds. Manual Connect Setting Fill in the blank, Network Name(SSID), Security type, Security key, then click [Next]. -
Page 19: Changing Connection From Usb To Wi-Fi
® Disconnect the USB cable between this unit and your PC first. From the Windows® start menu, select [All apps] > [KODAK VERITE 64] > [Device setting]. Click [Printer re-search] in the [Device setting] window. Connect up the Unit to your PC. -
Page 20: Changing Connection From Wi-Fi To Usb
Click the printer, select the driver from pull-down menu [Use], then click [Add]. Connect the USB cable between this unit and your PC. Make sure to choose FUNAI KODAK VERITE 64 with [Bonjour ● Multifunction] in [Kind]. Activate [System Preferences]. -
Page 21: Eco Mode
ECO mode e. g. 4) Layout : 2-up You can easily save on ink consumption using (ECO). ECO mode status Mode Ink Density Print Size ECO mode 0 (ECO Off) Selecting ECO mode, you can automatically save ink and reduce 100% 100% ●... -
Page 22: Print Using Your Smartphone/Tablet
Print using your smartphone/tablet Use the mobile App 'Easy Simple Print' can print the data in your smartphone/tablet Printing using the print application is available. directly to the unit. Printing is also available by using the mobile App for Android™ or How to download the mobile App iOS. -
Page 23: Mobile Connection By (Wireless)
Mobile connection by (Wireless) Note(s) Check whether your smartphone/tablet supports the code ● reading first. Scan the code below (or on the Quick Start Guide) with your smartphone/tablet and visit the address obtained. Your smartphone/tablet will be connected to the website (store) where you can download the mobile App. -
Page 24: Print From A Mobile Device
Print from a Mobile Device Information about Google Cloud Print™ This unit supports Google Cloud Print™ and iOS / OS X / macOS For information about Google Cloud Print™, visit website at - AirPrint. www.kodakverite.com/support The contents of the website are subject to change without notice. ●... -
Page 25: Airprint
AirPrint Information about AirPrint With iOS / OS X / macOS AirPrint, you can print photos, emails, web For information about AirPrint, visit website at - pages, and documents wirelessly from your Apple devices (iPhone, www.kodakverite.com/support iPod touch, iPad). The contents of the website are subject to change without notice. ●... -
Page 26: Check Print Status From Your Pc
Status Messenger Settings Check print status from your PC To configure the Status Messenger, right click on the Icon in the system tray and select [Settings]. Status Messenger for Windows ® Right click The Status Messenger application automatically displays an error when a unit error has occurred. -
Page 27: Print Media
Print media Insert paper into the paper support Set paper onto the paper support Specifications for print media Reach your hand to the back of the unit, just above the Rear You can set up normal printer paper, envelopes or printed Cover (Duplex Unit), and lift up the center of the Paper documents (forms) onto the paper support. - Page 28 Loading Pre-printed Material Open the paper exit tray and exit tray extender. If you would like to print on an input sheet (for example, ● forms or stationery), place the input sheet with the Pre- printed side facing front in the paper support. Pull out the Paper exit tray all the way before opening the Exit tray extender.
-
Page 29: Print Settings
Edit detailed print setting on the Advanced Settings Print settings menu Click [Advanced Settings] on the top right corner if you want to change specific detailed settings. Confirming Printing Preferences for Windows ® Note(s) Microsoft ® Windows ® Screenshots The screen shots in this guide were made with Windows ®... - Page 30 Color Output: 2-sided printing: Select print output for [Color] or [Black and White]. You can select whether to print on one side only or print on both sides. For both sides printing, you can also select whether the [Color] Color print binding position is along the long edge or the short edge of the [Black and White] Black-and-white print paper.
-
Page 31: Confirming Print Settings For Mac
Watermark: Confirming Print Settings for Mac You can choose a watermark from two modes. (Same watermark on all pages or a different watermark on first page.) Select a watermark Note(s) that you would like to add to your print job. [Use the same watermark on all pages] Macintosh Screenshots (None) - Page 32 Save changes Layout Click on [Presets] list box, and select [Save Current Settings as Preset...]. The saved configuration information will be managed by names. Input name in [Preset Name:] textbox, then select [Preset Available For:] radio button. Click on [OK] to save and close the window. Select [Cancel] to close window without saving.
-
Page 33: Advanced Options
Cover Page If necessary, you can print the cover page. Print Cover Page: If you would like to print the cover page, select [Before document] or [After document]. Cover Page Type: If you would like to print the Cover Page, select the type of Cover Page. -
Page 34: Making Copies
Copy Setting Printing using the available print application. The Copy function is available using (Copy) on the unit. start menu, select [All apps] > [KODAK From the Windows ® VERITE 64] > [Copying]. Lift the scanner lid on the unit. - Page 35 Color Pages per Side Set the copy Color setting from pull-down menu. You can copy multiple pages on one sheet by printing smaller images on each page. Color Black and White ● ● Lift the scanner lid on the unit. Quality Load the original print side down on the scanner glass.
- Page 36 ID Card Copy You can copy both sides of a small document (e.g. ID card, business card) onto one page. Note(s) This function is valid only with Letter or A4 size paper. ● Select [ID Card Copy] from [Quick settings] menu, then click [Advanced Settings] on the top right corner.
-
Page 37: Scanner
● Content Type: Run [Scanning] from the [Start] menu as it appears in the window below. Specify the Content Type of the scan document from below: start menu, select [All apps] > [KODAK From the Windows ® Text Text/Graphics Photo ●... -
Page 38: Scan In Mac
Resolution: Scan in Mac Select the scan Resolution from below: 75 dpi 150 dpi 300 dpi 1200 dpi Run the Image Capture application. (Scanning with other ● ● ● ● applications such as “Preview” is a very similar process.) 100 dpi 200 dpi 600 dpi ●... - Page 39 Format: When choosing [Color] in [Kind:] Select the image format of the scan from below: [Brightness] to adjust the balance between light and dark. JPEG ● ● [Tint] to adjust the Color balance between red and green. TIFF ● ● [Temperature] to adjust the Color balance of warm and cool.
-
Page 40: Settings
Network and Password Settings If you would like to connect to a router manually, follow the Steps You can set up the unit as you like depending on your needs. below. From the Start Menu, activate [Device setting]. – Click the SSID you would like to connect. Enter Password and click [Connect]. - Page 41 Proxy Direct Connect Time Click [Proxy]. Click [Direct Connect Time]. Select [OFF] or [Proxy]. Select Direct Connect Time from pull-down menu. 5 min 60 min If you select [Proxy], set the items below. ● ● 10 min Unlimited ● ● Address Port ●...
-
Page 42: Google Cloud Print
Register to Google Cloud Print™ Google Cloud Print™ Click [Register/Unregister]. You can set the Google Cloud Print™ settings. Click [Google Cloud Print]. – Register printer with Google. Click [Register], then the registration will start The following are required for Google Cloud Print registration. Google account (Gmail address) Internet environment Click [Register], then registration will start. -
Page 43: Airprint
AirPrint Printer Utility Enable or disable the AirPrint function. You can perform maintenance operations. Click [Printer Utility]. – Select [Enable] or [Disable]. Device Sleep Time Software update You can set the time to go into Sleep mode. You can update your printer's Software. Click [Update Now], then automatically starts updating. - Page 44 Cartridge Setup Open the scanner lid on the unit. Load the front side of the alignment pattern result facedown at the placement corner Print the alignment pattern for alignment adjustment. By reading the of the scanner glass (see below), then click [Next] to start pattern with the scanner, the printer alignment is optimized and the the alignment adjustment after closing the scanner lid.
- Page 45 Print Reports Paper Setup Print out the configuration information. Sets the paper type and paper size. Note(s) Click [Print Reports]. If you change the following Paper Settings, the default ● Click [Start] to start printing the configuration report. paper setting values in the Copy Menu will also be changed. This setting will also affect the AirPrint paper size setting.
-
Page 46: Web Interface
The following screen will be displayed. Configuration Report Configuration Report [2017-07-04 07:42:39(UTC)] [2017-07-04 07:42:39(UTC)] Device Information Device Information Model Name Model Name KODAK VERITE 62 PLUS KODAK VERITE 64 Serial Number Serial Number XXXXXXXXXXXXXXXX XXXXXXXXXXXXXXXX Software Version Software Version X.XX.XXX (XXXXXXXX) X.XX.XXX (XXXXXXXX) -
Page 47: Device Status
Device Status Network You can check the status of the unit, such as remaining ink level. Device Configuration If necessary, you can confirm or set the state of the Network. If you are not familiar with Network management, use the default settings. Note(s) Be careful if you want to assign the IP address manually. -
Page 48: Mobile
TCP/IP (IPv4) Settings Mobile AirPrint You can AirPrint Settings. » Refer to “AirPrint” on page 25 for more information. Note(s) When you select [Certificate Installation] or [Generate ● Certificate Request], you can set the encrypted communication. AirPrint Configuration You can turn On/Off the AirPrint function. If set to On, you can print You can change the IP source / IP address or the like. -
Page 49: Order Supplies
Select Action Software Update You can set the following for the Google Cloud Print™ setting. After you select the Action, click on [Accept]. Select Action Action Register to Google Register to Google Cloud Print™ Cloud Print Disable Cloud Print Disable Google Cloud Print™ Suspend Cloud Print Suspend Google Cloud Print™... -
Page 50: Service
Service Press front side blue Cartridge tab with 2 fingers to open the Cartridge slot. Note(s) If any problems occur, please see the notifications on the ● Status Messenger (Windows ® » Refer to “Status Messenger for Windows ® ” on page 26. Checking ink levels Remove the cartridges. - Page 51 Slide the Color Ink cartridge all the way into the right slot CAUTION using the green rail. Ink Cartridge Not Inserted Correctly! Color(Right) If the Ink door does not close properly, the Ink ● cartridges are not inserted correctly. Remove the Ink cartridges and then correctly insert them again.
-
Page 52: Ordering Supplies
Cartridges. Hard Reset Using genuine KODAK VERITÉ Ink Cartridges KODAK VERITÉ Ink Cartridges are designed to perform for superior » Refer to “Troubleshooting” on page 55. print quality, and our inks are formulated to work with the unit and help extend the life of your product. -
Page 53: Cleaning The Ink Cartridge Nozzles And Contacts
Refilling ink cartridges The warranty does not cover repair of failures or ● damage caused by a refilled ink cartridge. Kodak does not recommend use of a refilled ink ● cartridge. Refilling an ink cartridge can affect print quality and ●... -
Page 54: Cleaning The Exterior Of The Unit
Cleaning the exterior of the unit Make sure that the unit is turned Off (Standby) and unplugged from the AC outlet. SHOCK HAZARD To avoid the risk of electric shock, disconnect the AC ● Power cord from the AC outlet and disconnect all cables to the unit before proceeding. -
Page 55: Troubleshooting
Troubleshooting You can correct most problems by yourself. If you need additional help, the Kodak Solutions Center offers the most up-to-date driver, manuals, the latest FAQs and troubleshooting tips. Visit our website at www.kodakverite.com/support Setup troubleshooting Press (Power/Standby) (Power) LED is not lit ●... - Page 56 Page does not print Check messages ● If an error message appears, then resolve the error before trying to print again. Check power ● If the (Power/Standby) LED is not lit, then make sure that the AC Power cord is properly connected to the unit and the AC plug is connected to a known working AC outlet that other electrical devices have been using or check this outlet with another device.
- Page 57 ® 10 / 8.1). b. Display [Start] screen, right-click for [All apps] Icon to fade into the bottom right, click [All apps], select the printer Software folder “KODAK VERITE 64” from the list (Windows ® c. Click [Start] button, Click [All Programs], and then select the printer Software folder “KODAK VERITE 64”...
-
Page 58: Network Problems
Status Messenger Error Message appears » Refer to “Check print status from your PC” on page 26. » Refer to “Status messages and LED behaviors” on page 59. Paper handling » Refer to “Print media” on page 27. » Refer to “Status messages and LED behaviors” on page 62 (status message: Paper Jam). -
Page 59: Status Messages And Led Behaviors
Status messages and LED behaviors The Status information will report problems with the unit. Take the proper action by referring to the following table. » Refer to “Check print status from your PC” on page 26. Black ink LED indicated by —... - Page 60 LED behaviors Status messages Unit status or possible causes Refer to Software Update failed. If this error has occurred, visit our website at – www.kodakverite.com/ support for the latest This error is troubleshooting. displayed when “Software update” on printer is page 43 unrecoverable.
- Page 61 LED behaviors Status messages Unit status or possible causes Refer to An ink cartridge is not installed correctly. Press and hold (Power/Standby) longer than 3 seconds to – turn the unit Off (Standby). Unplug the AC Plug. Check that the Ink Cartridges have no obstacles and clear pathways.
- Page 62 LED behaviors Status messages Unit status or possible causes Refer to Black ink is empty in the ink cartridge. You get good printed results with Color mode in this – blink as pattern 4 and condition. “Changing the ink Black ink is empty. If you want to use both Ink cartridges, please cancel cartridge”...
- Page 63 LED behaviors Status messages Unit status or possible causes Refer to Black ink is empty in the ink cartridge. You get good printed results with Color mode in this – condition. lighting Black ink is empty. - If you want to use both Ink cartridges, please cancel ●...
- Page 64 LED behaviors Status messages Unit status or possible causes Refer to This printer is in the process of Weekly Maintenance. This represents If this printer receives a print job during Weekly Maintenance, – that Weekly the print job will be processed after maintenance completes. blinks as pattern 1 -...
-
Page 65: Improving The Print Quality
Improving the print quality If printout is like below, please try the suggestions in order. Examples of poor image quality Suggestions Using genuine ink cartridges » Refer to “Ordering ink cartridges” on page 52. Checking ink levels » Refer to “Checking ink levels” on page 50. Cleaning the ink cartridge nozzles »... -
Page 66: Appendix
Appendix Specifications For more product specifications, see the Product Data Sheet at www.kodakverite.com/support Technical Data Dimensions (width x depth x height) 17.7 x 13.2 x 5.3 inches (450 x 335 x 134 mm) Maximum dimensions (width x depth x height) 17.7 x 20.5 x 15.8 inches (450 x 521 x 402 mm) Weight 9.3 lb. -
Page 67: Note About Recycling
Note about recycling This unit’s packaging materials are recyclable and can ● be reused. Please dispose of any materials in accordance with your local recycling regulations. Safety Data Sheet (SDS) To obtain Safety Data Sheets (SDS) for supplies containing chemical substances (e.g. -
Page 68: Limited Warranty
Limited Warranty Wireless All-In-One Inkjet Printer FUNAI warrants this Product to be free from malfunctions and defects in both materials and workmanship for one year from the date of purchase unless the product is sold as refurbished in which case it then comes with a (90) day Limited Warranty. LIMITS AND EXCLUSIONS: Warranty service is only available from within the country where the Product was originally purchased. - Page 69 The Kodak trademark, logo and trade dress are used under license from Kodak. www.kodakverite.com © 2017 Funai Electric Co., Ltd. All rights reserved.