Daikin Altherma EDHQ011BB6V3 Installation Manual
Unit for to water heat pump system
Hide thumbs
Also See for Altherma EDHQ011BB6V3:
- Operation manual (28 pages) ,
- Operation manual (28 pages)
Table of Contents
Advertisement
Quick Links
INSTALLATION MANUAL
Unit for air to water heat pump system
EDHQ011BB6V3
EDHQ014BB6V3
EDHQ016BB6V3
EDHQ011BB6W1
EDHQ014BB6W1
EDHQ016BB6W1
EDLQ011BB6V3
EDLQ014BB6V3
EDLQ016BB6V3
EDLQ011BB6W1
EDLQ014BB6W1
EDLQ016BB6W1
EBHQ011BB6V3
EBHQ014BB6V3
EBHQ016BB6V3
EBHQ011BB6W1
EBHQ014BB6W1
EBHQ016BB6W1
EBLQ011BB6V3
EBLQ014BB6V3
EBLQ016BB6V3
EBLQ011BB6W1
EBLQ014BB6W1
EBLQ016BB6W1
Advertisement
Table of Contents

Related Manuals for Daikin Altherma EDHQ011BB6V3


Summary of Contents for Daikin Altherma EDHQ011BB6V3
-
Page 1: Installation Manual
INSTALLATION MANUAL Unit for air to water heat pump system EDHQ011BB6V3 EDHQ014BB6V3 EDHQ016BB6V3 EDHQ011BB6W1 EDHQ014BB6W1 EDHQ016BB6W1 EDLQ011BB6V3 EDLQ014BB6V3 EDLQ016BB6V3 EDLQ011BB6W1 EDLQ014BB6W1 EDLQ016BB6W1 EBHQ011BB6V3 EBHQ014BB6V3 EBHQ016BB6V3 EBHQ011BB6W1 EBHQ014BB6W1 EBHQ016BB6W1 EBLQ011BB6V3 EBLQ014BB6V3 EBLQ016BB6V3 EBLQ011BB6W1 EBLQ014BB6W1 EBLQ016BB6W1... - Page 2 B 2 B 2 D 2 D 2 D 2 D 2 L 1 L 1 B 1 B 1 L 2 L 2 D 1 D 1 B 2 B D 2 D 2 D 2 D 2 L 1 L 1 B 1 B 1 L 2 L 2 D 1 D 1...
- Page 3 3PW57792-10B...
-
Page 4: Table Of Contents
EDHQ011~016BB6V3 EDHQ011~016BB6W1 EDLQ011~016BB6V3 EDLQ011~016BB6W1 Installation manual Unit for air to water heat pump system EBHQ011~016BB6V3 EBHQ011~016BB6W1 EBLQ011~016BB6V3 EBLQ011~016BB6W1 10. Start-up and configuration ............28 ONTENTS Page 10.1. DIP switch settings overview............28 1. Definitions.................. 2 10.2. Room thermostat installation configuration........29 10.3. -
Page 5: Definitions
INFORMATION to the equipment. Be sure only to use accessories and optional equipment made by Daikin which are specially designed for use with This symbol identifies useful tips or additional information. the products as of subject in this manual and have them installed by Some types of danger are represented by special symbols: an installer. -
Page 6: Introduction
Thank you for purchasing this product. This unit is used for both heating and cooling applications. The unit can be combined with Daikin fan coil units, floor heating applications, low temperature radiators, domestic hot water tank (option) and Daikin solar kit (option). -
Page 7: Scope Of This Manual
3.4. Typical application examples Digital I/O PCB kit (option) An optional EKRP1HB digital I/O PCB can be connected to the unit The application examples given below are for illustration purposes and allows: only. remote alarm output Application 1 heating/cooling ON/OFF output bivalent operation (permission signal for the auxiliary boiler) or Space heating only application with the room thermostat connected additional external backup heater permission signal. -
Page 8: Application 2
Domestic water heating Application 2 When domestic water heating mode is enabled (either manually by Space heating only application without room thermostat connected to the user, or automatically through a schedule timer) the target the unit. The temperature in each room is controlled by a valve on domestic hot water temperature will be achieved by a combination of each water circuit. -
Page 9: Application 3
The ON/OFF setting of the heating/cooling operation is done by the Application 3 room thermostat and cannot be done by the user interface. Space heating and cooling application with the room thermostat set Domestic water heating for heating/cooling connected to the unit. Heating is provided Domestic water heating is as described under "Application 2"... -
Page 10: Application 5
Application 5 Space heating with an auxiliary boiler (alternating operation) Space heating application by either the Daikin unit or by an auxiliary boiler connected in the system. The decision whether either the E(D/B)* unit or the boiler will operate can be achieved by an auxiliary FHL1 contact or an E(D/B)* indoor controlled contact. - Page 11 (A). are not frequently turned ON/OFF. Configuration B Daikin shall not be held liable for any damage resulting When the room thermostat requests heating, either the E(D/B)* from failure to observe this rule. unit or the boiler starts operating, depending on the outdoor (a) The aquastat valve must be set for 55°C and must operate to close the return...
-
Page 12: Application 6
When the room temperature of both zones is above the thermostat set point, the unit and pump will stop operating. Daikin only offers a dual set point control function. By this function two set points can be generated. Depending on the required water NOTICE temperature (floor heating loops and/or fan coil units are required) -
Page 13: Accessories
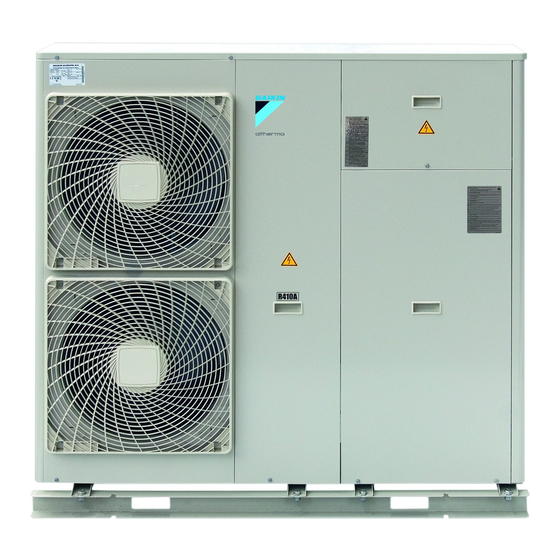
5.2. Main components CCESSORIES Hydraulic compartment (door 3) 4.1. Accessories supplied with the unit 1 Installation manual 2 Operation manual 3 Wiring diagram sticker (inside unit cover doors 1 and 2) 4 User interface kit (digital remote controller, 4 fixing screws and 2 plugs) VERVIEW OF THE UNIT 5.1. -
Page 14: Functional Diagram Of Hydraulic Compartment (Door 3)
14. Flow switch Switch box main components (door 2) The flow switch checks the flow in the water circuit and protects the heat exchanger against freezing and the pump against damage. 15. Pump The pump circulates the water in the water circuit. 16. -
Page 15: Installation
13. X9A socket NSTALLATION The X9A socket receives the thermistor connector (only for installations with domestic hot water tank). 6.1. Selecting an installation location 14. Pump fuse FU2 (in line fuse) 15. Pump relay K4M WARNING 16. Transformer TR1 for PCB power supply Be sure to provide for adequate measures in order to 17. -
Page 16: General
12 m in 10 m length. In order to optimise efficiency Daikin recommends to To prevent exposure to wind, install the unit with its suction side install the 3-way valve and the domestic hot water facing the wall. -
Page 17: Installation Servicing Space
For E(D/B)L only. Follow the procedure as described below for modifying the position of the air thermistor (R1T). The thermistor fixture is delivered in the accessory bag. INFORMATION Spare thermistor fixing plate is delivered in the accessory bag. 6.2. Installation servicing space The numerical figures used in the figures represent the dimensions in (Refer to "6.4. -
Page 18: Before Installation
6.3. Before installation (B) In case of stacked installation In case obstacles exist in front of the outlet side. Inspection At delivery, the unit must be checked and any damage must be reported immediately to the carrier claims agent. Handling Bring the unit as close as possible to its final installation position in its original package in order to prevent... -
Page 19: Important Information Regarding The Refrigerant Used
Important information regarding the refrigerant used Installation method for prevention of falling over This product contains fluorinated greenhouse gases covered by the CAUTION Kyoto Protocol. Do not vent gases into the atmosphere. Do not allow a child to mount on the unit or avoid placing Refrigerant type: R410A any object on the unit. -
Page 20: General Precautions Concerning Water Circuit
Take care that the components installed in the field piping can General precautions concerning water circuit withstand the water pressure and water temperature. Always use materials which are compatible with water used in Before continuing the installation of the unit, check the following the system and with the materials used in the unit. -
Page 21: Setting The Pre-Pressure Of The Expansion Vessel
Checking the maximum allowed water volume NOTICE To determine the maximum allowed water volume in the entire circuit, When circulation in each space heating loop is controlled proceed as follows: by remotely controlled valves, it is important that this Determine calculated pre-pressure (Pg) -
Page 22: Protecting The Water Circuit Against Freezing
If power failure can happen at times the unit is unattended, Daikin counteract acids formed by the oxidation of glycols; recommends adding glycol to the water system. Refer to Caution: "Use of glycol"... -
Page 23: Charging Water
HARGING WATER LECTRICAL WIRING WORK Connect the water supply to a drain and fill valve (see "5.2. Main 9.1. Precautions on electrical wiring work components" on page 10). Make sure the automatic air purge valve is open (at least 2 turns). WARNING: Electrical installation Fill with water until the manometer indicates a pressure of All field wiring and components must be installed by an... -
Page 24: Internal Wiring - Parts Table
9.2. Internal wiring - Parts table V1T ....IGBT (only for V3 models) X1M ....Power supply terminal strip Refer to the internal wiring diagram supplied with the unit (on the Y1E....Electronic expansion valve inside of the switch box cover). The abbreviations used are listed Y1S.... - Page 25 Door 2 electrical parts of the hydraulic compartment : TERMINAL STRIP A11P....Main PCB : CONNECTOR A12P....User interface PCB (remote controller) : TERMINAL A3P....Thermostat (EKRTW*, EKRTR*)(PC=Power Circuit) : PROTECTIVE EARTH A3P....Solar pump station PCB (EKSR3PA) DO NOT OPERATE THE UNIT BY SHORT-CIRCUITING ANY PROTECTION DEVICE A4P....
-
Page 26: System Overview Of Field Wiring
9.3. System overview of field wiring Required Maximum number of running Item Description conductors current WARNING Power supply cable for unit 2+GND Switch off the power supply before making any Power supply cable for backup connections. 2+GND heater All field wiring and components must be installed by a Power cable for bottom plate licensed electrician and must comply with the heater... -
Page 27: Field Wiring Guidelines
9.4. Field wiring guidelines Specifications of standard wiring components Most field wiring on the unit is to be made on the terminal block Door 1: compressor compartment and electrical parts: X1M inside the switch box. To gain access to the terminal block, remove the switch box service panel (door 2). -
Page 28: Connection Of The Thermostat Cable
Door 2: electrical parts of the hydraulic compartment: X10M Connection of the thermostat cable Connection of the thermostat cable depends on the application. 1N~ 50 Hz 3N~ 50 Hz 230 V 400 V See also "3.4. Typical application examples" on page 4 "10.2. -
Page 29: Connection Of The Valve Control Cables
Connection of the valve control cables Connection to a benefit kWh rate power supply Valve requirements Electricity companies throughout the world work hard to provide reliable electric service at competitive prices and are often authorized Power supply: 230 V AC to bill clients at benefit rates. - Page 30 Connect the unit to a normal kWh rate power supply When the unit is connected to a benefit kWh rate power supply, the voltage free contact of the receiver controlling the benefit kWh rate Using the appropriate cable, connect the power supply to the signal of the electricity company must be connected to clamps 17 circuit heater as shown in the wiring diagram and in the figure and 18 of X2M (as illustrated in the figure above).
-
Page 31: Installation Of The Digital Controller
Reattach the upper part of the digital controller. Installation of the digital controller CAUTION The unit is equipped with a digital controller offering a user-friendly Be careful not to pinch the wiring when attaching. way to set up, use and maintain the unit. Before operating the controller, follow this installation procedure. -
Page 32: Room Thermostat Installation Configuration
10.2. Room thermostat installation configuration 10.3. Pump operation configuration INFORMATION When no room thermostat is connected to To set the pump speed, refer to "10.8. Setting the pump the unit, toggle switch SS2-3 should be set to speed" on page OFF. -
Page 33: Domestic Hot Water Tank Installation Configuration
10.4. Domestic hot water tank installation 10.6. Pre-operation checks configuration Checks before initial start-up When no domestic hot water tank is DANGER installed, toggle switch SS2-2 should be set to OFF (default). Switch off all relevant power supply before making any connections. -
Page 34: Powering Up The Unit
10.9. Failure diagnosis at the moment of first 15 Pressure relief valve installation Check if the backup heater is completely filled with water by operating the pressure relief valve. It should purge water instead In case nothing is displayed on the remote controller (the current of air. -
Page 35: Field Settings
10.10.Field settings Detailed description The unit shall be configured by the installer to match the installation [0] User permission level environment (outdoor climate, installed options, etc.) and user demand. Thereto, a number of so called field settings are available. If required, certain user interface buttons can be made unavailable for These field settings are accessible and programmable through the the user. - Page 36 Field settings for cooling operation (EB units) [2] Disinfection function [1-05] Weather dependent for cooling function enable Applies only to installations with a domestic hot water tank. (1)/disable (0) The disinfection function disinfects the domestic hot water tank by [1-06] Low ambient temperature (Lo2_A): low outdoor periodically heating the domestic hot water to a specific temperature.
- Page 37 [3] Auto restart NOTICE When power returns after a power supply failure, the auto restart When the priority field setting is set to OFF (0), function reapplies the user interface settings at the time of the power make sure that electrical power consumption does supply failure.
- Page 38 INFORMATION Only for EKHTS: If the storage temperature set point is higher than 50°C, Daikin advises not to disable the backup heater second step because it will have a big impact on the required time for the unit to heat up the domestic hot water tank.
- Page 39 [5] Equilibrium temperature space heating priority WARNING temperature Be aware that the domestic hot water temperature will be Equilibrium temperature (only for EKHW*) automatically increased with the value selected in field The 'equilibrium temperature' field settings apply to operation of the setting [5-04] (if the outdoor temperature drops below field backup heater.
- Page 40 [6] DT for heat pump domestic water heating mode/scheduled Scheduled reheat domestic water heating storage and reheat domestic water heating [6-05] Reheat: defines whether the scheduled domestic water reheat during daytime is enabled (1) or continuous DT for heat pump domestic water heating mode reheat is enabled (2) or reheat is disabled (0) Applies only to installations with a domestic hot water tank.
- Page 41 INFORMATION WARNING Make sure that the domestic hot water set point is Be aware that the domestic hot water temperature will be according to your requirements. automatically increased (always) with the value selected in Start with a low domestic hot water storage set point, field setting [7-00] compared to the user set point for and only increase if you feel that the domestic hot domestic hot water (T...
- Page 42 Dual set point control [8] Domestic water heating mode timer Applies only to installations with different heat emitters which require Applies only to installations with a domestic hot water tank. different set points. The 'domestic water heating mode timer' field setting defines the Dual set point control makes it possible to generate 2 different set minimum and maximum domestic water heating times, minimum time points.
- Page 43 [8-03] Booster heater delay time (only for EKHW*): specifies [8-04] Additional running time at [4-02]/[F-01]: specifies the the start-up time delay of the booster heater operation when additional running time on the maximum running time at heat pump domestic water heating mode is active. outdoor temperature [4-02] or [F-01].
- Page 44 The purpose of this function is to [9-07] Stop time: time at which setback is stopped determine – based on the outdoor temperature – which heating source can/will provide the space heating, either the Daikin unit or an [9-08] Leaving water setback value auxiliary boiler.
- Page 45 Daikin shall not be held liable for any damage resulting from failure to observe this rule. (1) Only applicable for tank with built-in electrical booster heater (EKHW*).
- Page 46 Local shift value weather dependent [F] Option setup The local shift value weather dependent field setting is only relevant Pump operation in case weather dependent set point (see field setting "[1] Weather The pump operation field setting apply to the pump operation logic dependent set point"...
-
Page 47: Field Settings Table
10.11.Field settings table Installer setting at variance with default value First Second Default code code Setting name Date Value Date Value value Range Step Unit User permission level User permission level — Weather dependent set point Low ambient temperature (Lo_A) –10 –20~5 °C... - Page 48 Installer setting at variance with default value First Second Default code code Setting name Date Value Date Value value Range Step Unit Equilibrium temperature and space heating priority temperature Equilibrium temperature status (only in combination with domestic hot water tank without electrical 1 (ON) —...
- Page 49 Installer setting at variance with default value First Second Default code code Setting name Date Value Date Value value Range Step Unit Heating and cooling set point ranges Heating set point upper limit 37~55 °C Heating set point lower limit 15~37 °C Cooling set point upper limit...
- Page 50 Installer setting at variance with default value First Second Default code code Setting name Date Value Date Value value Range Step Unit Option setup Pump operation stop — (enabled) Space cooling permission temperature 10~35 °C Bottom plate heater ON temperature 3~10 °C Bottom plate heater hysteresis...
-
Page 51: Test Run And Final Check
11. T EST RUN AND FINAL CHECK NOTICE The installer is obliged to verify correct operation of the unit after When the unit is put into pump down operation, the installation. automatic test run flag will be cleared. The next time the system is put into operation, the automatic test run will be executed again. -
Page 52: Underfloor Heating Screed Dry-Out Program
11.5. Underfloor heating screed dry-out program Set field settings The different actions are programmed as follows: This function allows the installer to define and automatically execute (refer to "10.10. Field settings" on page 32 to know how to an "underfloor heating screed dry-out" program. change the field settings) The program is used to dry-out the screed of an underfloor heating 1 Set in [F-05] (Action number), the action to be programmed,... -
Page 53: Maintenance And Service
INFORMATION DANGER When the program is stopped by an error, by an Do not touch the refrigerant pipes during and operation switch off or by a power failure, then the U3 immediately after operation as the refrigerant pipes error will be displayed. may be hot or cold, depending on the condition of the To resolve the error codes, see "13.3. -
Page 54: Troubleshooting
13.2. General symptoms In case of use of glycol (Refer to Caution: "Use of glycol" on page Document the glycol concentration and the pH-value in the Symptom 1: The unit is turned on (y LED is lit) but the unit is system at least once a year. - Page 55 Symptom 4: The water pressure relief valve opens Symptom 8: [4-03] and maximum tank set point is not according to the the applicable tank OSSIBLE CAUSES ORRECTIVE ACTION In case of domstic hot water tank with built-in electrical booster The expansion vessel is broken. Replace the expansion vessel.
-
Page 56: Error Codes
13.3. Error codes Error code Failure cause Corrective action When a safety device is activated, the user interface LED will be Outlet water temperature of unit • Check that the contactor of the flashing, and an error code will be displayed. too high (>65°C) electric backup heater is not short circuited. -
Page 57: Technical Specifications
14. T ECHNICAL SPECIFICATIONS Error code Failure cause Corrective action Liquid pipe thermistor failure Contact your local dealer. 14.1. General Electric component failure Contact your local dealer. Electric component failure Contact your local dealer. EDLQ EDHQ EBLQ EBHQ Electric component failure Contact your local dealer. - Page 60 4PW67904-1 01.2011...