Table of Contents
Advertisement
Operation Manual
Portable Room Air Conditioner
Models: RPC35WA and RPC41WA
This appliance shall be installed in accordance with:
• Manufacturer's Installation Instructions
• Current AS/NZS 3000
• Local Regulations and Municipal Building Codes including local OH&S requirements
This appliance must be installed, maintained and removed by an Authorised Person.
For continued safety of this appliance it must be installed and maintained in
accordance with the manufacturers instructions.
Advertisement
Table of Contents

Related Manuals for Rinnai RPC35WA


Summary of Contents for Rinnai RPC35WA
-
Page 1: Operation Manual
Operation Manual Portable Room Air Conditioner Models: RPC35WA and RPC41WA This appliance shall be installed in accordance with: • Manufacturer’s Installation Instructions • Current AS/NZS 3000 • Local Regulations and Municipal Building Codes including local OH&S requirements This appliance must be installed, maintained and removed by an Authorised Person. - Page 2 BEFORE PROCEEDING WITH THE OPERATION OF YOUR NEW RINNAI PORTABLE ROOM AIR CONDITIONER PLEASE READ THIS MANUAL THOROUGHLY AND GAIN A FULL UNDERSTANDING OF THE REQUIREMENTS, FEATURES AND OPERATION OF YOUR NEW APPLIANCE. Rinnai Portable Room AC OIM...
-
Page 3: Table Of Contents
Save A Service Call ............................12 When to Call for Service ........................... 12 Installation Location ................................13 Duct assembly ..............................13 Installation Exhaust Ducting Options ..........................14 Window Installations ............................. 14 Installation Semi-Permanent Wall Installation ........................ 15 Condensate Drainage ............................15 Internal Condensate Tank ..........................15 Fixed Condensate Drainage Hose ....................... 15 Contacts Rinnai Portable Room AC OIM... -
Page 4: Safety & Important Points
Young children should be supervised to ensure they do not play with the appliance. DO NOT allow children or persons with reduced physical, sensory or mental capabilities to sleep directly in front of this appliance. DO NOT allow children to ‘post articles’ into the louvres of the appliance. DO NOT use power boards or double adaptors with this appliance. DO NOT coil or bundle the electric cord to reduce it’s length as overheating of the cord may occur which could result in a fire hazard. The flexible cord and plug must not be modified. If the cord or plug are damaged, they must be replaced by Rinnai or a Rinnai appointed service agent. DO NOT cover or place articles on or against any parts of this appliance, to avoid overheating. DO NOT sit on this appliance DO NOT use this appliance in the immediate surroundings of a bath, a shower or a swimming pool. DO NOT move this appliance whilst it is turned on. DO NOT unplug the appliance by pulling on the flexible cord. DO NOT handle any parts of this appliance, including the plug and flexible cord, with wet or damp hands. DO NOT immerse the appliance, flexible cord and plug in water or any other liquid. DO NOT place containers of any liquid or wax on top of this appliance. -
Page 5: Warranty & Specifications
Our goods come with guarantees that cannot be excluded under the Australian Consumer Law. You are entitled to a replacement or refund for a major failure and for compensation for any other loss or damage. You are also entitled to have the goods repaired or replaced if the goods fail to be of acceptable quality and the failure does not amount to a major failure. This appliance has a 2 year parts warranty from date of purchase. If the product fails within this 2 year period return it to the supplier with proof of purchase for repair or replacement. Supplier warranty claims for Rinnai products or services must be made by contacting Rinnai Australia. Contact details are on the back of this document. The following exclusions may cause the warranty to become void and may result in a service charge and costs of parts (if required): Accidental damage and acts of God. Failure due to abuse or misuse, improper maintenance, failure to maintain or improper storage. Failure due to incorrect or unauthorised installations or outdoors use. Failure or damage caused by alterations, service or repair work carried out by persons other than Rinnai service persons or service agents. Where it is found that there is no fault with the appliance and the issue is related to the installation or is due to the failure of electricity supply. SPECIFICATIONS MODEL RPC35WA RPC41WA Rated Power 1600W 2000W Rated Voltage 220-240V 50Hz Height 795mm... -
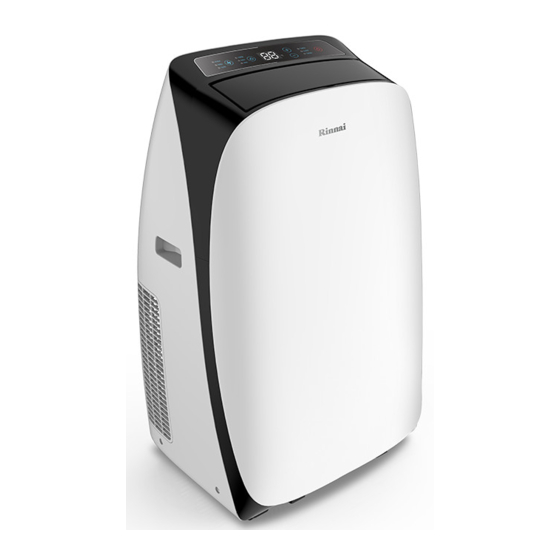
Page 6: Air Conditioner Basics
Drain outlet 1 Drain outlet 2 (not used on this model) Room air intake (filter located behind grill) 10. Lower air intake (filter located behind grill) 11. Swivel casters (x4) 12. Drain tray outlet 13. 1.2m flexible 2 pin cord 220-240V 50Hz 10A 14. Adjustable window slide kit 15. Window exhaust duct window adapter. 16. Exhaust duct (extends to 1.8M) 17. Duct to appliance adaptor 18. Wall exhaust adaptor 19. Wall exhaust terminal 20. Condensate drain hose Rinnai Portable Room AC OIM... -
Page 7: Control Panel And Remote Control Layout
To Install: Choose a safe and easily-accessible place. DO NOT mount the cradle in direct sunlight as this may damage the controller. IMPORTANT Fix the cradle to the wall using the holes provided using 2 screws. Rinnai Portable Room AC OIM... -
Page 8: Operation
On / Off button (28). BASIC OPERATION REMOTE CONTROL The remote controls allows for convenient operation of the appliance within a 15 metre range. Note that a confirmation beep sounds to confirm that a successful controller input has been received by the appliance COOL Press the On / Off button (34). Press the mode button (31) until the COOL mode indicator is illuminated. Use temperature buttons (37) to select the desired temperature (16°C to 32°C) Use fan speed buttons (39) to select the desired fan speed (LOW, MED or HIGH). 12:38 Press the On / Off button (34) to stop operation. Rinnai Portable Room AC OIM... -
Page 9: Dry (Dehumidifying)
12:38 19:30 19:30 12:38 Set the desired operational modes and temperature. Press the TIMER button (35) to begin timer based operation, when the set ON time is reached the appliance will turn ON. If no buttons are pressed for 10 seconds, clock setting will be cancelled and no change will be made. NOTE Rinnai Portable Room AC OIM... -
Page 10: Off Timer
OFF. 12:38 Press the SLEEP button (36) at any time to cancel the SLEEP function operation. Press the On / Off button (34) to stop operation. SWING FUNCTION The swing function allows adjustment of the air flow by controlling the cool air outlet louvre in either a cyclic or fixed direction. With the appliance ON, press the SWING button (38), an animated SWING icon will be displayed and the air outlet louvre will begin to cycle. Pressing the SWING button (38) will the stop cyclic motion at a fixed direction and the SWING icon will go out. Each consecutive press of the SWING button (38) will stop and start the cyclic motion. 12:38 To return the cool air outlet louvre to the default operational position press the On / Off button (34) twice (this will reset the appliance). Rinnai Portable Room AC OIM... -
Page 11: Care & Maintenance
To re-attach the Lower Air Intake Grill (10) ensure that all the tabs are properly seated and that the grill is securely clipped back into place and that the securing screw is replaced. The power may now be reconnected. Failure to clean the filters regularly can cause excessive condensation to form and reduce the appliances efficiency. NOTE If you need replacement filters, please contact Rinnai. Rinnai Portable Room AC OIM... -
Page 12: Save A Service Call
Move the appliance to level a operating surface. Splashing sound. High level of condensate being This is normal. This appliance generated. has a pump that evaporates some condensate through the exhaust duct. WHEN TO CALL FOR SERVICE SYMPTOM CAUSE There is a burning smell and a strange Turn off the air conditioner, and contact Rinnai. sound coming from the unit. When operated if a circuit breaker (safety, ground) is thrown or a fuse is blown. Rinnai Portable Room AC OIM... -
Page 13: Installation
DUCT ASSEMBLY Front Back Place the Duct to Unit Adaptor (17) over the Exhaust Outlet (5), push it downwards to ensure it engages the Exhaust Outlet tabs. Screw one end of the Exhaust Duct (16) into the Duct to Unit Adaptor (17). On the other end of the Exhaust Duct (16) fix either the Window Exhaust Duct Adaptor (15) or the Wall Exhaust Adaptor (18). Rinnai Portable Room AC OIM... -
Page 14: Installation
It is recommended to place a length of foam draft sealing strip along the top and bottom edges of the kit or the inside the window opening to form a seal. NOTE Connect the Window Exhaust Duct Adaptor (15) to the Adjustable Slider Kit (14). Rinnai Portable Room AC OIM... -
Page 15: Installation
The point to which the condensate is to be drained MUST BE lower than the drainage outlet point. When using a drain tray option, ensure that the capacity of the tray is greater than that of the NOTE condensate being produced. Rinnai Portable Room AC OIM... -
Page 16: Contacts
Braeside, Victoria 3195 For further information visit: www.rinnai.com.au Rinnai has a Service and Spare Parts network with personnel who are fully trained and equipped to give the best service on your Rinnai appliance. If your appliance requires service, please call our National Help Line. Rinnai recommends that this appliance be serviced every 1 years.