Table of Contents
Advertisement
Quick Links
Download this manual
See also:
Operating Manual
Installation Manual
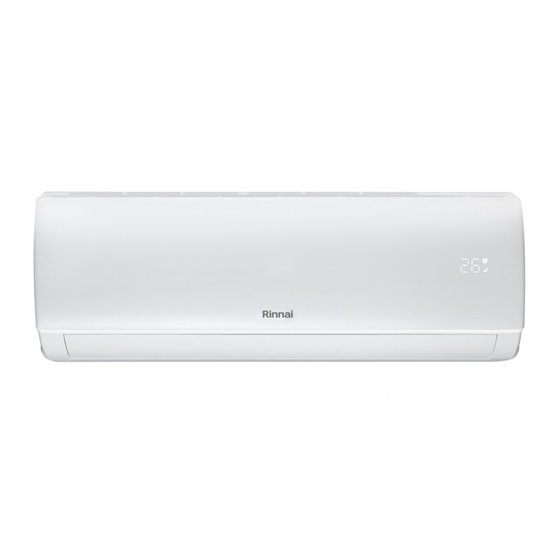
Split Type Wall Mounted Air Conditioner
Models: RINV25RB / RINV35RB / RINV52RB / RINV70RB
This appliance shall be installed in accordance with:
• Manufacturer's Installation Instructions
• Current AS/NZS 3000
• Local Regulations and Municipal Building Codes including local OH&S requirements
This appliance must be installed, maintained and removed by an Authorised Person.
For continued safety of this appliance it must be installed and maintained in
accordance with the manufacturers instructions.
Advertisement
Table of Contents

Summary of Contents for Rinnai RINV25RB
-
Page 1: Installation Manual
Installation Manual Split Type Wall Mounted Air Conditioner Models: RINV25RB / RINV35RB / RINV52RB / RINV70RB This appliance shall be installed in accordance with: • Manufacturer’s Installation Instructions • Current AS/NZS 3000 • Local Regulations and Municipal Building Codes including local OH&S requirements This appliance must be installed, maintained and removed by an Authorised Person. - Page 2 This page is intentionally blank Rinnai Split AC IM...
-
Page 3: Table Of Contents
Connecting Vapour / Liquid Pipes To Indoor & Outdoor Units ���������������������������������������������������������������������� 12 Air purging & Leakage Test �������������������������������������������������������������������������������������������������������������������������� 13 Evacuation Vacuum Method / Leak Test ������������������������������������������������������������������������������������������������������ 13 Adding refrigerant for longer line length ������������������������������������������������������������������������������������������������������� 13 Final Checklist �������������������������������������������������������������������������������������������������������������������������������������������������� 14 Contacts Rinnai Split AC IM... -
Page 4: Warnings And Important Information
The table below indicates the temperature ranges the air conditioner can be operated within� MINIMUM MAXIMUM MODE TEMPERATURE SOURCE OPERATION OPERATION TEMPERATURE TEMPERATURE Adjustable inside temperature 16°C 32°C Cooling / Heating Ambient outside temperature -12°C 47°C Rinnai Split AC IM... - Page 5 The circuit breaker must have the functions of magnetic tripping and heat tripping to prevent short circuit and overload� Use a standard circuit breaker and fuse conforming with the rating of the appliances� Model Circuit Breaker (Amps) RINV25RB RINV35RB RINV52RB RINV70RB The unit must be earthed in accordance with local regulations�...
- Page 6 DO NOT mix the batteries for the remote control with other types of batteries or mix new batteries with used batteries� Failure to do so may result in product failure� STOP using the remote control if there is a battery fluid leak. Rinnai Split AC IM...
-
Page 7: Installation General
Refrigerant entry (for service and installer use only) 10� Outdoor unit air inlet (on rear & left side of unit) 11� Outdoor unit air discharge and protective grille (on front of unit) WEIGHTS & DIMENSIONS Model RINV25RB RINV35RB RINV52RB RINV70RB Indoor Weight Outdoor Indoor... -
Page 8: Location
PIPE LENGTH & ELEVATION LIMITS Pipe Size Standard Maximum Maximum Additional Liquid Length Length - X Height -Y Refrigerant Models inch inch RINV25RB Ø9.52 Ø6.35 RINV35RB Ø12.7 Ø6.35 RINV52RB Ø15.88 Ø6.35 RINV70RB Ø15.88 Ø9.52 Outdoor unit Outdoor unit Indoor unit... -
Page 9: Installation
Drill a Ø70mm wall penetration through the wall with a 2° to 4° fall to the outside wall� INSIDE 2° to 4° fall OUTSIDE Drain Pipe 1� Connect the drain pipe to the drain hose outlet of the indoor unit, 2� Bind the joint with PVC insulation tape (not supplied)� Rinnai Split AC IM... -
Page 10: Electrical Connections
Foam shipping block Drain pipe Electrical Cable(s) Vapour / Liquid pipes Liquid pipe Vapour Foam shipping block Right connection Electrical pipe access cutout Plastic strap Cable(s) Plastic strap Drain pipe Connections cross-section Rinnai Split AC IM... -
Page 11: Outdoor Unit
Secure the electrical cable(s) and power cable onto the control board with the cable clip� 3� Connect the cables as shown on the drawing below� Wiring Terminal cover board Electric bracket Pressing To Power To Indoor Unit board 4� Re-install the wiring cover� Rinnai Split AC IM... -
Page 12: Refrigerant Pipes
Ø 5/8" 75 Nm Indoor Unit Outdoor Unit Vapour pipe Liquid pipe Ensure the joint nut is tightened firmly to avoid leakage. Ensure that both the connections and the refrigerant pipes are wrapped with insulation material. CAUTION Rinnai Split AC IM... -
Page 13: Air Purging & Leakage Test
It is very easy to overcharge, take caution in charging Vacuum refrigerant liquid and keep your eye on the scales to avoid Pump CAUTION overcharging the unit. Take care not to discharge refrigerant into the atmosphere during installation, re-installation, repair or service. Rinnai Split AC IM... -
Page 14: Final Checklist
No cooling or heating Is the end user fully aware of the operating procedure? Incorrect operation If you have answered no to any of the above, you must check and correct before appliance hand-over to customer. Rinnai Split AC IM... - Page 15 NOTES Rinnai Split AC IM...
-
Page 16: Contacts
Braeside, Victoria 3195 For further information visit: www.rinnai.com.au Rinnai has a Service and Spare Parts network with personnel who are fully trained and equipped to give the best service on your Rinnai appliance. If your appliance requires service, please call our National Help Line. Rinnai recommends that this appliance be serviced every 1 years.


