Sharp AL-2051 Service Manual
Digital multifunctional system
Hide thumbs
Also See for AL-2051:
- Operation manual (173 pages) ,
- Start manual (45 pages) ,
- Service manual (6 pages)
Table of Contents
Advertisement
[1] GENERAL . . . . . . . . . . . . . . . . . . . . . . . . . . . . . . . . . . . . . . . . . . . 1 - 1
[2] SPECIFICATIONS . . . . . . . . . . . . . . . . . . . . . . . . . . . . . . . . . . . . . 2 - 1
[3] CONSUMABLE PARTS . . . . . . . . . . . . . . . . . . . . . . . . . . . . . . . . . 3 - 1
[4] EXTERNAL VIEWS AND INTERNAL STRUCTURES . . . . . . . . . 4 - 1
[5] UNPACKING AND INSTALLATION . . . . . . . . . . . . . . . . . . . . . . . . 5 - 1
[6] COPY PROCESS . . . . . . . . . . . . . . . . . . . . . . . . . . . . . . . . . . . . . 6 - 1
[7] OPERATIONAL DESCRIPTIONS . . . . . . . . . . . . . . . . . . . . . . . . . 7 - 1
[8] DISASSEMBLY AND ASSEMBLY . . . . . . . . . . . . . . . . . . . . . . . . . 8 - 1
[9] ADJUSTMENTS . . . . . . . . . . . . . . . . . . . . . . . . . . . . . . . . . . . . . . 9 - 1
[10] SIMULATION, TROUBLE CODES . . . . . . . . . . . . . . . . . . . . . . . 10 - 1
[11] USER PROGRAM . . . . . . . . . . . . . . . . . . . . . . . . . . . . . . . . . . . . 11 - 1
[12] ELECTRICAL SECTION . . . . . . . . . . . . . . . . . . . . . . . . . . . . . . . 12 - 1
[13] CIRCUIT DIAGRAM . . . . . . . . . . . . . . . . . . . . . . . . . . . . . . . . . . 13 - 1
Parts marked with "
" are important for maintaining the safety of the set. Be sure to replace these parts with
specified ones for maintaining the safety and performance of the set.
SERVICE MANUAL
DIGITAL MULTIFUNC-
TIONAL SYSTEM
MODEL
CONTENTS
SHARP CORPORATION
CODE: 00ZAL2051/S1E
AL-2051
This document has been published to be used
for after sales service only.
The contents are subject to change without notice.
Advertisement
Table of Contents

Related Manuals for Sharp AL-2051


Summary of Contents for Sharp AL-2051
-
Page 1: Service Manual
CODE: 00ZAL2051/S1E DIGITAL MULTIFUNC- TIONAL SYSTEM AL-2051 MODEL CONTENTS [1] GENERAL ......... . . 1 - 1 [2] SPECIFICATIONS . - Page 2 CAUTION This product is a class 1 laser product that complies with 21CFR 1040 of the CDRH standard and IEC825. This means that this machine does not produce hazardous laser radiation. The use of controls, adjustments or performance of procedures other than those specified herein may result in hazardous radiation exposure.
- Page 3 At the production line, the output power Caution of the scanner unit is adjusted to 0.57 This product contains a low power laser MILLI-WATT PLUS 20 PCTS and is device. To ensure continued safety do not maintained constant by the operation of remove any cover or attempt to gain access the Automatic Power Control (APC).
-
Page 4: Table Of Contents
CONTENTS [1] GENERAL [7] OPERATIONAL DESCRIPTIONS 1. Major functions....... 1-1 1. - Page 5 8. Power section ......8-17 [12] ELECTRICAL SECTION A. List ........8-17 1.
-
Page 6: Major Functions
Scan to USB: Scan to USB FAX: FAX function. Sharpdesk: Scanner utilities USB: Interface port (USB) Network: Network 10/100 Base Descriptions of table : Standard provision : No function or no option available Opt: Option AL-2051 GENERAL 1 - 1... -
Page 7: Specifications
Saw-tooth charging with a grid, / (-) scorotron discharge Transfer system (+) DC corotron system Separation system (-) DC corotron system Developing Developing system Dry, 2-component magnetic brush development system Cleaning Cleaning system Counter blade system (Counter to rotation) AL-2051 SPECIFICATIONS 2 - 1... -
Page 8: Copy Performance
"Selection of copy start state" set to ON in the user programs (A4 (8-1/2" x 11"), paper fed from paper tray). The first-copy time may vary depending on machine operating conditions and ambient conditions such as temperature. AL-2051 SPECIFICATIONS 2 - 2... -
Page 9: Network Board
Thermal papers, originals with punch holes for files, be used folded paper, transparent originals such as OHP films, stapled or clip used originals with cover up liquid used, Originals with tape sealed, originals with high level frictional coefficient such as photos or catalogs. AL-2051 SPECIFICATIONS 2 - 3... -
Page 10: Consumable Parts
Toner/developer cartridge x 1 AL-204TD (A4 5% document) IC-Chip: Yes Stirring function: Yes Develop cartridge (Black) 4K Toner/developer cartridge x 1 AL-214TD (A4 5% document) IC-Chip: Yes Stirring function: Yes Drum cartridge Drum cartridge x 1 AL-100DR AL-2051 CONSUMABLE PARTS 3 - 1... -
Page 11: Environmental
40˚C Production control label attachment position (4) Supply storage condition Humidity (RH) Production control label attachment position(*1) –5˚C 45˚C *1: The production control label is not attached to the cartridge of a China product. AL-2051 CONSUMABLE PARTS 3 - 2... -
Page 12: External Views And Internal Structures
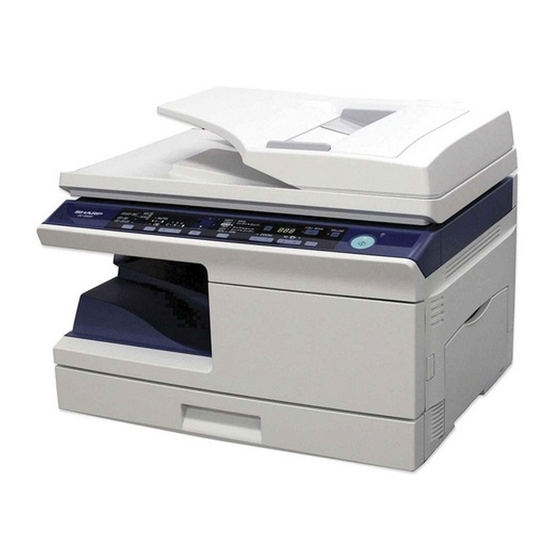
10 Paper output tray extension Power switch Handles 13 Power cord socket Paper holder arm 2. Internal TD (Toner/Developer) Drum cartridge cartridge Front cover Side cover Fusing unit release lever Transfer charger Charger cleaner AL-2051 EXTERNAL VIEWS AND INTERNAL STRUCTURES 4 - 1... -
Page 13: Operation Panel
20 Shows the number of copies that has been entered with the numeric keys. 21 A checkmark “ ” appears when the exposure has been changed, or when two-sided copying, sort, 2 IN 1, or margin shift is selected. AL-2051 EXTERNAL VIEWS AND INTERNAL STRUCTURES 4 - 2... -
Page 14: Motors And Solenoids
Duplex motor Devices the duplex paper transport section Shifter motor SFTM Drives the shifter. Reverse clutch SRVC Reverses the rotating direction of the roller. Paper feed solenoid (RSPF) SPUS Feeds paper. AL-2051 EXTERNAL VIEWS AND INTERNAL STRUCTURES 4 - 3... -
Page 15: Sensors And Switches
Transmission sensor Paper exit detection "H" paper empty Paper sensor SPPD Transmission sensor Paper transport detection "H" paper empty Upper door open/close sensor SCOD Transmission sensor Cover open/close detection "L" open AL-2051 EXTERNAL VIEWS AND INTERNAL STRUCTURES 4 - 4... -
Page 16: Pwb Unit
LSU motor PWB For polygon motor drive TCS PWB For toner sensor control LSU PWB For laser control Network PWB Network print control Power PWB AC power input, DC voltage control AL-2051 EXTERNAL VIEWS AND INTERNAL STRUCTURES 4 - 5... -
Page 17: Cross Sectional View
Separates documents to feed properly. Upper transport roller Transports of a document. Paper exit roller Discharges documents. Lower transport roller Transports of a document. PS roller Feeds documents to the scanning section. AL-2051 EXTERNAL VIEWS AND INTERNAL STRUCTURES 4 - 6... -
Page 18: Unpacking And Installation
Also make certain the outlet is properly grounded. Be sure to allow the required space around the machine for servic- ing and proper ventilation. Drum cartridge (installed in unit) 20cm (8") 20cm (8") 10cm 10cm (4") (4") TD cartridge AL-2051 UNPACKING AND INSTALLATION 5 - 1... -
Page 19: Unpacking
Protective pins CAUTION tape 2) Remove the pressure plate lock. Rotate the pressure plate lock in the direction of the arrow to remove it while pressing down the pressure plate of the paper tray. AL-2051 UNPACKING AND INSTALLATION 5 - 2... -
Page 20: Power To Copier
USB port. *2: Printing is not available in MS-DOS mode. *3: The machine does not support printing from a Macintosh envi- ronment. *4: Administrator's rights are required to install the software using the installer. AL-2051 UNPACKING AND INSTALLATION 5 - 3... -
Page 21: Installing The Software
• On Windows 2000, double-click "My Computer", and then Follow the on-screen instructions. double-click the CD-ROM icon. When "The installation of the SHARP software is complete." appears, click the "OK" button. 4) Double-click the "setup" icon ( On Windows Vista/7, if a message screen appears asking you Caution: for confirmation, click "Allow". - Page 22 PC card. • Connection is also possible using a USB 1.1 port on your com- puter. However, the specifications will be USB 1.1 specifications (Full- Speed). AL-2051 UNPACKING AND INSTALLATION 5 - 5...
- Page 23 Note: You can show the "SOFTWARE LICENSE" in a different language by selecting the desired language from the language menu. To install the software in the selected language, continue the installation with that language selected. AL-2051 UNPACKING AND INSTALLATION 5 - 6...
- Page 24 This completes the installation of the software. • After installation, see "CONFIGURING THE PRINTER DRIVER" to check the printer driver settings. • To install the Printer Status Monitor, see "Installing the printer status monitor" . AL-2051 UNPACKING AND INSTALLATION 5 - 7...
-
Page 25: Configuring The Printer Driver
Click the Windows "start" button, select "All Programs" ("Programs" then click the "Yes" button. in Windows 2000), select "SHARP Printer Status Monitor" and then select "Help". Note: You can show the "SOFTWARE LICENSE" in a different language by selecting the desired language from the language menu. -
Page 26: Setting Up Button Manager
4) In the "Properties" screen, click the "Events" tab. 5) Select "SC1:" from the "Scanner events" pull-down menu. 6) Select "Sharp Button Manager Y" in "Send to this application". Note: If other applications are shown, deselect the checkboxes for the other applications and leave only the Button Manager checkbox selected. -
Page 27: Interface
RJ-45 connector pin arrangement Pin No. Signal name LAN adapter RJ-45 connector Send output + TD– Send output - Receive input + RD– Receive input - 4, 5, 7, 8 Not used. Not used. AL-2051 UNPACKING AND INSTALLATION 5 - 10... -
Page 28: Attachment Method
3) Remove the rear cover for the document glass. <1> Remove the two screws and then remove the right glass holder. <2> Slide the rear cover for the document glass to remove it. <3> Remove the table glass. AL-2051 UNPACKING AND INSTALLATION 5 - 11... - Page 29 Press the cushion to make sure all the holes are covered. 20mm - 25mm Press and attach the cushion aligning it to the metal plate so that there will be no gap between them. AL-2051 UNPACKING AND INSTALLATION 5 - 12...
- Page 30 (the yellow mark). Stick the lower part of the cushion to the mylar, too. Press the cushion with a sharp-pointed stick or something to fill the gap between the mylar and the metal plate. Stick together. Stick together.
- Page 31 Attach the cushion leaving 3 - 7mm from the edge so that the gap between the Fan housing cushion and the filter of the rear cabinet is filled for sure. 14) Attach the parts removed in the items 1), 2), and 3). AL-2051 UNPACKING AND INSTALLATION 5 - 14...
-
Page 32: Copy Process
Waste toner box To face Synchronization Paper release Fusing Separation Transfer Manual feed with drum down tray Heat roller Electrode Transfer charger Cassette paper feed Transfer high Heater lamp voltage unit Print process Paper transport route AL-2051 COPY PROCESS 6 - 1... -
Page 33: Outline Of Print Process
A uniform negative charge is applied over the OPC drum surface Non-image area Image area by the main charging unit. Stable potential is maintained by means of the Scorotron charger. Positive charges are generated in the aluminum layer. About DC5.5KV ( 580V/ 400V) AL-2051 COPY PROCESS 6 - 2... - Page 34 It is transported to the waste toner collecting sec- tion in the cleaning unit by the waste toner transport roller. Toner is attracted over the shadowed area because of the develop- ing bias. AL-2051 COPY PROCESS 6 - 3...
- Page 35 Voltage added to the screen grid can be selected, high and low. To make it easily understood, the figure below shows voltage transi- tion at the developer unit. START STOP Print potential Toner attract Developing bias potential Drum potential High Time AL-2051 COPY PROCESS 6 - 4...
-
Page 36: Operational Descriptions
5) The LSU emits laser beams according to the print data. (Electrical signals are converted into photo signals.) 6) The laser beams are radiated through the polygon mirror and various lenses to the OPC drum. AL-2051 OPERATIONAL DESCRIPTIONS 7 - 1... -
Page 37: Scanner Section
473, the belt 190, and the shaft. Scanner motor Pulley gear Idle pulley Belt 473 Belt 190 Optical unit Shaft Idle gear Table glass AL-2051 OPERATIONAL DESCRIPTIONS 7 - 2... -
Page 38: Laser Unit
(Refer to the figure below.) Makes the laser scanning speeds at both ends of the drum same as each other. a ≠ b ≠ c d = e = f f θ LENS AL-2051 OPERATIONAL DESCRIPTIONS 7 - 3... -
Page 39: General Description
Level of the thermistor is controlled by the main PWB. Triac (in the power supply unit) With the signal from the main PWB, the triac is controlled on and off. (power supply PWB) AL-2051 OPERATIONAL DESCRIPTIONS 7 - 4... - Page 40 4) After more than half rotation of the pick-up roller, the paper feed latch is brought in contact with a notch on the clutch sleeve, stopping rotation of the pick-up roller. AL-2051 OPERATIONAL DESCRIPTIONS 7 - 5...
- Page 41 (Refer to 7-5 - 8.) paper feeding. 5) The solenoid turns off to close the gate and return to the initial state. MPFS MPFS AL-2051 OPERATIONAL DESCRIPTIONS 7 - 6...
-
Page 42: Process Unit New Drum Detection Mechanism
20T to push the micro-switch (process detection switch) installed to the machine Projection sensor cover, making a judgement as a new drum. Gear notch Gear 20T Gear 38T Projection Gear pawl Process detection switch AL-2051 OPERATIONAL DESCRIPTIONS 7 - 7... -
Page 43: Rspf Section
6) The SRJD is not turned ON for 2.4sec from release of PS in paper feed from the document set position. (100% copy) 7) The SRJD is not turned OFF for 1.6sec from completion of doc- ument scan in the case of complete document exit. (100% copy) AL-2051 OPERATIONAL DESCRIPTIONS 7 - 8... -
Page 44: Rspf Open/Close Detection (Book Document Detection)
• The paper is passed through the fusing section and the lower side of the gate section to the paper exit tray side. (However, it is not discharged completely.) • The paper is stopped once, and switchback operation is per- formed. (To the back copy) AL-2051 OPERATIONAL DESCRIPTIONS 7 - 9... -
Page 45: Shifter
The front and the back are not in upside down. 9. Shifter Shift width: 2.5cm The offset function by the shifter is turned ON/OFF by the user pro- gram. According to the setting, offset operation is performed for every job. (Default: ON) AL-2051 OPERATIONAL DESCRIPTIONS 7 - 10... -
Page 46: Disassembly And Assembly
1) Press the side cover open/close button and open the side Lock pawl front cover. C. Assembly procedure For assembly, reverse the disassembly procedure. D. Charger wire cleaning 1) Remove the charger cleaner from the manual paper feed unit. AL-2051 DISASSEMBLY AND ASSEMBLY 8 - 1... -
Page 47: Charger Wire Replacement
Part name Ref. • Be careful not to twist the charger wire. Operation panel unit Operation PWB B. Disassembly procedure 1) Open the side door, and Open the front cover. AL-2051 DISASSEMBLY AND ASSEMBLY 8 - 2... -
Page 48: Assembly Procedure
4) Remove four screws, and remove the operation PWB. 2) Remove two screws, and remove the earth wire. 3) Disconnect the connector. 4) Remove the RSPF unit. C. Assembly procedure For assembly, reverse the disassembly procedure AL-2051 DISASSEMBLY AND ASSEMBLY 8 - 3... - Page 49 10) Move the carriage to the position indicated on the figure. 11) Loosen the screw which is fixing the tension plate. 12) Move the tension plate in the arrow direction to release the ten- sion, and remove the belt. AL-2051 DISASSEMBLY AND ASSEMBLY 8 - 4...
-
Page 50: Assembly Procedure
Note: Attach the FCC to Marking line. fit with the marking line. 3) Cut the binding band, remove the screw, and remove the ther- mistor. Thermistor AL-2051 DISASSEMBLY AND ASSEMBLY 8 - 5... - Page 51 If the fusing unit is opened without sliding the fusing lower earth spring, the fusing lower earth spring is deformed. If the fusing lower earth spring is once deformed, the earth function may not work properly. Replace the deformed spring with a new one. AL-2051 DISASSEMBLY AND ASSEMBLY 8 - 6...
- Page 52 8) of "Pressure roller section disassembly. 11) Remove the pressure release levers on the right and the left sides. 6) Remove the C-ring and the fusing bearing, and remove the heat roller. Heat roller AL-2051 DISASSEMBLY AND ASSEMBLY 8 - 7...
-
Page 53: Assembly Procedure
8) Remove two screws and remove the thermo unit. Note: The set temperature of the thermostat differs from that of the current model. Temperature AL-2051 230°C 2) Remove two screws, and remove the hinge guide R. 3) Disconnect the connector. (2 positions) 4) Remove five screws, and remove the scanner unit. - Page 54 10) Disengage the pawl, and remove the roller knob. 11) Disengage the pawl, and shift the pulley and the bearing. 12) Remove the paper exit roller, and remove the belt, the pulley, and the bearing. AL-2051 DISASSEMBLY AND ASSEMBLY 8 - 9...
- Page 55 CAUTION:Attach the gears securely 17) Remove the parts as shown below, and remove the pressure release solenoid and the paper feed solenoid. 15) Remove three screws, and remove the DUP motor unit and the belt. AL-2051 DISASSEMBLY AND ASSEMBLY 8 - 10...
- Page 56 23) Shift and remove the shifter unit. 19) Put the lower paper guide unit upside down, remove two screws, and remove the shifter motor. 24) Remove four screws, and remove the LSU unit. AL-2051 DISASSEMBLY AND ASSEMBLY 8 - 11...
- Page 57 29) Remove the E-ring and remove the spring clutch from the PS roller unit. PS roller unit Use grease of Floil FG40H only to apply to this section. PS semi-circuler PS semi-circular earth plate earth plate AL-2051 DISASSEMBLY AND ASSEMBLY 8 - 12...
-
Page 58: Assembly Procedure
33) Remove three E-rings and remove the clutch unit. Back Clutch unit Paper feed roller Front 31) Remove the screw and the connector, and remove the PPD1 sensor PWB. C. Assembly procedure For assembly, reverse the disassembly procedure. AL-2051 DISASSEMBLY AND ASSEMBLY 8 - 13... -
Page 59: Manual Paper Feed Section
1) Remove the screw and remove the multi upper cover. 4) Remove two screws and remove the multi feed bracket unit from the multi paper feed upper frame. 2) Remove the screw and remove the side door detection unit. Back Wire treatment AL-2051 DISASSEMBLY AND ASSEMBLY 8 - 14... -
Page 60: Assembly Procedure
For assembly, reverse the disassembly procedure. D. Pressure plate holder attachment 1) Attach the pressure plate holder so that the resin section is not covered with the seal M1-N. Seal M1-N Pressure plate holder Attachment reference Attachment reference AL-2051 DISASSEMBLY AND ASSEMBLY 8 - 15... -
Page 61: Rear Frame Section
5) Remove two screws and one connector, and remove the exhaust fan motor. 2) Disconnect the connector. 3) Remove two screws, and remove the scanner motor. Blowing direction 6) Disconnect the connector. 7) Remove the two screws, and remove the network PWB. AL-2051 DISASSEMBLY AND ASSEMBLY 8 - 16... -
Page 62: Assembly Procedure
3) Remove two screws, and remove the power PWB unit. C. Assembly procedure For assembly, reverse the disassembly procedure. C. Assembly procedure For assembly, reverse the disassembly procedure. AL-2051 DISASSEMBLY AND ASSEMBLY 8 - 17... -
Page 63: Reverse Roller Section
4) Bend the reverse roller and remove it. B. Upper door unit 1) Release the shaft on the front side. 2) Remove the upper door unit. C. Assembly procedure For assembly, reverse the disassembly procedure. AL-2051 DISASSEMBLY AND ASSEMBLY 8 - 18... -
Page 64: Document Tray Unit
1) Disconnect one connector. 2) Remove the resin E-ring. 3) Remove the reverse clutch. ■ Note for reassembly Attach the stopper of the reverse clutch along with the rib on the motor mounting plate. AL-2051 DISASSEMBLY AND ASSEMBLY 8 - 19... -
Page 65: Shutter Solenoid
When assembling, use care so that the paper feed solenoid spring does not extend out of the paper feed solenoid lever. ■ Note for reassembly Connect the connectors according to the arrow indication marked on the motor mounting plate. AL-2051 DISASSEMBLY AND ASSEMBLY 8 - 20... -
Page 66: Pickup Roller, Take-Up Roller
(3) Paper feed roller removal 2) Slide and remove the paper feed PG support plate. 1) Pull out the shaft. 2) Remove the clutch boss and the clutch spring from the pickup roller. AL-2051 DISASSEMBLY AND ASSEMBLY 8 - 21... -
Page 67: Ps Roller
Use care so that the rib on the upper transport release arm catches the guide. ■ Note for reassembly Pass the earth wire through the hole to the outside of the frame, then install parts. AL-2051 DISASSEMBLY AND ASSEMBLY 8 - 22... -
Page 68: Paper Sensor
1) Remove the OC mat. M. Lower transport roller (1) Reverse self-weight gate removal 1) Remove the reverse self-weight gate. (2) Paper exit sensor removal 1) Disconnect one connector. 2) Remove the paper exit sensor. AL-2051 DISASSEMBLY AND ASSEMBLY 8 - 23... -
Page 69: Adjustments
4) When "U2" trouble occurs. 2) Set the copy magnification ratio to 100%. b. Necessary tools 3) Make a copy on A4 or 81/2" x 11" paper. • Scale 4) Measure the length of the copied scale image. AL-2051 ADJUSTMENTS 9 - 1... -
Page 70: Image Position Adjustment
Repeat procedures 1) - 8) until the sub scanning direction actual copy magnification ratio in 100% copying is within the specified range. When the set value is changed by 1, the magnification ration is changed by 0.1%. AL-2051 ADJUSTMENTS 9 - 2... - Page 71 (Example) Distance between paper lead cassette. Use the second or later sheet to check the rear edge and image: H = 5mm edge void. Image loss: R = 3mm 10mm AL-2051 ADJUSTMENTS 9 - 3...
-
Page 72: Copy Density Adjustment
Photo mode Brightness 5 steps. Adjustment of only the center brightness is made. Manual T/S mode Brightness 5 steps. Adjustment of only the center brightness is made. T/S Auto mode Brightness 1 step only AL-2051 ADJUSTMENTS 9 - 4... -
Page 73: Copy Density Adjustment Procedure
3) Make a copy. Check the adjustment level (shown in the above table) of the Use SIM 46-1 to set the copy density for each copy mode. exposure test chart (Sharp Gray Scale). For selection of modes, use the [ ] key. -
Page 74: Dv Bias Check
1) Paper trailing edge void quantity 50-19 (TEXT) This adjustment is made when the cassette paper size is rec- ognized. The trailing edge void quantity can be adjusted by changing the trailing edge image laser OFF timing. 5 10 AL-2051 ADJUSTMENTS 9 - 6... -
Page 75: Rspf Scan Position Automatic Adjustment
1 of setting represents 0.1 mm in void area. (2) Print start position (Duplex back surface) 1) Set the test chart so that the scale is positioned as shown below. 6cm or more is required. Scale (S-D mode) AL-2051 ADJUSTMENTS 9 - 7... -
Page 76: Rspf Mode Sub Scanning Direction Magnification Ratio Adjustment
After canceling, the machine goes into the sub code entry standby magnification ratio Reduce 1: mode. (RSPF mode) 0.1% decrease THE JOB IS BEING CANCELED. 3) After execution 63-02 BLACK LEVEL *** OK 3) In case of an error 63-02 BLACK LEVEL *** ERR AL-2051 ADJUSTMENTS 9 - 8... -
Page 77: Simulation, Trouble Codes
Cancel of U2 trouble RSPF mode sub scan direction magnification ratio JAM total counter display in copying Total counter display Flash ROM program writing mode RSPF counter display Drum counter display AL-2051 SIMULATION, TROUBLE CODES 10 - 1... -
Page 78: Descriptions Of Various Simulations
However, the operating conditions don't matter and the operation is not stopped even in case of a jam. Also the magnification ratio is displayed on the LCD/display. [Operation] The operation is similar to simulation 1-01. AL-2051 SIMULATION, TROUBLE CODES 10 - 2... - Page 79 Bios. [Operation] 1) Initial display 02-09 RSPF SPFS CHK EXECUTING... Shifter operation check [Function] The shifter is moved back and forth in four reciprocations. [Operation] 1) Initial display 03-03 SHIFTER CHK EXECUTING... AL-2051 SIMULATION, TROUBLE CODES 10 - 3...
- Page 80 [Operation] 1) Initial display 05-02 HT LAMP CHK EXECUTING... Copy lamp ON [Function] When [ENTER]/[START] key is pressed, the copy lamp turns ON for 5sec. [Operation] 1) Initial display 05-03 C-LAMP CHK EXECUTING... AL-2051 SIMULATION, TROUBLE CODES 10 - 4...
- Page 81 These operations are repeated. To cancel the simulation, turn off the power or execute a simulation which executes hardware reset. [Operation] 1) Initial display (Basic display of copy) READY TO COPY 100% AL-2051 SIMULATION, TROUBLE CODES 10 - 5...
- Page 82 Use the duplex motor Bios to drive the duplex motor in the reverse direction for 30sec. After completion of this process, the machine goes into the sub code entry standby mode. [Operation] 1) Initial display 09-02 DPLX ROT.REV. EXECUTING... AL-2051 SIMULATION, TROUBLE CODES 10 - 6...
- Page 83 Total counter display [Function] The total counter value is displayed. [Operation] 1) Initial display 22-05 TTL CNT ***,*** RSPF counter display [Function] The RSPF counter is displayed. [Operation] 1) Initial display 22-08 SPF CNT ***,*** AL-2051 SIMULATION, TROUBLE CODES 10 - 7...
- Page 84 The scanner mode counter is displayed. [Operation] 1) Initial display 22-19 S-MODE CNT ***,*** Password display [Function] Password (personal identification number to be managed by the department) is to be displayed. [Operation] 1) Initial display 22-20 PASSWORD ***** AL-2051 SIMULATION, TROUBLE CODES 10 - 8...
- Page 85 000,000 Printer counter clear [Function] When [ENTER]/[START] key is pressed, the printer counter value is cleared to 0, and "000,000" is displayed on the LCD/display. [Operation] 1) Initial display 24-09 PRT.CLR. CLEARED 000,000 AL-2051 SIMULATION, TROUBLE CODES 10 - 9...
- Page 86 30sec. After completion of 30sec operation, the operation is turned off with the Bios and the machine goes into the sub code entry standby mode. [Operation] 1) Initial display 25-10 LSU CHK EXECUTING... AL-2051 SIMULATION, TROUBLE CODES 10 - 10...
- Page 87 The operation is similar to simulation 26-02. Machine conditions check [Function] When this simulation is executed, the current machine setting is displayed. Copy quantity Remark 20 CPM [Operation] 1) The machine setting is displayed. 26-07 CPM 20 CPM AL-2051 SIMULATION, TROUBLE CODES 10 - 11...
- Page 88 [ENTER]/[START] key to save the setting. of printing) Code number Setting Display item Remark 0sec 0 SEC. 30sec 30 SEC. Default 60sec 60 SEC. 90sec 90 SEC. [Operation] The operation is similar to simulation 26-02. AL-2051 SIMULATION, TROUBLE CODES 10 - 12...
- Page 89 11( 0-21 ) 4) [ENTER]/[START] key: 2) [ ] key: Mode selection Settles the entered value. The display is shifted to the sub code input standby 26-42 TC ON TIMING menu. F-END 50( 1-99 ) AL-2051 SIMULATION, TROUBLE CODES 10 - 13...
- Page 90 Code number Setting contents Toner near end is displayed Toner near end is not displayed <Setting of operations at toner end> Code number Setting contents Operation setting 1 Operation setting 2 Operation setting 3 AL-2051 SIMULATION, TROUBLE CODES 10 - 14...
- Page 91 Setting range: 0 – 99 (Copes with margin 0 – 99 pixels.) Default: 30 (30 pixels) [Operation] The operation is similar to simulation 9-04. AL-2051 SIMULATION, TROUBLE CODES 10 - 15...
- Page 92 Manual paper feed Main cassette paper feed (small-size) TRAY1 SH Manual paper feed (small-size) MFT SH ∗ The cassette feed and the manual feed are controlled similarly. [Operation] The operation is similar to simulation 43-01. AL-2051 SIMULATION, TROUBLE CODES 10 - 16...
- Page 93 ] key to switch the setting, and press [ENTER]/[START] key to save it to the EEPROM. The machine goes to the sub code entry standby mode. Code Set temperature (°C) Remark Default [Operation] The operation is similar to simulation 43-01. AL-2051 SIMULATION, TROUBLE CODES 10 - 17...
- Page 94 3) [Numeric] key: Value entry 46-01 EXP.LEVEL 300 100% 62( 1-99) 4) [START] key: Fixing and printing value (No change on the LCD) * Print is started in the set mode. 46-01 EXP.LEVEL 300 100% 62( 1-99) AL-2051 SIMULATION, TROUBLE CODES 10 - 18...
- Page 95 TSAE COPY mode lamp SCAN mode lamp Dither mode D_PHO COPY mode lamp PRINT mode lamp SCAN mode lamp * No density display on LCD/display. [Operation] The operation is similar to simulation 46-01. AL-2051 SIMULATION, TROUBLE CODES 10 - 19...
- Page 96 When the set value is increased, copy becomes darker. When the set value is decreased, copy becomes lighter. (Adjustment range: 1 – 99) Mode Display item Default Remark RSPF [Operation] The operation is similar to simulation 46-01. AL-2051 SIMULATION, TROUBLE CODES 10 - 20...
- Page 97 When simulation 26-06 (Destination setting) or simulation 46-19 Auto Exposure mode is changed, the setting of this simulation is also changed to the default in connection. [Operation] The operation is similar to simulation 46-19. AL-2051 SIMULATION, TROUBLE CODES 10 - 21...
- Page 98 Mode Display item Default AE mode (including TS) COPY mode lamp TEXT mode (including TS) TEXT PRINT mode lamp PHOTO mode PHOTO SCAN mode lamp [Operation] The operation is similar to simulation 46-01. AL-2051 SIMULATION, TROUBLE CODES 10 - 22...
- Page 99 Sub scan magnification ratio SIDE2 PRINT mode adjustment on the back surface of lamp RSPF document * When there is no document in RSPF, copy is inhibited. [Operation] The operation is similar to simulation 46-01. AL-2051 SIMULATION, TROUBLE CODES 10 - 23...
- Page 100 To enter the download mode, there is a method to use key operations as well as to use a simu- lation. With the power OFF, press and hold [Clear All] key + [ ] key, turn on the power. [Operation] 1) Initial display DOWNLOAD MODE AL-2051 SIMULATION, TROUBLE CODES 10 - 24...
- Page 101 Image loss, R = 4mm void amount is regarded as 0.) ∗ The RSPF adjustment is made by adjusting the RSPF image scan start position after OC adjustment. 10mm [Operation] The operation is similar to simulation 46- AL-2051 SIMULATION, TROUBLE CODES 10 - 25...
- Page 102 * In the 2nd print center offset adjustment, print is made forcibly as 1to2/Short Edge from OC regardless of duplex setting. * When paper is discharged, the shifter is operated. [Operation] The operation is similar to simulation 46-01. AL-2051 SIMULATION, TROUBLE CODES 10 - 26...
- Page 103 * The initial value of duplex setting is "1to2/Long Edge" for the duplex model, or "2to1" for the simplex model. ∗ When paper is discharged, the shifter is operated. [Operation] The operation is similar to simulation 46-01. AL-2051 SIMULATION, TROUBLE CODES 10 - 27...
- Page 104 SIDE2 COPY mode lamp (Back surface) PRINT mode lamp Main cassette lamp Duplex back surface DUP-2 PRINT mode lamp SCAN mode lamp Main cassette lamp [Operation] The operation is similar to simulation 46-01. AL-2051 SIMULATION, TROUBLE CODES 10 - 28...
- Page 105 CCD which is not corrected is detected and the value is displayed in deci- mal values on the LCD/display. (3 digits) [Operation] 1) Initial display 63-01 SHADING CHK EXECUTING... AL-2051 SIMULATION, TROUBLE CODES 10 - 29...
- Page 106 Setting range: 1 – 99 (Light quantity stable width: Complying with 1 – 99 in 4095 gradations.) Default: 16 [Operation] The operation is similar to simulation 9-04. AL-2051 SIMULATION, TROUBLE CODES 10 - 30...
- Page 107 Code number Pattern Display item 1by2 1 BY 2 Grid pattern CHECK White paper WHITE Black background BLACK * For 4 – 99, flip. [Operation] The operation is similar to simulation 26-02. AL-2051 SIMULATION, TROUBLE CODES 10 - 31...
-
Page 108: Trouble Codes
Improper connection of the network board cable Improper firmware Network board abnormality MCU abnormality Check Check connection of the network board cable. remedy Update firmware. Replace the MCU and network board with new one. AL-2051 SIMULATION, TROUBLE CODES 10 - 32... - Page 109 The CCD black scan level is abnormal when the shading. Cause Improper connection of the CCD unit flat cable CCD unit abnormality MCU PWB abnormality Check Check connection of the CCD unit flat cable. Check the CCD unit. remedy AL-2051 SIMULATION, TROUBLE CODES 10 - 33...
- Page 110 Check the harness and the connector between the mirror motor and the MCU PWB. Replace the mirror unit. Replace the MCU PWB. When the mirror does feed. Use SIM 1-2 to check the mirror home position sensor. AL-2051 SIMULATION, TROUBLE CODES 10 - 34...
- Page 111 (stable state). Cause Exhaust fan motor connector connection trouble Exhaust fan motor trouble MCU PWB trouble Check Exhaust fan motor connector connection check remedy Exhaust fan motor replacement Replace the MCU PWB. AL-2051 SIMULATION, TROUBLE CODES 10 - 35...
-
Page 112: User Program
• Use this setting to select how long a key must be pressed for the input to 2: 0.5 SEC. be accepted. By selecting a longer time, you can prevent settings from 3: 1.0 SEC. being changed by the accidental pressing of a key. 4: 1.5 SEC. 5: 2.0 SEC. AL-2051 USER PROGRAM 11 - 1... - Page 113 "ON" and the machine is under DHCP environment, the IP address on the display is shown with " " at the tail end. * The scanning speed increases when the USB 2.0 mode is set to "HI-SPEED", however, the printing speed does not increase considerably. AL-2051 USER PROGRAM 11 - 2...
-
Page 114: Selecting A Setting For A User Program
Your selection appears briefly and then the previous screen appears. Note: When "AE LEVEL ADJUST" is selected in the user programs and the [OK] key is pressed, the automatic exposure adjustment screen appears. Adjust exposure and press the [OK] key. AL-2051 USER PROGRAM 11 - 3... -
Page 115: Electrical Section
[12] ELECTRICAL SECTION 1. Block diagram A. Overall block diagram AL-2051 ELECTRICAL SECTION 12 - 1... -
Page 116: Actual Wiring Diagram
2. Actual wiring diagram A. MCU PWB AL-2051 ELECTRICAL SECTION 12 - 2... -
Page 117: Rspf Unit
TO USB DEVICE UAT_RXD_NB UART_TXD1 nCNCT_NB DGND RESET_NB MCU_RESET DGND nPOF_NB NPOF FGND nWAKEUP WAKEUP FGND USB A Connector DGND DGND EN5V 5VIN EN5V 5VIN DGND DGND B14B-PASK-1PAP-14V-S PAP-14V-SB14B-PASK-1 LEDY 100ACT LED3/PHYAD3 LEDG LINK VCC3.3 AL-2051 ELECTRICAL SECTION 12 - 3... -
Page 118: Signal Name List
Main drive section /MPFS Multi bypass solenoid Optical section nCNCT_NB Network Board Connect signal Network section nPOF_NB Network Board Power Off signal Network section nWAKEUP Network Board WAKE UP signal Network section Online LED Operation section AL-2051 ELECTRICAL SECTION 12 - 4... - Page 119 Copy lamp control Scanner unit section /VFMCNT Fan speed signal Fan rotation speed control Optical section VFMOUT Fusing fan Fan drive signal Optical section /VIDEO Laser Laser drive signal (VSAMP) AFE control signal Scanner unit section AL-2051 ELECTRICAL SECTION 12 - 5...
-
Page 120: Circuit Diagram
[13] CIRCUIT DIAGRAM 1. MCU PWB AL-2051 CIRCUIT DIAGRAM 13 - 1... - Page 121 AL-2051 CIRCUIT DIAGRAM 13 - 2...
- Page 122 AL-2051 CIRCUIT DIAGRAM 13 - 3...
- Page 123 AL-2051 CIRCUIT DIAGRAM 13 - 4...
- Page 124 AL-2051 CIRCUIT DIAGRAM 13 - 5...
- Page 125 AL-2051 CIRCUIT DIAGRAM 13 - 6...
- Page 126 AL-2051 CIRCUIT DIAGRAM 13 - 7...
- Page 127 AL-2051 CIRCUIT DIAGRAM 13 - 8...
- Page 128 AL-2051 CIRCUIT DIAGRAM 13 - 9...
- Page 129 AL-2051 CIRCUIT DIAGRAM 13 - 10...
- Page 130 AL-2051 CIRCUIT DIAGRAM 13 - 11...
- Page 131 AL-2051 CIRCUIT DIAGRAM 13 - 12...
- Page 132 AL-2051 CIRCUIT DIAGRAM 13 - 13...
- Page 133 AL-2051 CIRCUIT DIAGRAM 13 - 14...
-
Page 134: Operation Pwb
2. OPERATION PWB AL-2051 CIRCUIT DIAGRAM 13 - 15... - Page 135 AL-2051 CIRCUIT DIAGRAM 13 - 16...
- Page 136 AL-2051 CIRCUIT DIAGRAM 13 - 17...
- Page 137 LEAD-FREE SOLDER The PWB’s of this model employs lead-free solder. The “LF” marks indicated on the PWB’s and the Service Manual mean “Lead-Free” solder. The alphabet following the LF mark shows the kind of lead-free solder. Example: <Solder composition code of lead-free solder> Solder composition Solder composition code Solder composition...
- Page 138 CAUTION FOR BATTERY REPLACEMENT (Danish) ADVARSEL ! Lithiumbatteri – Eksplosionsfare ved fejlagtig håndtering. Udskiftning må kun ske med batteri af samme fabrikat og type. Levér det brugte batteri tilbage til leverandoren. (English) Caution ! Danger of explosion if battery is incorrectly replaced. Replace only with the same or equivalent type recommended by the manufacturer.
- Page 139 United States and other countries. • IBM, PC/AT, and Power PC are trademarks of International Business Machines Corporation. • Sharpdesk is a trademark of Sharp Corporation. • All other trademarks and copyrights are the property of their respective owners. SHARP CORPORATION...