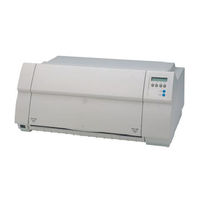
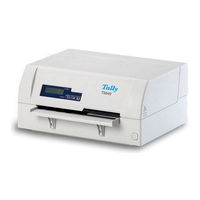
Sign In
Upload
Manuals
Brands
TallyGenicom Manuals
Printer
LA650+
TallyGenicom LA650+ Manuals
Manuals and User Guides for TallyGenicom LA650+. We have
5
TallyGenicom LA650+ manuals available for free PDF download: Quick Start Manual, User Manual, Product Manual, Specifications
TallyGenicom LA650+ Quick Start Manual (166 pages)
TallyGenicom LA650: Quick Start
Brand:
TallyGenicom
| Category:
Printer
| Size: 26.28 MB
Table of Contents
English
3
Table of Contents
3
Introduction
5
Symbols Used
5
Important Safety Instructions
5
Using the Online CD-ROM
6
Contents of the Online CD-ROM
6
Hardware Requirements
6
Troubleshooting
6
Printer at a Glance
7
View from the Front
7
Printer in Tractor Mode
7
Printer in Single-Sheet Mode
7
View from the Rear
7
Installation
8
Unpacking the Printer
8
Placing Your Printer
9
Connecting the Printer
10
Switching on the Printer
11
Control Panel
12
Online Mode
12
Offline Mode
12
Setup Mode
13
Changing the Ribbon Cassette
14
Paper Handling
20
Changing the Paper Type
20
Changing the Paper Type in the Setup Menu
21
Loading Paper
21
Fanfold Paper
21
Single Sheets
24
Paper Transport
25
Moving the Paper to the Tear Position
26
Removing Paper
27
Settings
28
Setting the Tear Position
28
Setting the First Printing Line (TOF)
29
Setting the Print Head Gap
30
Selecting Character Density and Font
31
Printing out Status Page
32
Technical Data
33
Printer Specifications
33
Paper Specifications
34
Accessories
34
Deutsch
35
Kurzanleitung
37
Einleitung
37
Zu den Verwendeten Symbolen
37
Wichtige Sicherheitshinweise
37
Arbeiten mit der Online-CD-ROM
38
Was ist auf der Online-CD-ROM
38
Hardwarevoraussetzungen
38
Fehlersuche
38
Auf einen Blick
39
Ansicht von Vorn
39
Drucker IM Traktorbetrieb
39
Drucker IM Einzelblattbetrieb
39
Ansicht von Hinten
39
Installation
40
Drucker Auspacken
40
Drucker Aufstellen
41
Drucker Anschließen
42
Drucker Einschalten
43
Bedienfeld
44
Online-Modus
44
Offline-Modus
45
Setup-Modus
45
Farbbandkassette Wechseln
46
Papierhandhabung
52
Papierart Wechseln
52
Papierartwechsel IM Menü Setup
53
Papier Einlegen
53
Endlospapier
53
Einzelblätter
56
Papiertransport
57
Papier in Abreißposition Fahren
58
Papier Entfernen
59
Einstellungen
60
Abreißposition Einstellen
60
Erste Druckzeile Einstellen (TOF)
61
Druckkopfabstand Einstellen
62
Zeichendichte und Schriftart Wählen
63
Statusseite Beim Einschalten Ausdrucken
64
Technische Daten
65
Druckerspezifikationen
65
Papierspezifikationen
66
Daten zur Langlebigkeit und Umweltverträglichkeit
67
Zubehör
68
Français
69
Guide de Démarrage Rapide
70
Introduction
71
Symboles Utilisés
71
Consignes Importantes de Sécurité
71
Utilisation du CD-ROM Online
72
Que Contient Le CD-ROM Online
72
Configuration Matérielle Requise
72
Recherche des Pannes
72
Vue D'ensemble
73
Vue du Devant
73
Imprimante en Mode Continu
73
Imprimante en Mode Feuille À Feuille
73
Vue de L'arrière
73
Installation
74
Déballage de L'imprimante
74
Mise en Place de L'imprimante
75
Connexion de L'imprimante
76
Mise Sous Tension de L'imprimante
77
Panneau de Commande
78
Mode Online
78
Mode Offline
79
Mode Setup
79
Remplacement de la Cartouche du Ruban Encreur
80
Manipulation du Papier
86
Changement du Type de Papier
86
Changement du Type de Papier Dans Le Menu Setup
87
Chargement du Papier
87
Papier Continu
87
Papier Feuille À Feuille
90
Transport du Papier
91
Déplacer Le Papier en Position de Séparation
92
Enlever Le Papier
93
Réglages
94
Réglage de la Position de Séparation
94
Réglage de la Première Ligne D'impression (TOF)
95
Réglage de L'écartement de la Tête D'impression
96
Sélection de la Densité des Caractères Et de la Police
97
Impression de la Page de Statut
98
Données Techniques
99
Spécifications de L'imprimante
99
Spécifications du Papier
100
Accessoires
100
Italiano
101
Introduzione
103
Simboli Utilizzati
103
Indicazioni DI Sicurezza Importanti
103
Utilizzo del CD-ROM Online
104
Cosa C'è Sul CD-ROM Online
104
Requisiti Hardware
104
Diagnostica
104
Configurazione Della Stampante
105
Vista Dal Davanti
105
Configurazione Della Stampante Per L'uso Dei Trascinamoduli
105
Configurazione Della Stampante Per L'uso DI Fogli Singoli
105
Vista Posteriore
105
Installazione
106
Rimozione Dell'imballaggio
106
Installazione Della Stampante
107
Collegamento Della Stampante
108
Accensione Della Stampante
109
Pannello Comandi
110
Modo Online
110
Modo Offline
111
Modo Setup
111
Sostituzione Della Cartuccia Colore
112
Modalità DI Gestione Della Carta
118
Cambio del Tipo DI Carta
118
Modifica del Tipo DI Carta Nel Menu Setup
119
Caricamento Della Carta
119
Moduli Continui
119
Fogli Singoli
122
Trasporto Carta
123
Posizionamento Della Carta Nella Posizione DI Strappo
124
Rimozione Carta
125
Impostazioni
126
Impostazione Della Posizione DI Strappo
126
Impostazione Della Riga DI Inizio Stampa (Top of Form, TOF)
127
Regolazione Della Distanza Della Testina DI Stampa
128
Selezione Della Densità Dei Caratteri E del Font
129
Pagina DI Stato
130
Dati Tecnici
131
Specifiche Della Stampante
131
Specifiche Della Carta
132
Accessori
132
Español
133
Introducción
135
Guía de Instalación
135
Símbolos Convencionales
135
Condiciones de Hardware
136
Detección de Errores
136
Qué Incluye la Documentación en Línea en el Disco CD-ROM
136
Utilizar la Documentación en Línea en el Disco CD-ROM
136
Vista de Conjunto
137
Vista Frontal
137
Impresora en Modo de Tractor
137
Impresora en Modo de Hojas Sueltas
137
Vista desde atrás
137
Instalación
138
Desembalar la Impresora
138
Colocar la Impresora
139
Conectar la Impresora
140
Encender la Impresora
141
Panel de Mando
142
Modo Online
142
Modo Offline
143
Modo Setup
143
Cambiar el Cartucho de Cinta
144
Manejo del Papel
150
Cambiar Tipo de Papel
150
Cambar el Origen de Papel Mediante el Menú Setup
151
Cargar Papel
151
Papel Continuo
151
Hojas Sueltas
154
Transporte de Papel
155
Transportar el Papel a la Posición de Corte
156
Quitar el Papel
157
Ajustes
158
Ajustar la Posición de Corte
158
Ajustar la Primera Línea de Impresión (TOF)
159
Ajustar la Distancia de Cabeza Grabadora
160
Seleccionar Densidad y Fuente
161
Página del Estado
162
Datos Técnicos
163
Especificaciones de la Impresora
163
Especificaciones del Papel
164
Accesorios
164
Advertisement
TallyGenicom LA650+ User Manual (157 pages)
Matrix printer
Brand:
TallyGenicom
| Category:
Printer
| Size: 26.31 MB
Table of Contents
Table of Contents
2
Introduction
8
Printer Features
8
Symbols Used
8
About this Manual
9
Printer at a Glance
10
Printer in Tractor Mode
11
Printer in Single-Sheet Mode
11
Paperway
12
Installation
13
Unpacking the Printer
13
Placing Your Printer
14
Checking the Printer Voltage
15
Connecting the Printer
15
Switching on the Printer
16
Inserting the Ribbon Cassette
17
Installing the Ribbon Cassette the First Time
17
Changing the Ribbon Cassette
22
Printer Drivers
27
Installing a Printer Driver in Windows 95/98/ME
27
Installing a Printer Driver in Windows 2000/NT 4.0/XP
28
Other Operating Systems
29
Changing Printer Settings
30
Form Settings (Windows 2000/NT 4.0/XP)
30
Graphic Options
31
Loading Optional Firmware
32
Troubleshooting
32
The Control Panel
33
The LC Display
34
Online Mode
35
Offline Mode
35
Setup Mode
36
Messages in the LC Display
37
Key Functions When Turning on the Printer
38
Paper Handling
39
Changing the Paper Path
39
Changing the Paper Type in the Setup Menu
40
Loading Paper
41
Fanfold Paper
41
Single Sheets
43
Paper Transport
45
Moving the Paper to the Tear Position
46
Removing Paper
47
Settings
48
Setting the Tear Position
48
Setting the First Printing Line (TOF)
49
Setting the Print Head Gap
50
Selecting Character Density and Font (Temporarily)
51
The Menu
52
Programming Via the Control Panel
52
Enabling Access to Menu Mode
52
Calling up the Menu
52
Menu Configurations (Macros)
53
Menu Handling
54
Save Settings
54
Selecting the LC Display Language
55
Terminating Setup Mode
56
Menu Structure
57
Menu Parameters
58
Printing out Macro Configurations (Print)
58
Loading Menu Configurations (Macro)
58
Reset to Default Values (Reset)
59
Quiet Mode Printing (Quiet)
59
Selecting Font (Font)
60
Setting Line Spacing (LPI)
61
Selecting Start Signal for Escape Sequence (Escchar)
61
Selecting Protocol (Emulation)
62
Bidirectional Printing (Printdir)
63
Settings for Interfaces (I/O)
64
Serial Interface (Serial)
64
Data Transmssion Rate (Baud)
64
Data Format (Format)
65
Buffer Control (Buffctrl)
66
Signal Processing (DTR)
66
Selecting Interface (Interf.)
67
Interface Buffer (Buffer)
67
Selecting Interface Timeout (Timeout)
68
Ethernet Interface (ETH-INT)
69
Setting IP Address (IP Addr)
69
Setting Gateway Address (Gateway)
69
Setting Subnet Mask (Subnet)
70
IP Address Administration (IP Get M)
71
Banner Page (Banner)
71
Automatic Carriage Return (Auto-CR)
72
Automatic Line Feed (Auto-LF)
72
Menu Lock (Menlock)
73
Language (Language)
74
Paper Parameters (Paper)
74
Form Length (Formlen)
75
First Printing Position (Formadj)
76
Print Head Gap Manually (Head)
77
View and Tear Position (Tearview)
78
Line Length (Width)
79
Barcode (Barcode)
79
Normal Characters and Barcode (Barmode)
80
Form Feed Mode (Ffmode)
81
Setting and Activating Options (Papopt)
82
Activation of Tractors (Autotra)
82
Automatic Paper Motion Sensor (PMS)
83
Automatic Gap Adjustment (AGA)
84
Paper Handling (Paphand)
84
Increasing the Print Head Gap (Head Up)
85
Paper Width (Pagewid)
85
Left-Hand Area (Leftzon)
86
Right-Hand Area (Rightzo)
86
Bidirectional Parallel Interface (CX-Bid)
87
Line Wrap (Wrap)
87
Beep at Paper End (Sound)
87
Setting for Printing Copy Paper (Hvyform)
88
Automatic Paper Width Detection (APW)
89
Automatic Detection of the Top Paper Margin (AED)
90
Setting the Page Margins (Margin)
91
Setting the Top Margin (Topmrg)
91
Setting the Bottom Margin (Botmrg)
92
Setting the Left Margin (Leftmrg)
92
Horizontal Spacing of Characters (CPI)
93
Setting the DEC Mode (Decmode)
93
Character Set (Charset)
94
User Preference Character Set (Userchr)
95
Deleting Sequence or Buffer (CAN Fkt.)
96
Printer ID (Prn.ID)
96
Disconnection on End of Transmission (Discnct)
97
Initial Report (Report)
97
Answerback on ENQ (Answ_Enq)
98
Automatic Answerback (Answbck)
98
Horizontal Spacing of Characters (CPI)
99
IBM Character Set (IBM-Cset)
99
Setting the IBM Mode (Ibmmode)
99
Code Page (Codpage)
100
Horizontal Pitch on Compress (Ibmcomp)
101
IBM Double Height (Dblhigh)
101
Slashed Zero (Sl.zero)
102
EPSON Character Set (EPS-Cset)
103
Horizontal Spacing of Characters (CPI)
103
Setting the EPSON Mode (Epsmode)
103
Code Page (Codpage)
104
Slashed Zero (Sl.zero)
105
Menu Settings (Example)
106
Advanced Menu
107
Test Functions
107
Printer Self-Test (Rolling ASCII)
108
Exiting Rolling ASCII Test Mode
109
Interface Test (H-Dump)
110
Printout in Hex-Dump
110
Terminating Hex-Dump
111
Advanced Settings
112
Deactivate Single Sheet Feeder (Single)
113
Settings for Paper with Dark Back (Pap.back)
113
Troubleshooting
114
General Print Problems
115
The Display Remains Dark
115
The Display Is Lit, but the Printer Does Not Print
115
Problems with the Paper Feed
116
Paper Jam (Fanfold Paper)
116
Paper Jam (Single Sheets)
117
Paper Does Not Move to Tear off Position
117
Problems with the Print Quality
118
Print Is too Pale
118
Smudged Print
118
Prints Undefined Characters
118
The First Line Is Not Completely Printed out at the Top
118
Dots Within Characters Are Missing
118
Error Messages Via the Display
119
Additional Display Messages
122
Care and Maintenance
123
Replacing the Fuse
123
Cleaning the Housing
124
Cleaning the Interior
124
Cleaning the Platen
125
Ribbon
125
Cleaning the Upper Friction
125
Carriage Shafts
125
Specifications
126
Printer Specifications
126
Interface Specifications
130
Paper Specifications
132
Available Character Sets and Fonts
133
Emulations
138
General
138
Escape Sequences
138
What Are Escape Sequences
138
How Are Escape Sequences Used
138
Barcode
139
List of Available Barcodes
139
Interfaces
140
Parallel Interface
141
Connector Assignment
141
Serial Interface V.24/RS232C
142
Connector Assignment
142
Interface Cable (Serial Interface)
143
Input Signals
143
Output Signals
143
Ethernet Interface
144
Hardware
144
Supported Operating Systems
144
Supported Protocols
144
Designation of IP Address
144
Configuration
144
Status
144
Management
144
Setup
144
Interface-Adapter if Adapter-Set RS232 (DB9M)/MMP
145
Protocols
146
Memory Mode Robust XON/XOFF
146
Memory Mode XON/XOFF
146
Configuring the Serial Interface of the PC
147
DOS Mode
147
Windows 2000/NT 4.0/XP
147
Windows 95/98/ME
147
Physical Printer Port in Ethernet with TCP/IP
148
Example of a Printer Connected to a Computer in an Ethernet
148
Example of Several Devices in an Ethernet
148
Options and Accessories
149
Options
149
Tractor 2, Front
149
Printer Pedestal
149
Paper Output Tray
149
Cable Cover
149
Interface Modules
149
Accessories
150
Ribbon Cassette
150
Programming Manuals
150
Index
151
TallyGenicom LA650+ User Manual (144 pages)
TallyGenicom LA650: User Guide
Brand:
TallyGenicom
| Category:
Printer
| Size: 20.31 MB
Table of Contents
Table of Contents
2
Introduction
8
Printer Features
8
Symbols Used
8
About this Manual
9
Printer at a Glance
10
Printer in Tractor Mode
11
Printer in Single-Sheet Mode
11
Paperway
12
Installation
13
Unpacking the Printer
13
Placing Your Printer
14
Checking the Printer Voltage
15
Connecting the Printer
15
Switching on the Printer
16
Changing the Ribbon Cassette
17
Black Ribbon
17
Printer Drivers
21
Installing a Printer Driver in Windows 95/98/ME
21
Installing a Printer Driver in Windows 2000/NT 4.0/XP
22
Other Operating Systems
23
Changing Printer Settings
24
Form Settings (Windows 2000/NT 4.0/XP)
24
Graphic Options
25
Loading Optional Firmware
26
Troubleshooting
26
The Control Panel
27
The LC Display
28
Online Mode
29
Offline Mode
29
Setup Mode
30
Messages in the LC Display
31
Key Functions When Turning on the Printer
32
Paper Handling
33
Changing the Paper Path
33
Changing the Paper Type in the Setup Menu
34
Loading Paper
35
Fanfold Paper
35
Single Sheets
37
Paper Transport
39
Moving the Paper to the Tear Position
40
Removing Paper
41
Settings
42
Setting the Tear Position
42
Setting the First Printing Line (TOF)
43
Setting the Print Head Gap
44
Selecting Character Density and Font (Temporarily)
45
The Menu
46
Programming Via the Control Panel
46
Enabling Access to Menu Mode
46
Calling up the Menu
46
Menu Configurations (Macros)
47
Menu Handling
48
Save Settings
48
Selecting the LC Display Language
49
Terminating Setup Mode
50
Menu Structure
51
Menu Parameters
52
Printing out Macro Configurations (Print)
52
Loading Menu Configurations (Macro)
52
Reset to Default Values (Reset)
53
Quiet Mode Printing (Quiet)
53
Selecting Font (Font)
54
Setting Line Spacing (LPI)
55
Selecting Start Signal for Escape Sequence (Escchar)
55
Selecting Protocol (Emulation)
56
Bidirectional Printing (Printdir)
57
Settings for Interfaces (I/O)
58
Serial Interface (Serial)
58
Data Transmssion Rate (Baud)
58
Data Format (Format)
59
Buffer Control (Buffctrl)
60
Signal Processing (DTR)
60
Selecting Interface (Interf.)
61
Interface Buffer (Buffer)
61
Selecting Interface Timeout (Timeout)
62
Automatic Carriage Return (Auto-CR)
62
Automatic Line Feed (Auto-LF)
63
Menu Lock (Menlock)
63
Language (Language)
64
Paper Parameters (Paper)
64
Form Length (Formlen)
65
First Printing Position (Formadj)
66
Print Head Gap Manually (Head)
67
View and Tear Position (Tearview)
68
Line Length (Width)
69
Barcode (Barcode)
70
Normal Characters and Barcode (Barmode)
70
Form Feed Mode (Ffmode)
71
Setting and Activating Options (Papopt)
72
Activation of Tractors (Autotra)
72
Automatic Paper Motion Sensor (PMS)
73
Automatic Gap Adjustment (AGA)
74
Paper Handling (Paphand)
75
Increasing the Print Head Gap (Head Up)
75
Paper Width (Pagewid)
76
Left-Hand Area (Leftzon)
76
Right-Hand Area (Rightzo)
77
Bidirectional Parallel Interface (CX-Bid)
77
Line Wrap (Wrap)
78
Beep at Paper End (Sound)
78
Setting for Printing Copy Paper (Hvyform)
79
Setting the Page Margins (Margin)
80
Setting the Top Margin (Topmrg)
80
Setting the Bottom Margin (Botmrg)
81
Setting the Left Margin (Leftmrg)
81
Horizontal Spacing of Characters (CPI)
82
Setting the DEC Mode (Decmode)
82
Character Set (Charset)
83
User Preference Character Set (Userchr)
84
Deleting Sequence or Buffer (CAN Fkt.)
85
Printer ID (Prn.ID)
85
Disconnection on End of Transmission (Discnct)
86
Initial Report (Report)
86
Answerback on ENQ (Answ_Enq)
87
Automatic Answerback (Answbck)
87
Horizontal Spacing of Characters (CPI)
88
IBM Character Set (IBM-Cset)
88
Setting the IBM Mode (Ibmmode)
88
Code Page (Codpage)
89
Horizontal Pitch on Compress (Ibmcomp)
90
IBM Double Height (Dblhigh)
90
Slashed Zero (Sl.zero)
91
EPSON Character Set (EPS-Cset)
92
Horizontal Spacing of Characters (CPI)
92
Setting the EPSON Mode (Epsmode)
92
Code Page (Codpage)
93
Slashed Zero (Sl.zero)
94
Menu Settings (Example)
95
Advanced Menu
96
Test Functions
96
Printer Self-Test (Rolling ASCII)
97
Exiting Rolling ASCII Test Mode
98
Interface Test (H-Dump)
99
Printout in Hex-Dump
99
Terminating Hex-Dump
100
Advanced Settings
101
Deactivate Single Sheet Feeder (Single)
101
Settings for Paper with Dark Back (Pap.back)
102
Troubleshooting
103
General Print Problems
104
The Display Remains Dark
104
The Display Is Lit, but the Printer Does Not Print
104
Problems with the Paper Feed
105
Paper Jam (Fanfold Paper)
105
Paper Jam (Single Sheets)
106
Paper Does Not Move to Tear off Position
106
Problems with the Print Quality
107
Print Is too Pale
107
Smudged Print
107
Prints Undefined Characters
107
The First Line Is Not Completely Printed out at the Top
107
Dots Within Characters Are Missing
107
Error Messages Via the Display
108
Additional Display Messages
111
Care and Maintenance
112
Replacing the Fuse
112
Cleaning the Housing
113
Cleaning the Interior
113
Cleaning the Platen
114
Ribbon
114
Cleaning the Upper Friction
114
Carriage Shafts
114
Specifications
115
Printer Specifications
115
Interface Specifications
119
Paper Specifications
120
Available Character Sets and Fonts
121
Emulations
126
General
126
Escape Sequences
126
What Are Escape Sequences
126
How Are Escape Sequences Used
126
Barcode
127
List of Available Barcodes
127
Interfaces
128
Parallel Interface
129
Connector Assignment
129
Serial Interface V.24/RS232C
130
Connector Assignment
130
Interface Cable (Serial Interface)
131
Input Signals
131
Output Signals
131
Interface-Adapter if Adapter-Set RS232 (DB9M)/MMP
132
Protocols
133
Memory Mode Robust XON/XOFF
133
Memory Mode XON/XOFF
133
Configuring the Serial Interface of the PC
134
DOS Mode
134
Windows 2000/NT 4.0/XP
134
Windows 95/98/ME
134
Physical Printer Port in Ethernet with TCP/IP
135
Example of a Printer Connected to a Computer in an Ethernet
135
Example of Several Devices in an Ethernet
135
Options and Accessories
136
Options
136
Tractor 2, Front
136
Printer Pedestal
136
Paper Output Tray
136
Cable Cover
136
Interface Modules
137
Optional Firmware
137
Accessories
138
Ribbon Cassette
138
Programming Manuals
138
Index
139
Advertisement
TallyGenicom LA650+ Product Manual (12 pages)
Matrix Printers, Mobile Printers, Color Laser Printers, Mono Laser Printers, Matrix Printing Solutions
Brand:
TallyGenicom
| Category:
Printer
| Size: 0.35 MB
TallyGenicom LA650+ Specifications (2 pages)
Serial Matrix Printer
Brand:
TallyGenicom
| Category:
Printer
| Size: 0.93 MB
Advertisement
Related Products
TallyGenicom LA36N
TallyGenicom LA550N
TallyGenicom LA48N
TallyGenicom LA48W
TallyGenicom LA550W
TallyGenicom LA800+
TallyGenicom LA800
TallyGenicom LA36W
TallyGenicom LJ Series
TallyGenicom LGi12
TallyGenicom Categories
Printer
All in One Printer
Printer Accessories
More TallyGenicom Manuals
Login
Sign In
OR
Sign in with Facebook
Sign in with Google
Upload manual
Upload from disk
Upload from URL