Sign In
Upload
Manuals
Brands
Ricoh Manuals
Printer
LDD280
Ricoh LDD280 Manuals
Manuals and User Guides for Ricoh LDD280. We have
2
Ricoh LDD280 manuals available for free PDF download: Service Manual, Operating Instructions Manual
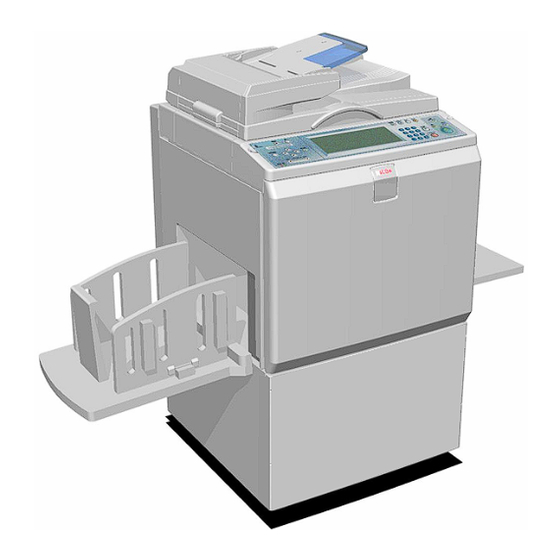
Ricoh LDD280 Service Manual (459 pages)
Brand:
Ricoh
| Category:
All in One Printer
| Size: 11.76 MB
Table of Contents
Table of Contents
13
Preventive Maintenance
27
Specifications
30
General Specifications
30
Installation
34
Installation Requirements
36
Optimum Environmental Condition
36
Environments to Avoid
36
Power Connection
36
Access to the Machine
37
Power Sockets for Peripherals
38
Installation Procedure
39
Main Body
39
Accessory Check
39
Installation Procedure
40
Date/Time Setting
52
SP Codes Setting
52
Changing the Operation Panel Language
52
Platen Cover (Option)
53
Accessory Check
53
Installation Procedure
53
Adf (Option)
54
Accessory Check
54
Installation Procedure
55
ADF Stabilizer Installation
58
Additional Drums (Option)
59
Extension Hdd Type 1 (Option)
63
Accessory Check
63
Installation Procedure
63
Postscript3 Board Type 2 (Option)
64
Accessory Check
64
Inserting Dimms
64
Installation Procedure
65
Ieee 802.11B I/F Unit Type 1 (Option)
66
Accessory Check
67
Installation Procedure
67
Ieee 1284 Parallel Board Type 1 (Option)
67
Accessory Check
68
Installation Procedure
68
Memory Unit Type C (128Mb/256Mb) (Option)
68
Installation Procedure
69
Configuration Page (Example Printout)
69
Preventive Maintenance
70
Maintenance Table
72
Replacement and Adjustment
74
General Caution
76
Covers
76
Front Cover, Inner Cover, Knob Cover
76
Left Cover, Right Front and Right Rear Covers, Rear Cover
77
Operation Panel, Left Scanner Cover, Rear Upper Cover, Right Scanner Cover, Lower Panel Cover
78
Exposure Glass, Scales
79
Scanner Unit
80
Scanner Frame, Scanner Hp Sensor, Platen Cover Sensor, Exposure Lamp
80
Lens Cover
81
Original Size Sensors
82
Lamp Stabilizer, Sbu, Scanner Drive Motor
83
Scanner Wires
85
Installation
85
Sbu (Sensor Board Unit) Calibration
87
Copy Image Adjustment
88
Leading Edge Registration Adjustment
88
Side-To-Side Registration Adjustment
89
Vertical Magnification Adjustment
90
Boards
91
Acu and Ecu, Psu Opening Procedure
91
Acu, Ecu, I/O
92
Psu
94
Double Feed Detector Board
95
Ecu and I/O Replacement, Nvrams
96
Master Eject Section
97
Master Eject Box
97
Master Eject Roller Unit, Master Eject Sensor
98
Master Eject Drive Unit, Sensors and Motors
99
Master Eject Box Lock Solenoid
100
Master Eject Sensor Adjustment
101
Reassembling the Master Pick-Up Roller Drive Gears
102
Master Feed Section
103
Master Making Unit
103
Master Set Roller, Platen Roller, Upper Tension Roller
105
Thermal Head
107
Duct Entrance Solenoid
108
Cutter Unit, Master Feed Control Motor, Clamp Tension Roller, Upper Master Feed Control Roller
109
Platen Release Sensor, Platen Release Motor
112
Master Amount Sensor
114
Master Duct Sensor, Master Suction Fans, Master Feed Motor
115
Master Set Sensor, Master Edge Sensor
117
Flat Cable
118
Master End Sensor
118
Master Buffer Fans
119
Platen Release Cam Adjustment
121
Thermal Head Voltage Adjustment
122
Master End Sensor Adjustment
123
Master Edge Sensor Adjustment
124
Master Set Sensor Adjustment
125
Thermal Head Alignment Adjustment
127
Master Making Unit Parallel Adjustment
128
Master Edge Trimming Procedure
130
Master Feed Mylar Positioning
132
Drum Section
133
Drum Unit
133
Drum Cloth Screen
133
Drum Master Clamper, Metal Screen
136
Motors and Sensors in the Drum
139
Ink ID Detection/Ink Flow Sensor Connector
142
Ink Roller Gap Adjustment
143
Ink Detection Adjustment
146
Drum Position Adjustment
147
1St Drum Master Sensor Adjustment
149
2Nd Drum Master Sensor Adjustment
151
Paper Feed Section
153
Paper Table Unit, Paper Feed Assembly
153
Pick-Up Roller, Paper Feed Roller
155
Paper Width Detection Board
156
Paper Height Sensor
157
Feed Pressure Motor, Feed Pressure Detection Board
158
Registration Pressure Motor, Registration Roller Press Sensor, Registration Roller Release Sensor
159
Paper Registration Sensor, Paper Feed Timing Sensor
160
Upper Registration Roller
164
Friction Pads
165
Separation Pressure Detection Board, Friction Pad Shift Motor
166
Separation Pressure Motor, Friction Pad
167
Position Sensors 1, 2
167
Lower Registration Roller
168
Registration Roller Lifting Cam Position Adjustment
169
Double Feed Sensor Adjustment
170
Timing Belt Tension Adjustment for the Paper Feed Motor
171
Timing Belt Tension Adjustment for the Registration Motor
172
Paper Feed and Separation Pressure Adjustment
173
Paper Feed Pressure Adjustment
173
Paper Separation Pressure Adjustment
173
Paper Feed Length Adjustment
174
Paper Feed Motor Stop Timing Adjustment
174
Paper Clamping Timing Adjustment
175
Printing Section
176
Pressure Cylinder, Paper Clamper
176
Removal Procedure
176
Reinstallation Procedure
179
Feed Encoder, Feed Start Sensor, Feed Encoder Harness, Feed Encoder Cleaning Brush
182
1St Drum Master Sensor
185
1St Drum Master Sensor Guide Adjustment
186
Printing Pressure Hp Sensor, Printing Pressure Position Sensor, Pressure Cam Shift Motor
187
Printing Pressure Adjustment
188
Printing Pressure Release Arm Gap Adjustment
188
Main Drive and Image Up/Down Shifting Drive Section
189
Main Motor and Torque Limiter
189
Main Drive Mechanism (Main Drive Timing Belt)
197
Disassembly Procedure
197
Reassembly Procedure
202
Copy Image Check Procedure after Main Drive and Image Up/Down Shifting Drive Section Re-Assembly
213
Scissors Gear
214
Pressure Cylinder Rotation Knob Adjustment
218
Scissors Gear Position Adjusement
219
Image Up/Down Shift Worm-Gear Position
219
Adjusement
219
Image Up/Down Shift Drive Unit Position
220
Adjusement
220
Image Shift Gear Pressure Adjusement
221
Paper Delivery Section
223
Paper Exit Pawl
223
Paper Delivery Unit, Air Knife Fan Unit, Paper Pick-Off Plate
224
Job Separator Unit, Printing Pressure Cam Shift Unit
226
Paper Exit Sensor, Transport Vacuum Fan
227
Paper Exit Sensor
227
Gap Adjustment between Paper Pick-Off Plate and Pressure Cylinder
228
Paper Exit Pawl Drive Timing Adjustment
230
Gap Adjustment between Exit Pawl and Drum
231
Chocks
232
Troubleshooting
233
Service Call Codes
235
Classification List
235
Service Call Code Table
236
Electrical Component Defects
245
Scanner
245
Adf
245
Master Making Unit
247
Drum
247
Master Eject
250
Paper Feed
251
Printing and Pressure Cylinder
252
Paper Eject
253
Paper Separation
254
Fuses on Boards
254
Dip Sw, Led, Vr, Tp, and Fuse Tables
255
Test Points
255
Ink Detection Board
255
Dip Switches
255
Acu
255
Potentiometers
256
I/O Board
256
Power Supply Board
256
Ink Detection Board
256
Led's
257
Mpu
257
I/O Board
257
Acu
257
Operation Panel
257
Fuses
257
Power Supply Unit
257
Main Motor Drive Board
258
I/O Board
258
Service Tables
259
Master Feed Mylar Positions
262
Main Drive Section
263
Special Tools
264
Touch Panel Position Adjustment
265
Service Program Mode
266
Types of Sp Modes
267
SP Mode Button Summary
268
Selecting the Program Number
269
Service Program Table
270
Data Logging
271
Basic Settings
278
System Settings
286
Input Test Mode
288
Output Test Mode
291
System Adjustment
294
Memory Data Clear
309
System Test
310
Firmware Update
312
Preparing to Download Firmware
313
Downloading the Firmware to the Machine
314
Errors During Firmware Update
319
Sp Mode Settings after Replacing an Nvram
320
Detailed Section Descriptions
323
Electrical Component Layout
324
Paper Feed Section
325
Master Eject, Pressure Cylinder, and Other Sections
326
Master Making Unit
327
Table of Electrical Components
328
Switches
329
Sensors
330
Solenoids
332
Drive Layout
333
Main Drive
334
Scanner and Optics
335
Original Size Detection in Platen Mode
336
Auto Background Correction
338
Image Processing
339
Auto Shading
340
Filtering
341
Centering
342
Memory Function
343
Thermal Head
344
Remarks for Handling the Thermal Head
345
Overview
346
Master Eject Mechanism
347
Drum Lock Mechanism
348
Master Pick-Up Roller Drive and Master Clamper Open
349
Master Eject and Transportation
350
Master Eject Roller Unit Slide-Out Mechanism
351
Master Eject Box Mechanism
352
Master Eject Box Lock Mechanism
354
Pressure Plate Drive Mechanism
355
Homing Operation
356
Shift to the Master Eject Position
357
Ejected Master Compression
358
Master Box Full Detection Mechanism
360
Pressure Plate Operation Timing Charts
361
Overview
363
Master Set Mechanism
364
Master End Detection
366
Master Amount Detection
367
Master Making and Feed Mechanism
368
Platen Roller Pressure Release
369
Master Buffer Mechanism
370
Wrapping the Master Around the Drum
371
Master Feed Control Roller Mechanism
372
Master Clamping and Wrapping Around the Drum
373
Cutter Mechanism
374
Master Buffer Duct Entrance Control
375
Misfed Master Detection
376
Master Making Unit Set Mechanism
377
Master Jam, Cutter Error, and Clamp Error Detection
378
Master Cut Error
379
Drum
380
Ink Supply and Kneading Mechanism
381
Ink Detection Board
382
Drum Type Detection
383
Color Drum ID Detection
384
Automatic Ink Supply for a New Drum
386
Ink Kneading Mechanism
387
Drum Idling Mechanism
388
Drum Shift Mechanism for Image Side-To-Side Shift
391
Drum Set Mechanism
392
Drum Rotation Lock Mechanism
393
Drum Drive Mechanism
394
Master Detection
396
Drum Home Position Detection
397
Paper Feed
398
Paper Feed Mechanism
399
Paper Feed/Separation Pressure Adjustment Mechanism
400
Paper Separation Pressure
401
Friction Pad Exchange Mechanism
402
Paper Types
403
Paper Registration Mechanism
405
Registration Roller Up/Down Mechanism
407
Paper Feed Control Mechanism
408
Paper Feed Retry Mechanism
409
Registration Roller Pressure Release Mechanism
410
Double Feed Detection
411
Recovery from Double Feed
412
Paper Table Angle Adjustment Mechanism
413
Paper Table Up/Down Mechanism
414
Paper Side Fence Mechanism
415
Side Fence Lock Lever
416
Detection Mechanisms
417
Table Upper/Lower Limit Detection and Paper Height Control
418
Paper Amount Detection
419
Paper Feed Timing
420
Overview
422
Pressure Cylinder
423
Paper Clamping
424
Printing Pressure Mechanism
425
Printing Pressure Cam Shifting for A3/A4 Size Masters
426
Paper Release Pawls Mechanism
427
Paper Feed Control Mechanism
428
Pressure Cylinder Drive Mechanism
429
Print Pressure Adjustment Mechanism
431
Auto Cycle Printing, from Master Making
432
Timing
433
Overview
434
Paper Separation from the Drum
435
Air Knife Mechanism
436
Paper Pick-Off Plate Mechanism
437
Paper Delivery Wing Mechanism
438
Paper Delivery Table Mechanism
439
Adjustable Buffer Fins
440
Job Separation Mechanism
441
Sliding Arm Control
442
Paper Delivery Jam Sensors
443
Paper Delivery Unit Drive Mechanism
444
Paper Exit Jam Detection
445
Overview
446
Image Up/Down Shifting Mechanism
447
Security Mode
448
Machine Operation in Security Mode
449
Auto off Mode
450
Error Detection
451
Paper Delivery Error Detection
452
Jam Indication When You Turn on the Power
453
Master Eject Error Detection
454
Error Detection During Master Making
455
Master Cut Error
456
Original Feed Error Detection in the Adf
457
Advertisement
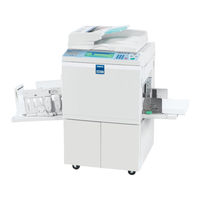
Ricoh LDD280 Operating Instructions Manual (204 pages)
Ricoh Printer Operating Instructions
Brand:
Ricoh
| Category:
Printer
| Size: 6.15 MB
Table of Contents
Operating Instructions
1
Manuals for this Machine
3
What You Can Do with this Machine
4
Table of Contents
7
Notice
13
Information about Installed Software
15
How to Read this Manual
20
Safety Information
21
Safety During Operation
21
Positions of RWARNING and RCAUTION Labels
23
Guide to Components
24
Buffer Fins
26
Options
27
Option List
27
Guide to Major Options
28
Control Panel
30
Display Panel
32
Turning on the Power
34
Turning on the Main Power
34
Turning on the Power
35
Turning off the Power
35
Turning off the Main Power
35
1 Before Using the Machine
37
Originals
37
Size and Weights of Recommended Originals
37
Sizes Difficult to Detect
39
Print Paper
40
Recommended Paper Size and Type
40
Recommended for the LCIT
40
Recommended for the LCOT
41
Non-Recommended Paper
41
Storing Paper
43
Printing Size
44
2 Basics
45
Printing Preparations
45
Using the Paper Feed Tray and Delivery Tray
45
Using the LCIT and LCOT
48
After Printing
53
Folding the Paper Feed Tray and Delivery Tray
53
Uninstalling the LCIT
55
Placing Originals
56
Placing Originals on the Exposure Glass
56
Placing Originals in the Auto Document Feeder
56
Original Orientation
57
Basic Procedure
58
Original Beeper
59
Auto Reset
59
Saving Energy
60
Auto off Timer
60
Printing Onto Various Kinds of Paper
61
Printing Onto Thick Paper
61
Printing Onto Standard Paper
61
Printing Onto Envelopes
61
Printing Onto Special Paper
62
Making a Master and Prints
63
Selecting Cycle Setting
64
Image Rotation
65
Selecting Original Type
66
Master Making Density
67
Sample Print and Adjustment
68
Adjusting the Position of Printed Images
68
Changing the Printing Speed
69
3 Printing Functions
71
Preset Reduce/Enlarge
71
Zoom
72
Auto Reduce/Enlarge
74
Directional Magnification (%)
76
Directional Size Magnification (Inch)
77
Combine
78
Class Settings
81
Separate
85
Image Repeat
86
Centering
90
Erase Border
90
Margin Adjustment
91
Overlay
92
Preset Stamp
94
Make-Up Printing Features
96
Command Sheets for Make-Up Printing
99
Make-Up Printing
106
Quality Start
110
Economy Mode
110
Skip Feed
111
Security
112
Conserving the Master
113
Double Feed
114
Storing File
115
Storing Data
115
Changing a Stored File's User Name, File Name, or Password
117
Searching for Stored Files
118
Printing Stored Files
119
Deleting Stored Files
120
Printing or Deleting Stored Files Using a Web Browser
120
Programs
121
Storing a Program
121
Recalling a Program
122
Changing a Stored Program
122
Changing a Program Name
122
Protecting a Program
122
Deleting a Program
123
Making Color Prints
124
Changing the Color Drum Unit
124
Making Color Prints
125
Printing in Two Colors
126
Changing the Drum Size
128
Printing Area (at 23°C/73°F, 65% RH)
128
Master Cut Length
128
Combination Chart
129
4 Troubleshooting
131
If Your Machine Does Not Operate as You Want
131
If You Cannot Make Clear Prints
133
Faint Prints
133
Black Lines/Stained Prints
133
Dirty Background
133
If You Cannot Make Prints as You Want
136
Combine
136
Storing Files
137
Bloading Paper
138
Loading Paper into the Paper Feed Tray
138
Loading Paper into LCIT
139
Jadding Ink
140
Creplacing the Master Roll
142
Clearing Misfeeds
144
A" Paper Misfeeds in the Paper Feed Section
144
A + B" Paper Misfeeds in the Paper Feed Section
145
B" Paper or Master Wrapped Around the Drum
146
C" Paper Misfeeds in the Paper Exit Section
148
D" Master Misfeeds in the Master Feed Section
149
B + D" Master Misfeeds in the Master Feed Section
150
B + E" Master Misfeeds in the Master Eject Section
150
E" Master Misfeeds in the Master Eject Section
151
P" Original Misfeeds Occur in the Auto Document Feeder
152
When Paper Misfeeds in the LCIT
153
Changing the Paper Size
155
Changing the Paper Size of the Paper Feed Tray
155
Changing the Paper Size of LCIT
156
Mwhen the Open Cover/Unit Indicator Lights
157
Kremoving the Used Master
158
When Multiple Sheets Are Fed at the same Time
159
When Prints Are Not Delivered in a Neat Stack
160
When Printing on Small Size Paper
160
5 User Tools
161
User Tools Menu
161
System Settings
161
Master Making/Print Settings
163
Accessing User Tools (System Settings/Master Making/Print Settings)
166
Changing Default Settings
166
Quitting User Tools
166
Settings You Can Change with User Tools
167
System Settings
167
Master Making/Print Settings
172
User Code
176
Registering a User Code
176
Changing a User Code
177
Deleting a User Code
177
Displaying the Counter for each User Code
177
Printing the Counter for All User Codes
178
Clearing the Counter
178
6 Remarks
179
Do's and Don'ts
179
Where to Put Your Machine
181
Machine Environment
181
Moving
182
Power Connection
182
Access to the Machine
183
Maintaining Your Machine
184
Cleaning the Exposure Glass
184
Cleaning the Exposure Glass Cover
184
Cleaning the Auto Document Feeder
185
Cleaning the Paper Feed Roller (Paper Feed Tray)
185
Cleaning the Paper Feed Roller (LCIT)
185
Other Functions
186
Inquiry
186
Changing the Display Language
187
Counter/Data Print
188
Displaying the Counter
188
Print the Log Data and Programmed Class List
188
7 Entering Text
189
Available Characters
189
Keys
189
Entering Text
190
8 Specifications
191
Main Unit
191
Options
195
Auto Document Feeder (ADF: DF Type 85)
195
Twin Color Press Roller Printing System TC-IIR
195
Large Capacity System (LCS: LS3000R)
196
Other Options
197
Consumables
198
Index
199
Advertisement
Related Products
Ricoh LDD250
Ricoh LDD350d
Ricoh Lanier LDD 030
Ricoh LD316
Ricoh LD032c
Ricoh LD040
Ricoh LD040B
Ricoh LD050
Ricoh LD050B
Ricoh LD117SPF
Ricoh Categories
All in One Printer
Printer
Digital Camera
Copier
Printer Accessories
More Ricoh Manuals
Login
Sign In
OR
Sign in with Facebook
Sign in with Google
Upload manual
Upload from disk
Upload from URL