Sign In
Upload
Manuals
Brands
Ricoh Manuals
Copier
Aficio MP C4502
Ricoh Aficio MP C4502 Manuals
Manuals and User Guides for Ricoh Aficio MP C4502. We have
8
Ricoh Aficio MP C4502 manuals available for free PDF download: Service Manual, User Manual, General Settings Manual, Quick Start Manual, Specifications
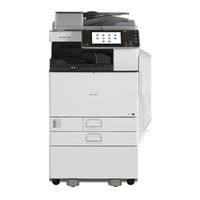
Ricoh Aficio MP C4502 Service Manual (2011 pages)
Brand:
Ricoh
| Category:
All in One Printer
| Size: 26 MB
Table of Contents
Documentation History
4
Table of Contents
5
Prevention of Physical Injury
21
Health Safety Conditions
21
Observance of Electrical Safety Standards
21
Safety and Ecological Notes for Disposal
22
Laser Safety
22
Warnings, Cautions, Notes
23
Symbols, Abbreviations and Trademarks
24
Product Information
25
Specifications
27
Product Overview
28
Component Layout
28
Paper Path
30
Drive Layout
31
Machine Codes and Peripherals Configuration
33
Guidance for those Who Are Familiar with Predecessor Products
37
Installation
39
Installation Requirements
41
Environment
41
Machine Level
42
Machine Space Requirements
42
Machine Dimensions
43
Power Requirements
43
Copier Installation
44
Power Sockets for Peripherals
44
Installation Flow Chart
45
Installation Procedure
46
Tapes and Retainers
46
Protection Sheet (Only for Single Pass ADF Model)
47
Developer and Toner Bottles
48
Paper Trays
49
Decals
50
Initialize the Developer
50
Settings Relevant to the Service Contract
51
SP Operation Sound On/Off Setting
52
Settings for @Remote Service
53
Enabling VM
57
Enabling App2Me
57
Security Function Installation
58
External Usb Keyboard (External Option)
66
Moving the Machine
67
Transporting the Machine
67
Paper Feed Unit Installation (D580)
68
Accessory Check
68
Installation Procedure
69
Envelope Feeder Ef3020 (D638)
72
Accessory Check
72
Installation Procedure
73
Lcit Pb3140 (D581)
74
Accessory Check
74
Installation Procedure
74
SP Settings
77
Lct Installation (D631)
78
Component Check
78
Installation Procedure
79
Side Fence Position Change
81
Ardf Installation (D630)
82
Component Check
82
Installation Procedure
83
1-Bin Tray Unit Installation (D632)
86
Component Check
86
Installation Procedure
87
Internal Shift Tray (D633)
89
Component Check
89
Installation Procedure
90
Side Tray (D635)
92
Component Check
92
Installation Procedure
93
Bridge Unit Installation (D634)
96
Component Check
96
Installation Procedure
97
Finisher Sr3090 (D588)
100
Accessory Check
100
Installation Procedure
101
2000/3000-Sheet (Booklet) Finisher (D636/D637)
103
Accessory Check
103
Installation Procedure
104
Support Tray Installation
107
Component Check
108
Installation Procedure
109
Key Counter Bracket Type H (A674)
114
Installation Procedure
114
Copy Data Security Unit Type F (B829)
116
Component Check
116
Installation
117
User Tool Setting
118
Optional Counter Interface Unit Type a (B870)
119
Components Check
119
Installation Procedure
119
Card Reader Bracket Type C3352 (D593)
121
Component Check
121
Installation Procedure
123
Anti-Condensation Heater (Scanner)
123
Anti-Condensation Heater Type a
125
Component Check
125
Installation Procedure
126
For Installing the Tray Heater in the Main Machine
126
For Installing the Tray Heater in D537
127
For Installing the Tray Heater in D538
129
Controller Options
132
Overview
132
I/F Card Slots
132
SD Card Slots
132
Sd Card Appli Move
133
Overview
133
Move Exec
134
Undo Exec
134
Postscript3 Unit Type C5502
135
Ipds Unit Type C5502
136
File Format Converter Type E
137
Ieee 1284 Interface Board Type a
138
Installation Procedure
138
Ieee 802.11A/G G Interface Unit Type J/K
139
Installation Procedure
139
Installing Various Hardware Combinations
140
UP Mode Settings for Wireless LAN
140
SP Mode and up Mode Settings for IEEE 802.11 A/G G Wireless LAN
142
Bluetooth Interface Unit Type D
143
Camera Direct Print Card Type J
144
Sd Card for Netware Printing Type H
145
Browser Unit Type F
146
Installation Procedure
146
Browser Icon Addition
147
Gigabit Ethernet Type B
149
Check All Connections
150
Preventive Maintenance
151
Maintenance Tables
153
Pm Parts Settings
154
Before Removing the Old Pm Parts
154
After Installing the New Pm Parts
155
Preparation before Operation Check
156
Operation Check
156
Replacement and Adjustment
157
Beforehand
159
Special Tools
160
Image Adjustment
161
Scanning
161
Scanner Sub-Scan Magnification
161
Scanner Leading Edge and Side-To-Side Registration
162
Ardf
163
ARDF Side-To-Side, Leading Edge Registration and Trailing Edge
163
ARDF Sub-Scan Magnification
163
Registration
164
Image Area
164
Leading Edge
164
Side to Side
164
Adjustment Standard
164
Paper Registration Standard
164
Adjustment Procedure
165
Erase Margin Adjustment
166
Color Registration
167
Line Position Adjustment
167
Printer Gamma Correction
167
Copy Mode
168
Printer Mode
173
Exterior Covers
174
Front Door
174
Controller Cover
175
Left Cover
175
Rear Cover
176
Right Rear Cover
177
Operation Panel
178
Paper Exit Cover
181
Inner Tray
181
Ozone Filter and Dust Filter
182
Ozone Filters for the Scanner Unit
182
Ozone Filter and Dust Filter for the AC Controller
183
Scanner Unit
184
Exposure Glass
184
Exposure Lamp
185
Scanner Motor
188
Sensor Board Unit (Sbu)
189
When Reassembling
190
Original Length Sensors
191
Exposure Lamp Stabilizer
192
Sio (Scanner In/Out) Board
192
Scanner Hp Sensor
193
Platen Cover Sensor
194
Front Scanner Wire
194
Reassembling the Front Scanner Wire
195
Rear Scanner Wire
197
Reassembling the Rear Scanner Wire
198
Touch Panel Position Adjustment
199
Laser Optics
200
Caution Decal Location
200
Ld Safety Switch
201
Error Messages
201
Laser Optics Housing Unit
202
Preparing the New Laser Optics Housing Unit
202
Before Removing the Old Laser Optics Housing Unit
203
Recovery Procedure for no Replacement Preparation of Laser Optics Housing Unit
203
Removing the Old Laser Optics Housing Unit
204
Installing a New Laser Optics Housing Unit
205
After Installing the New Laser Optics Housing Unit
205
Polygon Mirror Motor and Drive Board
207
Airflow Fans
208
Laser Optics Rear Right Thermistor
209
Image Creation
211
Pcdu
211
Drum Unit and Development Unit
212
Developer
215
Toner Collection Bottle
216
Second Duct Fans
217
When Reinstalling the Second Duct Fans
218
Third Duct Fan
219
When Reinstalling the Third Duct Fan
219
Toner Pump Unit
220
When You Install the New Toner Pump Unit
223
Toner End Sensor
226
Image Transfer
227
Image Transfer Belt Cleaning Unit
227
Image Transfer Belt Unit
228
Image Transfer Belt
229
When Reinstalling the Image Transfer Belt
232
Paper Transfer
234
Paper Transfer Roller Unit
234
Paper Transfer Unit
235
ID Sensor Board
237
Cleaning for ID Sensors
238
After Installing a New ID Sensor Unit/Board
238
Temperature and Humidity Sensor
239
Drive Unit
240
Gear Unit
241
When Installing the Drive Unit
245
Adjustment after Replacing the Gear Unit
246
Registration Motor
247
Paper Feed Motor
248
Drum/Development Motors for M, C, and y
249
Drum/Development Motor-K
250
Itb Drive Motor
250
Fusing/Paper Exit Motor
251
Image Transfer Belt Contact Motor
251
Duplex Inverter Motor
252
Pressure Roller Contact Motor
253
Duplex/By-Pass Motor
254
Paper Transfer Contact Motor
255
Toner Transport Motor
257
Toner Collection Unit
258
Paper Feed Clutches
259
Development Clutch-Y
261
Development Clutches for M and C
262
Development Clutch-K
263
Fusing
264
Fusing Unit Pm Parts
264
Fusing Unit
264
Fusing Exit Shutter Plate
266
Fusing Entrance Guide Plate
267
Cleaning Requirement
268
Fusing Exit Guide Plate Cleaning Procedure
268
Fusing Unit Upper Cover
269
Fusing Unit Lower Cover
271
Heating Sleeve Belt Unit
273
Pressure Roller
276
Stripper Plate
277
Cleaning Requirement
278
Pressure Roller Thermistors
278
Pressure Roller Thermostats
279
Nc Sensors
280
Fusing Fan
281
When Installing the Fusing Fan
281
Paper Exit Fan
282
When Installing the Paper Exit Fan
282
Ac Controller Board Fan
283
When Installing the AC Controller Fan
283
Fusing Entrance Thermopiles
284
When Cleaning the Lens of the Thermopile
284
Pressure Roller Hp Sensor
286
Qsu Fan
287
Fusing Unit Shutter Plate Drive Motor
288
Fusing Unit Shutter Plate Home Position Sensor4-131
289
Fusing Unit Shutter Plate Drive Mechanism
290
Paper Feed
292
Paper Feed Unit
292
Pick-Up, Feed and Separation Rollers
293
Tray 1 and Tray 2
293
Tray Lift Motor
293
Vertical Transport, Paper Overflow, Paper End and Paper Feed Sensor
294
Registration Sensor
295
By-Pass Paper Size Sensor and By-Pass Paper Length
296
Sensor
296
When Reinstalling the By-Pass Paper Size Sensor
297
By-Pass Bottom Tray
298
By-Pass Paper End Sensor
300
By-Pass Pick-Up, Feed and Separation Roller, Torque
301
Limiter
301
By-Pass Feed Clutch
302
Paper Exit Unit
303
Fusing Exit, Paper Overflow, Junction Paper Jam and Paper Exit Sensor
304
Duplex Unit
306
Duplex Door Sensor
308
Duplex Entrance Sensor
308
Duplex Exit Sensor
309
Electrical Components
310
Boards
310
Controller Box Closed
310
Behind the IOB, FCU and G3 Interface Unit
311
Controller Box Open
311
Controller Unit
312
Controller Box Right Cover
313
Controller Box
313
When Opening the Controller Box
313
When Removing the Controller Box
314
Iob (In/Out Board)
317
Bcu
319
When Installing the New BCU
319
Psu
320
Shutdown Board
320
PSU Bracket
321
PSU Board
322
PSU Fans
322
Itb Power Supply Board
323
High Voltage Supply Board
324
High Voltage Supply Board Bracket
324
Ac Controller Board
325
Ac Controller Board Bracket
326
Controller Board
327
When Installing the New Controller Board
328
Hdd Fan
328
When Installing the HDD Fan
328
Hdd
329
When Installing a New HDD Unit
330
Toner Bottle Detection Board
331
Nvram Replacement Procedure
332
NVRAM on the BCU
332
NVRAM on the Controller Board
333
Tube Cooling Fan (1St Duct Fan)
334
Single Pass Adf (Single Pass Adf Model Only)
335
Single Pass Adf
335
Adf Covers
336
ADF Front Cover
336
ADF Rear Cover
337
Original Feed Cover
338
Original Tray Unit
339
Original Feed Unit
341
Original Feed Belt and Pick-Up Roller
342
Original Separation Roller
343
Original Registration Sensor
344
Adf Control Board
345
Original Width, Interval, Original Separation and Skew Correction Sensors
346
Original Width Sensors
346
Original Separation and Skew Correction Sensors
347
Interval Sensor
348
Original Length Sensors
349
Aps Start Sensor
349
Other Adf Sensors
350
Bottom Plate HP Sensor
350
Original Set Sensor
351
Original Feed Cover Sensor
352
Bottom Plate Position Sensor
352
Original Pick-Up Roller HP Sensor
353
Bottom Plate Lift Motor
353
Original Transport Motor
354
Original Feed Motor
355
Original Pick-Up Roller Motor
358
Original Exit Motor
358
Cis Unit
360
When Reinstalling the CIS Unit
362
Original Exit Sensor
363
Adf Fan
364
When Reinstalling the ADF Fan
364
Using Dip Switches
365
Controller Board
365
Bcu Board
365
System Maintenance
367
Service Program Mode
369
Sp Tables
369
Enabling and Disabling Service Program Mode
369
Entering SP Mode
369
Exiting SP Mode
369
Types of Sp Modes
370
SP Mode Button Summary
370
Switching between SP Mode and Copy Mode for Test Printing
371
Selecting the Program Number
372
Exiting Service Mode
373
Service Mode Lock/Unlock
373
Remarks
374
Display on the Control Panel Screen
374
Others
375
Main Sp Tables-1
376
Sp1-XXX (Feed)
376
Main Sp Tables-2
434
Sp2-XXX (Drum)
434
Sp3-XXX (Process)
514
Sp4-XXX (Scanner)
549
Sp6-XXX (Peripherals)
643
Sp7-XXX (Data Log)
652
Sp8-XXX: Data Log2
691
Input Check Table
744
Sheet Finisher (D588)
756
Internal Shift Tray (D633)
758
Bin Tray (D632)
758
Output Check Table
760
Shift Tray (D633)
772
Bin Tray (D632)
772
Printer Service Mode
774
SP1-XXX (Service Mode)
774
Scanner Sp Mode
784
SP1-XXX (System and Others)
784
Firmware Update
786
Type of Firmware
786
Before You Begin
787
Updating Firmware
788
Updating Procedure
788
Firmware Update Error
789
Recovery after Power Loss
790
Updating the Lcdc for the Operation Panel
790
Update Procedure for App2Me Provider
791
Browser Unit Update Procedure
792
Handling Firmware Update Errors
793
Error Message Table
793
Installing Another Language
795
Reboot/System Setting Reset
798
Advertisement
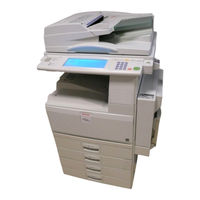
Ricoh Aficio MP C4502 User Manual (830 pages)
User Guide
Brand:
Ricoh
| Category:
All in One Printer
| Size: 12 MB
Table of Contents
Table of Contents
2
Introduction
4
How to Read the Manuals
5
Disclaimer
5
Notes
5
Symbols Used in the Manuals
5
Machine Types
6
1 Manuals Provided with this Machine
8
Manuals for this Machine
8
Manuals List
11
On-Screen Operating Instructions
12
Formats of the Operating Instructions
12
Reading the HTML Manuals on the CD-ROM
12
Installing and Opening the HTML Manuals
13
Reading the PDF Manuals on the CD-ROM
13
2 Safety Information
16
Safety During Operation
16
Safety Precautions to be Followed
17
Environments Where the Machine Can be Used
17
Handling Power Cords and Power Cord Plugs
18
Handling the Main Machine
20
Handling the Machine's Interior
22
Handling the Machine's Supplies
23
Safety Labels of this Machine
25
Positions of WARNING and CAUTION Labels for Users of Types 1 and 2
25
Positions of WARNING and CAUTION Labels for Users of Types 3 and 4
32
Power Switch Symbols
38
3 Information for this Machine
40
Duplication and Printing Prohibited
40
Laser Safety
41
Laser Safety for Types 1 and 2
41
Laser Safety for Types 3 and 4
41
Notes to USA Users of FCC Requirements
42
Part 15 of the FCC Rules
42
Part 68 of the FCC Rules Regarding Facsimile Unit
43
Important Safety Instructions for Facsimile Unit
45
IMPORTANTES MESURES de SÉCURITÉ de L'unité Fax
45
Notes to Canadian Users of Facsimile Unit
46
Remarques à L'attention des Utilisateurs Canadiens de L'unité Fax
46
ENERGY STAR Program
47
Energy Saving Functions
48
Notes to Users in the State of California (Notes to Users in USA)
50
4 Appendix
52
Trademarks
52
Table of Contents
61
How to Read the Manuals
66
Symbols Used in the Manuals
66
Model-Specific Information
67
Names of Major Features
68
1 What You Can Do with this Machine
69
I Want to Save Paper
69
I Want to Convert Documents to Electronic Formats Easily
70
I Want to Register Destinations
71
I Want to Operate the Machine more Effectively
72
You Can Customize the [Home] Screen as You Like
73
You Can Make Copies Using Various Functions
74
You Can Print Data Using Various Functions
75
You Can Utilize Stored Documents
76
You Can Send and Receive Faxes Without Paper
77
You Can Send and Receive Faxes Using the Internet
79
You Can Send and Receive Faxes by Using the Machine Without Fax Unit Installed
81
You Can Use the Facsimile and the Scanner in a Network Environment
82
You Can Prevent Information Leakage (Security Functions)
83
You Can Monitor and Set the Machine Using a Computer
84
You Can Prevent an Unauthorized Copy
85
2 Getting Started
87
Guide to Names and Functions of Components
87
Guide to Components of Types 1 and 2
87
Guide to Components of Types 3 and 4
90
Guide to Functions of the Machine's Options
93
Guide to Functions of the Machine's External Options
93
Guide to the Names and Functions of the Machine's Control Panel
105
How to Use the [Home] Screen
108
Adding Icons to the [Home] Screen
109
Registering Functions in a Program
113
Example of Programs
115
Turning On/Off the Power
119
Turning off the Main Power
119
Turning on the Main Power
119
When the Authentication Screen Is Displayed
121
Logging in Using the Control Panel
121
User Code Authentication Using the Control Panel
121
Logging out Using the Control Panel
122
Placing Originals
123
Placing Originals in the Auto Document Feeder
123
Placing Originals on the Exposure Glass
123
3 Copy
127
Basic Procedure
127
Auto Reduce / Enlarge
129
Duplex Copying
131
Combined Copying
133
One-Sided Combine
134
Two-Sided Combine
135
Copying Onto Custom Size Paper from the Bypass Tray
138
Copying Onto Envelopes
139
Copying Onto Envelopes from the Bypass Tray
139
Copying Onto Envelopes from the Paper Tray
140
Finishing
141
Staple
141
Punch
143
Storing Data in the Document Server
146
4 Fax
147
Basic Procedure for Transmissions (Memory Transmission)
147
Registering a Fax Destination
149
Deleting a Fax Destination
150
Transmitting While Checking Connection to Destination (Immediate Transmission)
152
Canceling a Transmission
154
Canceling a Transmission before the Original Is Scanned
154
Canceling a Transmission While the Original Is Being Scanned
154
Canceling a Transmission after the Original Is Scanned
155
Sending at a Specific Time (Send Later)
156
Storing a Document
157
Sending Stored Documents
158
Printing the Journal Manually
160
5 Print
161
Quick Install
161
Displaying the Printer Driver Properties
162
Standard Printing
163
When Using the PCL 6 Printer Driver
163
Locked Print
164
Printing a Locked Print File Using the Control Panel
164
Sending a Locked Print File
164
Hold Print
166
Printing a Hold Print File Using the Control Panel
166
Sending a Hold Print File
166
Stored Print
168
Sending a Stored Print File
168
Printing a Stored Print File Using the Control Panel
169
Direct Printing from a Removable Memory Device
170
Printing from a Removable Memory Device
172
Screen for Direct Printing
174
Pictbridge Printing
176
Using Pictbridge
176
Exiting Pictbridge
177
6 Scan
178
Basic Procedure When Using Scan to Folder
178
Creating a Shared Folder on a Computer Running Windows/Confirming a Computer's Information
179
Registering an SMB Folder
181
Deleting an SMB Registered Folder
184
Entering the Path to the Destination Manually
185
Basic Procedure for Sending Scan Files by E-Mail
186
Registering an E-Mail Destination
187
Deleting an E-Mail Destination
188
Entering an E-Mail Address Manually
189
Basic Procedure for Storing Scan Files
190
Checking a Stored File Selected from the List
191
Specifying the File Type
192
Specifying Scan Settings
193
Basic Procedure for Saving Scan Files on a Removable Memory Device
194
7 Document Server
198
Storing Data
198
Printing Stored Documents
200
8 Web Image Monitor
202
Displaying Top Page
202
Viewing Received Fax Documents Using Web Image Monitor
204
9 Adding Paper and Toner
206
Loading Paper into Paper Trays
206
Loading Paper into the Bypass Tray
208
Settings to Use the Bypass Tray under the Printer Function
209
Loading Paper into the Small Size Paper Tray
213
Loading Paper into Tray 3 (LCT)
215
Loading Paper into the Large Capacity Tray (LCT)
217
Recommended Paper Sizes and Types
219
Thick Paper
227
Envelopes
228
Adding Toner
232
Sending Faxes or Scanned Documents When Toner Has Run out
233
Disposing of Used Toner
234
10 Troubleshooting
236
Indicators
236
When an Indicator for the [Check Status] Key Is Lit
237
Panel Tone
239
When You Have Problems Operating the Machine
240
When Messages Are Displayed on the Control Panel
247
Messages Displayed When Using the Copy/Document Server Function
247
Messages Displayed When Using the Facsimile Function
251
Messages Displayed When Using the Printer Function
268
Other Messages
273
Messages Displayed When Using the Scanner Function
282
When Messages Are Displayed on Your Computer Screen
297
Messages Displayed When Using the Scanner Function
297
11 Appendix
304
Trademarks
304
Setting up Options
316
Operating Instructions
319
Table of Contents
321
1 Introduction
323
Start Installer
323
Software and Utilities Included on the CD-ROM
325
Printer Drivers
325
TWAIN Driver
327
LAN-Fax Driver
328
Font Manager
329
For Mac os X Users
330
2 Installing the Printer Driver
331
Confirming the Connection Method
331
Network Connection
331
Local Connection
332
Quick Install
333
Installing the Printer Driver for a Network Connection
334
Using as a Network Printer
342
Installing the Printer Driver for a Local Connection
347
USB Connection
347
Bluetooth Connection
351
Parallel Connection
351
Configuring Option Settings for the Printer
355
Conditions for Bidirectional Communication
355
If Bidirectional Communication Is Disabled
356
Installing Font Manager
357
Using Adobe Pagemaker Version 6.0, 6.5, or 7.0
358
3 Installing the Scanner Driver
359
Installing the TWAIN Driver
359
Installing a TWAIN-Compliant Application on the same Client Computer
359
4 Installing the Facsimile Driver
361
Installing the LAN-Fax Driver
361
Specifying the same Port as the Printer Driver
361
Specifying the Port When Installing the LAN-FAX Driver
362
Enabling the Function to Prevent Transmission to the Wrong Destination
364
Editing the Configuration File
364
Installing the LAN-FAX Driver in "Add Printer
365
Setting LAN-Fax Driver Properties
367
Setting Print Properties
367
Configuring Option Settings for the Facsimile
368
5 Troubleshooting
369
Messages Displayed When Installing the Printer Driver
369
If USB Connection Fails
371
6 Installing the Printer Driver under Mac os
373
Installing the PPD Files
373
Registering the Printer
374
USB Connection
374
Network Connection
375
Configuring Option Settings for the Printer under Mac os X
377
7 Appendix
379
Updating or Deleting the Driver
379
Updating the Driver
379
Deleting the Driver
380
Trademarks
383
Index
385
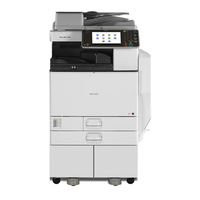
Ricoh Aficio MP C4502 General Settings Manual (296 pages)
operating instructions
Brand:
Ricoh
| Category:
All in One Printer
| Size: 6 MB
Table of Contents
Operating Instructions
1
Manuals for this Machine
3
Table of Contents
5
How to Read this Manual
9
Symbols
9
Display Panel
10
Accessing User Tools
11
Changing Default Settings
11
Quitting User Tools
12
Menu Protect
12
1 Connecting the Machine
13
Connecting to the Interfaces
13
Connecting to the Ethernet Interface
14
Connecting to the USB Interface
16
Connecting to the IEEE 1284 Interface
17
Connecting to the IEEE 802.11B (Wireless LAN) Interface
18
Network Settings
21
Settings Required to Use the Printer/Lan-Fax
21
Settings Required to Use Internet Fax
23
Settings Required to Use E-Mail Function
27
Settings Required to Use Scan to Folder Function
30
IEEE 802.11B (Wireless LAN)
31
Settings Required to Use the Network Delivery Scanner
32
Settings Required to Use Network TWAIN Scanner
34
Settings Required to Use Document Server
36
Using Utilities to Make Network Settings
38
Connecting the Machine to a Telephone Line and Telephone
46
Connecting the Telephone Line
46
Selecting the Line Type
48
Connecting the Optional Handset or an External Telephone
49
2 System Settings
51
General Features
51
Output Tray Settings
53
Tray Paper Settings
54
Timer Settings
57
Interface Settings
59
Network
59
Parallel Interface
62
IEEE 802.11B
63
Print List
64
File Transfer
65
Administrator Tools
72
Program / Change / Delete LDAP Server
79
Programming the LDAP Server
80
3 Copier / Document Server Features
85
General Features
85
Reproduction Ratio
90
Edit
92
Stamp
97
Background Numbering
97
Preset Stamp
97
User Stamp
98
Date Stamp
99
Page Numbering
100
Input/Output
101
Settings for the Document Server
103
4 Facsimile Features
105
General Settings/Adjustment
105
Reception Settings
109
E-Mail Settings
111
IP-Fax Settings
113
Administrator Tools
117
Registering Fax Information
125
Registering Fax Information
126
Changing Fax Information
128
Deleting Fax Information
129
Storing, Changing, and Deleting an Auto Document
130
Storing and Changing an Auto Document
130
Deleting an Auto Document
132
Programming Changing and Deleting a Scan Size
133
Deleting a Scan Size
134
Forwarding
135
Programming an End Receiver
136
Quitting the Forwarding Function
137
Forwarding Mark
138
Parameter Settings
139
Changing the User Parameters
144
Printing the User Parameter List
145
Advertisement
Ricoh Aficio MP C4502 User Manual (244 pages)
Manuals
Brand:
Ricoh
| Category:
Copier
| Size: 5 MB
Table of Contents
Table of Contents
3
How to Read the Manuals
8
Symbols Used in the Manuals
8
Model-Specific Information
9
Names of Major Features
10
1 What You Can Do with this Machine
11
I Want to Save Paper
11
I Want to Convert Documents to Electronic Formats Easily
12
I Want to Register Destinations
13
I Want to Operate the Machine more Effectively
14
You Can Customize the [Home] Screen as You Like
15
You Can Make Copies Using Various Functions
16
You Can Print Data Using Various Functions
17
You Can Utilize Stored Documents
18
You Can Send and Receive Faxes Without Paper
19
You Can Send and Receive Faxes Using the Internet
21
You Can Send and Receive Faxes by Using the Machine Without Fax Unit Installed
23
You Can Use the Facsimile and the Scanner in a Network Environment
24
You Can Prevent Information Leakage (Security Functions)
25
You Can Monitor and Set the Machine Using a Computer
26
You Can Prevent an Unauthorized Copy
27
2 Getting Started
29
Guide to Names and Functions of Components
29
Guide to Components of Types 1 and 2
29
Guide to Components of Types 3 and 4
32
Guide to Functions of the Machine's Options
35
Guide to Functions of the Machine's External Options
35
Guide to the Names and Functions of the Machine's Control Panel
47
How to Use the [Home] Screen
50
Adding Icons to the [Home] Screen
51
Registering Functions in a Program
55
Example of Programs
57
Turning On/Off the Power
61
Turning on the Main Power
61
Turning off the Main Power
61
When the Authentication Screen Is Displayed
63
User Code Authentication Using the Control Panel
63
Logging in Using the Control Panel
63
Logging out Using the Control Panel
64
Placing Originals
65
Placing Originals on the Exposure Glass
65
Placing Originals in the Auto Document Feeder
65
3 Copy
69
Basic Procedure
69
Auto Reduce / Enlarge
71
Duplex Copying
73
Combined Copying
75
One-Sided Combine
76
Two-Sided Combine
77
Copying Onto Custom Size Paper from the Bypass Tray
80
Copying Onto Envelopes
81
Copying Onto Envelopes from the Bypass Tray
81
Copying Onto Envelopes from the Paper Tray
82
Finishing
83
Staple
83
Punch
85
Storing Data in the Document Server
88
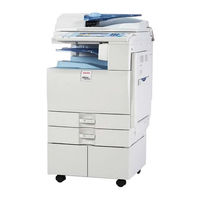
Ricoh Aficio MP C4502 User Manual (240 pages)
Brand:
Ricoh
| Category:
All in One Printer
| Size: 7 MB
Table of Contents
Table of Contents
3
How to Read the Manuals
8
Symbols Used in the Manuals
8
Model-Specific Information
9
Names of Major Features
10
1 What You Can Do with this Machine
11
I Want to Save Paper
11
I Want to Convert Documents to Electronic Formats Easily
12
I Want to Register Destinations
13
I Want to Operate the Machine more Effectively
14
You Can Customize the [Home] Screen as You Like
15
You Can Make Copies Using Various Functions
16
You Can Print Data Using Various Functions
17
You Can Utilize Stored Documents
18
You Can Send and Receive Faxes Without Paper
19
You Can Send and Receive Faxes Using the Internet
21
You Can Send and Receive Faxes by Using the Machine Without Fax Unit Installed
23
You Can Use the Facsimile and the Scanner in a Network Environment
24
You Can Prevent Information Leakage (Security Functions)
25
You Can Monitor and Set the Machine Using a Computer
26
You Can Prevent an Unauthorized Copy
27
2 Getting Started
29
Guide to Names and Functions of Components
29
Guide to Components of Types 1 and 2
29
Guide to Components of Types 3 and 4
32
Guide to Functions of the Machine's Options
35
Guide to Functions of the Machine's External Options
35
Guide to the Names and Functions of the Machine's Control Panel
47
How to Use the [Home] Screen
50
Adding Icons to the [Home] Screen
51
Registering Functions in a Program
55
Example of Programs
57
Turning On/Off the Power
60
Turning on the Main Power
60
Turning off the Main Power
60
When the Authentication Screen Is Displayed
62
User Code Authentication Using the Control Panel
62
Logging in Using the Control Panel
62
Logging out Using the Control Panel
63
Placing Originals
64
Placing Originals on the Exposure Glass
64
Placing Originals in the Auto Document Feeder
64
3 Copy
67
Basic Procedure
67
Auto Reduce / Enlarge
68
Duplex Copying
70
Combined Copying
73
One-Sided Combine
74
Two-Sided Combine
75
Copying Onto Custom Size Paper from the Bypass Tray
78
Copying Onto Envelopes
79
Copying Onto Envelopes from the Bypass Tray
79
Copying Onto Envelopes from the Paper Tray
80
Finishing
81
Staple
81
Punch
83
Storing Data in the Document Server
86
Ricoh Aficio MP C4502 User Manual (41 pages)
PaperCut Ricoh Embedded Manual
Brand:
Ricoh
| Category:
All in One Printer
| Size: 1 MB
Table of Contents
Table of Contents
1
1 Overview
3
Consistency
3
Integration
3
Rate of Development
3
Vendor Neutral
3
Security
3
2 Installation
4
Requirements
4
Devices Supporting GW+ ESA SDK Version 10.X (or Later)
5
Devices Supporting ESA SDK Version 4.X, 5.X, 7.X
5
Devices Supporting ESA SDK Version 2.X
6
How to Determine the ESA SDK Version
6
Setup Procedure
7
Verify Access to the Ricoh Administrative Web Interface
7
Networking/Firewall Configuration
7
Papercut Settings
7
Choosing Application Version
7
Choosing App Version
7
Configuring the Enhanced External Charge Unit (SDK 4.X+ Devices Only)
8
Disable the Document Server
8
Increase Extended Feature Settings Heap / Stack Size
10
Revision: 19 2012
10
Fax Configuration (Recommended When Tracking Faxes)
10
Choose an Installation Method
11
Installing Application Using Ricoh Web Admin (Recommended)
12
Installing Application Using the Ricoh Java SD Card
14
Set Default Application and System Timeout
16
Starting the Embedded Application
16
3 Post-Install Testing
18
Test Preparation
18
Scenario 1: Standard Copying
19
Scenario 2: Copying with Account Selection
20
Scenario 3: Print Release
21
4 Configuration
23
Device Function
23
Authentication Methods
23
Shared Account Selection
24
Customizing Text and Messages
25
5 Advanced Configuration
26
Config Editor
26
Customizing the Header Logos and Colors
27
Customized Logos
27
Custom Header Color
27
Configuring Application Switch Buttons (SDK 4.X+ Devices Only)
28
Setting Papercut as Priority Application
28
Enable Application Switch Button(S)
28
Configuring Swipe Card Readers
29
6 Known Limitations and Security
31
Limitations on SDK V4 (or Higher) Devices
31
Fax Tracking Limitations
31
Limitations on SDK V2 Devices
31
Bypassing the System
31
Ricoh Aficio MP C4502 Quick Start Manual (24 pages)
Brand:
Ricoh
| Category:
Printer
| Size: 2 MB
Table of Contents
Copying Documents
2
Using Batch Mode
3
Stapling Documents
5
Reduction / Enlargement
11
Directional/Size Magnification
12
Create Margin
13
Erase Center / Border
14
Page Numbering
15
Double Copies
16
Image Centering
17
Adding Covers
18
Sample Copy
20
Using the Bypass Tray
21
Job Preset
22
Simple Screen
23
Ricoh Aficio MP C4502 Specifications (8 pages)
Multifunction Color
Brand:
Ricoh
| Category:
All in One Printer
| Size: 0 MB
Advertisement
Related Products
Ricoh Aficio MP C4502A
Ricoh MP C4504 series
Ricoh MP C401SP
Ricoh Aficio MP C3002
Ricoh MP C2004 series
Ricoh MP C6004 series
Ricoh MP CW2201
Ricoh Aficio MP C2530
Ricoh MPC 2050
Ricoh MP C3504 series
Ricoh Categories
All in One Printer
Printer
Digital Camera
Copier
Printer Accessories
More Ricoh Manuals
Login
Sign In
OR
Sign in with Facebook
Sign in with Google
Upload manual
Upload from disk
Upload from URL