Sign In
Upload
Manuals
Brands
hatch Manuals
Dental equipment
X-RAY
hatch X-RAY Manuals
Manuals and User Guides for hatch X-RAY. We have
1
hatch X-RAY manual available for free PDF download: Operating Manual
hatch X-RAY Operating Manual (67 pages)
Brand:
hatch
| Category:
Dental equipment
| Size: 4 MB
Table of Contents
Table of Contents
4
1 Introduction
8
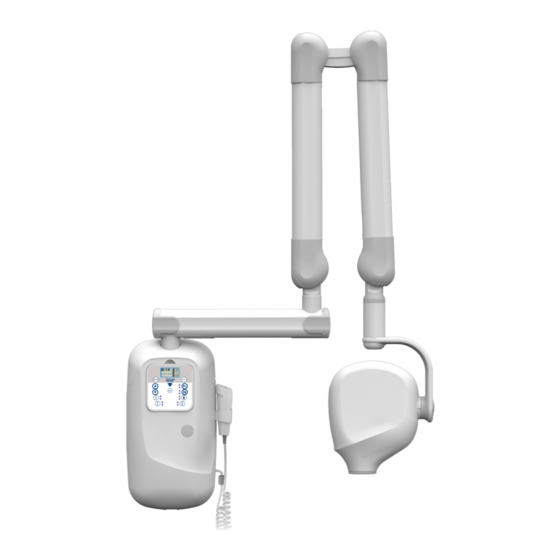
Hatch X-Ray Equipment
8
Indication for Use
8
About this Manual
8
Included System Components
9
Table 1: Hatch X-Ray System Components
9
2 Safety and Precautions
10
Safety Symbols
10
3 Know Your X-Ray Unit
12
Key Component Identification
12
System Labels
13
Figure 1 : Identification of Wall Mount
13
Figure 2 : Label Location
15
Hatch X-Ray Reach Dimensions and Movements
16
Figure 3 : Wall Mounted Hatch X-Ray Fully Extended Right Side and Top Views
16
Figure 4 : Wall Mounted Hatch X-Ray Ground Clearance
16
Hatch X-Ray Wall Mount Configurations
17
Figure 5 : Wall Mounted Hatch X-Ray Vertically Extended
17
Keypad Console
21
Figure 6 : Hatch X-Ray Keypad Console with LCD Display
22
4 Operating the Unit
24
Before You Begin
24
Positioning the Patient
24
Achieving the Best Image Quality
25
Figure 7 : Horizontal Angulation
26
Figure 8 : Paralleling Technique
26
Power Turn-On Procedure
27
Hatch X-Ray Operating Procedure Summary
27
Exposure Settings and Tables
28
Table 7. Default Exposure Values - Custom Modes (All)
28
Exposure Delivery Procedure
29
Figure 9 : Home Screen
29
Figure 10 : X-Ray - Ready
29
Figure 11 : X-Ray - Exposing
29
Figure 12 : X-Ray - Results
30
Table 2 : Default Exposure Values for Short / Long Cone Slow Film - Mode 1
31
Table 3 : Default Exposure Values for Short / Long Cone Fast Film - Mode 1
32
Table 4 : Default Exposure Values for Short / Long Cone - Mode 2
33
Table 5 : Default Exposure Values - PSP (Short Cone)
34
Table 6 : Default Exposure Values - PSP (Long Cone)
35
5 Using the Control Console
38
Selecting a Pre-Set Mode
38
Figure 13 : Start-Up Screen
38
Figure 14 : Home Screen
38
Selecting a Pre-Set
39
Figure 15 : Mode Selection Screen
39
Modifying Exposure Parameters
40
Figure 16 : Home Screen with Ms Highlighted
40
Figure 17 : Ms Parameter Being Modified (Blinking)
40
Figure 18 : Ms Parameter Modified and Accepted, Kv Highlighted
40
Setting the Default Start-Up Mode
41
Using Previously Used Exposure Parameters
41
Figure 19 : Setting a Start-Up Mode
41
Figure 20 : History Screen
41
Configuring Accessories
42
Console Events
42
Figure 21 : Configuration Screen
42
Figure 22 : Stand-By Screen
42
Figure 23 : Error Display
42
Table 8 : Attention / Warning Messages
44
6 Maintenance
46
Cleaning and Disinfecting
46
Caring for Your Equipment
46
Shipping and Long Term Storage
47
Table 9 : Tube Seasoning
47
Preventive Maintenance
48
Disposal of the Unit
48
Optional Accessories
49
Table 10 : Hatch X-Ray Optional Accessories
49
7 Troubleshooting
50
Table 11 : Error Codes
50
Table 12 : Troubleshooting Tips
51
Annex a TECHNICAL SPECIFICATIONS
52
Figure A-1 : X-Ray Tube Insert Rating Chart-OX/70-4
53
Table A1 : Tube-Head Specifications
53
Table A2 : X-Ray Tube Insert Specifications
53
Figure A-2 : X-Ray Tube Insert Thermal Data-OX/70-4
54
Figure A-3 : Heating and Cooling Curve - Product's Tube Inserts-OX/70-4
54
Table A3 : Mechanical Dimensions and Weight
55
Table A4 : Mains Power Requirements
56
Table A5 : Environmental Conditions
56
Annex B DECLARATION of CONFORMITY
58
Annex C GUIDANCE and MANUFACTURER'S DECLARATION
60
Table C1 : Guidance and Manufacturer's Declaration - Electromagnetic Emissions
60
Table C2 : Guidance and Manufacturer's Declaration - Electromagnetic Immunity - for
62
Table C3 : Guidance and Manufacturer's Declaration - Electromagnetic Immunity - for All EQUIPMENT and SYSTEMS that Are Not LIFE-SUPPORTING
64
Annex D CONTACT DETAILS
66
Advertisement
Advertisement
Related Products
hatch comfort TAURAUS C1
hatch Categories
Alarm Clock
Lighting Equipment
Laboratory Equipment
Dental equipment
Tablet
More hatch Manuals
Login
Sign In
OR
Sign in with Facebook
Sign in with Google
Upload manual
Upload from disk
Upload from URL