Sign In
Upload
Manuals
Brands
Grandstream Networks Manuals
PBX
UCM6300A
Grandstream Networks UCM6300A Manuals
Manuals and User Guides for Grandstream Networks UCM6300A. We have
5
Grandstream Networks UCM6300A manuals available for free PDF download: User Manual, High Availability User Manual, Basic Configuration Manual, Quick Installation Manual
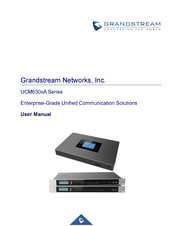
Grandstream Networks UCM6300A User Manual (200 pages)
Enterprise-Grade Unified Communication Solutions
Brand:
Grandstream Networks
| Category:
Network Hardware
| Size: 4.86 MB
Table of Contents
Section 1
4
Table of Contents
4
Section 2
18
Table of Figures
25
Document Purpose
39
Change Log
40
Firmware Version 1.0.7.12
40
Firmware Version 1.0.7.9
40
Firmware Version 1.0.9.10
40
Welcome
41
Product Overview
43
Table 1: Technical Specifications
43
Technical Specifications
43
Equipment Packaging
48
Figure 1: UCM6300A Back View
48
Installation
48
Table 2: Ucm630Xa Equipment Packaging
48
UCM6300A Front and Back View
48
Figure 2:UCM6300A Front View
49
Figure 3: UCM6302A Back View
49
Figure 4:UCM6302A Front View
49
Figure 5: UCM6304A Front View
49
UCM6302A Front and Back View
49
UCM6304A Front and Back View
49
Figure 6: UCM6304A Back View
50
Figure 7: UCM6308A Front View
50
Figure 8: UCM6308A Back View
50
UCM6308A Front and Back View
50
Getting Started
52
Use the LCD Menu
52
Table 3: LCD Menu Options
53
Figure 9: Ports Status
54
Use the LED Indicators
54
Accessing the Web UI
55
Figure 10: UCM6302A Web GUI Login Page
55
Table 4: UCM6304A/6308A LED Indicators
55
Using the Web UI
55
Figure 11: Ucm630Xa Setup Wizard
56
Setup Wizard
56
Main Settings
57
Web GUI Languages
57
Figure 12: Ucm630Xa Web GUI Language
58
Figure 13: Web GUI Search Bar
58
Web GUI Search Bar
58
Saving and Applying Changes
59
Setting up an Extension
59
Figure 14: General Settings Interface
60
General Settings
60
System Settings
60
Table 5: General Settings Parameters
60
Cloud IM
61
Figure 15: Cloud IM
61
IM Settings
61
Figure 16: IM Server Configuration Interface
62
IM Server
62
Table 6: Cloud IM Parameters
62
HTTP Server
63
Table 7: IM Server Parameters
63
Table 8: HTTP Server Settings
63
Basic Settings
65
Network Settings
65
Table 9: Ucm630Xa Network SettingsBasic Settings
65
Figure 17: UCM6302A Network Interface Method: Route
70
Figure 18: UCM6302A Network Interface Method: Switch
71
Figure 19: UCM6302A Network Interface Method: Dual
72
Figure 20: Ucm630Xa Using 802.1X as Client
73
Figure 21: Ucm630Xa Using 802.1X EAP-MD5
73
Static Routes
74
Table 10: Ucm630Xa Network Settings802.1X
74
Table 11: Ucm630Xa Network SettingsStatic Routes
75
Figure 22: UCM6304A Static Route Sample
76
Figure 23: UCM6304A Static Route Configuration
77
Port Forwarding
77
Table 12: Ucm630Xa Network SettingsPort Forwarding
77
Figure 24: Create New Port Forwarding
79
Figure 25: Ucm630Xa Port Forwarding Configuration
79
ARP Settings
80
Figure 26: GXP2160 Web Access Using UCM6302A Port Forwarding
80
Table 13: ARP Settings
80
Openvpn
81
Table 14: Ucm630Xa System SettingsNetwork SettingsOpenvpn
81
DDNS Settings
82
Figure 27: Open VPN® Feature on the Ucm630Xa
82
Figure 28: Register Domain Name on Noip.com
83
Figure 29: Ucm630Xa DDNS Setting
84
Figure 30: Using Domain Name to Connect to Ucm630Xa
84
Security Settings
85
Static Defense
85
Table 15: Ucm630Xa FirewallStatic DefenseCurrent Service
85
Table 16: Typical Firewall Settings
87
Figure 31: Create New Firewall Rule
88
Table 17: Firewall Rule Settings
88
Dynamic Defense
90
Table 18: Ucm630Xa Firewall Dynamic Defense
90
Fail2Ban
91
Figure 32: Configure Dynamic Defense
91
Figure 33: Fail2Ban Settings
92
Table 19: Fail2Ban Settings
92
Figure 34: SSH Access
94
SSH Access
94
Table 20: SSH Access
94
LDAP Server
95
LDAP Server Configurations
95
Figure 35: LDAP Server Configurations
96
Figure 36: Default LDAP Phonebook DN
97
Figure 37: Default LDAP Phonebook Attributes
97
LDAP Phonebook
97
Figure 38: LDAP ServerLdap Phonebook
98
Figure 39: Add LDAP Phonebook
98
Figure 40: Edit LDAP Phonebook
98
Figure 41: Import Phonebook
99
Figure 42: Phonebook CSV File Format
99
Figure 43: LDAP Phonebook after Import
100
Figure 44: Export Selected LDAP Phonebook
100
Figure 45: LDAP Client Configurations
101
LDAP Client Configurations
101
Automatic Date and Time
103
Figure 46: GXP2170 LDAP Phonebook Configuration
103
Time Settings
103
Figure 47: Set Time Manually
104
Set Date and Time
104
Table 21: Time Auto Updating
104
Figure 48: Create New Office Time
105
NTP Server
105
Office Time
105
Table 22: Create New Office Time
105
Figure 49: SettingsTime SettingsOffice Time
106
Holiday
106
Figure 50: Create New Holiday
107
Table 23: Create New Holiday
107
Email Settings
108
Figure 51: SettingsTime SettingsHoliday
108
Table 24: Email Settings
108
Figure 52: Ucm630Xa Email Settings
110
Email Send Log
111
Email Templates
111
Figure 53: Email Template
111
Figure 54: Email Send Log
112
Table 25: Email Log - Display Filter
112
Figure 55: Email Logs
113
Table 26: Email Codes
113
HA Settings
114
Figure 56: HA Settings
115
Table 27: HA Settings Parameters
115
Figure 57: HA Status
116
HA Log
116
HA Status
116
Configuration Architecture for End Point Device
118
Overview
118
Provisioning
118
Auto Provisioning Settings
119
Figure 58: Zero Config Configuration Architecture for End Point Device
119
Figure 59: Ucm630Xa Zero Config
120
Figure 60: Auto Provision Settings
121
Table 28: Auto Provision Settings
121
Discovery
123
Figure 61: Auto Discover
124
Figure 62: Discovered Devices
124
Uploading Devices List
124
Figure 63: Device List - CSV File Sample
125
Figure 64: Managing Discovered Devices
125
Managing Discovered Devices
125
Global Configuration
126
Figure 65: Global Policy Categories
127
Global Policy
127
Table 29: Global Policy Parameters - Localization
128
Table 30: Global Policy Parameters - Phone Settings
128
Table 31: Global Policy Parameters - Contact List
129
Table 32: Global Policy Parameters - Maintenance
132
Table 33: Global Policy Parameters - Network Settings
134
Table 34: Global Policy Parameters - Customization
136
Table 35: Global Policy Parameters - Communication Settings
138
Global Templates
139
Table 36: Create New Template
139
Figure 66: Edit Global Template
140
Model Configuration
141
Model Templates
141
Table 37: Create New Model Template
141
Figure 67: Edit Model Template
142
Model Update
143
Figure 68: OEM Models
144
Device Configuration
145
Figure 69: Template Management
145
Figure 70: Upload Model Template Manually
145
Create New Device
146
Figure 71: Create New Device
146
Manage Devices
146
Figure 72: Manage Devices
147
Figure 73: Edit Device
147
Figure 74: Edit Customize Device Settings
149
Figure 75: Modify Selected Devices - same Model
150
Figure 76: Modify Selected Devices - Different Models
150
Figure 77: Device List in Zero Config
151
Sample Application
151
Figure 78: Zero Config Sample - Global Policy
152
Figure 79: Zero Config Sample - Device Preview 1
153
Figure 80: Zero Config Sample - Device Preview 2
154
Figure 81: Zero Config Sample - Device Preview 3
154
Create New SIP Extension
156
Create New User
156
Extensions
156
Figure 82: Create New Device
156
Table 38: SIP Extension Configuration ParametersBasic Settings
157
Table 39: SIP Extension Configuration ParametersMedia
160
Table 40: SIP Extension Configuration ParametersFeatures
161
Table 41: SIP Extension Configuration ParametersSpecific Time
169
Table 42: Table 34: SIP Extension Configuration ParametersFollow Me
169
Create New IAX Extension
170
Table 43: IAX Extension Configuration ParametersBasic Settings
170
Table 44: IAX Extension Configuration ParametersMedia
172
Table 45: IAX Extension Configuration ParametersFeatures
172
Table 46: IAX Extension Configuration ParametersSpecific Time
176
Create New FXS Extension
177
Table 47: IAX Extension Configuration ParametersFollow Me
177
Batch Add Extensions
186
Batch Add SIP Extensions
186
Batch Add IAX Extensions
196
Advertisement
Grandstream Networks UCM6300A High Availability User Manual (34 pages)
IP PBX
Brand:
Grandstream Networks
| Category:
PBX
| Size: 1.07 MB
Table of Contents
Table of Contents
2
Supported Devices
5
Table 1: UCM Models Supporting High Availability Feature
5
Introduction
6
Typical Network Topology
7
Figure 1: Typical Network Topology
7
Ha Prerequisites
8
Prerequisites
8
Connecting UCM for HA Setup
8
Network Configuration
8
Figure 2: Network Settings
9
Ha Configurations
10
For UCM Without UCMRC Plan
10
Figure 3: HA Settings on Primary UCM
10
Figure 4: HA Settings on Secondary UCM
11
Figure 5: HA Configured on Secondary UCM
12
Figure 6: HA Status on Secondary UCM
12
For UCM with UCMRC Plan
13
Scenario 1: Two New Ucms on Factory Default Settings and both UCM Use UCMRC Service
13
UCM Use UCMRC Service
14
Ha Configuration Parameters
15
Table 2: HA Related Parameters
15
Ucmrc Configurations
19
UCMRC Plan
19
Custom Domain Configuration
19
Figure 7: Add UCM to GDMS
19
Figure 8: Assign UCMRC Plan to UCM
19
Figure 9: Edit Device
20
Figure 10: Configure Custom Domain
20
Verify Ha Settings
21
Figure 11: HA Status for Active UCM
21
Figure 12: HA Status for Standby UCM
21
Active/Standby Role in Ha
22
Automatic Failure Detection
22
Active UCM: Self-Failure Detection
22
Figure 13: Active and Standby UCM Failover
22
Standby UCM: Periodic Heartbeat
23
Force Switch
23
Figure 14: Force Switch
23
Firmware Upgrade
24
Replacing Ucm in Ha
25
HA Setup with UCMRC
25
Scenario 1: UCM A's Station Type Is "Primary" and It's the Active UCM. UCM B's Station Type Is "Secondary" and It's in Standby Status
25
Primary" and It's in Standby Status
25
HA Setup Without UCMRC
26
Disabling Ha Setup
27
Cloud IM in Ha Setup
28
Using Ucmrc with Ha
29
Switching UCMRC Role in HA
29
Figure 15: GDMS Display for UCM HA Status
29
Service Status
30
Active/Standby Status
30
Web UI Access for UCM
30
Log in Wave
30
Failover During Call
31
Data Sync
32
Backup and Restore
33
Maintenance
34
Figure 16: System Alert Events
34
Figure 17: HA Logs
34
Grandstream Networks UCM6300A Basic Configuration Manual (29 pages)
Brand:
Grandstream Networks
| Category:
Network Hardware
| Size: 1.57 MB
Table of Contents
Table of Contents
2
Overview
4
Setup Guide Scenario
4
Figure 1: Typical Ucm6Xx Scenario
4
Quick Installation
5
Connecting the UCM6XXX
5
Figure 2: UCM6302 Back View
5
Figure 3: UCM6302 Top View
5
Access Ucm6Xxx Series Web Interface
6
Figure 4: UCM6302 Web GUI Login Page
6
Create User Extension
7
Configure Extension Range
7
Figure 5: Create User Extension - Extension Range
7
Batch & Single User Creation
8
Steps on Adding Single User
8
Figure 6: Create User Extension - Extensions
8
Steps on Adding Batch of Users
9
Figure 7: Create User Extension - Create New User
9
Figure 8: Create User Extension - Created Single User
9
Figure 9: Create User Extension - Batch Add User
10
Figure 10: Create User Extension - Create User Prompt
10
Figure 11: Create User Extension - Single and Batch Add Extensions Created
11
Provisioning & Zero Config
12
Auto Discovering
12
Extension Assignment
13
Figure 12: Provisioning with Zero Config - Auto Discovery
13
Figure 13: Provisioning with Zero Config - Extension Assignment
13
Figure 14: Provisioning with Zero Config - Manually Assigned Extension
14
Figure 15: Provisioning with Zero Config - Extension Status
14
Conference Bridge
15
How to Set up a Conference Bridge (Ucm62Xx/Ucm6510)
15
Figure 16: Conference Bridge - Create New Conference Room
16
Figure 17: Conference Bridge - Create New Conference Room
16
Figure 18: Conference Bridge - Conference in Progress
16
How to Set up a Meeting Room in the Ucm630X
17
How to Set up a Meeting Room in the Ucm630Xa
17
Figure 19: Meeting Room - Ucm630X
17
Figure 20: Meeting Room - Ucm630Xa
18
Ivr (Interactive Voice Response)
19
Configure IVR
19
Create New IVR
19
Figure 21: Manage IVR
19
Figure 22: IVR - Create New IVR
20
Figure 23: IVR - Key Pressing Events
21
Trunks
22
Analog Trunks
22
Set up Analog Trunk
22
Voip Trunks
23
Figure 24: Analog Trunks - Create New Analog Trunk
23
Set up Voip Trunk
24
Figure 25: Voip Trunks - Create New Register SIP Trunk
25
Figure 26: Voip Trunks - Edit Voip Trunk
26
Figure 27: Status - Trunks
26
Call Routes
27
Outbound Routes
27
How to Configure an Outbound Route
27
Inbound Routes
28
Figure 28: Routes - Create Outbound Route
28
Figure 29: Routes - Create Inbound Route
29
Set up Inbound Route
29
Advertisement
Grandstream Networks UCM6300A User Manual (14 pages)
IP PBX
Brand:
Grandstream Networks
| Category:
PBX
| Size: 0.39 MB
Table of Contents
Table of Contents
2
Supported Devices
4
Table 1: UCM Models Supporting Multi-Factor Authentication Feature
4
Introduction
5
Virtual MFA Device
5
Physical MFA Device
5
Mfa Device Specifications
6
Table 2: MFA Device Specifications
6
Virtual Mfa Applications
7
Table 3: Virtual MFA Applications
7
Using Mfa Device
8
Using Virtual MFA Device
8
Figure 1: Email Settings
9
Figure 2: User Information
9
Figure 3: Scan MFA QR Code
9
Figure 4: Enter MFA Code
10
Using Physical MFA Device
11
Figure 5: Hardware MFA Device Certification
11
Figure 6: Physical MFA Device
12
Removing Mfa Device
13
Removing MFA Via User Management
13
Removing MFA Via Login Page
13
Faq
14
MFA Device Lost or Invalidated
14
Grandstream Networks UCM6300A Quick Installation Manual (21 pages)
IP PBX Appliance
Brand:
Grandstream Networks
| Category:
PBX
| Size: 6.26 MB
Table of Contents
Package Contents
3
Información General
7
Contenido del Paquete
7
Contenu du Pack
9
Contenuto Della Confezione
13
Меры Предосторожности
15
Общий Обзор
15
Комплект Поставки
15
Conteúdo Do Pacote
17
Środki OstrożnośCI
19
Opis Urządzenia
19
Zawartość Opakowania
19
Advertisement
Related Products
Grandstream Networks UCM6300 Series
Grandstream Networks UCM630X
Grandstream Networks UCM6302A
Grandstream Networks UCM6308A
Grandstream Networks UCM6304A
Grandstream Networks UCM6102
Grandstream Networks UCM6104
Grandstream Networks UCM6116
Grandstream Networks UCM6108
Grandstream Networks UCM6510
Grandstream Networks Categories
IP Phone
Telephone
Telephone Accessories
Gateway
Wireless Access Point
More Grandstream Networks Manuals
Login
Sign In
OR
Sign in with Facebook
Sign in with Google
Upload manual
Upload from disk
Upload from URL