Sign In
Upload
Manuals
Brands
Ford Manuals
Automobile
1998 Expedition
Ford 1998 Expedition Full-size SUV Manuals
Manuals and User Guides for Ford 1998 Expedition Full-size SUV. We have
5
Ford 1998 Expedition Full-size SUV manuals available for free PDF download: Owner's Manual, Workshop Manual
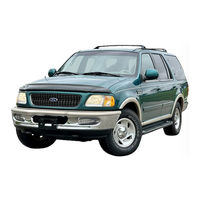
Ford 1998 Expedition Owner's Manual (217 pages)
Ford Motor Company Ford Expedition Owner's Guide
Brand:
Ford
| Category:
Automobile
| Size: 1 MB
Table of Contents
Table of Contents
1
Introduction
2
Icons
2
Breaking-In Your Vehicle
2
Warnings
2
Special Notices
3
Instrumentation
4
Climate Control Systems
5
Warning Lights and Chimes
6
Low Fuel
6
Service Engine Soon
6
Light Turns on Solid
7
Light Is Blinking
7
Air Bag Readiness
7
Turn Signal
8
Brake System Warning
8
Safety Belt
8
Anti-Lock Brake System (ABS)
8
High Beams
9
Securilock Anti-Theft System
9
Charging System
9
Oil Pressure/Engine Coolant
9
Four Wheel Drive Low (if Equipped)
10
Four Wheel Drive Indicator (if Equipped)
10
Check Air Suspension
10
Low Washer Fluid
10
Key-In-Ignition Warning Chime
11
Headlamps on Warning Chime
11
Safety Belt Warning Chime
11
Supplemental Restraint System (SRS) Warning Chime
11
Fuel Reset
11
Fuel Gauge
12
Speedometer
12
Engine Coolant Temperature Gauge
12
Odometer
13
Trip Odometer
13
Tachometer
13
Trip Computer
14
Engine Oil Pressure Gauge
14
Battery Voltage Gauge
14
English/Metric Display
15
Mode Control
15
Fuel Range
15
Selectable Features
15
Average Fuel Economy
16
Headlamp Control
17
Daytime Running Lamps (DRL) (if Equipped)
17
Foglamp Control (if Equipped)
17
Controls and Features
17
Power Adjustable Foot Pedals (if Equipped)
18
Autolamp Control
18
Panel Dimmer Control
18
Rear Window Defroster
19
4Wd Control (if Equipped)
19
Using Your Audio System
20
Premium AM/FM Stereo/Cassette/Premium Sound
20
MACH Audio System with Premium AM/FM Stereo/ Cassette
20
Volume/Power Control
21
Speed Sensitive Volume (if Equipped)
21
AM/FM Select
22
AM/FM Select in Radio Mode
22
AM/FM Select in Tape Mode
22
Tune Adjust in Radio Mode
22
Seek Function for CD Changer
23
Seek Function
23
Seek Function in Tape Mode
23
Seek Function in Radio Mode
23
Scan Function in Tape Mode
24
Scan Function in CD Mode
24
Radio Station Memory Preset
24
Setting Memory Preset Stations
24
Bass Adjust
25
Treble Adjust
25
Speaker Balance Adjust
25
Speaker Fade Adjust
25
Tape Direction Select
26
Rewind
26
Fast Forward
26
Tape/CD Select
26
Eject Function
27
Dolby Noise Reduction
27
Compression Feature
27
Shuffle Feature
27
Traffic
28
Program Type
28
Show
29
RDS Clock Feature
29
Mute Mode
29
Digital Signal Processing
29
Setting the Clock with Radio Data System (RDS) Feature
30
Rear Seat Controls (if Equipped)
31
Adjusting the Volume
31
Turning the Speakers on and off
32
Using Headphones
32
Mode Select
32
Memory Preset Control
33
CD Changer (if Equipped)
33
Troubleshooting the CD Changer (if Equipped)
35
If Sound Skips
35
If Your Changer Does Not Work
35
Cleaning Cassette Player (if Equipped)
36
Cassette and Cassette Player Care
36
CD and CD Changer Care
36
Cleaning Compact Discs
36
Radio Frequency Information
37
Radio Reception Factors
37
Climate Control System
38
Manual Heating and Air Conditioning System
38
Fan Speed Control
38
Temperature Control Knob
38
Operating Tips
40
Electronic Automatic Temperature Control (EATC) System
40
Turning the EATC on
41
Turning the EATC off
41
Automatic Operation
41
The English/Metric (E/M) Control on
42
Temperature Selection
42
Temperature Conversion
42
Fan Speed
43
Manual Override Controls
43
Displaying Outside Temperature
45
Auxiliary A/C-Heater Controls (if Equipped)
46
Positions of the Ignition
48
Turn Signal Control
48
Speed Control
49
To Turn Speed Control on
49
To Turn Speed Control off
49
To Set a Higher Set Speed
50
To Set a Speed
50
To Set a Lower Set Speed
51
To Disengage Speed Control
52
To Return to a Previously Set Speed
52
Tilt Steering
53
Hazard Flasher
53
Windshield Wiper/Washer Controls
53
Rear Window Wiper/Washer Controls
54
Speed Dependent Wipers
54
Flash to Pass
55
Overdrive Control
55
Activating Overdrive
55
Deactivating Overdrive
55
Forward Storage bin (if Equipped)
56
Installing a Garage Door Opener (if Equipped)
56
One-Touch Moon Roof (if Equipped)
57
Electronic Compass (if Equipped)
57
Compass Zone Adjustment
58
Compass Calibration Adjustment
59
Power Quarter Rear Windows (if Equipped)
59
Power Windows
60
One Touch down
60
Window Lock
61
Accessory Delay
61
Power Door Locks
61
Childproof Door Locks
61
Heated Outside Mirrors
62
Power Side View Mirrors
62
To Adjust Your Mirrors
62
Signal Mirrors (if Equipped)
63
Fold-Away Mirrors
63
Center Console
63
Rear Center Console Features (if Equipped)
64
Positive Retention Floor Mat (if Equipped)
64
Liftgate
64
Securilock Passive Anti-Theft System
65
Theft Indicator
66
Programming Spare Securilock Keys
66
Procedure to Program Spare Securilock Keys to Your Vehicle
66
Remote Entry System
67
Unlocking the Doors
68
Locking the Doors
68
Sounding a Panic Alarm
68
Replacing the Battery
69
Replacing Lost Transmitters
70
Illuminated Entry
70
Autolock (if Equipped)
70
Relock
70
Deactivating/Activating the Autolock Feature
71
Keyless Entry System (if Equipped)
71
Programming Your Own Personal Entry Code
72
Activating/Deactivating Autolock with the Keyless Entry System
73
Locking the Doors with the Keyless Entry System
73
Unlocking the Doors with the Keyless Entry System
73
Adjustable Head Restraints (if Equipped)
74
Using the Manual Lumbar Support
74
Adjusting the Front Manual Seat
74
Seating and Safety Restraints
74
60/40 Split Bench Seat (if Equipped)
75
Using the Armrest (if Equipped)
76
Adjusting the Front Power Seat (if Equipped)
76
Heated Seats (if Equipped)
77
Rear Seats
77
Head Restraints
77
Folding down the Rear Seats
78
Rear Folding Bench Seat (if Equipped)
78
Returning the Seat to Upright
79
Reclining the Seatback
79
Third Row Seat
80
Accessing the Third Row Seat
80
Removing the Third Row Seat
81
Installing the Third Row Seat
82
Safety Restraints
83
Safety Restraints Precautions
83
Combination Lap and Shoulder Belts
84
Vehicle Sensitive Mode
85
Automatic Locking Mode
85
How to Use the Automatic Locking Mode
85
Adjusting the Lap Belt
86
Lap Belts
86
How to Disengage the Automatic Locking Mode
86
Front and Second Row Safety Belt Height Adjustment
87
Safety Belt Extension Assembly
87
Safety Belt Warning Light and Indicator Chime
88
Conditions of Operation
88
Safety Belt Maintenance
88
Air Bag Supplemental Restraint System (Srs)
89
Important Supplemental Restraint System (SRS) Precautions
89
Children and Air Bags
90
How Does the Air Bag Supplemental Restraint System Work?
91
Determining if the System Is Operational
92
Children and Safety Belts
93
Safety Restraints for Children
93
Important Child Restraint Precautions
93
Disposal of Air Bags and Air Bag Equipped Vehicles
93
Safety Seats for Children
94
Child and Infant or Child Safety Seats
94
When Installing a Child Safety Seat
95
Installing Child Safety Seats in Combination Lap and Shoulder Belt Seating Positions
96
Attaching Safety Seats with Tether Straps
98
Tether Anchorage Hardware
99
Preparing to Start Your Vehicle
100
Important Safety Precautions
100
Before Starting the Vehicle
100
Starting
100
Starting the Engine
102
Using the Engine Block Heater (if Equipped)
103
Guarding against Exhaust Fumes
103
Important Ventilating Information
104
Brakes
105
Driving
105
ABS Warning Lamp
106
Using ABS
106
Parking Brake
107
Steering
108
Speed Sensitive Steering
109
Air Suspension System (if Equipped)
109
Traction-Lok Axle (if Equipped)
110
Check Air Suspension Light
110
Transmission Operation
111
Brake-Shift Interlock
111
Driving with a 4–Speed Automatic Transmission
112
Understanding Gearshift Positions
112
Four-Wheel Drive (4Wd) Operation (if Equipped)
114
Control-Trac Automatic Four-Wheel Drive System
115
Positions of the Control-Trac System
115
Using the Control-Trac System
116
Shifting from A4WD to 4H
116
Shifting from 4H to 4L (and 4L to 4H)
116
Shifting to A4WD
116
Mud and Water
117
If Your Vehicle Gets Stuck
117
Sand
117
Driving Off-Road with 4WD
117
Driving on Hilly or Sloping Terrain
118
Driving on Snow and Ice
119
Driving through Water
119
Vehicle Loading
119
GVW (Gross Vehicle Weight)
120
GVWR (Gross Vehicle Weight Rating)
120
GAWR (Gross Axle Weight Rating)
120
Maximum Trailer Weight Rating
120
Calculating the Load Your Vehicle Can Carry/Tow
121
Trailer Towing
122
Trailer Towing Table (with Heavy Duty Trailer Tow Option)
123
GCWR (Gross Combined Weight Rating)/Trailer Weights
123
Preparing to Tow
124
Hitches
124
Load Equalizing Hitch
124
Safety Chains
125
Trailer Brakes
125
Trailer Lamps
125
Using a Step Bumper
125
Driving While You Tow
126
When Towing a Trailer
126
Servicing after Towing
126
Trailer Towing Tips
126
Launching or Retrieving a Boat
127
Luggage Rack (if Equipped)
127
Fuel Pump Shut-Off Switch
128
Roadside Emergencies
128
Fuses
129
Standard Fuse Amperage Rating and Color
130
Passenger Compartment Fuse Panel
130
Fuses Codes
131
Power Distribution Box
133
High-Current Fuses
134
Location of the Spare Tire and Tools
137
Removing the Jack Handle
137
Spare Tire Information
137
Changing the Tires
137
Removing the Spare Tire
138
Stowing the Spare
138
Tire Change Procedure
138
Jump Starting Your Vehicle
142
Connecting the Jumper Cables
143
Jump Starting
145
Removing the Jumper Cables
145
Wrecker Towing
147
Service Recommendations
148
Precautions When Servicing Your Vehicle
148
Working with the Engine off
148
Maintenance and Care
148
Opening the Hood
149
Identifying Components in the Engine Compartment
150
Checking the Engine Oil
150
Adding Engine Oil
152
Engine Oil and Filter Recommendations
152
Checking and Adding Brake Fluid
153
Windshield Washer Fluid
154
Checking and Adding Washer Fluid
154
Checking and Adding Washer Fluid for the Liftgate
154
Engine Coolant
154
Adding Engine Coolant
155
Severe Winter Climate
156
Coolant Refill Capacity
156
Recycled Engine Coolant
156
What You Should Know about Fail-Safe Cooling
157
How Fail-Safe Cooling Works
157
When Fail-Safe Mode Is Activated
157
Checking and Adding Power Steering Fluid
158
Transmission Fluid
159
Checking Automatic Transmission Fluid
159
Low Fluid Level
160
Correct Fluid Level
160
High Fluid Level
161
Adjusting Automatic Transmission Fluid Levels
161
Driveline Universal Joint and Slip Yoke
161
Battery
162
Changing the Air Filter Element
164
Air Filter Maintenance
164
Windshield Wiper Blades
165
Checking the Wiper Blades
165
Changing the Wiper Blades
166
To Replace the Wiper Blades
166
Information about Tire Quality Grades
166
U.S. Department of Transportation-Tire Quality Grades
166
Treadwear
167
Traction AA a B C
167
Temperature a B C
167
Servicing Your Tires
168
Checking the Tire Pressure
168
Tire Rotation
168
Replacing the Tires
169
Snow Tires and Chains
169
What You Should Know about Automotive Fuels
170
Choosing the Right Fuel
172
Octane Recommendations
172
Fuel Quality
172
Cleaner Air
173
Running out of Fuel
173
If You Have Run out of Fuel
173
Fuel Filler Cap
173
Fuel Filter
174
Essentials of Good Fuel Economy
174
Measuring Techniques
174
Filling the Tank
175
Calculating Fuel Economy
175
Driving Style — Good Driving and Fuel Economy Habits
176
Habits
176
Maintenance
176
Conditions
177
EPA Window Sticker
177
Emission Control System
178
Readiness for Inspection/Maintenance (I/M) Testing
179
Exterior Bulbs
179
Replacing Exterior Bulbs
179
Replacing Headlamp Bulbs
180
Replacing Front Parking Lamp/Turn Signal Bulbs
181
Replacing Tail Lamp/Backup Lamp Bulbs
182
Replacing Foglamp Bulbs
182
High-Mount Brakelamp
183
Replacing License Plate Lamp Bulbs
183
Using the Right Bulbs
184
Replacing the Interior Bulbs
184
Map Lamps
184
Aiming the Headlamps
184
Cleaning and Caring for Your Vehicle
185
Washing Your Vehicle
185
Waxing Your Vehicle
185
Underbody
186
Cleaning the Wheels
186
Repairing Paint Chips
186
Cleaning the Engine
187
Cleaning Plastic Exterior Parts
187
Cleaning the Exterior Lamps
187
Cleaning the Wiper Blades and Windshield
188
Cleaning the Instrument Panel
188
Cleaning the Overhead Console
188
Cleaning the Interior Fabric
188
Cleaning and Maintaining the Safety Belts
189
Cleaning Leather Seats (if Equipped)
189
Motorcraft Part Numbers
190
Capacities and Specifications
190
Refill Capacities
191
Lubricant Specifications
194
Engine Data
196
Vehicle Dimensions
196
Identifying Your Vehicle
198
Certification Label
198
Vehicle Identification Number
198
Engine Number
198
Getting Roadside Assistance
199
Using Roadside Assistance
199
Customer Assistance
199
Reporting Safety Defects
211
Index
212
Filling Station Information
216
Advertisement
Ford 1998 Expedition Owner's Manual (216 pages)
Ford Motor Company Ford Expedition Owner's Guide
Brand:
Ford
| Category:
Automobile
| Size: 1 MB
Table of Contents
Table of Contents
1
Introduction
2
Special Notices
3
Instrumentation
4
Climate Controls
5
Warning Lights and Chimes
6
Check Engine
6
Fuel Gauge
13
Headlamp Control
20
Controls and Features
20
Audio System
23
Climate Control System
23
Positions of the Ignition
32
Turn Signal Control
32
Tilt Steering
37
Hazard Flasher
38
Windshield Wiper/Washer Controls
38
Flash-To-Pass
39
Automatic Dimming Inside Rear View Mirror
46
Power Windows
47
Positive Retention Floor Mat (if Equipped)
53
Seating and Safety Restraints
60
Air Bag Supplemental Restraint System (Srs)
78
Safety Restraints for Children
83
Preparing to Start Your Vehicle
92
Starting
92
Starting the Engine
95
Driving
98
Fuel Consumption
126
Roadside Emergencies
127
Fuses and Relays
128
Jump Starting Your Vehicle
145
Wrecker Towing
148
Precautions When Servicing Your Vehicle
150
Maintenance and Care
150
Opening the Hood
152
Identifying Components in the Engine Compartment
152
Checking and Adding Power Steering Fluid
163
Driveline Universal Joint and Slip Yoke
167
Changing the Air Filter
170
What You Should Know about Automotive Fuels
177
Aiming the Headlamps
193
Replacing the Interior Bulbs
193
Cleaning and Caring for Your Vehicle
194
Motorcraft Part Numbers
200
Refill Capacities
200
Capacities and Specifications
200
Lubricant Specifications
202
Engine Data
204
Vehicle Dimensions
204
Vehicle Identification Number
206
Engine Number
206
Identifying Your Vehicle
206
Reporting Safety Defects
207
Index
208
Filling Station Information
216
Ford 1998 Expedition Workshop Manual (65 pages)
Transfer Case
Brand:
Ford
| Category:
Automobile
| Size: 1 MB
Table of Contents
Transfer Case
1
Special Tool(S)
1
A4WD Vacuum Schematic
1
4WD Mode Switch Input Resistances
1
Inspection and Verification
2
Visual Inspection Chart
2
GEM Diagnostic Trouble Code (DTC) Index
2
Neutral Safety Switch Input Conditions
2
GEM Parameter Identification (PID) Reference Chart
4
Symptom Chart
5
Pinpoint Tests
6
A1 Check the Ignition States — Monitor the Pid Ign_Gem
6
A2 Retrieve the Diagnostic Trouble Codes (Dtcs)
6
A3 Check the 4Wabs Module Input; 4Wabs Module Connected — Monitor the Pid Pwr_Rly
7
A4 Check the 4Wabs Module Input; 4Wabs Module Disconnected — Monitor the Pid Pwr_Rly
7
A5 Check Circuit 239 (W/O) for Short to Power
7
A6 Check Hall Effect Power Circuit for Short to Ground — Monitor the Pid Hallpwr
8
A7 Check the Hall Effect Circuit for Short to Ground — Transfer Case Assembly C201 Disconnected
8
A8 Check Front and Rear Hall Effect Sensors
9
A9 Check Circuit 774 (Lg) for Short to Ground
9
A10 Monitor the Front and Rear Hall Effect Pids Tra_Rsp and Tra_Fsp
9
A11 Check the Voltage to the Hall Effect Sensors — Circuit 774 (Lg)
10
A12 Check Circuit 774 (Lg) for Open
10
A13 Check Circuit 682 (Db) for Open
11
A14 Check the Voltage to the Hall Effect Sensors — Circuit 774 (Lg)
11
A15 Check the Hall Effect Sensor Ground Circuits 682 (Db) for Open
11
A16 Check Circuit 435 (Y/Lb)/722 (Lb) for Open
12
A17 Check Circuit 435 (Y/Lb)/772 (Lb) for Short to Ground
12
A18 Check Circuit 435 (Y/Lb)/772 (Lb) for Short to Power
12
A19 Monitor the A4Wd Clutch Relay Pid 4Wdclst
13
A20 Check Circuit 976 (O) for Short to Power
13
A21 Check Circuit 976 (O) for Short to Ground
14
A22 Check Circuit 976 (O) for Open
14
A23 Monitor the A4Wd Clutch Relay Pid 4Wdclst
14
A24 Monitor the Pid 4Wdclst — Rear Wheels Breaking Traction
15
A25 Monitor the Pid 4Wdclst for On--- Response
15
A26 Check Circuit 976 (O) for Short to Power
15
A27 Check the A4Wd Output
16
A28 Check Circuit 779 (Br) for Open
16
A29 Check Circuit 779 (Br) for Short to Ground
17
A30 Check Circuit 779 (Br) for Short to Power
17
A31 Check A4Wd Clutch Relay Circuit 57 (Bk) for Open
17
A32 Check the Voltage to the A4Wd Clutch Relay — Circuit 704 (Dg/Lg)
17
Pinpoint Test B: the Vehicle Does Not Shift between 2Wd/A4Wd and 4Wd Modes Properly
18
B1 Check the Ignition States — Monitor the Pid Ign_Gem
18
B2 Retrieve the Diagnostic Trouble Codes (Dtcs)
18
B3 Check the A4Wd Indicator
19
B4 Check the 4H Indicator
19
B5 Check the 4L Indicator
19
B6 Monitor the Mode Switch Pid 4Wdsgem
20
B7 Check the Mode Switch
20
B8 Check Circuit 780 (Db) for Open
20
B9 Check Circuit 780 (Db) for Short to Ground
21
B10 Check Circuit 780 (Db) for Short to Power
21
B11 Check Circuit 682 (Db) for Open
21
B12 Check Circuit 682 (Db) for Short to Power
22
B13 Check the Front Axle Engagement
22
B14 Check the Front Driveshaft Engagement
22
B15 Check the Front Driveshaft Disengagement
23
B16 Check the Front Axle Disengagement
23
B17 MONITOR the PIDS MTR_CCW and MTR_CW — ACTIVE COMMAND CW/CCW on
23
B18 Monitor the Pids Mtr_Ccw and Mtr_Cw Active Command Cw/Ccw to on
23
B19 Check the Voltage to the Transfer Case Shift Relays Coils — Circuit 704 (Dg/Lg)
24
B20 Check Circuit 781 (O/Lb) for Open
24
B21 Check Circuit 782 (Br/W) for Open
24
B22 Check Circuits 781 (O/Lb) and 782 (Br/W) for Short(S) to Ground
24
B23 Check Circuit 782 (Br/W) for Short to Power
25
B24 Check Circuit 781 (O/Lb) for Short to Power
25
B25 Check the Transfer Case Shift Relays Coils
25
B26 Check the Voltage to the Transfer Case Shift Motor — Active Command Cw/Ccw on
26
B27 Check the Voltage to the Transfer Case Shift Relays Switch Side — Circuit 704 (Dg/Lg)
26
B28 Check the Voltage to the Transfer Case Shift Motor — Active Command Cw/Ccw off
27
B29 Check Circuits 777 (Y) and 778 (O) for Short(S) to Power
27
B30 Check Circuits 777 (Y) and 778 (O) for Open
27
B31 Check Circuit 777 (Y) for Open
28
B32 Check Circuit 778 (O) for Open
28
B33 Check the Ground to the Transfer Case Shift Relays — Circuit 57 (Bk)
28
B34 Check the Contact Plate Switches — Monitor the Pids Plate_A, Plate_B, Plate_C and Plate_D
29
B35 Monitor the Pid Plate_A for Open
29
B36 Check Circuit 771 (P/Y) to the Contact Plate Switch a
30
B37 Check Circuit 771 (P/Y) for Short to Ground
30
B38 Check Circuit 771 (P/Y) for Open
30
B39 Check Circuit 771 (P/Y) for Short to Power
31
B40 Check Circuit 762 (Y/W) for Short to Power
31
B41 Check Circuit 762 (Y/W) for Open
31
B42 Monitor the Pid Plate_B for Open
32
B43 Check Circuit 770 (W) to the Contact Plate Switch B
32
B44 Check Circuit 770 (W) for Short to Ground
32
B45 Check Circuit 770 (W) for Open
33
B46 Check Circuit 770 (W) for Short to Power
33
B47 Monitor the Pid Plate_C for Open
33
B48 Check Circuit 764 (Br/W) to the Contact Plate Switch C
34
B49 Check Circuit 764 (Br/W) for Short to Ground
34
B50 Check Circuit 764 (Br/W) for Open
34
B51 Check Circuit 764 (Br/W) for Short to Power
35
B52 Monitor the Pid Plate_D for Open
35
B53 Check Circuit 763 (O/W) to the Contact Plate Switch D
35
B54 Check Circuit 763 (O/W) for Short to Ground
36
B55 Check Circuit 763 (O/W) for Open
36
B56 Check Circuit 763 (O/W) for Short to Power
36
B57 Check the Shift Motor
37
C1 Check the Ignition States — Monitor the Pid Ign_Gem
37
C2 Retrieve the Diagnostic Trouble Codes (Dtcs)
38
C3 Check the 4H Indicator
39
C4 Check the 4L Indicator
39
C5 Monitor the Mode Switch Pid 4Wdsgem
39
C6 Check the Mode Switch
39
C7 Check Circuit 780 (Db) for Open
40
C8 Check Circuit 780 (Db) for Short to Ground
40
C9 Check Circuit 780 (Db) for Short to Power
40
C10 Check Circuit 682 (Db) for Open
41
C11 Check Circuit 682 (Db) for Short to Power
41
C12 Check Bpp Switch Pid Boo_Gem
41
C13 Check the Voltage to the Bpp Switch
42
C14 Check the Bpp Switch
42
C15 Monitor the Tr Sensor Pid Ntrl_Sw
43
C16 Check the Ground to the Digital Transmission Range (Dtr) Sensor — Circuit 57 (Bk)
43
C17 Check Circuit 463 (R/W) for Open
43
C18 Check the Dtr Sensor
44
C19 Monitor the Vss Pid Vss_Gem
44
C20 Check Circuit 676 (Pk/O) for Open
44
C21 Check Circuit 679 (Gy/Bk) for Open
45
C22 Check the Fuse Junction Panel Circuit between the Gem and Circuit 676 (Pk/O)
45
C23 Check the Fuse Junction Panel Circuit between the Gem and Circuit 679 (Gy/Bk)
45
C24 Check the Contact Plate Switches — Monitor the Pids Plate_A, Plate_B, Plate_C and Plate_D
45
C25 Check the Pid Plate_A for Open
46
C26 Check Circuit 771 (P/Y) to the Contact Plate Switch a
47
C27 Check Circuit 771 (P/Y) for Short to Ground
47
C28 Check Circuit 771 (P/Y) for Open
47
C29 Check Circuit 771 (P/Y) for Short to Power
48
C30 Check Circuit 762 (Y/W) for Short to Power
48
C31 Check Circuit 762 (Y/W) for Open
48
C32 Check the Pid Plate_B for Open
49
C33 Check Circuit 770 (W) to the Contact Plate Switch B
49
C34 Check Circuit 770 (W) for Short to Ground
49
C35 Check Circuit 770 (W) for Open
50
C36 Check Circuit 770 (W) for Short to Power
50
C37 Check the Pid Plate_C for Open
50
C38 Check Circuit 764 (Br/W) to the Contact Plate Switch C
51
C39 Check Circuit 764 (Br/W) for Short to Ground
51
C40 Check Circuit 764 (Br/W) for Open
51
C41 Check Circuit 764 (Br/W) for Short to Power
52
C42 Check the Pid Plate_D for Open
52
C43 Check Circuit 763 (O/W) to the Contact Plate Switch D
52
C44 Check Circuit 763 (O/W) for Short to Ground
53
C45 Check Circuit 763 (O/W) for Open
53
C46 Check Circuit 763 (O/W) for Short to Power
53
C47 Check the Transfer Case Electric Shift Motor
53
D1 Check the Ignition States — Monitor the Pid Ign_Gem
54
D2 Retrieve the Diagnostic Trouble Codes (Dtcs)
55
D3 Check the 4H Indicator
56
D4 Check the 4L Indicator
56
D5 Check the A4Wd Indicator
56
D6 Check the Front Axle Engagement
56
D8 Check the Front Driveshaft Disengagement
57
D9 Check the Front Axle Disengagement
57
D10 Check 4Wd and 2Wd Vacuum Solenoid Circuits
57
D11 Check 4Wd and 2Wd Vacuum Hub Solenoids
57
D12 Check Circuits 145 (Gy/Bk) and 605 (R) for Short to Power
58
D13 MONITOR the 4WD and 2WD VACUUM SOLENOID Pids 4WDSOL and 2WDSOL
58
D14 Check the Voltage to the 4Wd and 2Wd Vacuum Solenoids — Circuit 294 (W/Lb)
58
D15 Check the 2Wd and 4Wd Vacuum Solenoid
59
D16 Check Circuit 145 (Gy/Bk) for Open
59
D17 Check Circuit 605 (R) for Open
60
D18 Check Circuit 145 (Gy/Bk) for Short to Ground
60
D19 Check Circuit 605 (R) for Short to Ground
60
D20 Check the Vacuum at the 4Wd and 2Wd Vacuum Solenoids
60
D21 Check the 4Wd and 2Wd Vacuum Solenoids — Closed Condition
61
D22 Check the 4Wd and 2Wd Vacuum Solenoids — Open Condition
61
D23 Check the Vacuum Feed Lines from the Vacuum Motor
61
D24 Check the Vacuum Motor — Axle Engg on and Axle Dscn off
61
D25 Check the Vacuum Motor — Axle Engg off and Axle Dscn on
62
E1 Check the Ignition States — Monitor the Pid Ign_Gem
62
E2 Check Circuit 1052 (T/Bk) for Voltage
62
E3 Check the Fuse Junction Panel for Voltage
62
E4 Check Gem C239-26 Circuit 875 (Bk/Lb) for Continuity to Ground
63
E5 Check Gem C239-14 Circuit 875 (Bk/Lb) for Continuity to Ground
63
Advertisement
Ford 1998 Expedition Workshop Manual (25 pages)
Brand:
Ford
| Category:
Automobile
| Size: 0 MB
Ford 1998 Expedition Workshop Manual (8 pages)
Bleeding
Brand:
Ford
| Category:
Automobile
| Size: 0 MB
Table of Contents
Bleeding
1
Four Wheel Anti-Lock Brake System (4WABS)
2
Gravity
3
Manual
4
Pressure
5
Master Cylinder, Bench
6
Advertisement
Related Products
Ford 1998 Contour
Ford 1998 E-150
Ford 1998 F-150
Ford 1998 Escort
Ford 1998 Crown Victoria
Ford 1998 Mustang
Ford 1998 Windstar
Ford 1998 Mercury Villager
Ford 1998 Mustang GT
Ford 1998 F-450
Ford Categories
Automobile
Automobile Accessories
Tractor
Engine
Portable Generator
More Ford Manuals
Login
Sign In
OR
Sign in with Facebook
Sign in with Google
Upload manual
Upload from disk
Upload from URL