FLIR E53 Manuals
Manuals and User Guides for FLIR E53. We have 2 FLIR E53 manuals available for free PDF download: User Manual

FLIR E53 User Manual (328 pages)
E series
Brand: FLIR
|
Category: Thermographic Cameras
|
Size: 15 MB
Table of Contents
-
Disclaimers13
-
Copyright13
-
Patents13
-
EULA Terms13
-
EULA Terms14
-
Calibration19
-
Accuracy19
-
Training19
-
General21
-
Downloads22
-
Procedure24
-
General25
-
Procedure25
-
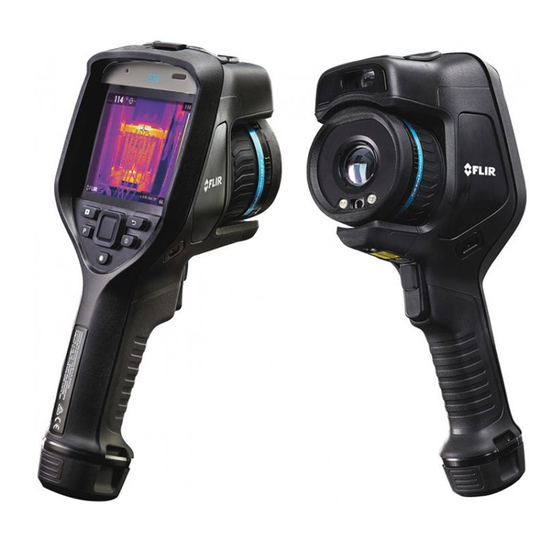
Camera Parts30
-
Figure30
-
Explanation30
-
Figure31
-
Explanation31
-
General32
-
General35
-
Menu System35
-
General38
-
General39
-
Figure42
-
Procedure42
-
General43
-
Figure43
-
Procedure43
-
General44
-
Procedure44
-
General45
-
Figure46
-
Procedure46
-
General47
-
Procedure47
-
Figure48
-
Explanation48
-
General48
-
Procedure49
-
General50
-
Procedure51
-
General51
-
Hand Strap51
-
General55
-
Wrist Strap56
-
General56
-
Introduction62
-
Procedure64
-
General65
-
General66
-
Procedure66
-
General67
-
Procedure67
-
General68
-
Procedure68
-
General69
-
Procedure69
-
Procedure70
-
General71
-
General72
-
Procedure72
-
General73
-
Procedure73
-
General74
-
Procedure74
-
General75
-
Manual Focus75
-
Autofocus75
-
General76
-
General79
-
Procedure79
-
General80
-
Procedure81
-
General82
-
Procedure83
-
General84
-
General87
-
General88
-
Procedure88
-
General89
-
Procedure90
-
General92
-
Procedure93
-
General93
-
General94
-
Procedure94
-
Color Alarms97
-
General97
-
General101
-
Adding a Note101
-
Procedure101
-
General102
-
Procedure102
-
General105
-
Procedure105
-
Adding a Sketch106
-
General106
-
Procedure106
-
General108
-
Procedure108
-
General109
-
Procedure109
-
Screening Alarm111
-
General111
-
Procedure111
-
General113
-
Procedure113
-
General114
-
General115
-
Procedure116
-
General116
-
More Information117
-
General118
-
Recording Mode118
-
Connections118
-
Device Settings120
-
Liquids123
-
Equipment123
-
Procedure123
-
Infrared Lens123
-
General124
-
Procedure124
-
Technical Data125
-
Flir E53 24126
-
Flir E75 14132
-
Flir E75 24139
-
Flir E75 42146
-
Flir E85 14180
-
Flir E85 24187
-
Flir E85 42194
-
Flir E95 14228
-
Flir E95 24235
-
Flir E95 42242
-
General280
-
Figure280
-
Figure281
-
Oxidized Socket281
-
General281
-
General282
-
Figure282
-
Draft283
-
General283
-
Figure283
-
Introduction290
-
Emissivity290
-
Distance294
-
Other Parameters294
-
Introduction295
-
Introduction301
Advertisement
FLIR E53 User Manual (115 pages)
Brand: FLIR
|
Category: Thermal cameras
|
Size: 9 MB
Table of Contents
-
-
-
-
-
Manual Focus27
-
Autofocus27
-
-
Hand Strap35
-
Wrist Strap39
-
-
-
General47
-
-
-
-
General56
-
-
Manual Focus56
-
Autofocus56
-
-
-
-
General64
-
-
-
-
General85
-
-
-
Introduction109
-
Advertisement