Sign In
Upload
Manuals
Brands
Daikin Manuals
Air Conditioner
EBSX11P50DF
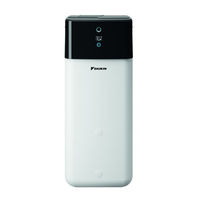
Daikin EBSX11P50DF Manuals
Manuals and User Guides for Daikin EBSX11P50DF. We have
5
Daikin EBSX11P50DF manuals available for free PDF download: Installer's Reference Manual, User Reference Manual, Installation Manual, Operation Manual
Daikin EBSX11P50DF Installer's Reference Manual (316 pages)
Brand:
Daikin
| Category:
Air Conditioner
| Size: 27.52 MB
Table of Contents
Table of Contents
2
About the Documentation
6
About this Document
6
Meaning of Warnings and Symbols
7
Installer Reference Guide at a Glance
8
General Safety Precautions
10
For the Installer
10
General
10
Installation Site
11
Refrigerant - in Case of R410A or R32
11
Water
13
Electrical
13
Specific Installer Safety Instructions
16
About the Box
22
Outdoor Unit
22
To Handle, Unpack and Remove Accessories - Outdoor Unit
22
To Remove the Transportation Stay
24
Indoor Unit
25
To Unpack the Indoor Unit
25
To Remove the Accessories from the Indoor Unit
25
To Handle the Indoor Unit
26
About the Units and Options
27
Overview: about the Units and Options
27
Identification
27
Identification Label: Outdoor Unit
27
Identification Label: Indoor Unit
28
Combining Units and Options
28
Possible Combinations of Indoor Unit and Outdoor Unit
28
Possible Options for the Outdoor Unit
29
Possible Options for the Indoor Unit
29
Application Guidelines
33
Overview: Application Guidelines
33
Setting up the Space Heating/Cooling System
34
Single Room
35
Multiple Rooms - One LWT Zone
39
Multiple Rooms - Two LWT Zones
45
Setting up Bivalent Heat Sources
50
Setting up a Direct Auxiliary Heat Source for Space Heating
50
Setting up an Indirect Auxiliary Heat Source for Domestic Hot Water and Space Heating
53
Setting up a Solar System Via Drainback Connection
54
Setting up a Solar System Via Bivalent Heat Exchanger
55
Setting up an Electric Backup Heater
55
Setting up the Storage Tank
56
System Layout - Integrated Storage Tank
56
Selecting the Volume and Desired Temperature for the Storage Tank
56
Setup and Configuration - Storage Tank
57
DHW Pump for Instant Hot Water
58
DHW Pump for Disinfection
58
Setting up the Energy Metering
59
Produced Heat
59
Consumed Energy
59
Normal Kwh Rate Power Supply
60
Preferential Kwh Rate Power Supply
61
Setting up the Power Consumption Control
62
Permanent Power Limitation
63
Power Limitation Activated by Digital Inputs
64
Power Limitation Process
65
BBR16 Power Limitation
65
Setting up an External Temperature Sensor
66
Unit Installation
68
Preparing the Installation Site
68
Installation Site Requirements of the Outdoor Unit
68
Additional Installation Site Requirements of the Outdoor Unit in Cold Climates
70
Installation Site Requirements of the Indoor Unit
71
Special Requirements for R32 Units
72
Installation Patterns
74
Opening and Closing the Units
83
About Opening the Units
83
To Open the Outdoor Unit
83
To Close the Outdoor Unit
84
To Open the Indoor Unit
84
To Lower the Switch Box of the Indoor Unit and Remove the Top Cover
85
To Close the Indoor Unit
87
Mounting the Outdoor Unit
87
About Mounting the Outdoor Unit
87
Precautions When Mounting the Outdoor Unit
87
To Provide the Installation Structure
87
To Install the Outdoor Unit
88
To Provide Drainage
89
To Install the Discharge Grille
90
To Prevent the Outdoor Unit from Falling over
91
Mounting the Indoor Unit
91
About Mounting the Indoor Unit
91
Precautions When Mounting the Indoor Unit
91
To Install the Indoor Unit
91
To Connect the Drain Hose to the Drain
92
Piping Installation
94
Preparing Refrigerant Piping
94
Refrigerant Piping Requirements
94
Refrigerant Piping Insulation
95
Connecting the Refrigerant Piping
95
About Connecting the Refrigerant Piping
95
Precautions When Connecting the Refrigerant Piping
96
Guidelines When Connecting the Refrigerant Piping
97
Pipe Bending Guidelines
97
To Flare the Pipe End
97
To Braze the Pipe End
98
Using the Stop Valve and Service Port
99
To Connect the Refrigerant Piping to the Outdoor Unit
100
To Connect the Refrigerant Piping to the Indoor Unit
103
Checking the Refrigerant Piping
103
About Checking the Refrigerant Piping
103
Precautions When Checking the Refrigerant Piping
104
Checking Refrigerant Piping: Setup
104
To Check for Leaks
104
To Perform Vacuum Drying
105
Charging Refrigerant
106
About Charging Refrigerant
106
Precautions When Charging Refrigerant
107
Charging Additional Refrigerant
108
Completely Recharging Refrigerant
108
To Fix the Fluorinated Greenhouse Gases Label
109
Preparing Water Piping
110
Water Circuit Requirements
110
To Check the Water Volume and Flow Rate
113
Connecting Water Piping
114
About Connecting the Water Piping
114
Precautions When Connecting the Water Piping
115
To Connect the Water Piping
115
To Connect a Pressure Vessel
118
To Fill the Heating System
118
To Fill the Heat Exchanger Inside the Storage Tank
120
To Fill the Storage Tank
120
To Insulate the Water Piping
121
Electrical Installation
123
About Connecting the Electrical Wiring
123
Precautions When Connecting the Electrical Wiring
123
Guidelines When Connecting the Electrical Wiring
124
About Electrical Compliance
125
About Preferential Kwh Rate Power Supply
126
Overview of Electrical Connections Except External Actuators
126
Connections to the Outdoor Unit
127
Specifications of Standard Wiring Components
128
To Connect the Electrical Wiring to the Outdoor Unit
128
Connections to the Indoor Unit
130
To Connect the Electrical Wiring to the Indoor Unit
133
To Connect the Main Power Supply
135
To Connect the Backup Heater Power Supply
137
To Connect the Backup Heater to the Main Unit
140
To Connect the Shut-Off Valve
141
To Connect the Electricity Meters
142
To Connect the Domestic Hot Water Pump
143
To Connect the Alarm Output
144
To Connect the Space Cooling/Heating ON/OFF Output
145
To Connect the Changeover to External Heat Source
146
To Connect the Power Consumption Digital Inputs
147
To Connect the Safety Thermostat (Normally Closed Contact)
149
To Connect a Smart Grid
150
To Connect the WLAN Cartridge
155
To Connect the Solar Input
156
To Connect the DHW Output
156
Finishing the Outdoor Unit Installation
158
To Check the Insulation Resistance of the Compressor
158
To Finish the Outdoor Unit Installation
158
Configuration
159
Overview: Configuration
159
To Access the most Used Commands
160
To Connect the PC Cable to the Switch Box
162
Configuration Wizard
162
Possible Screens
164
Possible Screens: Overview
164
Home Screen
165
Main Menu Screen
167
Menu Screen
168
Setpoint Screen
168
Detailed Screen with Values
169
Schedule Screen: Example
170
Weather-Dependent Curve
174
What Is a Weather-Dependent Curve
174
2-Points Curve
174
Slope-Offset Curve
175
Using Weather-Dependent Curves
177
Settings Menu
179
Malfunctioning
179
Room
179
Main Zone
183
Additional Zone
193
Space Heating/Cooling
198
Tank
207
User Settings
212
Information
217
Installer Settings
219
Commissioning
246
User Profile
246
Operation
246
Wlan
247
Menu Structure: Overview User Settings
249
Menu Structure: Overview Installer Settings
250
Commissioning
251
Overview: Commissioning
251
Precautions When Commissioning
252
Checklist before Commissioning
252
Checklist During Commissioning
253
Minimum Flow Rate
253
Air Purge Function
254
Operation Test Run
256
Actuator Test Run
257
Underfloor Heating Screed Dryout
258
To Set up Bivalent Heat Sources
261
Hand-Over to the User
262
Maintenance and Service
263
Overview: Maintenance and Service
263
Maintenance Safety Precautions
263
Yearly Maintenance
264
Yearly Maintenance Outdoor Unit: Overview
264
Yearly Maintenance Outdoor Unit: Instructions
264
Yearly Maintenance Indoor Unit: Overview
264
Yearly Maintenance Indoor Unit: Instructions
264
Troubleshooting
266
Overview: Troubleshooting
266
Precautions When Troubleshooting
266
Solving Problems Based on Symptoms
267
Symptom: the Unit Is NOT Heating or Cooling as Expected
267
Symptom: Hot Water Does NOT Reach the Desired Temperature
268
Symptom: the Compressor Does NOT Start (Space Heating or Domestic Water Heating)
268
Symptom: the System Is Making Gurgling Noises after Commissioning
269
Symptom: the Pump Is Blocked
270
Symptom: the Pump Is Making Noise (Cavitation)
270
Symptom: the Pressure Relief Valve Opens
271
Symptom: the Water Pressure Relief Valve Leaks
271
Symptom: the Space Is NOT Sufficiently Heated at Low Outdoor Temperatures
272
Symptom: Tank Disinfection Function Is NOT Completed Correctly (AH-Error)
273
Solving Problems Based on Error Codes
273
To Display the Help Text in Case of a Malfunction
273
Error Codes: Overview
274
Disposal
278
To Recover Refrigerant
278
To Open the Stop Valves
279
To Manually Open the Electronic Expansion Valves
279
Recovery Mode - in Case of 3N~ Models (7-Segments Display)
280
Recovery Mode - in Case of 1N~ Models (7-Leds Display)
283
To Drain the Storage Tank
285
To Drain the Storage Tank Without a Connected Pressureless Solar System
285
To Drain the Storage Tank with a Connected Pressureless Solar System
287
Technical Data
288
Service Space: Outdoor Unit
289
Piping Diagram: Outdoor Unit
290
Piping Diagram: Indoor Unit
291
Wiring Diagram: Outdoor Unit
292
Wiring Diagram: Indoor Unit
293
ESP Curve: Indoor Unit
299
Name Plate: Indoor Unit
299
Glossary
301
Field Settings Table
302
Advertisement
Daikin EBSX11P50DF Installer's Reference Manual (316 pages)
Brand:
Daikin
| Category:
Chiller
| Size: 27.14 MB
Table of Contents
Table of Contents
2
About the Documentation
6
About this Document
6
Meaning of Warnings and Symbols
7
Installer Reference Guide at a Glance
8
General Safety Precautions
10
For the Installer
10
General
10
Installation Site
11
Refrigerant - in Case of R410A or R32
11
Water
13
Electrical
13
Specific Installer Safety Instructions
16
About the Box
22
Overview: about the Box
22
Outdoor Unit
22
To Handle, Unpack and Remove Accessories - Outdoor Unit
22
To Remove the Transportation Stay
24
Indoor Unit
25
To Unpack the Indoor Unit
25
To Remove the Accessories from the Indoor Unit
25
To Handle the Indoor Unit
26
About the Units and Options
27
Overview: about the Units and Options
27
Identification
27
Identification Label: Outdoor Unit
27
Identification Label: Indoor Unit
28
Combining Units and Options
28
Possible Combinations of Indoor Unit and Outdoor Unit
28
Possible Options for the Outdoor Unit
29
Possible Options for the Indoor Unit
29
Application Guidelines
33
Overview: Application Guidelines
33
Setting up the Space Heating/Cooling System
34
Single Room
35
Multiple Rooms - One LWT Zone
39
Multiple Rooms - Two LWT Zones
44
Setting up Bivalent Heat Sources
48
Setting up a Direct Auxiliary Heat Source for Space Heating
48
Setting up an Indirect Auxiliary Heat Source for Domestic Hot Water and Space Heating
51
Setting up a Solar System Via Drainback Connection
52
Setting up a Solar System Via Bivalent Heat Exchanger
53
Setting up an Electric Backup Heater
53
Setting up the Storage Tank
54
System Layout - Integrated Storage Tank
54
Selecting the Volume and Desired Temperature for the Storage Tank
54
Setup and Configuration - Storage Tank
55
DHW Pump for Instant Hot Water
56
DHW Pump for Disinfection
56
Setting up the Energy Metering
57
Produced Heat
57
Consumed Energy
57
Normal Kwh Rate Power Supply
58
Preferential Kwh Rate Power Supply
59
Setting up the Power Consumption Control
60
Permanent Power Limitation
61
Power Limitation Activated by Digital Inputs
62
Power Limitation Process
63
BBR16 Power Limitation
63
Setting up an External Temperature Sensor
64
Unit Installation
66
Preparing the Installation Site
66
Installation Site Requirements of the Outdoor Unit
66
Additional Installation Site Requirements of the Outdoor Unit in Cold Climates
68
Installation Site Requirements of the Indoor Unit
69
Special Requirements for R32 Units
70
Installation Patterns
72
Opening and Closing the Units
81
About Opening the Units
81
To Open the Outdoor Unit
81
To Close the Outdoor Unit
82
To Open the Indoor Unit
82
To Lower the Switch Box of the Indoor Unit and Remove the Top Cover
83
To Close the Indoor Unit
84
Mounting the Outdoor Unit
85
About Mounting the Outdoor Unit
85
Precautions When Mounting the Outdoor Unit
85
To Provide the Installation Structure
85
To Install the Outdoor Unit
86
To Provide Drainage
86
To Install the Discharge Grille
88
Mounting the Indoor Unit
88
About Mounting the Indoor Unit
88
Precautions When Mounting the Indoor Unit
89
To Install the Indoor Unit
89
To Connect the Drain Hose to the Drain
89
Piping Installation
91
Preparing Refrigerant Piping
91
Refrigerant Piping Requirements
91
Refrigerant Piping Insulation
92
Connecting the Refrigerant Piping
92
About Connecting the Refrigerant Piping
92
Precautions When Connecting the Refrigerant Piping
93
Guidelines When Connecting the Refrigerant Piping
94
Pipe Bending Guidelines
94
To Flare the Pipe End
94
To Braze the Pipe End
95
Using the Stop Valve and Service Port
96
To Connect the Refrigerant Piping to the Outdoor Unit
97
To Connect the Refrigerant Piping to the Indoor Unit
100
Checking the Refrigerant Piping
100
About Checking the Refrigerant Piping
100
Precautions When Checking the Refrigerant Piping
101
Checking Refrigerant Piping: Setup
101
To Check for Leaks
101
To Perform Vacuum Drying
102
Charging Refrigerant
103
About Charging Refrigerant
103
Precautions When Charging Refrigerant
104
Charging Additional Refrigerant
105
Completely Recharging Refrigerant
105
To Fix the Fluorinated Greenhouse Gases Label
106
Preparing Water Piping
107
Water Circuit Requirements
107
To Check the Water Volume and Flow Rate
110
Connecting Water Piping
111
About Connecting the Water Piping
111
Precautions When Connecting the Water Piping
112
To Connect the Water Piping
112
To Connect a Pressure Vessel
115
To Fill the Heating System
116
To Fill the Heat Exchanger Inside the Storage Tank
117
To Fill the Storage Tank
117
To Insulate the Water Piping
118
Electrical Installation
120
About Connecting the Electrical Wiring
120
Precautions When Connecting the Electrical Wiring
120
Guidelines When Connecting the Electrical Wiring
121
About Electrical Compliance
122
About Preferential Kwh Rate Power Supply
123
Overview of Electrical Connections Except External Actuators
123
Connections to the Outdoor Unit
124
Specifications of Standard Wiring Components
125
To Connect the Electrical Wiring to the Outdoor Unit
125
Connections to the Indoor Unit
127
To Connect the Electrical Wiring to the Indoor Unit
130
To Connect the Main Power Supply
132
To Connect the Backup Heater Power Supply
134
To Connect the Backup Heater to the Main Unit
137
To Connect the Shut-Off Valve
138
To Connect the Electricity Meters
139
To Connect the Domestic Hot Water Pump
140
To Connect the Alarm Output
141
To Connect the Space Cooling/Heating ON/OFF Output
142
To Connect the Changeover to External Heat Source
143
To Connect the Power Consumption Digital Inputs
144
To Connect the Safety Thermostat (Normally Closed Contact)
146
To Connect a Smart Grid
147
To Connect the WLAN Cartridge
152
To Connect the Solar Input
153
To Connect the DHW Output
153
Finishing the Outdoor Unit Installation
155
To Check the Insulation Resistance of the Compressor
155
To Finish the Outdoor Unit Installation
155
Configuration
156
Overview: Configuration
156
To Access the most Used Commands
157
To Connect the PC Cable to the Switch Box
159
Configuration Wizard
159
Possible Screens
161
Possible Screens: Overview
161
Home Screen
162
Main Menu Screen
164
Menu Screen
165
Setpoint Screen
165
Detailed Screen with Values
166
Schedule Screen: Example
167
Weather-Dependent Curve
171
What Is a Weather-Dependent Curve
171
2-Points Curve
171
Slope-Offset Curve
172
Using Weather-Dependent Curves
174
Settings Menu
176
Malfunctioning
176
Room
176
Main Zone
180
Additional Zone
190
Space Heating/Cooling
195
Tank
204
User Settings
209
Information
214
Installer Settings
216
Commissioning
242
User Profile
242
Operation
243
Wlan
243
Menu Structure: Overview User Settings
246
Menu Structure: Overview Installer Settings
247
Commissioning
248
Overview: Commissioning
248
Precautions When Commissioning
249
Checklist before Commissioning
249
Checklist During Commissioning
250
Minimum Flow Rate
250
Air Purge Function
251
Operation Test Run
253
Actuator Test Run
254
Underfloor Heating Screed Dryout
255
Hand-Over to the User
259
Maintenance and Service
260
Overview: Maintenance and Service
260
Maintenance Safety Precautions
260
Yearly Maintenance
261
Yearly Maintenance Outdoor Unit: Overview
261
Yearly Maintenance Outdoor Unit: Instructions
261
Yearly Maintenance Indoor Unit: Overview
261
Yearly Maintenance Indoor Unit: Instructions
261
Troubleshooting
263
Overview: Troubleshooting
263
Precautions When Troubleshooting
263
Solving Problems Based on Symptoms
264
Symptom: the Unit Is NOT Heating or Cooling as Expected
264
Symptom: Hot Water Does NOT Reach the Desired Temperature
265
Symptom: the Compressor Does NOT Start (Space Heating or Domestic Water Heating)
265
Symptom: the System Is Making Gurgling Noises after Commissioning
265
Symptom: the Pump Is Blocked
267
Symptom: the Pump Is Making Noise (Cavitation)
267
Symptom: the Pressure Relief Valve Opens
268
Symptom: the Water Pressure Relief Valve Leaks
268
Symptom: the Space Is NOT Sufficiently Heated at Low Outdoor Temperatures
269
Symptom: Tank Disinfection Function Is NOT Completed Correctly (AH-Error)
270
Solving Problems Based on Error Codes
270
To Display the Help Text in Case of a Malfunction
270
Error Codes: Overview
271
Disposal
275
To Recover Refrigerant
275
To Open the Stop Valves
276
To Manually Open the Electronic Expansion Valves
276
Recovery Mode - in Case of 3N~ Models (7-Segments Display)
277
Recovery Mode - in Case of 1N~ Models (7-Leds Display)
280
To Drain the Storage Tank
282
To Drain the Storage Tank Without a Connected Pressureless Solar System
282
To Drain the Storage Tank with a Connected Pressureless Solar System
284
Technical Data
285
Service Space: Outdoor Unit
286
Piping Diagram: Outdoor Unit
288
Piping Diagram: Indoor Unit
289
Wiring Diagram: Outdoor Unit
290
Wiring Diagram: Indoor Unit
291
ESP Curve: Indoor Unit
297
Name Plate: Indoor Unit
297
Glossary
299
Field Settings Table
300
Daikin EBSX11P50DF Installation Manual (52 pages)
Brand:
Daikin
| Category:
Heat Pump
| Size: 11.69 MB
Table of Contents
1 About the Documentation
4
Table of Contents
4
About this Document
4
2 Specific Installer Safety Instructions
5
3 About the Box
6
Indoor Unit
6
To Remove the Accessories from the Indoor Unit
7
To Handle the Indoor Unit
7
4 Unit Installation
7
Preparing the Installation Site
7
Installation Site Requirements of the Indoor Unit
7
Special Requirements for R32 Units
8
Installation Patterns
9
Opening and Closing the Unit
15
To Open the Indoor Unit
15
To Lower the Switch Box of the Indoor Unit and Remove the Top Cover
16
To Close the Indoor Unit
16
Mounting the Indoor Unit
16
To Install the Indoor Unit
16
To Connect the Drain Hose to the Drain
16
5 Piping Installation
17
Preparing Refrigerant Piping
17
Refrigerant Piping Requirements
17
Refrigerant Piping Insulation
17
Connecting Refrigerant Piping
18
To Connect the Refrigerant Piping to the Indoor Unit
18
Preparing Water Piping
18
To Check the Water Volume and Flow Rate
18
Connecting Water Piping
19
To Connect the Water Piping
19
To Connect a Pressure Vessel
20
To Fill the Heating System
20
To Protect the Water Circuit against Freezing
21
To Fill the Heat Exchanger Inside the Storage Tank
21
To Fill the Storage Tank
21
To Insulate the Water Piping
22
6 Electrical Installation
22
About Electrical Compliance
22
Guidelines When Connecting the Electrical Wiring
22
Connections to the Indoor Unit
22
To Connect the Electrical Wiring to the Indoor Unit
23
To Connect the Main Power Supply
24
To Connect the Backup Heater Power Supply
25
To Connect the Backup Heater to the Main Unit
27
To Connect the Shut-Off Valve
27
To Connect the Electricity Meters
28
To Connect the Domestic Hot Water Pump
28
To Connect the Alarm Output
29
To Connect the Space Cooling/Heating ON/OFF Output
29
To Connect the Changeover to External Heat Source
30
To Connect the Power Consumption Digital Inputs
30
To Connect the Safety Thermostat (Normally Closed Contact)
31
To Connect a Smart Grid
32
To Connect the WLAN Cartridge
34
To Connect the Solar Input
34
To Connect the DHW Output
34
7 Configuration
35
Overview: Configuration
35
To Access the most Used Commands
35
Configuration Wizard
36
Configuration Wizard: Language
36
Configuration Wizard: Time and Date
36
Configuration Wizard: System
36
Configuration Wizard: Backup Heater
38
Configuration Wizard: Main Zone
38
Configuration Wizard: Additional Zone
39
Configuration Wizard: Tank
39
Weather-Dependent Curve
40
What Is a Weather-Dependent Curve
40
2-Points Curve
40
Slope-Offset Curve
40
Using Weather-Dependent Curves
41
Settings Menu
42
Main Zone
42
Additional Zone
42
Information
42
Menu Structure: Overview Installer Settings
43
8 Commissioning
44
Checklist before Commissioning
44
Checklist During Commissioning
44
To Check the Minimum Flow Rate
44
To Perform an Air Purge
45
To Perform an Operation Test Run
45
To Perform an Actuator Test Run
45
To Perform an Underfloor Heating Screed Dryout
45
9 Hand-Over to the User
46
10 Technical Data
47
Piping Diagram: Indoor Unit
47
Wiring Diagram: Indoor Unit
48
Advertisement
Daikin EBSX11P50DF User Reference Manual (68 pages)
Brand:
Daikin
| Category:
Air Conditioner
| Size: 3.07 MB
Table of Contents
Table of Contents
2
1 About this Document
4
Meaning of Warnings and Symbols
5
2 User Safety Instructions
7
General
7
Instructions for Safe Operation
8
3 About the System
10
Components in a Typical System Layout
10
4 Quick Guide
11
User Permission Level
11
Space Heating/Cooling
11
Domestic Hot Water
14
5 Operation
16
User Interface: Overview
16
Menu Structure: Overview User Settings
18
Possible Screens: Overview
19
Home Screen
19
Main Menu Screen
22
Setpoint Screen
23
Detailed Screen with Values
24
Turning Operation on or off
24
Visual Indication
24
To Turn on or off
25
Reading out Information
26
Space Heating/Cooling Control
26
About Space Heating/Cooling Control
26
Setting the Space Operation Mode
27
Determining Which Temperature Control You Are Using
28
To Change the Desired Room Temperature
28
To Change the Desired Leaving Water Temperature
29
Domestic Hot Water Control
30
About Domestic Hot Water Control
30
Reheat Mode
31
Scheduled Reheat Mode
31
To Change the Domestic Hot Water Temperature
32
Using DHW Powerful Operation
33
Preset Values and Schedules
33
Using Preset Values
33
Using and Programming Schedules
34
Schedule Screen: Example
36
Setting the Energy Prices
40
Weather-Dependent Curve
42
What Is a Weather-Dependent Curve
42
2-Points Curve
43
Slope-Offset Curve
44
Using Weather-Dependent Curves
45
Other Functionalities
47
To Configure Time and Date
47
Using Quiet Mode
48
Using Holiday Mode
48
Using WLAN
49
6 Energy Saving Tips
53
7 Maintenance and Service
54
Overview: Maintenance and Service
54
8 Troubleshooting
56
To Display the Help Text in Case of a Malfunction
56
To Check the Malfunction History
56
Symptom: You Are Feeling too Cold (Hot) in Your Living Room
57
Symptom: the Water at the Tap Is too Cold
57
Symptom: Heat Pump Failure
57
Symptom: the System Is Making Gurgling Noises after Commissioning
58
9 Relocation
60
Overview: Relocation
60
10 Disposal
61
11 Glossary
62
12 Installer Settings: Tables to be Filled in by Installer
63
Configuration Wizard
63
Settings Menu
64
Daikin EBSX11P50DF Operation Manual (24 pages)
Brand:
Daikin
| Category:
Air Conditioner
| Size: 2.55 MB
Table of Contents
1 About this Document
2
Table of Contents
2
2 User Safety Instructions
3
General
3
Instructions for Safe Operation
4
3 About the System
4
Components in a Typical System Layout
4
4 Quick Guide
4
User Permission Level
4
Space Heating/Cooling
5
Domestic Hot Water
6
5 Operation
6
User Interface: Overview
7
Menu Structure: Overview User Settings
8
Possible Screens: Overview
9
Home Screen
9
Main Menu Screen
10
Setpoint Screen
10
Detailed Screen with Values
11
Turning Operation on or off
11
Visual Indication
11
To Turn on or off
11
Reading out Information
11
To Read out Information
11
Possible Read-Out Information
11
Space Heating/Cooling Control
12
Setting the Space Operation Mode
12
To Change the Desired Room Temperature
12
To Change the Desired Leaving Water Temperature
12
Domestic Hot Water Control
13
Reheat Mode
13
Scheduled Reheat Mode
13
Using DHW Powerful Operation
13
Schedule Screen: Example
14
Weather-Dependent Curve
15
What Is a Weather-Dependent Curve
15
2-Points Curve
16
Slope-Offset Curve
16
Using Weather-Dependent Curves
17
6 Energy Saving Tips
17
7 Maintenance and Service
18
Overview: Maintenance and Service
18
8 Troubleshooting
18
To Display the Help Text in Case of a Malfunction
18
To Check the Malfunction History
18
Symptom: You Are Feeling too Cold (Hot) in Your Living Room
19
Symptom: the Water at the Tap Is too Cold
19
Symptom: Heat Pump Failure
19
Symptom: the System Is Making Gurgling Noises after Commissioning
19
9 Disposal
20
10 Glossary
20
11 Installer Settings: Tables to be Filled in by Installer
20
Configuration Wizard
20
Settings Menu
20
Advertisement
Related Products
Daikin EBSX11P30DF
Daikin EBSX16P30DF
Daikin EBSX16P50DF
Daikin EBSXB11P30DF
Daikin EBSXB11P50DF
Daikin EBSXB16P30DF
Daikin EBSXB16P50DF
Daikin EBSHB11P30DF
Daikin EBSH16P30DF
Daikin EBSH16P50DF
Daikin Categories
Air Conditioner
Heat Pump
Remote Control
Chiller
Fan
More Daikin Manuals
Login
Sign In
OR
Sign in with Facebook
Sign in with Google
Upload manual
Upload from disk
Upload from URL