Sign In
Upload
Manuals
Brands
Beckman Coulter Manuals
Laboratory Equipment
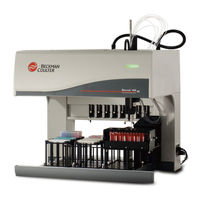
Biomek NXP
Beckman Coulter Biomek NXP Manuals
Manuals and User Guides for Beckman Coulter Biomek NXP. We have
2
Beckman Coulter Biomek NXP manuals available for free PDF download: User Manual, Preinstallation Manual
Beckman Coulter Biomek NXP User Manual (134 pages)
Laboratory Automation Workstations
Brand:
Beckman Coulter
| Category:
Laboratory Equipment
| Size: 10 MB
Table of Contents
Revision History
3
Safety Notice
5
Alerts for Danger, Warning, Caution, Important, and Note
5
Electrical Safety
5
High Voltage
5
Disposal of Electronic Equipment
6
Laser Light
6
Laser Specifications
6
Chemical and Biological Safety
6
Maintenance
7
China Rohs Caution Label
8
Warnings and Cautions Found in this Manual
8
Table of Contents
13
Biomek NX Multichannel Introduction
21
Instrument Overview
21
Control Modes
21
System Components
22
Towers
22
Biomek NX with Multichannel Pod
22
Left Tower Outside
23
Right Tower Outside
23
Indicator Lights
24
Multichannel Pod
24
Right Tower Inside
24
Deck
25
Alps
25
Optional Devices
25
Device Controller
25
Protective Barriers
26
Protective Barriers for the Biomek NX Instrument
26
Light Curtain Protection System
27
Side Safety Shields
27
Preventive Maintenance
28
Light Curtain Maintenance
28
Troubleshooting
28
Changing Fuses
29
Replacing Fuses in Tower
30
Multichannel Pod
31
Overview
31
Main Components of the Multichannel Pod
31
Multichannel Pod Installed on Biomek NX
31
Pod Movements
32
Multichannel Pod - Main Components
32
Multichannel Pod Axes Movement
32
Control Modes
33
Interchangeable Heads
33
Changing Heads
33
Tip Compatibility and Max Volumes on Multichannel Heads
33
Removing Heads
34
Wrist Ground Strap Attached to the Deck
34
Bottom Cover Removed from Pod
35
Plunger Screws and Shoulder Screws Removed from
36
Installing Multichannel Heads
37
Sequence for Removing Four Plunger Screws and Four Shoulder Screws on All Multichannel Heads
37
Chamfer Locations on a Multichannel Head
38
Sequence for Installing Four Plunger Screws and Four Shoulder Screws on All Multichannel Heads
39
Gripper
40
Framing the Gripper
41
Preventive Maintenance
41
Troubleshooting
42
Multichannel Pod Troubleshooting
42
Replacing Gripper Fingers
43
Removing Gripper Fingers
43
Installed Replaceable Grippers
43
Installing Gripper Fingers
44
Removable Front Gripper Assembly
44
In Biomek Software, 2-1
47
Configuring the Biomek NX Multichannel in Biomek Software
47
Overview
47
Accessing Hardware Setup
47
Understanding the Options in Hardware Setup
48
Hardware Setup for a Biomek NX Multichannel Instrument
48
Hardware Setup Options
48
Configuring the Biomek NX Multichannel Instrument
49
Configuring a Multichannel Pod
49
Configuring a New Head
50
Hardware Setup Showing the Configuration of a Multichannel Pod
50
Setting Multichannel Pod Properties
51
Warnings Must be Addressed before Homing Process Begins
51
Multichannel Pod Properties
52
Using the Plate Sensor
53
Saving, Restoring, and Deleting Settings
54
Saving Pod Settings
54
Hardware Setup Displaying Enable Plate Sensor
54
Error for no Plate Sensed
54
Restoring Pod Settings
55
Save Configuration
55
Deleting Pod Settings
56
Load Settings
56
Confirmation to Reset Stored Configuration
56
Delete Settings
57
Confirmation to Delete Stored Configuration
57
Framing Instructions
59
Overview
59
Framing Deck Positions on the Biomek NX Using Accuframe
59
Accuframe Framing Tool
60
Homing All Axes of the Pods
61
Attaching the Framing Fixture to the Pod
62
Warning to Address before Homing Process Begins
62
Installing Accuframe
63
Framing Fixture
63
Framing the Position
64
Deck Editor
65
Position Properties
65
Teaching Instructions
66
Selecting Appropriate Teaching Instructions
67
Manually Framing Deck Positions on the Biomek NX
68
Deck Editor
68
Position Properties for a Positive Position ALP
69
Manual Framing Wizard - Warning
69
Manual Framing Wizard if Tips Are Not Already Loaded
70
Manual Framing Wizard if Tips Are Loaded
70
Framing to the Corner of Four Wells
71
Using the Graphic Alignment Tool
72
Framing to the Center of a Well
72
Using the Delta Value and Directional Buttons
74
Manual Teaching the X- and Y-Axes
74
Framing the Z-Axis
75
Framing the Gripper
77
Warning to Make Sure Gripper Is Ready for Framing
78
Pick Previously Framed Deck Position to Frame the Grippers
79
Advanced Manual Control for Moving Gripper During Framing
79
Moving Pod into Gripping Position
80
Gripper Framing Position on the Accuframe
80
Correct and Incorrect Gripper Framing Alignment
81
Testing Gripper Framing Accuracy
82
Troubleshooting
82
Troubleshooting Framing
82
In Biomek Software, 4-1
83
Manually Controlling the Biomek NX in Biomek Software
83
Overview
83
Accessing Manual Control
83
Confirms Manual Control Is Connecting
83
Using Manual Control
84
Homing All Axes of the Moving the Pod to a Specific Deck
84
Manual Control
84
Stopping the Pod
85
Warnings Must be Addressed before Homing Process Begins
85
Viewing the Firmware
86
Accessing Advanced Manual
86
Using Advanced Manual
86
Viewing the Current Position of the Moving the Pod to a Safe Roving
86
Performing Relative Moves for the
86
Firmware Version Information
86
Extending and Retracting the Unloading Tips
87
Overview Advanced Manual Control for a Multichannel Pod
87
Advanced Manual Control Selection Areas for the Multichannel Pod (Refer to Specific Subsections for Instructional Use.)
88
Vector Builder
92
Enter Absolute Move Coordinates
93
Specifications
95
System Specifications
95
Using a Stacker Carousel
97
Integrating the Stacker
97
Positioning the Stacker Carousel on the Mounting the Stacker
98
Attaching the Side
98
Operating the Stacker
98
Carousel
99
Stacker Shuttle Positions
99
Stacker Carousel Integration
100
Attaching Alignment Bracket
101
Attaching Riser Plate
103
Stacker Attachment
104
Attaching the Side Shield Components to Biomek NX
105
Aligning the Stack Shuttle
106
Front View of Stacker Integration
107
Troubleshooting
108
Stacker Carousel Final Placement (Top View Rear Position, Right Side
108
Reader
110
Bar Code Reader Bracket
110
Bar Code Reader Shuttle Mount Access Cover
111
Mounting Bracket Attachment
111
Mounting Bar Code Reader
112
Bar Code Reader in Narrow Side Scanning
113
Bar Code Reader in Wide Right Side Scanning
114
Bar Code Reader in Wide Right Side Scanning Position (Bottom View
114
Bar Code Reader in Rear Narrow Side Scanning
115
Bar Code Reader in Rear Narrow Side Scanning Position (Bottom View
115
Bar Code Reader in Wide Left Side Scanning
116
Bar Code Reader in Wide Left Side Scanning Position (Bottom View
116
Bar Code Reader in Front Narrow Side Scanning
117
Bar Code Reader in Front Narrow Side Scanning Position (Bottom View
117
Bracket
118
Bar Code Reader Attachment
118
Beam
119
Bar Code Reader - Laser Beam Position over Bar Code
120
Adjust Laser Alignment as Necessary
121
Setup
122
Hardware Setup
122
Label Positioning on Microplate
122
New Devices
123
Installing a Stacker Carousel by
123
Hardware Setup Showing the Configuration View for a Stacker Carousel
124
Stacker
125
Adding the Accuframe and Framing Tool Adaptor to the Stacker
126
Advertisement
Beckman Coulter Biomek NXP Preinstallation Manual (52 pages)
Laboratory Automation Workstation
Brand:
Beckman Coulter
| Category:
Laboratory Equipment
| Size: 1 MB
Table of Contents
Revision History
3
Safety Notice
5
Table of Contents
11
CHAPTER 1 Preparing the Site
15
Biomek NX P System Specifications
16
Dimensions
16
System Specifications
16
Work Area Minimum Dimensions
17
Dimensions Required
18
Weights
18
Component Weights
19
Requirements
19
Air, Vacuum, and System Fluid Requirements
20
Air Supply Requirements (NX-MC and NX-S8 with a Microplate Shaking ALP Only)
20
Electrical Components and Requirements
20
Vacuum Supply Requirements
21
System Fluid Requirements
22
Electrical Requirements
20
Preparation Overview
15
Models
15
Site Preparation
15
CHAPTER 2 Preparing the Biomek NXP Instrument for Setup
23
Unpacking the NX P Instrument
24
Required Tools
24
Unpacking the Accessories
25
Accessories by Model Number
26
Unpacking the Instrument
27
Inspecting the NX P Instrument
28
Site
28
Moving the NX P Instrument to the Installation Site
29
Contacting Your Field Service Engineer
30
Placing the NX P Instrument on the Lab Bench
30
CHAPTER 3 Preparing Cytomat Devices
31
Cytomat 2C Incubator Specifications
32
Cytomat 6001 HS Incubator Specifications
32
Cytomat Device Specifications
32
Cytomat Microplate Hotel Specifications
32
Cytomat ALP Electrical Requirements
33
Setting up a 1 M X 1 M Optical Table for the Cytomat 6001
34
Estimating Required Workspace Dimensions
33
Setting up Optical Tables
33
Unpacking an Optical Table
33
Assembled 1 M X 1 M Optical Table
35
Setting up a .6 M X .9 M Optical Table for the Biomek NXP
36
Table
36
Assembled .6 M X .9 M Optical Table
37
Optical Table Layout
38
Table
39
Layout for .6 M X .9 M Optical Table
40
Unpacking Cytomat Devices
41
Moving the NX P Instrument Crate to the Unpacking Location
23
Overview
23
Overview
31
CHAPTER 4: Preparing Other Integrated Devices
43
Overview
43
Dimensions for Integrated Devices
43
System Layout Dimension Changes
43
Electrical Component Requirements
45
Integrated Devices
45
Electrical Components and Requirements
45
Advertisement
Related Products
Beckman Coulter BiomekFX
Beckman Coulter BiomekFXP
Beckman Coulter Biomek NX
Beckman Coulter Biomek i Series
Beckman Coulter BioLector XT
Beckman Coulter B87585
Beckman Coulter B87586
Beckman Coulter B87588
Beckman Coulter B87583
Beckman Coulter B87584
Beckman Coulter Categories
Laboratory Equipment
Measuring Instruments
Cash Counter
Medical Equipment
Desktop
More Beckman Coulter Manuals
Login
Sign In
OR
Sign in with Facebook
Sign in with Google
Upload manual
Upload from disk
Upload from URL