Sign In
Upload
Manuals
Brands
AudioCodes Manuals
IP Phone
405
User Manuals: AudioCodes 405 IP Phone
Manuals and User Guides for AudioCodes 405 IP Phone. We have
3
AudioCodes 405 IP Phone manuals available for free PDF download: Administrator's Manual, User Manual, Quick Manual
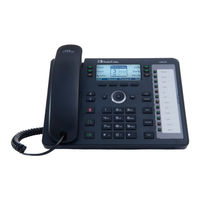
AudioCodes 405 Administrator's Manual (336 pages)
Series of High Definition IP Phones, HD VoIP
Brand:
AudioCodes
| Category:
IP Phone
| Size: 3 MB
Table of Contents
Table of Contents
3
Customer Support
17
Documentation Feedback
17
Document #: LTRT
18
1 Introduction
19
Configuration Tools
21
2 IP Phone User Interface
23
Accessing the Administration Menu
23
Changing Display Language
24
Figure 2-1: Language
24
Table 2-1: Language Display Parameters
24
3 Web Interface
25
Accessing Web Interface
25
Figure 3-1: Web Interface Login
25
Getting Started with the Web
26
Figure 3-2: Web Interface Areas
26
Configuring the Web Interface's Port
27
Configuring User Login Credentials
27
Figure 3-3: Web Interface - User Account
27
Table 3-1: Web Interface - Port Parameters
27
Table 3-2: User Name and Password Parameters
27
4 Configuration File
29
Introduction
29
File Syntax
29
Linking Multiple Files
29
Downloading the Configuration File from the Phone
30
Creating Configuration Files Using Voiprovision Utility
30
Configuration File Format
30
Global Configuration File
30
Voiprovision Utility Overview
31
CSV File
31
Template File
31
Generated Configuration Files
31
Table 4-1: Example of CSV File
31
Starting the Voiprovision Utility
32
Usage
32
Using the Encryption Tool
32
Encrypting Configuration Files
32
Encrypting Passwords in the Configuration File
33
5 IP Phone Management Server
35
Table 5-1: IP Phone Management Server Parameters
35
6 Configuring TR-069 Management
37
Figure 6-1: Web Interface - TR-069
37
Table 6-1: TR-069 Management Parameters
37
Automatic Provisioning
39
7 Introduction
41
Configuring Automatic Update of Firmware/Configuration File
41
8 Updating the Configuration File Manually
43
Figure 8-1: Web Interface - Configuration File (430HD)
43
Figure 8-2: Web Interface - Load New Configuration File
43
9 Setting up Network for Auto Provisioning
45
10 Obtaining Firmware and Configuration Files
47
Provisioning Hunt Order
47
Dynamic URL Provisioning
47
Figure 10-1: Web Interface - Automatic Provisioning - Dynamic URL
47
Table 10-1: DHCP Automatic Provisioning Parameters
48
Figure 10-2: Web Interface - Automatic Provisioning - DHCP Option 160
50
Provisioning Using DHCP Option 160
50
Provisioning Using DHCP Option 43
51
Provisioning Using DHCP Option 66/67
51
Table 10-2: Auto Provisioning Via DHCP Option 66/67
51
Figure 10-3: Provisioning Using DHCP Option 43 in the DHCP Server
52
SIP SUBSCRIBE and NOTIFY Messages
53
Cached Address of Last Provisioning Server Used
56
Hardcoded Domain Name for Provisioning Server
56
Figure 10-4: Redirect Server Configuration Process
57
Redirect Server
57
Static URL Provisioning
58
Figure 10-5: Web Interface - Automatic Provisioning - Static URL
58
Table 10-3: Static URL Automatic Provisioning Parameters
59
Quick Setup
61
11 Quick Setup
63
Figure 11-1: Web Interface - Quick Setup
63
Networking
65
12 Introduction
67
13 Configuring Date and Time Manually
69
Figure 13-1: Web Interface - Date and Time
69
Table 13-1: Date Display Format
69
Configuring Daylight Saving Time
70
Figure 13-2: Web Interface - NTP & Time Settings
70
Figure 13-3: Web Interface - Daylight Saving Time
70
Table 13-2: Daylight Saving Time Parameters
70
Configuring the NTP Server
73
Figure 13-4: Web Interface - NTP & Time Settings
73
Table 13-3: NTP Server Parameters
73
Configuring NTP Server Via DHCP
75
Figure 13-5: Web Interface - NTP and Time Settings
75
Table 13-4: NTP Server and GMT Parameters
76
14 Configuring IP Network Settings
77
Configuring Static IP Address
77
Configuring Static IP Address Using the Phone's LCD
77
Configuring IP Network Settings
78
Figure 14-1: Web Interface - Network Settings
78
Table 14-1: Network Settings Parameters
79
Configuring Partial DHCP
80
Table 14-2: Partial DHCP Parameters
80
15 Configuring LAN and PC Port Settings
83
Figure 15-1: Web Interface - Network Settings - Port Mode
83
Table 15-1: Port Settings
83
16 Configuring VLAN Settings
85
Figure 16-1: Web Interface - Network Settings - VLAN Settings
85
Table 16-1: VLAN Settings
85
Configuring Manual or Automatic VLAN Assignment
86
Configuring Manual VLAN Assignment to the IP Phone
86
Configuring Automatic VLAN Assignment to the IP Phone
86
Voip Settings
87
17 Configuring SIP Settings
89
Configuring General SIP Settings
89
Figure 17-1: Web Interface - Signaling Protocols- SIP General
89
Table 17-1: SIP General Parameters
90
Configuring Proxy and Registration
93
Figure 17-2: Web Interface - SIP Proxy and Registrar
93
Table 17-2: Proxy and Registrar Parameters
93
Configuring Proxy Redundancy
97
Figure 17-3: Web Interface - Proxy Redundancy
97
Table 17-3: SIP Proxy Server Redundancy Parameters
98
Device Registration Failover/Failback
100
Failover
100
Table 17-4: Device Registration Failover Parameters
100
Failback
101
Table 17-5: Device Registration Failback Parameter
101
Configuring a Line
102
Figure 17-4: Web Interface - Line Settings
102
Figure 17-5: Line Settings
102
Configuring Shared Call Appearance
103
Figure 17-6: Shared Call Appearance
103
Configuring SIP Timers
104
Figure 17-7: Web Interface - Signaling Protocols - SIP Timers
104
Figure 17-8: Web Interface - Quality of Service
106
Table 17-7: SIP Qos Parameters
106
Configuring SIP Reject Code
107
Figure 17-9: Web Interface - General Parameters - Reject Code
107
Table 17-8: Reject Code Parameter
107
Table 17-6: SIP Timers Parameters
104
Configuring SIP Qos
106
18 Configuring Dialing
109
Configuring General Dialing Parameters
109
Figure 18-1: Web Interface Dialing
109
Table 18-1: Dialing Parameters
109
Configuring Auto Redial
111
Figure 18-2: Automatic Redial on Busy
111
Table 18-2: Automatic Redial on Busy Parameters
111
Configuring Dial Tones
112
Figure 18-3: Dialing Page - Tones
112
Figure 18-4: Web Interface - Services Page - Tones
112
Table 18-3: Dial Tones Parameters
112
Configuring DTMF
114
Figure 18-5: Web Interface - DTMF Transport Mode
114
Table 18-4: DTMF Transport Mode
114
Configuring Digit Maps and Dial Plans
115
Figure 18-6: Web Interface - Digit Map and Dial Plan
115
Table 18-5: Digit Map and Dial Plan Parameters
115
Configuring Headset LED to Stay on
117
Table 18-6: Headset LED Parameter
117
Configuring Default Audio Device
118
Figure 18-7: Web Interface - Default Audio Device
118
Table 18-7: Audio Device Parameter
118
19 Configuring Ring Tones
119
Configuring Distinctive Ring Tones
119
Figure 19-1: Web Interface - Distinctive Ringing
119
Table 19-1: Distinctive Ringing Parameters
119
Configuring CPT Regional Settings
120
Figure 19-2: Web Interface - Tones - Regional Settings
120
Table 19-2: Regional Parameters
120
Uploading Ring Tones
122
Figure 19-3: Web Interface - Upload Ringing Tone
122
Table 19-3: Ring Tone Parameters
123
20 Configuring Media Settings
125
Configuring Media Streaming
125
Table 20-1: Media Streaming Parameters
125
Configuring RTP Port Range and Payload Type
126
Figure 20-1: Web Interface - Media Streaming
126
Table 20-2: RTP Port Range and Payload Type Parameters
126
Configuring RTP Qos
127
Figure 20-2: Web Interface - Quality of Service
127
Table 20-3: RTP Qos Parameter
127
Configuring Codecs
128
Figure 20-3: Web Interface - Media Streaming - Codecs
128
Table 20-4: Codec Parameters
128
Figure 20-4: Web Interface - Media Streaming - Codecs
129
21 Configuring Voice Settings
131
Configuring Gain Control
131
Configuring Jitter Buffer
131
Figure 21-1: Web Interface - Voice - Jitter Buffer
131
Table 21-1: Jitter Buffer Parameters
131
Configuring Silence Compression
132
Figure 21-2: Web Interface - Voice - Silence Compression
132
Table 21-2: Silence Compression Parameters
132
Configuring Noise Reduction
133
Figure 21-3: Web Interface - Voice - Noise Reduction
133
Table 21-3: Noise Reduction Parameters
133
Configuring Echo Cancellation
134
22 Configuring Extension Lines
135
Using the Phone LCD
135
Using the Web Interface and Configuration File
136
Figure 22-1: Web Interface - Line Settings
136
Table 22-1: Line Parameters
136
23 Configuring Supplementary Services
139
Figure 23-1: Web Interface - Services
139
Selecting the Application Server
139
Table 23-1: General Supplementary Services Parameters
139
Configuring Call Waiting
140
Figure 23-2: Web Interface - Services - Call Waiting
140
Table 23-2: Call Waiting Parameters
140
Configuring Call Forwarding
141
Figure 23-3: Web Interface - Services - Call Forward
141
Table 23-3: Call Forward Parameters
141
Allowing the Initiator to Drop out of a Conference
143
Configuring a Conference
143
Figure 23-4: Web Interface - Services - Conference
143
Table 23-4: Conference Parameters
143
Table 23-5: Allowing a Conference Initiator to Drop out When On-Hooking
143
Configuring Automatic Dialing
144
Figure 23-5: Web Interface - Dialing - Automatic Dialing
144
Table 23-6: Automatic Dialing Parameters
144
Configuring Automatic Answer
145
Table 23-7: Automatic Answer Parameters
145
Figure 23-6: Web Interface - Services - Dnd
146
Figure 23-7: Web Interface - Services - BLF Support - Call Pick up
147
Table 23-9: Call Pick up Parameters
147
Configuring Message Waiting Indication
148
Figure 23-8: Web Interface - Services - MWI
148
Table 23-10: MWI Parameters
148
Configuring Busy Lamp Field
149
Figure 23-9: Web Interface - Services - BLF
149
Table 23-11: BLF Parameters
149
Configuring Advice of Charge
151
Figure 23-10: Web Interface - Services - AOC Support
151
Table 23-12: AOC Parameters
151
Configuring Onhook Disconnect When Held
152
Disabling the HOLD Key
152
Table 23-13: Disabling the HOLD Key
152
Configuring Ringing on the Default Audio Device
153
Allowing an Incoming Call When the Phone Is Locked
154
Allowing Call Center Agents to Record Welcome Greetings
154
Configuring Attended and Semi-Attended Call Transfer
155
Configuring Blind Transfer
155
Creating a Speed Dial File for Configuration File
156
Table 23-8: Do Not Disturb Parameters
146
Configuring Call Pick up
147
Configuring Do Not Disturb (Dnd)
146
24 Configuring Volume Levels
157
Configuring Gain Control
157
Figure 24-1: Web Interface - Voice - Gain Control
157
Configuring Tone Volume
159
Configuring Ringer Volume
160
Configuring Speaker Volume
161
Configuring Handset Volume
164
Configuring Headset Volume
166
Advanced Phone Settings
169
25 Configuring the Phone Directory
171
Configuring the Corporate Directory
171
Configuring the LDAP-Based Corporate Directory
171
Figure 25-1: Web Interface - LDAP
171
Loading a Text-Based Corporate Directory File
173
Figure 25-2: Web Interface - Corporate Directory
174
Modifying the Local Phone Directory
175
Figure 25-3: Web Interface - Directory - Add Contact
175
26 Configuring Keys
177
Configuring Function Keys
177
430HD Phone
177
Figure 26-1: 430HD Phone Web Interface - Personal Settings - Function Keys
177
440HD Phone
178
Figure 26-2: 440HD Phone Web Interface - Personal Settings - Function Keys
178
Configuring Additional Function Keys
179
Configuring Programmable Keys
180
430HD and 440HD Phones
180
Figure 26-3: Web Interface - Programmable Keys (430HD/440HD Phones)
180
Configuring Multiple Lines
181
Configuring a Key Event
182
Configuring Speed Dials
183
420HD and 405 Phone Models
183
Figure 26-4: Web Interface - Personal Settings - Speed Dials (420HD and 405 Phone Models)
183
Deleting Speed Dials
184
Saving Configured Speed Dials
184
Creating a Speed Dial File for the Configuration File
185
Configuring Softkeys
186
Figure 26-5: Web Interface - Softkeys (420HD and 405 Phone)
187
Table 26-9: Softkey Parameters
188
Configuring Programmable Softkeys (PSK)
189
Configuring Navigation Control Button Positions
190
Figure 26-6: Web Interface - Navigation Keys
190
Figure 26-7: Web Interface - Load and Save
191
Loading Saved Keys to Phones
191
Saving Configured Keys
191
27 Configuring Multicast Paging
193
Configuring Using the Web Interface
193
Figure 27-1: Web Interface - Enable Paging
193
Barge-In
194
Configuring Using the Configuration File
195
Figure 27-2: Web Interface - Enable Barge-In
195
28 Configuring Feature Key Synchronization
197
Security
199
29 Implementing X.509 Authentication
201
Factory-Set Certificates and Audiocodes Trusted Root CA
201
User-Generated Certificates
202
External Trusted Root Cas
203
Figure 29-1: Certificate
203
30 Loading a Certificate
205
Loading the Trusted Root CA Certificate to the Phone
205
Loading Trusted Root CA Certificate Using Configuration File
205
Figure 30-1: Web Interface - Root CA Certificate
205
Loading the Client Certificate to the Phone
206
Loading the Client Certificate to the Phone Using the Configuration File
206
Figure 30-2: Web Interface - Client Certificate
206
Enabling Server-Side Authentication (Mutual Authentication)
207
Generating a Certificate Signing Request
208
Figure 30-3: Web Interface - Certificate Signing Request
208
Using Previously Loaded Certificates
209
31 Configuring SIP TLS
211
Configuring TLS
211
Configuring SIP TLS Using the Web Interface
211
Figure 31-1: Web Interface - Signaling Protocols - SIP General
212
32 Configuring 802.1X
213
Configuring 802.1X Using the Phone's LCD
213
Configuring EAP-MD5 Mode
214
Configuring EAP-TLS Mode
214
Configuring 802.1X Using Web and Configuration File
214
Figure 32-1: Web Interface -801.1X Settings - EAP-MD5
214
Configuring EAP TLS Mode
215
Figure 32-2: Web Interface -801.1X Settings - EAP-TLS
215
33 Configuring SRTP
217
Figure 33-1: Web Interface - SRTP
217
34 Configuring HTTP/S
219
35 Logging into a Remote HTTP/S Server Using the Phone LCD
221
36 Securing the Web Interface Using HTTP/S
223
Figure 36-1: Securing Web Interface Management with HTTP/S
223
Provisioning
224
Figure 36-2: Web Interface - Automatic Provisioning
224
37 MAC-Based Authenticaton
225
Maintenance
227
38 Changing Administrator Login Credentials
229
Figure 38-1: Web Interface - Users - Administrator Account
229
39 Restarting Phones
231
Restarting from the Phone's LCD
231
Restarting the Phone Using the Web Interface
232
Figure 39-1: Web Interface -Restart System
232
Figure 39-2: Confirmation Box
232
40 Restoring Phone Defaults
233
Restoring Factory Defaults from the Phone's LCD
233
Restoring Factory Defaults Using the Web Interface
234
Figure 40-1: Web Interface -Restore Defaults
234
Figure 40-2: Submit Confirmation Box
234
Status and Monitoring
235
41 Determining Network Status
237
Determining LAN Status
237
Determining Port Status
237
Determining 802.1X Status
237
Figure 41-1: Web Interface - LAN Information
237
Figure 41-2: Web Interface - Port Mode Status
237
Figure 41-3: Web Interface - 802.1X Status
237
42 Determining Voip Status
239
Determining Phone Status
239
Determining Line Status
239
Figure 42-1: Web Interface - Voip Status - Phone Status
239
Figure 42-2: Web Interface - Line Status
239
Determining Memory Status
240
Figure 42-3: Web Interface - Memory Status
240
Viewing Current Call Information
241
Figure 42-4: Web Interface - Memory Status - Linux Meminfo Command - Displayed Information
241
Figure 42-5: Web Interface -Line 1 Call Information
241
43 Viewing Call History
243
Figure 43-1: Web Interface - Call History
243
44 Accessing System Information
245
Accessing Phone Firmware Version
245
Accessing Firmware Version Using the Web Interface
245
Accessing Firmware Version from the Phone's LCD
245
Figure 44-1: Web Interface - System Information-Firmware Version
245
Viewing Phone Firmware Release Information
246
Viewing Firmware Release Information in the Web Interface
246
Figure 44-2: Web Interface - System Information - Release Information
246
Viewing Firmware Release Information in the Phone's LCD
247
45 Monitoring Quality of Experience
249
Configuring Remote Voice Quality Monitoring
249
Configuring RTCP Extended Report
249
Figure 45-1: Web Interface - Media Streaming - RTCP-XR
249
Configuring Voice Quality Monitoring
250
Diagnostics and Troubleshooting
251
46 Diagnosing Phone Hardware
253
Figure 46-1: Diagnostic Tests Displayed in Phone LCD
253
Testing Keypad and Hook
254
Figure 46-2: Keypad and Hook Test- On-Hook (E.g., 440HD)
254
Figure 46-3: Keypad Test - Off-Hook (E.g., 440HD)
254
Testing Handset
255
Testing the Headset
255
Testing Hands Free
255
47 Recovering Firmware
257
48 Configuring System Logging (Syslog)
259
Analyzing and Debugging Traffic Using Regular Syslog
259
Figure 48-1: Web Interface -System Logging
259
Analyzing and Debugging Traffic Using 'Lightweight Syslog
260
49 Viewing Error Messages Displayed in Phone LCD
261
50 Debugging Using Packet Recording Parameters
263
Figure 50-1: Web Interface - Recording
263
51 Creating a Crash Dump File
265
Figure 51-1: Web Interface - Crash Dump
265
52 Configuring Port Mirroring
267
Figure 52-1: Web Interface -Port Mirroring
267
53 Enabling Tracing
269
Figure 53-1: Tracing System Key Behavior
269
Table 53-1: Tracing Parameters
270
Appendices
271
A Configuring Phones in Server-Specific Deployments
273
Broadsoft's Broadworks
273
Configuring BLF
274
Figure A-1: Web Interface - BLF Configuration in a Broadsoft Environment
274
A.1.1 Configuring BLF
274
Configuring Call Forwarding
275
Figure A-2: Configuring Call Forwarding Using Broadsoft's Broadworks
276
Configuring Dnd
277
Figure A-3: Configuring Dnd in Broadsoft's Broadworks - Status
277
Figure A-4: Configuring Dnd in Broadsoft's Broadworks
277
A.1.3 Configuring Dnd
277
Configuring FKS
278
Figure A-5: Web Interface - Services
278
Figure A-6: Web Interface - Services - Feature Key Synchronization
278
A.1.4 Configuring FKS
278
Configuring Shared Call Appearance
279
Figure A-7: Shared Call Appearance on an Executive Assistant's Phone
279
Figure A-8: Broadsoft Server - Assigning Shared Calls Appearance to a User
279
Table A-2: Broadsoft Server - Shared Call Appearance – Identity/Device Profile Type
280
Figure A-9: Broadsoft Server - Shared Call Appearance Add
281
Figure A-10: Web Interface - Line Settings - Shared Line
281
Loading the Corporate Directory to the Phone
282
Adding a Contact to the Corporate Directory
283
Deleting a Contact from the Corporate Directory
283
Disabling Handset Mode
283
Displaying a Message in Agents' Lcds
284
Asterisk, Coral and Metaswitch
285
Configuring BLF
285
Genesys SIP Server for Contact Centers
286
Using DHCP to Auto Provision Phones
286
Verifying Firmware Version
286
Accessing a Phone's Web Interface
286
Configuring Dual Registration to Ensure SIP Business Continuity for Agents
287
Figure A-15: Web Interface - Signaling Protocol – SIP Proxy and Registrar – Secondary Proxy
288
Disabling the Web Interface
291
Forcing a Reboot on Provisioning
291
Provisioning Using TFTP / FTP / HTTP / HTTPS in DHCP Options 66/67
291
Enabling Agents to Sign in with Phone Numbers
292
Locking Agents Phones Alphabetical Keys
292
Playing a Beep on an Incoming Call
293
Enabling Proactive Mute
293
Configuring Automatic Answer
294
Regulating the 'Logged Out' Message
294
3PCC (Third Party Call Control)
295
Disabling Handset Mode
295
Displaying a Message in Agents' Lcds
296
Configuring a Redundant (Backup) Genesys Server
296
Table 53-18: Redundant Genesys Server - Parameters
297
B Configuring Automatic Call Distribution (ACD)
299
Figure B-1: Web Interface - ACD
300
Table B-1: ACD Parameters
301
Softkey Display and Command Menu Options
303
C Recovering Audiocodes' IP Phone
305
Identifying that the Phone Is in Recovery Mode
305
Verifying that the Phone Is in Recovery Mode
305
Recovering the Phone
306
Figure C-4: Recovering the Phone - Configure the PC NIC to Which the Phone Is Connected
307
Verifying that the Phone Is Downloading the Image File
309
Verifying Using Wireshark
309
Verifying Using Tftpd64
310
Verifying Using the Phone LCD
311
D Deploying Audiocodes IP Phones - Use Case
313
Preparing Configuration (Cfg) Files for the Enterprise Customer
313
Saving the Phone's Default Configuration to File
313
Preparing a Global.cfg Configuration File
314
Generating MAC-Specific <Private>.Cfg Configuration Files
314
Preparing the DHCP Server to Automatically Provision IP Phones
317
Making Sure Phones Are Correctly Provisioned
317
E Supported SIP Rfcs and Headers
319
SIP Compliance Tables
321
SIP Methods
321
SIP Headers
322
F Parameters Requiring Reload / Reboot
325
G Specifications
327
HRTCP-XR Parameters
331
I Example SIP - PUBLISH Message
333
Advertisement
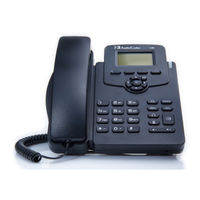
AudioCodes 405 User Manual (74 pages)
VoIP, 400 IP Phone Series
Brand:
AudioCodes
| Category:
IP Phone
| Size: 1 MB
Table of Contents
Table of Contents
3
Customer Support
7
Documentation Feedback
7
Related Documentation
8
1 Introducing the 405 / 405G IP Phone
9
About Audiocodes' 400HD Series of IP Phones
9
Features Common to All Audiocodes IP Phones
9
Unified Communications
9
Enterprise IP Telephony
9
IP Contact Centers
10
2 Setting up the Phone
11
Unpacking
11
Device Description
11
Front View
11
Figure 2-1: Front View
12
Table 2-1: Font View Description
12
Rear View
13
Figure 2-2: Rear View
14
Table 2-2: Rear View Description (from L-R)
14
Cabling
15
Mounting
15
Mounting on a Desk
15
Figure 2-3: Desktop Mounting
15
Table 2-3: Cabling
15
Mounting on a Wall
16
Routing the Handset Cable
16
Figure 2-4: Wall Mounting
16
3 Getting Started
17
LCD in Idle State
17
Figure 3-1: LCD in Idle State
17
Table 3-1: LCD in Idle State
17
Softkeys
18
Table 3-2: Softkeys
18
Accessing Menus
19
Figure 3-2: Menus
19
Entering Numbers, Alphabetical Letters and Symbols
20
Figure 3-3: Alphanumerical Selection
20
Figure 3-4: Selected Alphanumerical Mode (Abc)
20
Displayed Messages
22
Table 3-3: Messages Displayed on LCD Indicating Processes in Progress
22
4 Customizing Your Phone
23
Selecting Language
23
Selecting Ring Tone
24
Enabling Call Waiting
25
Setting Date and Time
26
Changing LCD Contrast Level
27
Setting the LCD Backlight Timeout
28
Changing the Default Answer Device
29
Restarting the Phone
29
Adjusting Volume
30
Adjusting Ring Volume
30
Adjusting Tones Volume
30
Adjusting Handset Volume
31
Adjusting Speaker Volume
31
Adjusting Headset Volume
31
Defining Call Forwarding
32
Managing Your Personal Directory
33
Accessing the Directory
33
Adding Contacts to the Personal Directory
33
Editing a Contact
35
Deleting a Contact
36
Searching for a Contact
36
Configuring Keys
37
Configuring Speed Dial Keys
37
Editing a Speed Dial
38
Deleting a Speed Dial
38
Configuring Softkeys
39
Table 4-1: Softkey Functionalities
39
Deleting a Configured Softkey
40
Configuring a Softkey as a Speed Dial
40
Configuring a Softkey as a Speed Dial + BLF
40
Configuring a Navigation Key Position Function
41
Removing a Configured Function
42
5 Performing Basic Operations
43
Using Audio Devices
43
Making Calls
43
Dialing
44
Redialing
44
Dialing a Missed Call
45
Answering Calls
45
Rejecting Incoming Calls
46
Silencing Incoming Calls
46
Ending an Established Call
46
Viewing Missed, Received and Dialed Calls
47
6 Performing Advanced Operations
49
Answering Waiting Calls
49
Placing Calls on Hold
50
Calling a Contact Listed in the Directory
50
Enabling Auto Redial
50
Pressing a Speed Dial Key to Make a Call
52
Transferring a Call
52
Attended Transfer
52
Semi- Attended Transfer
53
Blind Transfer
53
Hosting 3-Way Conference Calls
54
Leaving a 3-Way Conference You Set up Without Disconnecting the Others
54
Muting Calls
54
Activating Do Not Disturb
55
Retrieving Voice Mail Messages
55
Using Two Lines
56
Choosing a Extension Line
56
Making a Call on an Extension Line
56
Making up to Eight Calls Per Extension Line
57
Toggling between up to Eight Calls Per Extension Line
57
Answering Calls
57
Ending Calls
57
Logging into a Remote HTTP/S Server
58
7 Troubleshooting
59
Table 7-1: Troubleshooting
59
A Specific Third-Party Features
61
Broadsoft
61
Monitored Lines Based on Broadsoft's Broadworks BLF Service
61
Support for SCA (Participant Only)
61
Softkey Display and Command Menu Options
62
Presence Management
62
Table A-1: Broadsoft-Softkey Display States and Command Menu Options
62
Setting Unavailability Status
63
Setting Availability Status
63
Logging out
64
Viewing Missed Calls
64
Configuring Do Not Disturb (Dnd)
64
Configuring Automatic Forwarding
65
Configuring the 'Forward no Reply' Timeout as Number of Rings
65
Automatically Receiving an External Line
65
Viewing VOICEMAIL Indications Per Line
66
Listening in Capability for Call Center Supervisors
66
Hearing a Beep, Not a Ring Tone, on Headsets When a Call Comes in to a Call Center
66
Recording an Agent's Welcome Greeting
66
Entering Broadworks User Credentials for Xsi Access
67
Setting up a Remote Conference
68
Genesys' Contact Centers
69
Using the Broadsoft ACD
69
Setting Unavailability Status
69
Table A-2: Genesys Contact Center Phones' Broadsoft ACD
69
Setting Availability Status
70
Presence Management
70
Logging in
70
A.2.2 Presence Management
70
Logging out
71
Configuring Do Not Disturb (Dnd)
71
Configuring Automatic Forwarding
71
A.2.4 Logging out
71
Listening in Capability for Call Center Supervisors
72
Recording an Agent's Welcome Greeting
73
AudioCodes 405 Quick Manual (4 pages)
IP Phone for Microsoft Skype for Business
Brand:
AudioCodes
| Category:
IP Phone
| Size: 0 MB
Advertisement
Advertisement
Related Products
AudioCodes 420HD
AudioCodes 430HD
AudioCodes 440HD
AudioCodes 400HD Series
AudioCodes 450HD
AudioCodes 405HD
AudioCodes 445HD
AudioCodes Mediant 4000 SBC
AudioCodes Mediant 4000B SBC
AudioCodes Mediant 4000 E-SBC
AudioCodes Categories
Gateway
IP Phone
Controller
Network Router
Conference System
More AudioCodes Manuals
Login
Sign In
OR
Sign in with Facebook
Sign in with Google
Upload manual
Upload from disk
Upload from URL