Advertisement
Quick Links
Download this manual
See also:
User Manual
Parts checklist
Go to businessphones.vtech.com
1
to register your product for
enhanced warranty support and
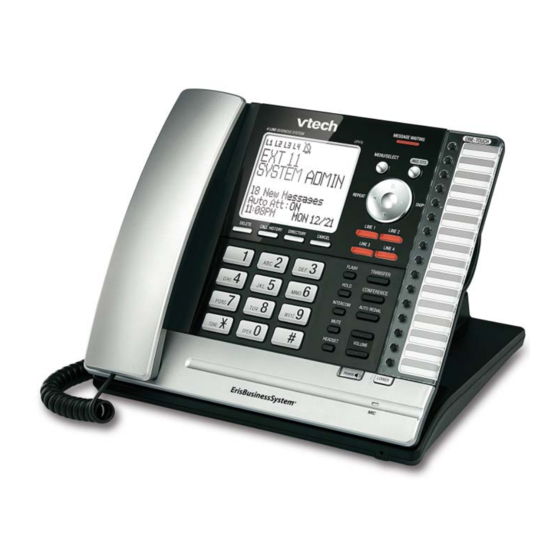
UP416
latest VTech product news.
UP406
UP416
UP407
IS6100
Go to
UP416
businessphones.vtech.com
enhanced warranty support and
to register your product for
4-Line Office Phones
4-Line Office Phones
latest VTech product news.
Main console
Abridged user's manual
Installation guide
Connect your system - console
3
Notes
• An Ethernet network is not required for one station.
• Install and set up the UP416 console first before expanding your system with UP406 deskset, UP407
cordless handset, and IS6100 cordless headset.
• Check and make sure your Ethernet switch or router has enough slots to accommodate the UP416
console and all UP406 desksets.
• Depending on the telephone line wall jack configuration in your office, you might need to connect the
telephone line cords in different ways as shown in the illustrations below.
• Connect the UP416 console to the power outlets that are not controlled by a wall switch.
• Remove the protective sticker covering the UP416 console display before use.
• Use only the power adapter supplied with this product.
• Only power up the system after you are fully connecting all the telephone lines and the Ethernet cable.
Tip
• To order a replacement power adapter, visit out website at businessphones.vtech.com, or
call 1(800) 595-9511. In Canada, call 1 (800) 267-7377.
Connect the console to single-line wall jacks
Ethernet switch/
router
Use only
Supplied
5.1
Adapter
L4
L3/4
L2
L1/2
Line 4
Line 3/4
Line 2
1 Plug one end of the telephone lines into the
6 Connect the plug head of the power adapter to the
telephone lines into the L1/2, L2, L3/4, and L4
power outlet that is not controlled by a wall switch.
MS2015 Engraving:
jacks at the rear side of the console.
»
The system startup takes at least a minute,
Use only
Supplied
and the screen displays booting.....
Adapter
2 Plug the other end of the telephone lines into the
one-line telephone wall jacks.
Note
MS2085 Engraving:
3 Plug one end of the Ethernet cable into the
Ethernet port (
) at the rear side of the console.
Use only
• If you have DSL high-speed Internet service on
Supplied
5.1
Adapter
L4
L3/4
L2
L1/2
a particular line, a DSL filter (not included) is
4 Plug the other end of the Ethernet cable into an
required for that line. Plug the DSL filter into the
Ethernet wall jack, which is connected to the
telephone wall jack.
Ethernet network.
5 Insert the connector of the power adapter to the
power jack at the rear side of the console.
Install your console
4
After the system startup is complete, the screen
displays:
»
Is this Console going to register UP406
Desksets?
'SELECT': Yes
'CANCEL': No
• Press SELECT if you want to set up multiple
stations.
The screen displays Console is in system
»
mode.
• Press CANCEL if you want to set up one station.
The screen displays Console is in
»
standalone mode.
Multiple stations setup
Obtain an IP address
Once the console is in system mode, it will
automatically obtain an IP address. The screen
displays:
»
Obtaining IP from DHCP server. Please
wait...
After an IP address is obtained, the screen displays:
»
IP obtained: XXX.XXX.X.XXX Please set an
extension number to this phone.
UP406
UP407
Go to
UP406
businessphones.vtech.com
Go to
to register your product for
enhanced warranty support and
4-Line Office Phones
businessphones.vtech.com to
latest VTech product news.
Deskset
enhanced warranty support
register your product for
and latest VTech product
news.
Abridged user's manual
Abridged user's manual
IS6100
Cautions
• The power adapter is intended to be correctly oriented in a vertical or floor mount position. The
prongs are not designed to hold the plug in place if it is plugged into a ceiling, under-the-table, or
cabinet outlet.
• Place the UP416 console away from:
» Devices such as television sets, VCRs, or other cordless telephones;
» Excessive heat sources;
» Noise sources such as a window with traffic outside, motors, microwave ovens, refrigerators, or
fluorescent lighting;
» Excessive moisture;
» Extremely low temperature; and
» Mechanical vibration or shock such as the open lid of a washing machine or a work bench.
Connect the console to two-line wall jacks
Ethernet switch/
router
5.1
Line 1/2
4 Plug one end of the Ethernet cable into the
Note
Ethernet port (
• A two-line wall jack supports two telephone
5 Plug the other end of the Ethernet cable into an
numbers in one wall jack. Contact your
Ethernet wall jack, which is connected to the
telephone service provider for details.
Ethernet network.
6 Insert the connector of the power adapter to the
1 Plug one end of the black telephone line cord into
power jack at the rear side of the console.
the L1/2 jack at the rear side of the console.
7 Connect the plug head of the power adapter to the
2 Plug one end of another black telephone line cord
power outlet that is not controlled by a switch.
into the L3/4 jack at the rear side of the console.
The system start up takes at least a minute,
»
and the screen displays booting.....
3 Plug the other end of both black telephone line
cords into the two-line telephone wall jacks.
Set an extension number
• When the startup is complete, the console
enters idle screen.
1 Press
/SELECT.
MENU
2 Press t/REPEAT or u/SKIP to choose the
Lift the handset to check on the dial tone for
desired extension number.
successful installation.
Change from one station to multiple stations
3 Press
/SELECT again to save.
MENU
setup
»
The screen displays Please wait... and
Starting....
You may want to change from one station to multiple
• When the startup is complete, the console
stations setup at a later stage. Follow the steps
below:
enters idle screen.
• Wait for another minute for the console to
synchronize.
1 Connect the Ethernet cable between the console
4 Lift the handset to check on the dial tone for
and an Ethernet wall jack, which is connected to
successful installation.
the Ethernet network.
2 Follow steps 1 to 8 in To enable the Auto set IP
Note
under the Network setup section of the online
complete user's manual.
• By default, the console's name is Console.
• You can also manually obtain an IP address.
One station setup
Follow steps 1 to 8 in To enable the Set static
IP under the Network setup section of the
Once the console is in standalone mode, the screen
online complete user's manual.
displays:
3 Register your UP406 deskset to the console.
Starting...
»
Choose and plan your telephone system
2
Before you start setting up your telephone system, plan it carefully. Choose between a multiple stations
system or just an one station system, and then add in the accessories as you need. Contact your technical
support for the Ethernet network setup. Make sure you have all the required devices and cables.
UP407
Consider the following before you start planning your system:
4-Line Office Phones
Cordless Handset
BC
Number of station(s) you need.
Whether you have an existing Ethernet network that can be used to connect the system telephones.
Number of cordless accessories you need.
Notes
• UP416 console is the main component of the ErisBusinessSystem. UP406 deskset and all other
accessories cannot function without the UP416 console.
• You can only have one UP416 console in your system. Connect only one UP416 console to your desired
telephone lines.
• Depending on the telephone line wall jack configuration in your office, you might need a DSL filter (not
included).
• Expand the number of stations in your system by adding UP406 desksets. For more than one station,
an Ethernet network is required.
• Each station in your telephone system has a unique extension number.
• Only one UP407 cordless handset and one IS6100 cordless headset can be connected to the UP416
console or a UP406 deskset.
• If a station has cordless accessories, the cordless accessories are a part of that station with the same
extension number. Only one extension device can be used at a time.
Multiple stations
UP416 Main console (1 set)
UP406 Deskset (up to 15 sets)
UP407 Handset and/or IS6100 Headset (optional, up to 5 sets)
Ethernet switch/
router
Phone lines
UP416 console
Note
• Make sure your Ethernet switch or router has enough ports to accommodate the UP416 console, the
UP406 deskset(s), and your computer(s).
Use only
Supplied
Connect your system - deskset
Adapter
5
L4
L3/4
L2
L1/2
Notes
• Install and set up the UP416 console first before expanding your system with UP406 deskset, UP407
cordless handset, and IS6100 cordless headset.
• Check and make sure your Ethernet switch or router has enough slots to accommodate the UP416
MS2015 Engraving:
console and all UP406 desksets.
• Connect the UP406 deskset to the power outlets that are not controlled by a wall switch.
Use only
Supplied
Line 3/4
Adapter
Line 1/2
• Remove the protective sticker covering the UP406 deskset display before use.
• Use only the power adapter supplied with this product.
MS2085 Engraving:
• Only power up the system after you are fully connecting all the telephone lines and the Ethernet cable.
) at the rear side of the console.
Use only
Supplied
Adapter
L4
L3/4
L2
L1/2
5.1
Tip
• To order a replacement power adapter, visit out website at businessphones.vtech.com, or
call 1(800) 595-9511. In Canada, call 1 (800) 267-7377.
Set up your deskset
One station
UP416 Main console (1 set)
UP407 Handset and/or IS6100 Headset (optional,
up to 1 set each)
Phone lines
Note
• An Ethernet network is not required.
UP407
cordless
UP406 deskset
Computer
handset
IS6100
cordless
headset
IS6100
cordless
headset
UP406 deskset
Computer
UP407
IS6100
cordless
Console
cordless
handset
headset
Note
• To set up a new Ethernet network, contact your technical support.
Cautions
• The power adapter is intended to be correctly oriented in a vertical or floor mount position. The
prongs are not designed to hold the plug in place if it is plugged into a ceiling, under-the-table, or
cabinet outlet.
• Place the UP406 deskset(s) away from:
» Communication devices such as television sets, VCRs, or other cordless telephones;
» Excessive heat sources;
» Noise sources such as a window with traffic outside, motors, microwave ovens, refrigerators, or
fluorescent lighting;
» Excessive moisture;
» Extremely low temperature; and
» Mechanical vibration or shock such as the open lid of a washing machine or a work bench.
Connect the Ethernet cable and
power adapter
Ethernet switch/
router
1 Plug one end of the Ethernet cable into the
Ethernet port (
1 Plug one end of the coiled handset cord into the
deskset.
jack on the left side of the deskset.
2 Plug the other end of the Ethernet cable into an
2 Lift the kickstand to release it from the groove.
Ethernet wall jack, which is connected to the
• There are seven pairs of grooves designed to
Ethernet network.
hold the deskset at different angles for optimum
3 Insert the connector of the power adapter to the
visibility.
power jack at the rear side of the deskset.
3 Snap the kickstand into the desired grooves until
it locks into place.
4 Connect the plug head of the power adapter to
the power outlet that is not controlled by a wall
switch.
»
The system start up takes at least a minute,
and the screen displays booting.....
Maximize your existing Ethernet
network setup with PC port
The PC port on the console or the deskset can
maximize your existing Ethernet network and be
the Internet pass-through of your computer when
the Ethernet wall jacks are all in use.
Notes
• Make sure there is power connected to the
UP416 console or UP406 deskset; otherwise
the PC port does not function.
• This telephone system does not support
Power over Ethernet (PoE).
• If you are using the Gigabit Ethernet system,
the connection speed of your computer will
MS2015 Engraving:
be slower.
Use only
UP416 console
Supplied
Adapter
MS2015 Engraving:
1 Unplug your Ethernet cable of your computer
from the existing Ethernet wall jack.
MS2085 Engraving:
Use only
Supplied
UP407
IS6100
2 Plug one end of the Ethernet cable into the
Adapter
cordless
cordless
Ethernet port (
) at the back side of the
Use only
Supplied
L4
L3/4
L2
5.1
Adapter
handset
headset
console or deskset, and the other end to the
Ethernet wall jack.
MS2085 Engraving:
3 Connect your computer to the Ethernet network
through the PC port (
) of the console or
Use only
Supplied
L4
L3/4
5.1
Adapter
deskset.
Deskset
Use only
Supplied
5.1
Adapter
L4
L3/4
L2
L1/2
Phone lines
MS2015 Engraving:
Use only
Supplied
Adapter
Tip
MS2085 Engraving:
• For better cable and cord management,
) at the rear side of the
Use only
Supplied
L4
L3/4
L2
L1/2
5.1
Adapter
route through the slots that are located at
the rear side of the deskset.
L1/2
L2
Advertisement

Related Manuals for VTech UP416


Summary of Contents for VTech UP416
- Page 1 UP416 console. IS6100 the PC port does not function. • You can only have one UP416 console in your system. Connect only one UP416 console to your desired • This telephone system does not support telephone lines.
- Page 2 Mounting Frequent asked questions MS2015 Engraving: Console: If you cannot find the answer to your question, visit our website at businessphones.vtech.com or call 1 (800) 595-9511 for customer service. In Canada, call 1 (800) 267-7377. MS2015 Engraving: Use only Supplied...
Need help?
Do you have a question about the UP416 and is the answer not in the manual?
Questions and answers