Beyerdynamic TG 1000 Operating Instructions Manual
Hide thumbs
Also See for TG 1000:
- Operating instructions manual (42 pages) ,
- Quick start manual (24 pages) ,
- Operating instructions manual (9 pages)
Table of Contents
Advertisement
Advertisement
Table of Contents

Related Manuals for Beyerdynamic TG 1000


Summary of Contents for Beyerdynamic TG 1000
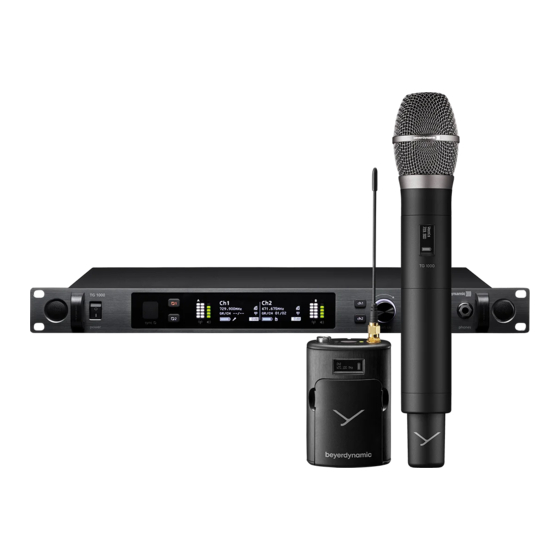
- Page 1 TG 1000 DIGITAL WIRELESS SYSTEM Operating Instructions...
-
Page 2: Table Of Contents
Synchronisation ..............Page 25 2.11 Multi-Channel Operation (Cascading Several TG 1000 Receivers) ......Page 25 2.12 WA-AS 6 Antenna Splitter . -
Page 3: Safety Instructions
As a real digital wireless system the TG 1000 operates with a 24 bit 8. Do not install near any heat sources such as radiators, heat frequency shift keying. Both the transmitter and receiver communicate... -
Page 4: Tg 1000 Handheld And Beltpack Transmitters
In both cases you could receive an electric shock. • The handheld and beltpack transmitters of the TG 1000 system can • The mains cable must be firmly connected. If it is loose there is a fire only be powered with AA (LR6) Mignon alkaline batteries or hazard. -
Page 5: Digital Tg 1000 Uhf Diversity Receiver
TG 1000 – Digital Diversity Receiver Digital TG 1000 UHF Diversity Receiver Controls and Indicators Front View µ ¸ ¹ Hole for 19" rack mounting Display channel 1 and channel 2 Hole for mounting the antennae on the front Channel selector button 1 or 2 µ... -
Page 6: How To Connect The Antennae
TG 1000 – Digital Diversity Receiver How to Connect the Antennae • Connect the supplied antennae to the A and B antenna inputs and set them at an angle (approx. 60°) in the shape of a “V”. Important: For the diversity operation it is absolutely necessary to connect both antennae! A weighting circuit ensures that an antenna is selected that supplies the better signal. -
Page 7: Mounting And Connection
TG 1000 – Digital Diversity Receiver Mounting and Connection 2.5.1 Where to Place the Receiver • Place the receiver in the same room where the transmission takes place. • Place the receiver as close as possible to the transmitter. For optimal reception, a free line of sight is advisable between trans- mitter and receiver. -
Page 8: Setting Up
TG 1000 – Digital Diversity Receiver Setting up 2.6.1 How to Operate the Receiver • After having mounted and connected the receiver, turn it on with the on-off switch • Standard Display Display when there is a valid transmitter signal available... -
Page 9: Menu Settings
TG 1000 – Digital Diversity Receiver Menu Settings • At the receiver you can adjust settings for name, frequency group, frequency, digital gain etc. in different menus for channel 1 or 2. • Select channel 1 or 2 by pressing the appropriate channel selector button •... - Page 10 TG 1000 – Digital Diversity Receiver Interference of the transmitted signal is displayed by inversion of the “1 A/B” or “2 A/B” channel description. dBm -90 RF level display – interference on channel 1 Audio level display If you turn the rotary switch further to the right, the audio level for channel 1 and 2 will be displayed each by a bar.
- Page 11 TG 1000 – Digital Diversity Receiver • Frequency Group (GR) / Channel (CH) Here you can select a channel or frequency from a predefined ▲ Name: Sample frequency group according to the respective region code (A, B, C, D or E).
- Page 12 TG 1000 – Digital Diversity Receiver • Quick Scan Here you can select a channel or frequency from a predefined ▲ ▲ Freq: xxx.xxxMHz Freq: xxx.xxxMHz group according to the respective region code (A, B, C, D or E). • Quick Scan •...
- Page 13 TG 1000 – Digital Diversity Receiver • Handheld Gain Here you can digitally adapt the level of the audio output to the ▲ Quick Scan input level of the amplifier or mixing console, i.e. if the signal, which is picked up with the handheld microphone is very low, it •...
- Page 14 TG 1000 – Digital Diversity Receiver • RF Power Here you can set the RF power. ▲ Beltpack: Mic x dB The “Standard” setting is recommended when the transmitter is close to the receiving antennae or with multi-channel systems to •...
- Page 15 TG 1000 – Digital Diversity Receiver • Power Lock Here you can set if the transmitter can be switched off via its ▲ Encrption: On on-off button or not. When the “Power Lock” function is enabled (On), the transmitter cannot be accidentally turned off and the •...
-
Page 16: Function Settings
TG 1000 – Digital Diversity Receiver Function Settings • On the receiver you can adjust settings when the receiver is operating in a network or you can update the firmware of the transmitters. Furthermore, you can display information about support. For the functions described in the chapters 2.8.1 to 2.8.7... - Page 17 TG 1000 – Digital Diversity Receiver • Adjust the settings for the network on the receiver as described in the following. • Press the function button ¹. “Network” is displayed . Press the rotary switch µ to enter the “IP” sub-menu.
- Page 18 TG 1000 – Digital Diversity Receiver Mode • Turn the rotary switch µ to the right and press the rotary switch µ ▲ Mask: to access the “Mode” sub-menu. By pressing and turning the rotary switch µ you can select “DHCP” or “Manual”. To confirm •...
-
Page 19: Chameleon Software
Chameleon-Software - Start screen In order to use the Chameleon software with the client device, it can be linked to any TG 1000 receiver. For this you have to enter the IP address of the receiver in your web browser (e.g. - Page 20 TG 1000 – Digital Diversity Receiver Frequency Scan • The scan displays the RF signals of the selected frequency range. These signals can be microphone signals or interferences caused by DVB-T channels. The Frequency Scan can be opened in an extra window by selecting the “Frequency scan (extra window)”...
- Page 21 TG 1000 – Digital Diversity Receiver • Select the channel window of the receiver to enter the channel menu. • You can enter the following settings: Name: You can enter the artist’s name. RF Power: You can set the transmitter power.
-
Page 22: How To Set The Brightness Of The Display
Ch.2: 0.0 • With the Region Code you can recognise which predefined Region Code: A frequency ranges are provided for which regions in the TG 1000 system: Display the Firmware Version and the Region Code – Region Code: A 470 - 789 MHz –... -
Page 23: How To Update The Firmware Of The Receiver
TG 1000 – Digital Diversity Receiver 2.8.6 How to Update the Firmware of the Receiver • You can update the firmware of the receiver with the so-called “Bootloader” via the network. • You will find the appropriate update of the firmware (for receiver and transmitters) and the Chameleon software on the internet at: www.beyerdynamic.com/tg1000/help... -
Page 24: Monitoring
TG 1000 – Digital Diversity Receiver Monitoring • For monitoring purposes you can listen to channel 1 or 2 with a headphone. • Connect a headphone to the headphone connection of the receiver. • Press the appropriate button to monitor channel 1 or 2. When the function is activated, the appropriate button is highlighted red. -
Page 25: Synchronisation
TG 1000 – Digital Diversity Receiver 2.10 Synchronisation • Via an infrared interface the receiver can transmit frequency and other settings such as encryption and “Power Lock” of the appropriate channel to a transmitter. • In order to transmit the settings to a transmitter, press the button for synchronisation for channel 1 or 2 on the receiver. -
Page 26: Wa-As 6 Antenna Splitter
• The WA-AS 6 antenna splitter is a 6-way wideband antenna splitter operating in the frequency range of 470 to 790 MHz. • With one WA-AS 6 antenna splitter you can operate up to 72 TG 1000 diversity receivers (cascaded) with only two antennae. -
Page 27: Mounting And Installation
• Use the WA-AC antenna cable from beyerdynamic. The longer the cable, the higher the attenuation of the high frequency signal. • For the connection of remote antennae use the WA-AC antenna cable from beyerdynamic. The longer the cable, the higher the RF signal loss. -
Page 28: Digital Tg 1000 Uhf Handheld Transmitter
TG 1000 – Digital Handheld Transmitter Digital TG 1000 UHF Handheld Transmitter Controls and Indicators Thread to attach a microphone head or adapter for microphone heads with a 1.25"/28 thread from other manufacturers OLED display Cover for battery compartment Coloured ring, replaceable Antenna Infrared interface für synchronisation... -
Page 29: How To Attach The Microphone Head
TG 1000 – Digital Handheld Transmitter How to Attach the Microphone Head For the TG 1000 handheld transmitter there are different condenser and dynamic microphone capsules or the WA-HHA-SHBY adapter available to connect microphone heads with a 1.25"/28 thread from other manufacturers. -
Page 30: How To Insert The Batteries
TG 1000 – Inhalt TG V90w Dynamic ribbon microphone head, cardioid polar pattern, for vocals. Clear, natural sound. High gain before feedback. TG V96w Condenser microphone head, cardioid polar pattern, for vocals. Uncoloured reproduction. Discreet treble boost for an open and unobtrusive sound. -
Page 31: How To Operate The Handheld Transmitter
TG 1000 – Digital Handheld Transmitter How to Operate the Handheld Transmitter • Turn on the handheld transmitter by holding the on-off button pressed, until the standard display is shown in the display • The display shows the battery status and the name, which has been entered in the first line of the receiver. -
Page 32: Maintenance
TG 1000 – Digital Handheld Transmitter Maintenance • Protect the handheld transmitter from humidity, knocks and shock. Avoid dropping the transmitter at all times. • For cleaning metal surfaces, use a soft cloth moistened with methylated spirits or alcohol. • As soon as your microphone sounds dull, you should clean the integrated pop shield. -
Page 33: Digital Tg 1000 Uhf Beltpack Transmitter
TG 1000 – Digital Beltpack Transmitter Digital TG 1000 UHF Beltpack Transmitter Controls and Indicators Top view Bottom view 4-pin mini XLR connector (male) to connect microphones or OLED display instruments Cover of the battery compartment AF peak LED Gain switch 0 dB / -12 dB... -
Page 34: How To Insert The Batteries
TG 1000 – Digital Beltpack Transmitter How to Insert the Batteries • Take hold of the cover of the battery compartment on top at the inlets at the right and left hand side. • Flap the cover of the battery compartment downwards. -
Page 35: Synchronisation / How To Transmit The Receiving Frequency To The Transmitter
TG 1000 – Digital Beltpack Transmitter Synchronisation / How to Transmit the Receiving Frequency to the Transmitter • In order to transmit the frequency and other settings to the transmitter, press the button for synchronisation on the receiver for channel 1 or channel 2. -
Page 36: General Instructions For All Transmitters
If the “Instrument Active” function is selected in the “Beltpack Gain” menu item, a 0 dB structure is produced again. In the development of TG 1000 it was the objective to create a system that transmits audio as accurately as possible, that has a clear level and is as simple as possible to handle. - Page 37 TG 1000 – Block Diagrams Block Diagrams Audio Level of Beltpack Transmitter Audio Level of Handheld Transmitter Audio Level of Receiver...
-
Page 38: Components
Connecting cable to mount the antennas on the front, for TG 1000 series ......Order # 711.527... -
Page 39: Technical Specifications
Charger WA-CD Charger for TG 1000 Beltpack and TG 1000 Handheld transmitters as well as Quinta TH handheld transmitter, with 4 charging compartments and control via Ethernet; charges up to 2 handheld and 2 beltpack transmitters or 2 handheld transmitters and 4 NiMH rechargeable batteries simultaneously . - Page 40 TG 1000 – Technical Specifications Digital UHF Beltpack Transmitter Operating principle....Digital UHF beltpack transmitter Frequency range Region A ..... 470 – 789 MHz Region B .
-
Page 41: Service
In most countries around the world, wireless systems must be approved for use by the authorities and it may be necessary to obtain a licence to use it legally. Your local beyerdynamic dealer will be able to give you details on wireless system regulations for your area. -
Page 42: Ec-Declaration Of Conformity
Model Numbers: TG 1000 Dual Receiver TG 1000 Handheld Transmitter TG 1000 Beltpack Transmitter I, the undersigned, as an employee of beyerdynamic, hereby declare that the equipment specified conforms to the above Directive and Standards. Manufacturer’s Signature: Date: September, 2012... -
Page 43: Fcc Regulation
NOTICE: Changes or modifications made to this equipment not expressly approved by beyerdynamic GmbH & Co. KG may void the FCC authorization to operate this equipment. NOTICE: This device complies with Part 15 of the FCC Rules and with RSS-210 of Industry Canada. - Page 44 Theresienstr. 8 | 74072 Heilbronn – Germany Tel. +49 (0) 7131 / 617 - 0 | Fax +49 (0) 7131 / 617 - 204 info@beyerdynamic.de | www.beyerdynamic.com Weitere Vertriebspartner weltweit finden Sie unter www.beyerdynamic.com For further distributors worldwide, please go to www.beyerdynamic.com...
Need help?
Do you have a question about the TG 1000 and is the answer not in the manual?
Questions and answers