
Related Manuals for Master Bilt CMICL-156


Summary of Contents for Master Bilt CMICL-156
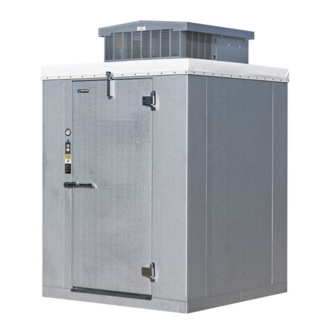
- Page 1 Installation & Operations Manual Master-Bilt Products 908 Highway 15 North New Albany, MS 38652 Phone: (800) 684-8988 PN 090-90000 Rev 05/20/03 LocN.
-
Page 3: Table Of Contents
INTRODUCTION………………………………….……………………………………………………………4 STORE CONDITIONS..……………….………...……...……………………………….………………….…4 WARNING LABELS AND SAFETY INSTRUCTIONS…………………………………………………….5 PRE-INSTALLATION INSTRUCTIONS………………………..….………………………………………..6 Inspection for Shipping Damage…………………………………………………………….………6 INSTALLATION INSTRUCTIONS……………………………………………………………………………6 General Instructions………………………………………………………………………………….6 Notice to store owners/ managers………………………………………………………………….6 Electrical...………………………………………………………………………………………….… 7 Panel Storage…………………………………………………………………………………………7 Cam Fasteners………………………..…..………………………………………………………….8 Level Floor…………………………………………………………………………………………….9 Caulking……………………………………………………………………………………………….9 Floor Assembly……………………………………………………………………………………...10 Celing and Wall Penal Assembly………………………………………………………………….10 Door and Frame installation……………………………………………………………………….10 Refrigeration…………………………………………………………………………………………11 Adjusting Door and Replacing Hinges……………………………………………………………11 Door Frame Heater Replacement…………………………………………………………………12... -
Page 4: Introduction
INTRODUCTION Thank you for purchasing a Master-Bilt cabinet. This manual contains important instructions for installing, using and servicing a Master-Bilt CM/CL-156 case. A parts list is included in with this manual. Read all these documents carefully before installing or servicing your equipment. STORE CONDITIONS The Master-Bilt CM/CL-156 cases are designed to operate in the controlled environment of an air-conditioned store. -
Page 5: Warning Labels And Safety Instructions
WARNING LABELS AND SAFETY INSTRUCTIONS This symbol is the safety-alert symbol. When you see this symbol on your cabinet or in this manual be alert to the potential for personal injury or damage to your equipment. Be sure you understand all safety messages and always follow recommended precautions and safe operating practices. -
Page 6: Pre-Installation Instructions
PRE-INSTALLATION INSTRUCTIONS INSPECTION FOR SHIPPING DAMAGE You are responsible for filing all freight claims with the delivering truck line. Inspect all cartons and crates for damage as soon as they arrive. If damage is noted to shipping crates or cartons or if a shortage is found, note this on the bill of lading (all copies) prior to signing. -
Page 7: Electrical
ELECTRICAL WARNING Before servicing electrical components in the case or the doors or doorframes make sure all power to case is off. Always use a qualified technician. PANEL STORAGE To comply with Sanitation requirements this cabinet must be mounted on casters, legs (6” high min.) or the base must be sealed to the floor. -
Page 8: Cam Fasteners
CAM FASTENERS NOTE: When facing the interior of the wall panel, all vertical latch access holes should be on the left side of the panels. Before attempting to erect the walk-in, you should know how Master-Bilt cam-lock on some panels, it may be difficult to position the hex wrench as showing Figure #3, #4, and #5. -
Page 9: Level Floor
Figure #5 If locking arm fails to hook locking pin, turn cam-lock counter-clockwise one completes turn and repeat the procedure like Figure #3 LEVEL FLOOR It is very important that the existing floor be level If it is not level the insulated floor panels must be leveled by shimming between the existing floor and the floor panels. -
Page 10: Floor Assembly
FLOOR ASSEMBLY Lay out all floor panels in sequence as shown on assembly drawings and make sure they are level. Fasten these panels as evenly as possible to one another. Tighten the cam fasteners all the way so that the panels are aligned evenly and as snug one to the other as possible. -
Page 11: Refrigeration
4. Using the same procedure as above continue with the installation of the remaining corner panels. 5. Place a carpenter’s level against the face of the door frame to ensure correct vertical alignment and latch the door frame to the roof panel while holding level in place. 6. -
Page 12: Door Frame Heater Replacement
This will revolve the outer dial. Line up the correct time of day on the outer dial with the time pointer. Do not try to set the time control by grasping the outer dial. Rotate the inner dial only. Fro Replacement: of this control contact Refrigerator manufacture. Master_Bilt (800) 684-8988... -
Page 13: Final Check List
FINAL CHECK LIST A. Check operating pressures. B. Check electrical requirements of unit to supply voltage. C. Set temperature control for desired temperature range D. Check system for proper defrosts settings and operation. 1. Set three 30 minutes per 24 hours. E. -
Page 14: Master-Bilt Part Numbers
Compressor will not start – hums, but cycles on overload Low voltage. Relay defective. Overload defective. High head pressure (see 1). Special service situations If moisture or liquid is observed around or under a Master-Bilt cabinet, an immediate investigation should be made by qualified personnel to determine the source of moisture or liquid. The investigation made should determine if the cabinet is malfunctioning or if there is a simple housekeeping problem.
Need help?
Do you have a question about the CMICL-156 and is the answer not in the manual?
Questions and answers