Table of Contents
Advertisement
Quick Links
E2B21BD_E2B28BD_EN.book Page 1 Monday, August 21, 2006 5:05 PM
Accessories Supplied
• Remote control with two R6 (AA) batteries
Before using this unit you need to complete connections.
Refer to "Connections" on pages 15-17.
Owner's Manual
DVD Recorder with HDD
HD-B2735
HD-B2785
OPEN/
CLOSE
HDD & DVD-R / DVD-RW RECORDING
• RF cable
• Owner's Manual
HDD
DVD
STOP
PLAY
REC
STAND-BY ON
• Quick Setup Guide
Advertisement
Table of Contents

Related Manuals for FUNAI HD-B2735


Summary of Contents for FUNAI HD-B2735
- Page 1 E2B21BD_E2B28BD_EN.book Page 1 Monday, August 21, 2006 5:05 PM Owner’s Manual DVD Recorder with HDD HD-B2735 HD-B2785 OPEN/ CLOSE STOP PLAY STAND-BY ON HDD & DVD-R / DVD-RW RECORDING Accessories Supplied • Remote control with two R6 (AA) batteries • RF cable •...
-
Page 2: Before You Start
E2B21BD_E2B28BD_EN.book Page 2 Monday, August 21, 2006 5:05 PM Before You Start Precautions WARNING : TO REDUCE THE RISK OF FIRE OR ELECTRIC SHOCK, DO NOT EXPOSE THIS APPLIANCE TO RAIN OR MOISTURE. The lightning flash with CAUTION arrowhead symbol, within an equilateral triangle, is intended to RISK OF ELECTRIC SHOCK alert the user to the presence of... -
Page 3: Installation Location
E2B21BD_E2B28BD_EN.book Page 3 Monday, August 21, 2006 5:05 PM Connection to Power A NOTE ABOUT RECYCLING This product’s packaging materials are recyclable Before Switching on make sure that the voltage of and can be reused. Please dispose of any your electricity supply is the same as that indicated on materials in accordance with your local recycling the rating plate. -
Page 4: About Copyright
E2B21BD_E2B28BD_EN.book Page 4 Monday, August 21, 2006 5:05 PM About Copyright Maintenance Unauthorized copying, broadcasting, public SERVICING performance and lending of discs are prohibited. • Please refer to relevant topics on the This product incorporates copyright protection “Troubleshooting” on pages 83 to 87 before technology that is protected by U.S. -
Page 5: Table Of Contents
E2B21BD_E2B28BD_EN.book Page 5 Monday, August 21, 2006 5:05 PM Table of contents Before You Start........2 Playback ..........44 Precautions ............2 Information on playback ........44 Features ..............6 Basic playback............. 45 Guide to the Owner’s Manual........ 7 PBC function for Video CDs ........ 52 Functional Overview.......... -
Page 6: Features
Variable Skip [ Page 56] You can skip forward a certain time, which is specified 160 GB Hard Disc (HD-B2735) in the Setup Menu in advance, with one-touch while 250 GB Hard Disc (HD-B2785) [ Pages 25-27] playback. -
Page 7: Guide To The Owner's Manual
01_14_Introduction_EN.fm Page 7 Tuesday, August 22, 2006 1:39 PM Editing Guide to the Owner’s Manual Adding or deleting chapter marks manually Page 62] Symbols used in the Owner’s Manual You can add chapter marks to a title. Creating titles to a Playlist (VR mode DVD-RW To show what recording mode or disc type applies to discs and HDD only) [ Page 63]... -
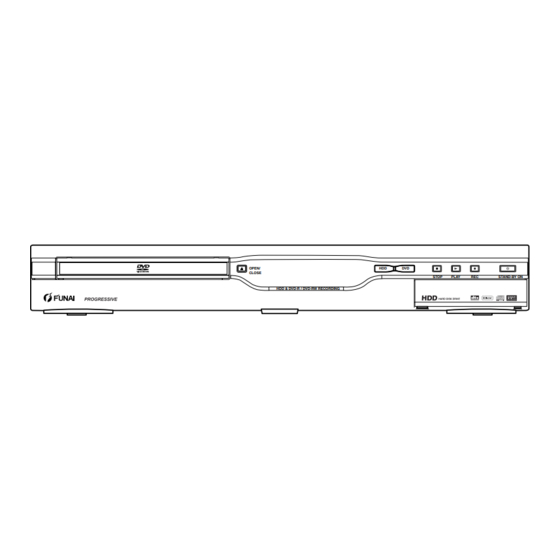
Page 8: Functional Overview
E2B21BD_E2B28BD_EN.book Page 8 Monday, August 21, 2006 5:05 PM Functional Overview Front Panel 10 11 OPEN/ CLOSE STOP PLAY STAND-BY ON HDD & DVD-R / DVD-RW RECORDING S-VIDEO VIDEO AUDIO S-VIDEO VIDEO AUDIO 1 STANDBY-ON button / indicator 8 Disc tray Press to turn the unit on / off. -
Page 9: Rear Panel
E2B21BD_E2B28BD_EN.book Page 9 Monday, August 21, 2006 5:05 PM Rear Panel DIGITAL AUDIO OUTPUT COMPONENT PCM/BITSTREAM VIDEO OUTPUT S-VIDEO COAXIAL OPTICAL AV2 ( DECODER ) AV2 ( DECODER ) AV1 ( TV ) AV1 ( TV ) ANALOG ANTENNA AUDIO OUT 1 ANTENNA IN 6 Mains cable Connect to an antenna cable. -
Page 10: Remote Control
E2B21BD_E2B28BD_EN.book Page 10 Monday, August 21, 2006 5:05 PM Remote Control 5 SETUP button Press once to display the Setup Menu. Press to exit from the present menu. TIMER INPUT 6 DISC MENU button OPEN/CLOSE STANDBY-ON PROG. SELECT Displays the Disc Menu. 7 Cursor buttons .@/ :... - Page 11 E2B21BD_E2B28BD_EN.book Page 11 Monday, August 21, 2006 5:05 PM 25 AUDIO button 34 HDD button During playback, press to change the audio Press to activate the remote control in HDD settings. mode. (See page 12.) 26 TOP MENU button Press to activate the HDD. 35 DVD button Displays the Title List.
-
Page 12: Installing Batteries In The Remote Control
01_14_Introduction_EN.fm Page 12 Tuesday, August 22, 2006 1:41 PM Installing batteries in the remote HDD / DVD modes switching control Because this unit is a combination of a HDD and a DVD recorder, you must first select which component Install two R6 (AA) batteries (supplied) into the you wish to operate. -
Page 13: Guide To Display Information
E2B21BD_E2B28BD_EN.book Page 13 Monday, August 21, 2006 5:05 PM Guide to Display Information Guide to Setup Menu The Display Menu gives you all information of the This unit uses the following on-screen menu for most HDD or DVD. operations. Display Example: How to use Setup Menus: Press [DISPLAY] once to show all information. -
Page 14: Front Panel Display Guide
E2B21BD_E2B28BD_EN.book Page 14 Monday, August 21, 2006 5:05 PM Front Panel Display Guide P-SCAN CD R W I HDD 1 Title / Track and Chapter mark : Lights up during HDD recording. I DVD : Lights up during DVD recording. Appears when indicating a title / track number. -
Page 15: Connections
E2B21BD_E2B28BD_EN.book Page 15 Monday, August 21, 2006 5:05 PM Connections Antenna To Aerial jack Cable Audio/Video cable (not supplied) Signal Scart/RCA cable (not supplied) Scart cable (not supplied) RF cable Scart adaptor (supplied) (not supplied) DIGITAL AUDIO OUTPUT COMPONENT PCM/BITSTREAM VIDEO OUTPUT S-VIDEO COAXIAL... -
Page 16: Connecting To External Equipment
E2B21BD_E2B28BD_EN.book Page 16 Monday, August 21, 2006 5:05 PM Recording from a camcorder or other Connect the ANALOG AUDIO OUT jacks of this unit to the analogue Audio-Video equipment with no Scart output Audio input jacks of your TV. Use a jack (AV3) commercially available Audio cable. - Page 17 E2B21BD_E2B28BD_EN.book Page 17 Monday, August 21, 2006 5:05 PM Connecting a Dolby Digital™ decoder, DTS decoder or MPEG decoder • Connecting Multi-channel Dolby Digital decoder allows you to enjoy the Multi-channel Dolby Digital surround system as well as DTS decoder, Multi- channel surround system.
-
Page 18: Initial Setups
E2B21BD_E2B28BD_EN.book Page 18 Monday, August 21, 2006 5:05 PM Initial Setups For the first time use Channel Setting Right after the purchase of the unit, do the Initialise Auto Tuning Setting by doing the following procedures. This menu may not appear if you have already turned If you have already set the channels when you first on the unit. -
Page 19: Manual Tuning
E2B21BD_E2B28BD_EN.book Page 19 Monday, August 21, 2006 5:05 PM Select “Channel Setting” using [Cursor ], then press [ENTER]. Auto Tuning 10/04/06(Mon) 19:34 Initial Setting 10/04/06(Mon) 19:34 Clock Setting Auto Tuning Now Auto Tuning Now Channel Setting Wait for a moment. Wait for a moment. -
Page 20: To Select A Channel
E2B21BD_E2B28BD_EN.book Page 20 Monday, August 21, 2006 5:05 PM Channel Plan Move CH Indication TV Channel You can replace two channels. 01 – 10 IRA-IRJ, GAP 21 – 69 E21 – E69 74 – 78 X, Y, Z, Z+1, Z+2 Press [SETUP] in stop mode. -
Page 21: Setting The Clock
E2B21BD_E2B28BD_EN.book Page 21 Monday, August 21, 2006 5:05 PM Select the line of the channel you want to move to a new position Setting the clock using [Cursor ], then press [ENTER]. Auto Clock Setting Move 10/04/06(Mon) 19:34 Press [SETUP] in stop mode. Setup Menu will appear. -
Page 22: Manual Clock Setting
E2B21BD_E2B28BD_EN.book Page 22 Monday, August 21, 2006 5:05 PM Select “On” using [Cursor Manual Clock Setting then press [ENTER]. Follow the steps 1 to 3 in “Auto Clock Setting” on page 21. 10/04/06(Mon) 19:34 Initial Setting Clock Setting Select “Clock Setting” using Channel Setting Clock Setting TV Aspect... -
Page 23: Selecting The Sound Mode
E2B21BD_E2B28BD_EN.book Page 23 Monday, August 21, 2006 5:05 PM Selecting the sound mode Selecting the TV aspect ratio This unit can receive bilingual broadcasts. You can select the TV aspect ratio to match the formats of what you are playing back on the unit and You can switch between modes by pressing [AUDIO] your TV screen (4:3 standard or 16:9 widescreen TV). - Page 24 E2B21BD_E2B28BD_EN.book Page 24 Monday, August 21, 2006 5:05 PM Refer to the table below to find the appropriate setting for your TV. Your Setting The aspect ratio of Your TV the original image 16:9 Shrink 4:3 Pan & Scan 4:3 Letter Box 16:9 Wide 16:9 *1, *2...
-
Page 25: Recording
E2B21BD_E2B28BD_EN.book Page 25 Monday, August 21, 2006 5:05 PM Recording Information on supported media Media types ✬✬✬: Most suitable. ✬✬: Can be used. ✬: Some functions are limited. —: Cannot be used. You want to DVD-RW DVD-RW DVD-R Video Record TV programmes ✬✬✬... -
Page 26: Recordable Discs
E2B21BD_E2B28BD_EN.book Page 26 Monday, August 21, 2006 5:05 PM To select the Rec Mode you prefer, press Recordable discs [REC MODE]. The information of the selected media (internal HDD or DVD) will be displayed. • Discs that can be used with this unit: DVD-R: 2x, 4x, 8x or 16x DVD-RW: 2x or 4x •... -
Page 27: Restrictions On Recording
E2B21BD_E2B28BD_EN.book Page 27 Monday, August 21, 2006 5:05 PM Restrictions on recording Making discs playable in other DVD players (Finalise) You cannot record copy-protected video or a programme broadcasted in the NTSC colour system After recording, you must finalise the disc to play it using this unit. -
Page 28: Formatting A Disc
E2B21BD_E2B28BD_EN.book Page 28 Monday, August 21, 2006 5:05 PM Select the desired setting using [Cursor ], then press [ENTER]. Formatting a disc Disc Management 10/04/06(Mon) 19:34 Auto Format DVD Format VR Mode DVD Disc Control Video Mode Video Mode HDD Initialise Whenever you load a brand new DVD-RW disc, the unit will ask you to format the disc. -
Page 29: Deleting All Contents In Hdd
E2B21BD_E2B28BD_EN.book Page 29 Monday, August 21, 2006 5:05 PM Part Erase: Select “Yes” using [Cursor ], then press Deleting all contents in HDD [ENTER]. Press [SETUP] in stop mode. Disc Management 10/04/06(Mon) 19:34 Setup Menu will appear. DVD Format DVD Disc Control All Erase HDD Initialise Part Erase... -
Page 30: Setting Bilingual Recording Audio
E2B21BD_E2B28BD_EN.book Page 30 Monday, August 21, 2006 5:05 PM Select the desired setting using [Cursor ], then press [ENTER]. Setting Bilingual Recording Audio 10/04/06(Mon) 19:34 Recording Auto Chapter [HDD] 5 minutes Video Noise Reduction 10 minutes DVD-RW DVD-RW DVD-R DVD-R Bilingual Recording Audio 15 minutes Fast Dubbing Audio (Video Mode) -
Page 31: Recording Audio Select (Xp)
E2B21BD_E2B28BD_EN.book Page 31 Monday, August 21, 2006 5:05 PM Note Recording Audio Select (XP) • “LPCM” stands for Linear Pulse Code Modulation. It changes analogue sound to digital sound without compressing audio data. Video DVD-RW DVD-RW DVD-RW DVD-RW DVD-R DVD-R •... -
Page 32: Basic Recording
E2B21BD_E2B28BD_EN.book Page 32 Monday, August 21, 2006 5:05 PM Basic Recording One-touch Timer Recording (OTR) Video DVD-RW DVD-RW DVD-RW DVD-RW DVD-R DVD-R Follow the steps below to record a TV programme. Video DVD-RW DVD-RW DVD-RW DVD-RW DVD-R DVD-R This is a simple way to start a timer recording. You •... -
Page 33: Timer Recording
E2B21BD_E2B28BD_EN.book Page 33 Monday, August 21, 2006 5:05 PM • If you want to monitor the programme that you are recording, make sure the device such as a Satellite Timer Recording Box is turned off when it is connected to AV2. •... - Page 34 E2B21BD_E2B28BD_EN.book Page 34 Monday, August 21, 2006 5:05 PM 3 Recording Date: • If you press [STANDBY-ON] to turn the unit to standby mode, it will turn on 2 minutes before When press [Cursor ] at the current date, the the programmed recording time, and start setting will change as follows.
-
Page 35: Hints For Timer Recording
E2B21BD_E2B28BD_EN.book Page 35 Monday, August 21, 2006 5:05 PM correctly. If the timer is not programmed correctly, the incorrect timer setting stays in effect unless you Timer Programme 10/04/06(Mon) 19:34 cancel it. To cancel an incorrect timer setting, refer to Station --- “Editing the Timer Programming information”... -
Page 36: Setting External Input Audio
E2B21BD_E2B28BD_EN.book Page 36 Monday, August 21, 2006 5:05 PM Setting External Input Audio Satellite Link Video DVD-RW DVD-RW DVD-RW DVD-RW DVD-R DVD-R When recording from the external equipment, select You can set the unit to start recording whenever it “Stereo” or “Bilingual” to match the audio type of what detects the scart control signal from the external you are recording. -
Page 37: Information On Dubbing
E2B21BD_E2B28BD_EN.book Page 37 Monday, August 21, 2006 5:05 PM To cancel the Satellite Link function while in the Satellite Link standby mode: Information on dubbing Press [STANDBY-ON] or [SATELLITE LINK] to turn on the unit. Video DVD-RW DVD-RW DVD-RW DVD-RW DVD-R DVD-R To cancel the Satellite Link function while the... -
Page 38: One Touch Dubbing
E2B21BD_E2B28BD_EN.book Page 38 Monday, August 21, 2006 5:05 PM Note Bi-directional Dubbing between HDD • NTSC dubbing is prohibited in this unit. and DVD • During Fast Dubbing of copy-once programmes, the following operations are not available: - Basic recording, or the Simultaneous Recording and Playback of the titles in the HDD. - Page 39 E2B21BD_E2B28BD_EN.book Page 39 Monday, August 21, 2006 5:05 PM Select “Add to Title”. To move a title: 1 Select a title using [Cursor ], then press • If “Add to Title” is already highlighted, press [ENTER]. [ENTER]. 2 Select “Move” using [Cursor ], then •...
-
Page 40: Setting For External Connection (Av3)
E2B21BD_E2B28BD_EN.book Page 40 Monday, August 21, 2006 5:05 PM Select “Yes” using [Cursor then press [ENTER]. Setting for external connection (AV3) HDD ➔ DVD Dubbing 15/07/06(Sat) 19:53 Connect the external equipment using either the input jacks, AV1(TV) (Rear), AV2(DECODER) (Rear) or Please Select Rec Mode AV3 (Front). -
Page 41: Dubbing From The External Devices
E2B21BD_E2B28BD_EN.book Page 41 Monday, August 21, 2006 5:05 PM Dubbing from the external Finalising a disc devices In order to play back discs recorded in this unit on other player, you must finalise the discs. Video • Although finalisation is recommended, you may be DVD-RW DVD-RW DVD-RW... -
Page 42: Auto Finalise
E2B21BD_E2B28BD_EN.book Page 42 Monday, August 21, 2006 5:05 PM Select “Yes” using [Cursor Auto Finalise then press [ENTER]. Video DVD-RW DVD-RW DVD-RW DVD-RW DVD-R DVD-R Disc Management 10/04/06(Mon) 19:34 You can finalise discs automatically when the disc DVD Format space runs out if you set this in the Setup Menu. Finalise DVD Disc Control Auto Finalise... -
Page 43: Setting Disc Protection
E2B21BD_E2B28BD_EN.book Page 43 Monday, August 21, 2006 5:05 PM Select “Yes” using [Cursor then press [ENTER]. Setting disc protection 10/04/06(Mon) 19:34 Disc Management DVD-RW DVD-RW DVD Format You can protect a disc from the accidental overwriting, Finalise DVD Disc Control Auto Finalise HDD Initialise editing or erasing. -
Page 44: Playback
E2B21BD_E2B28BD_EN.book Page 44 Monday, August 21, 2006 5:05 PM Playback Disc Logo Information on playback DVD-Video Read the following information before you play back a DVD. DVD-RW Playable discs (VIDEO/VR mode, DivX files) ® You can play back all the discs listed on the right. Before attempting to play back a DVD, make sure it meets the requirements for Region Codes and Colour DVD-R... -
Page 45: Basic Playback
E2B21BD_E2B28BD_EN.book Page 45 Monday, August 21, 2006 5:05 PM Note Basic playback • Some discs may start playback automatically. • If no resume point is set when you stop HDD or DVD playback, it will start from beginning of the last title. Hint for HDD / DVD playback •... - Page 46 E2B21BD_E2B28BD_EN.book Page 46 Monday, August 21, 2006 5:05 PM Changing the order of the Title Playback from the DVD Menu display Video DVD-RW DVD-RW DVD-R DVD-R Video DVD-RW DVD-RW DVD-RW DVD-RW DVD-R DVD-R With finalised Video mode DVDs or the Video mode DVDs made on other units, a DVD Menu may be You can display the titles by order of name, date or appeared instead of the Title List.
- Page 47 E2B21BD_E2B28BD_EN.book Page 47 Monday, August 21, 2006 5:05 PM Playing back an MP3 Note • MP3 files cannot be recorded as digital sound using an MD or DAT deck. • Files with extensions other than “.mp3 (MP3)” will not be listed in the File List. Press [DVD] first.
-
Page 48: Playing Back A Divx
E2B21BD_E2B28BD_EN.book Page 48 Monday, August 21, 2006 5:05 PM [JPEG] Size of picture Hint for the purchased or rental official DivX ® • Upper limit: 6300 x 5100 dots Certified product • Lower limit: 32 x 32 dots • When you purchased or rental a DivX file through ®... - Page 49 E2B21BD_E2B28BD_EN.book Page 49 Monday, August 21, 2006 5:05 PM • You can play back the disc recorded in multi- DivX Subtitle ® session. • Playback will be stopped if the File List is displayed during the playback. The subtitle created by the user can be displayed •...
-
Page 50: Divx Vod
E2B21BD_E2B28BD_EN.book Page 50 Monday, August 21, 2006 5:05 PM Playing back discs contains mixture DivX ® of different type of media DivX DivX ® ® For playing back a CD-RW / R that contains mixture of This unit allows you to play back the files purchased different type of media (DivX , MP3, JPEG etc.), you ®... - Page 51 E2B21BD_E2B28BD_EN.book Page 51 Monday, August 21, 2006 5:05 PM Playing back discs using the Disc Playing back discs using the Title menu menu DVD-V DVD-V DVD-V DVD-V A DVD contains a disc menu, which lists the contents Some DVDs have a title menu, which lists the titles and enables you to customize playback.
-
Page 52: Pbc Function For Video Cds
E2B21BD_E2B28BD_EN.book Page 52 Monday, August 21, 2006 5:05 PM Select “Playback” using [Cursor ], then press [ENTER]. PBC function for Video CDs 10/04/06(Mon) 19:34 Setup Menu Disc Management Editing Dubbing This unit conforms to ver. 1.1 and ver. 2.0 of the Video Timer Programme CD standard playback control (PBC) function. -
Page 53: Special Playback
E2B21BD_E2B28BD_EN.book Page 53 Monday, August 21, 2006 5:05 PM Note Special playback • For Video CDs, if you turn “PBC” on using the setting menu, the resume function is cancelled. • Resume point will be lost when you; Resume playback - Open / Close the disc tray. - Page 54 E2B21BD_E2B28BD_EN.book Page 54 Monday, August 21, 2006 5:05 PM Fast forward / Fast reverse playback Slow forward / Slow reverse playback Video Video DVD-V DVD-V DVD-RW DVD-RW DVD-RW DVD-RW DVD-V DVD-V DVD-RW DVD-RW DVD-RW DVD-RW DVD-R DVD-R DivX DivX DivX ®...
-
Page 55: Step By Step Playback
E2B21BD_E2B28BD_EN.book Page 55 Monday, August 21, 2006 5:05 PM Using the [TIME SHIFT] button Note With [TIME SHIFT] button, even if you leave your • Video CDs, Audio CDs, MP3, JPEG and DivX ® couch while you are watching TV through this unit, also be played back during HDD recording. - Page 56 E2B21BD_E2B28BD_EN.book Page 56 Monday, August 21, 2006 5:05 PM While the picture is enlarged, press Variable replay / Variable skip [Cursor ] to move the zoomed image up, down, left or right. Video DVD-V DVD-V DVD-RW DVD-RW DVD-RW DVD-RW The gray box with an inner orange box that shows during Zoomed Playback is the position guide.
-
Page 57: Repeat / Programme Playback / Slide Show
E2B21BD_E2B28BD_EN.book Page 57 Monday, August 21, 2006 5:05 PM Programme playback Repeat / Programme playback / Slide Show (PBC OFF) You can programme the disc to play back in your desired order. Repeat playback Video Press [SETUP] in stop mode. DVD-V DVD-V DVD-RW... -
Page 58: Search
E2B21BD_E2B28BD_EN.book Page 58 Monday, August 21, 2006 5:05 PM Hint Search • To erase tracks you entered, select the track and then press [CLEAR]. • You can make up to 50 track settings. Video DVD-V DVD-V DVD-RW DVD-RW DVD-RW DVD-RW •... -
Page 59: Selecting The Format Of Audio And Video
E2B21BD_E2B28BD_EN.book Page 59 Monday, August 21, 2006 5:05 PM Selecting the format of audio Audio 1 English Dolby Digital 5.1ch and video You can select the format of audio and video to suit the content of the disc you are playing back. Switching subtitles DVD-V DVD-V... -
Page 60: Switching Virtual Surround System
E2B21BD_E2B28BD_EN.book Page 60 Monday, August 21, 2006 5:05 PM For manual picture settings: Note 1 Select “User 1”, “User 2” or “User 3” using • If the “Angle” is not selectable, that means the scene [Cursor ], then press [SYSTEM]. does not contain the sequences shot from the 2 Select setup option you want to adjust using multiple angles. -
Page 61: Editing
E2B21BD_E2B28BD_EN.book Page 61 Monday, August 21, 2006 5:05 PM Editing 1 Editing Menu 2 Items of Editing Menu Guide to the editing on this unit • Items vary between “Playlist” and “Original”. 3 Selected device (HDD or DVD) The following editing menus are three different 4 Channel, starting time, the length of recording methods depending on how you edit the titles. -
Page 62: Adding Or Deleting Chapter Marks Manually
E2B21BD_E2B28BD_EN.book Page 62 Monday, August 21, 2006 5:05 PM What are Original and Playlist? Adding or deleting chapter There are 2 types for the title list: Original and Playlist. marks manually Original: Original is the list of the recorded programmes (titles) DVD-RW DVD-RW DVD-RW... -
Page 63: Creating Titles To A Playlist
E2B21BD_E2B28BD_EN.book Page 63 Monday, August 21, 2006 5:05 PM Chapter Mark Delete Creating titles to a Playlist DVD-RW DVD-RW DVD-RW Playlist Playlist You can create a title to the Playlist as you prefer. You can make it up to 99 titles for DVDs and 600 titles for HDD. - Page 64 E2B21BD_E2B28BD_EN.book Page 64 Monday, August 21, 2006 5:05 PM Select a desired title you want to add to the Playlist using [Cursor [HDD PL] New P01 12:22 (1:04:40) XP then press [ENTER]. Example: [HDD PL] New HDD Remain 72h00m(SP) 001/016 Title Name Recording Date Playlist Name...
-
Page 65: Deleting Titles
E2B21BD_E2B28BD_EN.book Page 65 Monday, August 21, 2006 5:05 PM Select “Yes” using [Cursor then press [ENTER]. Deleting titles The title is deleted. Be advised that the titles once deleted cannot be Press [RETURN R] or [SETUP] recovered. twice to exit. With DVD-R discs, deleting titles will not affect the recordable disc space. -
Page 66: Deleting A Scene Of A Title
E2B21BD_E2B28BD_EN.book Page 66 Monday, August 21, 2006 5:05 PM Continue to select a desired title again using [Cursor ], then Deleting a scene of a title press [ENTER]. DVD-RW DVD-RW DVD-RW DVD-RW DVD-RW DVD-RW Original Playlist Original Playlist P01 12:22 (1:04:40) XP You can delete a specific scene of a title. - Page 67 E2B21BD_E2B28BD_EN.book Page 67 Monday, August 21, 2006 5:05 PM Example: Playlist • You can use [PLAY P], [REV r], [FWD f], [SKIP B / F], [VARIABLE REPLAY ], [PAUSE p] or [VARIABLE SKIP Editing 10/04/06(Mon) 19:34 [STOP S] (which is substitute for [PAUSE p]) to PlaylistEditing PlaylistEditing Playlist...
-
Page 68: Editing Title Names
E2B21BD_E2B28BD_EN.book Page 68 Monday, August 21, 2006 5:05 PM When it reaches the desired end point, press [ENTER]. Editing title names An end point is marked on the progress bar. DVD-RW DVD-RW DVD-RW DVD-RW DVD-RW DVD-RW [HDD PL] Scene Delete Original Playlist Original... -
Page 69: Protecting / Undo Protecting Titles
E2B21BD_E2B28BD_EN.book Page 69 Monday, August 21, 2006 5:05 PM To enter a title name, refer to “Guide to Edit Title Name” below. Protecting / Undo protecting titles P01 12:22 (1:04:40) XP Video DVD-RW DVD-RW DVD-RW DVD-RW DVD-RW DVD-R DVD-R HDD Remain 72h00m(SP) Remain 76:13(SP) Page 1/4 001/016... -
Page 70: Combining Titles
E2B21BD_E2B28BD_EN.book Page 70 Monday, August 21, 2006 5:05 PM Select a desired title (title 1) using [Cursor ], then press [ENTER]. Combining titles [HDD PL] Title Combine DVD-RW DVD-RW DVD-RW (1:04:40) Playlist Playlist You can combine two titles into a single title. HDD Remain 72h00m(SP) 001/016 Playlist... -
Page 71: Dividing A Title
E2B21BD_E2B28BD_EN.book Page 71 Monday, August 21, 2006 5:05 PM Select “Yes” using [Cursor then press [ENTER] to exit. Dividing a title Note • If the number of chapter marks in the combined title DVD-RW DVD-RW DVD-RW exceeds 999 (99 for HDD), the combination will be Playlist Playlist rejected. - Page 72 E2B21BD_E2B28BD_EN.book Page 72 Monday, August 21, 2006 5:05 PM Select a desired title you want to When it reaches the desired dividing divide, then press [ENTER]. point, press [ENTER], or press [PAUSE p] or [STOP S] and then [ENTER]. [HDD PL] Title Divide P01 12:22 (1:04:40) XP HDD Remain 72h00m(SP) 001/016...
-
Page 73: Other Setups
E2B21BD_E2B28BD_EN.book Page 73 Monday, August 21, 2006 5:05 PM Other Setups Tour of the Setup Menus The following table shows the items which you can change the setting and their default settings. Refer to the following table for your convenience. Setup Menu Items Selection... - Page 74 E2B21BD_E2B28BD_EN.book Page 74 Monday, August 21, 2006 5:05 PM Setup Menu Items Selection Contents (highlight is the default) Playback Still Mode Set the still mode. Auto Page 79 Field Frame Parental Lock Set the parental level for DVD Page 79 disc playback.
-
Page 75: Initial Setting
E2B21BD_E2B28BD_EN.book Page 75 Monday, August 21, 2006 5:05 PM SCART(RGB): Select “SCART(RGB)” if your TV has a scart Initial Setting terminal and connected to it. Component (Progressive): Press [SETUP] in stop mode. If your TV is compatible with progressive scanning, select “Component (Progressive)” and Setup Menu will appear. -
Page 76: Digital Audio Setting
E2B21BD_E2B28BD_EN.book Page 76 Monday, August 21, 2006 5:05 PM Note Digital Audio Setting When playing back disc with copyright protection: • Even if you select “96kHz”, the sound will be down sampled at 48 kHz. Press [SETUP] in stop mode. Setup Menu will appear. -
Page 77: Playback
E2B21BD_E2B28BD_EN.book Page 77 Monday, August 21, 2006 5:05 PM 4. DTS (Default: On) Playback Set the DTS. (Follow steps 1 to 2 on page 76.) Press [SETUP] in stop mode. Select “DTS” using [Cursor Setup Menu will appear. then press [ENTER]. Select “Playback”... - Page 78 E2B21BD_E2B28BD_EN.book Page 78 Monday, August 21, 2006 5:05 PM 3. Disc Menu Language (Default: English) Select the desired setting using [Cursor ], then press [ENTER]. Set the Disc Menu language. Audio Language (Follow steps 1 to 2 on page 77.) Original English Select “Language”...
- Page 79 E2B21BD_E2B28BD_EN.book Page 79 Monday, August 21, 2006 5:05 PM 5. Still Mode (Default: Auto) • When the password has been set already, the password will be displayed as “ ” for your Set the still mode. security. - If the password you have entered is wrong, the (Follow steps 1 to 2 on page 77.) error message will appear.
- Page 80 E2B21BD_E2B28BD_EN.book Page 80 Monday, August 21, 2006 5:05 PM 9. V. Replay/Skip Speed • Record the password in case you forget it. • Press [CLEAR] to erase numbers entered Assign the [VARIABLE REPLAY ] or incorrectly. [VARIABLE SKIP ] button to rewind or skip by a If you forget your password or you want to clear all certain amount of time.
-
Page 81: Recording
E2B21BD_E2B28BD_EN.book Page 81 Monday, August 21, 2006 5:05 PM 2. Fast Dubbing Audio (Video Mode) (Default: Off) Recording On: When recording a bilingual programme to the Press [SETUP] in stop mode. HDD and to make the Fast Dubbing (HDD to DVD (Video Mode)) available, the unit only records Setup Menu will appear. -
Page 82: Display
E2B21BD_E2B28BD_EN.book Page 82 Monday, August 21, 2006 5:05 PM 2. Display Device Status (Default: On) Display Set the operating display. (Follow steps 1 to 2 on the left.) Press [SETUP] in stop mode. Select “Display Device Status” using Setup Menu will appear. [Cursor ], then press [ENTER]. -
Page 83: Others
E2B21BD_E2B28BD_EN.book Page 83 Monday, August 21, 2006 5:05 PM Others Troubleshooting Before requesting service for this unit, check the table below for a possible cause of the problem you are experiencing. Some simple checks or a minor adjustment on your part may eliminate the problem and restore proper performance. Error message Possible cause Solution... - Page 84 E2B21BD_E2B28BD_EN.book Page 84 Monday, August 21, 2006 5:05 PM Error message Possible cause Solution • Make sufficient space in the recording Insufficient disc space in the recording • The space in the recording media is not media, or change the Rec Mode. (See media.
- Page 85 E2B21BD_E2B28BD_EN.book Page 85 Monday, August 21, 2006 5:05 PM Symptom Solution The power does not turn on. • Check that the AC power cord is connected securely. • Batteries of the remote control are weak. The unit turns on automatically without any •...
- Page 86 E2B21BD_E2B28BD_EN.book Page 86 Monday, August 21, 2006 5:05 PM Symptom Solution Disc Playback cannot be performed. • Check if the playable disc is inserted. • Check if the disc is loaded correctly with the labelled side facing up. • Discs made on other devices or on personal computers cannot be played back on this unit unless it is finalised on the device.
- Page 87 E2B21BD_E2B28BD_EN.book Page 87 Monday, August 21, 2006 5:05 PM Symptom Solution Titles cannot be edited or deleted. • The titles or the disc itself may be protected. Cancel the protection by following the steps on page 69 for title protection and page 43 for disc protection.
-
Page 88: Language Code
E2B21BD_E2B28BD_EN.book Page 88 Monday, August 21, 2006 5:05 PM Language code Language Code Language Code Language Code Language Code Abkhazian 4748 French 5264 Lithuanian 5866 Sindhi 6550 Afar 4747 Frisian 5271 Macedonian 5957 Singhalese 6555 Afrikaans 4752 Galician 5358 Malagasy 5953 Siswat 6565... -
Page 89: Glossary
E2B21BD_E2B28BD_EN.book Page 89 Monday, August 21, 2006 5:05 PM Glossary Analogue audio Dolby Digital Playlist An electrical signal that directly A system developed by Dolby From this list you can play back represents sound. In contrast, Laboratories that compresses contents of a disc in your desired digital audio can also be an digital sound. -
Page 90: Specifications
E2B21BD_E2B28BD_EN.book Page 90 Monday, August 21, 2006 5:05 PM Specifications General System HDD, DVD-Video, DVD-RW / R, VCD, CD-DA, CD-RW / R Internal 3.5 inch HDD 160 GB (HD-B2735) Internal 3.5 inch HDD 250 GB (HD-B2785) Power requirements 220–240 V ± 10%, 50 Hz ± 0.5% Power consumption 35 W (standby: 6.0 W) - Page 91 E2B21BD_E2B28BD_EN.book Page 91 Monday, August 21, 2006 5:05 PM...
-
Page 92: Declaration Of Conformity
73 / 23 / EEC CE Marking: 93 / 68 / EEC We declare that the following product: DVD Recorder with HDD, Model HD-B2735 / HD-B2785 Trade Name: Funai is in compliance with following Regulations. EN55013: 2001+A1:2003, EN55020: 2002+A1:2003, EN61000-3-2: 2000, EN61000-3-3: 1995 + A1: 2001 EN60065: 2002 EN60825-1 Edition 1.2: 2001...
Need help?
Do you have a question about the HD-B2735 and is the answer not in the manual?
Questions and answers